Author: Eddy Green

  • How to Grow Kiwi Vines in Your Backyard (Full Guide)

    How to Grow Kiwi Vines in Your Backyard (Full Guide)

    Picture popping a sweet, grape-sized kiwi straight into your mouth, no peeling, no fuzz, just an intense burst of tropical flavor grown right in your own backyard, even if that backyard freezes solid every winter. That’s the magic of the hardy kiwi, and learning how to grow kiwi vines is one of the most rewarding and surprisingly cold tolerant, definitely a fruit projects you can take on.

    Most people picture the fuzzy brown grocery-store kiwi and assume it needs a warm, subtropical climate. But its smooth-skinned cousin, the hardy kiwi (or “kiwiberry”), is a vigorous, pest-free vine that thrives as far north as zone 3 and rewards you with hundreds of sweet little fruits for decades. This complete guide walks you through everything, from the all-important male-and-female question to building a trellis, pruning like a pro, and harvesting your first backyard kiwis.

    Can You Grow Kiwi Vines at Home?

    Yes, you can grow kiwi vines at home, and hardy kiwi in particular is easy in most US backyards. Plant female and male vines (most kiwis need both to fruit) in full sun with rich, well-draining soil, give them a strong trellis to climb, water and prune regularly, and you’ll harvest sweet, grape-sized kiwiberries within three to five years. In cold regions, choose hardy or arctic kiwi varieties.

    The two non-negotiables are pollination and support. Because most kiwi vines come in separate male and female plants, you usually need both to get fruit and because these vines are astonishingly vigorous, they need a sturdy structure built to last. Get those two things right, and kiwi is a remarkably low-fuss, long-lived crop.

    Vibrant kiwi fruits hanging on verdant vines in a natural setting, ready for harvest
    Vibrant kiwi fruits hanging on verdant vines in a natural setting, ready for harvest

    Meet the Three Backyard Kiwis

    Not all kiwis are the same, and choosing the right type for your climate is the first step. Here are the three you’ll encounter:

    Type Fruit Zones Notes
    Hardy kiwi (Actinidia arguta) Smooth, grape-sized, very sweet, eat whole 4–9 The backyard standard; vigorous and productive
    Arctic kiwi (A. kolomikta) Smaller, smooth, early-ripening 3–7 Most cold-hardy; ornamental pink-and-white variegated leaves
    Fuzzy kiwi (A. deliciosa) Classic large brown fuzzy fruit 7–9 The grocery-store type; needs a long warm season

    For most home gardeners, especially in cooler regions, the hardy kiwi is the star. Its grape-sized fruits have tender, edible skin (no peeling needed), are packed with vitamin C, and taste even sweeter and more intense than the familiar fuzzy kiwi. One important rule: match your species when pairing plants, because hardy kiwi males won’t pollinate arctic kiwi females, and vice versa.

    The arctic kiwi deserves a special mention for cold-climate and ornamental gardeners: its male plants develop striking leaves splashed with pink, white, and green, making the vine a beautiful landscape feature in its own right, quite apart from the fruit. The fuzzy kiwi, meanwhile, is the one to choose if you live in a milder zone (7–9) and want the classic large fruit you know from the store, just be aware it needs a longer, warmer growing season and a good stretch of winter chill hours to fruit well. Whichever type calls to you, the growing principles that follow are broadly the same.

    The One Rule You Can’t Skip: Male and Female Vines

    Here’s the single most important thing to understand about growing kiwifruit: most kiwi vines are dioecious, meaning each plant is either male or female, and only females bear fruit. A row of nothing but female vines will produce exactly zero kiwis.

    To get fruit, you need both generally one male vine for every six female vines (anywhere from five to eight works), with the male planted within about 50 feet so pollen can travel by wind and bees. Reputable nurseries sell vines already “sexed” and clearly labeled, so pairing them is easy. Popular females include ‘Anna’ (Ananasnaya), ‘Geneva’, ‘Ken’s Red’, and ‘Prolific’; reliable male pollinators include ‘Meader’ and ‘Opitz’. For the best pollination, position the male upwind of, or centrally among, your females so the breeze carries pollen where it’s needed and welcoming bees to your garden helps enormously, since they do much of the work of moving pollen from the male blossoms to the female flowers.

    Short on space? There’s a happy exception: the self-fertile variety ‘Issai’ produces fruit on its own without a male (though a pollinator boosts the yield), making it perfect for a single-vine, small-space planting. ‘Prolific’ also fruits well without a mate. If you only have room for one vine, these are your friends.

    It also pays to choose varieties suited to both your climate and your harvest goals. In the coldest regions (zones 3–4), lean on arctic kiwi selections like ‘Arctic Beauty’ paired with a hardy ‘Red Beauty’ female. In milder zones, the classic ‘Anna’ (prized for its pineapple-like flavor), red-fleshed ‘Ken’s Red’, and heavy-cropping ‘Geneva’ are all excellent. If you have room for several female vines, planting a mix of early, mid, and late-ripening cultivars staggers your harvest over many weeks instead of all at once, a favorite trick of permaculture growers who like a long, steady supply of fruit.

    Build a Strong Trellis First

    Do not underestimate a kiwi vine. These are among the most vigorous plants you can grow, capable of putting on 10 to 20 feet in a single season, living for 30 to 50 years or more, and eventually carrying hundreds of pounds of vine, leaves, and fruit. A flimsy trellis will collapse under a mature vine.

    Build your support before you plant, so you never have to disturb established roots later. A sturdy pergola, arbor, or a heavy-duty T-bar wire trellis all work beautifully, kiwis grow best trained along a horizontal, flat overhead surface. Because these vines can outlive the gardener who plants them, it’s worth using rot-resistant posts and thick, durable wire rather than lightweight materials you’ll be replacing in a few years. Our guides to installing a garden trellis and building a garden arbor walk through building something strong enough to last as long as the vine does. As a bonus, a kiwi-covered pergola makes a gorgeous living shade structure over a patio, one reason hardy kiwi is a permaculture and food-forest favorite.

    What You’ll Need

    • Kiwi vines — at least one female and one male of the same species (or a self-fertile ‘Issai’)
    • A heavy-duty support — a pergola, arbor, or T-bar wire trellis built to last decades
    • A sunny, sheltered planting site with rich, well-draining soil
    • Compost or aged manure to enrich the planting area
    • Organic mulch — compost or shredded leaves work well
    • Stakes and soft ties to train the young leader
    • Sharp, clean pruners for annual pruning

    How to Plant Kiwi Vines: Step-by-Step

    With your plants and trellis chosen, here’s how to get them in the ground.

    • Step 1: Choose Your Vines

    Buy sexed, labeled nursery vines: at least one female (for fruit) and one male (for pollination) of the same species, or a self-fertile ‘Issai’ if you want a single vine. For a family, just two or three female vines plus a male are usually plenty — hardy kiwis are that productive.

    • Step 2: Pick a Sunny, Sheltered, Well-Drained Site

    Choose a spot with full sun (at least eight hours) for the best fruiting, sheltered from strong wind, with loose, rich, well-draining soil. Kiwis hate waterlogged roots, so good drainage is essential. If possible, an east-facing slope helps, since it keeps vines from breaking bud too early and getting caught by late spring frosts.

    • Step 3: Erect the Trellis

    Put your sturdy trellis, pergola, or T-bar support firmly in place before planting. Building it first protects the vine’s roots from disturbance and means your fast-growing kiwi has something to climb from day one.

    • Step 4: Plant and Space Correctly

    Plant in spring after the last frost. Give each vine plenty of room — space plants about 10 to 15 feet apart (they’ll want even more than you’d expect). Set each plant at the same depth it grew in its pot, backfill, firm gently, and water in well. Mulch around the base with a few inches of compost or shredded leaves, keeping it a few inches away from the stem.

    • Step 5: Train a Single Leader Up the Support

    In the first year, select one or two strong shoots to become the main trunk and tie them loosely to a stake, guiding them straight up to the trellis. Removing competing side shoots early creates a strong framework. First-year vines need frequent, attentive training to grow upward rather than into a tangled mess.

    Close-up of fuzzy kiwi fruits ripening on vine with green leaves in natural outdoor setting
    Close-up of fuzzy kiwi fruits ripening on vine with green leaves in natural outdoor setting

    Kiwi Vine Care: Water, Feeding and Pruning

    Once established, kiwi vine care is mostly about water, feeding, and bove all pruning.

    • Watering. Water regularly through summer and dry spells, especially while plants are young and establishing. Just be careful not to overdo it: kiwis are very prone to root rot in soggy soil, so let the ground dry somewhat between waterings and never leave the roots waterlogged. A good mulch layer helps hold steady moisture, see our guide to types of mulch.
    • Feeding. Skip fertilizer in the first year while the plant settles in. After that, feed each spring (and again as fruit begins to develop) with a balanced or all-purpose fertilizer; kiwis especially love compost and composted manure. Feed early in the season, since too much fertilizer late in the year can delay ripening. Our guide to homemade organic fertilizer offers gentle, low-waste options.
    • Pruning. This is where kiwi care really matters, think of it like growing grapes. Prune female vines while dormant in winter, removing dead, diseased, and crossing wood and cutting back the previous year’s fruited branches, leaving young one-year-old canes shortened to about eight to twelve buds (that’s where this year’s fruit forms). Prune male vines in early summer, after they’ve finished flowering, to keep them tidy and encourage fresh growth. Then prune lightly through summer to thin congested shoots. Don’t be timid, kiwis are vigorous and bounce back readily, so it’s better to prune too hard than too little.

    In our experience, pruning is the make-or-break skill with kiwi, and the biggest mistake new growers make is being too gentle. Left unpruned, a kiwi vine turns into a dense, tangled thicket that produces plenty of leaves but disappointingly little fruit, because sunlight and air can’t reach the fruiting wood. Gardeners who commit to a firm winter prune on their females  and a quick summer tidy-up all around, consistently get bigger, sweeter harvests on healthier vines. Think of the annual prune not as a chore but as the single most valuable hour you’ll spend on your kiwi all year.

    • Propagation. Once you have a vine you love, hardy kiwi is easy and fun to multiply for free. Take a healthy greenwood cutting, trim it into six-inch segments, and stand them in a glass with about an inch of water; in roughly three weeks small roots appear, ready to pot up. It’s a lovely, low-waste way to expand your planting or share vines with friends, just remember to keep track of which are male and female.

    How Long Until Kiwi Vines Fruit & Harvesting

    Patience is part of the deal with kiwi. Vines typically begin bearing in their third to fifth year, though some take a little longer to establish  and once they start, they can produce abundantly for 20 to 30 years or more.

    Here’s the seasonal rhythm to expect:

    • Late spring/early summer: fragrant little white flowers open (they smell like lily of the valley) and are pollinated by wind and bees.
    • Summer: clusters of small fruits form and swell all season.
    • Fall: fruit ripens, typically September into October depending on variety and region.

    For the best flavor, let hardy kiwis ripen fully, but be sure to harvest everything before a hard fall frost. If fruit is still firm when frost threatens, pick it and let it finish ripening on the kitchen counter. The reward: sweet, aromatic, grape-sized kiwis you can eat by the handful, skin and all. Their famously short shelf life is exactly why you rarely see them in stores  and exactly why growing your own is such a treat.

    To judge ripeness, gently squeeze a fruit or two, ripe kiwiberries yield slightly and taste sweet rather than starchy. A handy trick used by orchardists is to pick a sample fruit and leave it on the counter; if it softens to delicious within a few days, the rest of the crop is ready to harvest and ripen the same way. Once picked, ripe kiwiberries keep only a few days at room temperature but will hold for a couple of weeks in the fridge, and they freeze well for smoothies and baking. Beyond eating them fresh off the vine (the way most growers can’t resist), they’re wonderful in fruit salads, jams, and desserts, adding a bright, tropical note to the tail end of the growing season when little else is fruiting.

    Detailed view of ripe kiwifruit hanging on a vine, showcasing the vibrant textures and natural environment
    Detailed view of ripe kiwifruit hanging on a vine, showcasing the vibrant textures and natural environment

    Common Problems and How to Fix Them

    Hardy kiwis are among the most trouble-free fruits you can grow, but a few things are worth watching.

    Problem Likely Cause The Fix
    Lots of vine, no fruit No male pollinator, or all-female (or all-young) planting Add a male of the same species; be patient as vines mature
    Wilting, dying vines Root rot from waterlogged soil Improve drainage; water less; never leave roots soggy
    Frost-damaged spring shoots Late frost on tender new growth Site on an east slope; protect shoots; expect regrowth
    Vine collapsing the support Underbuilt trellis for a heavy mature vine Build a strong, durable structure from the start
    Chewed or shredded young vines Cats — kiwi foliage attracts them like catnip Protect young plants with a cage or barrier
    Delayed ripening Too much late-season nitrogen Feed early in spring, not late in the season

    Happily, hardy kiwis are so pest- and disease-resistant that they rarely need spraying at all, making them a favorite of organic and permaculture gardeners.

    Is Growing Kiwi Worth It?

    Absolutely, especially if you love the idea of a “tropical” fruit that laughs at cold winters. A hardy kiwi vine gives you a beautiful, shade-giving living structure, fragrant spring flowers, and years of sweet, no-peel fruit you simply can’t buy fresh in stores. Once established, it’s low-maintenance, pest-free, and astonishingly productive, a permaculture dream that keeps giving for decades. And because a single well-managed vine can yield hundreds of pounds of fruit, just two or three plants can supply a whole family, with plenty left over to freeze, share, and turn into jam.

    If growing your own unusual fruit appeals, keep exploring: try fig trees for beginners, pomegranate from seed, a pineapple from a top, or a compact kumquat tree in a pot. For the full collection of exotic edibles, browse our hub on growing tropical and exotic fruits, part of the broader EcoGardenHub Plant Library.

    Set up a strong trellis, plant a female and a male this spring, and in a few years your backyard could be dripping with sweet little kiwis, proof that a taste of the tropics can grow just about anywhere. It’s a patient project, but few plants reward that patience as generously, or for as many years, as a well-loved kiwi vine.

    Frequently Asked Questions

    Do you need two kiwi plants to get fruit? Usually, yes. Most kiwi vines are dioecious, meaning you need both a male and a female plant to get fruit, with one male for every five to eight females. The exceptions are self-fertile varieties like ‘Issai’ and ‘Prolific’, which can fruit on their own.

    How long does it take for kiwi vines to produce fruit? Kiwi vines typically begin fruiting in their third to fifth year, though some take a bit longer to establish. Once they start, a healthy vine can produce abundantly for 20 to 30 years or more.

    What is hardy kiwi? Hardy kiwi (Actinidia arguta), also called kiwiberry, is a cold-tolerant kiwi vine that produces smooth, grape-sized fruit you eat whole, skin and all. It’s sweeter than the fuzzy grocery-store kiwi and grows in USDA zones 4 to 9 (arctic kiwi is hardy to zone 3).

    How much space do kiwi vines need? Quite a lot, kiwis are vigorous and usually need more room than expected. Space vines about 10 to 15 feet apart on a strong trellis, pergola, or T-bar support built to carry hundreds of pounds of mature growth.

    Do kiwi vines need a trellis? Yes. Kiwis are heavy, fast-growing vines that must have a sturdy structure to climb. Build a strong, durable trellis, pergola, or arbor before planting, since a mature vine can weigh hundreds of pounds and last for decades.

    When and how do you prune kiwi vines? Prune female vines while dormant in winter, cutting back fruited wood and shortening one-year-old canes to eight to twelve buds. Prune male vines in early summer after flowering, and thin lightly through summer. Kiwis are vigorous, so don’t be afraid to prune hard.

    Can you grow kiwi in cold climates? Yes. Hardy kiwi grows in zones as cold as 4, and arctic kiwi down to zone 3, so you can grow sweet kiwiberries even where winters are harsh. Their spring shoots are frost-sensitive, so a sheltered site helps.

  • How to Grow Leaf Lettuce for Continuous Harvest

    How to Grow Leaf Lettuce for Continuous Harvest

    Here’s a scenario every new gardener knows: you grow a beautiful lettuce plant, pull the whole thing up for one salad, and just like that, your harvest is over. Now here’s the professional secret that changes everything. Learning how to grow lettuce properly means one small planting can feed you salads for months, not one dinner.

    The trick is a technique called cut-and-come-again, and it’s built on a simple bit of plant biology: lettuce grows from its center outward. Harvest the outer leaves and leave that growing point untouched, and the plant just keeps producing. Pair that with a little succession sowing and you’ll have crisp, fresh greens from early spring right through fall from a patch of ground the size of a doormat. This guide shows you exactly how.

    How Do You Grow Lettuce for a Continuous Harvest?

    Sow loose-leaf lettuce seeds shallowly in cool weather, spacing plants 4 to 6 inches apart in rich, moist soil with sun or part shade. Once leaves reach 3 to 4 inches, harvest using the cut-and-come-again method, snipping outer leaves or cutting 1 to 2 inches above the soil while leaving the central crown intact. The plant regrows in 7 to 14 days, giving three or four harvests. Sow a fresh batch every 2 to 3 weeks for greens all season.

    The two habits that make lettuce a season-long crop are protecting the crown when you harvest and succession sowing so a new batch is always coming along behind. Master those and you’ll never buy a bag of salad again.

    Close-up of fresh green lettuce plants growing in garden soil outdoors
    Close-up of fresh green lettuce plants growing in garden soil outdoors

    Meet Leaf Lettuce (and Why It’s the Easiest Crop You’ll Grow)

    Lettuce (Lactuca sativa) is a fast, cool-season crop, and loose-leaf types are the friendliest of the family. Unlike iceberg or other heading lettuces that form a tight ball, loose-leaf varieties grow as an open rosette of leaves, which is exactly what makes them so generous.

    That open habit brings real advantages:

    • You can plant them close together.  4 to 6 inches apart, with no thinning required, so a tiny space produces a lot.
    • Every leaf is edible from the start. There’s no waiting for a head to form; lettuce is delicious at any size, even as microgreens.
    • It’s fast. Seeds sprout in about three days and you can be picking baby leaves within a couple of weeks, with a first full harvest around four weeks.
    • It tolerates partial shade. Lettuce is one of the very few vegetables that grows well without full sun, making it perfect for shadier balconies and yards.

    Here’s a bonus most gardeners don’t realize: you can harvest leaf-style from any type of lettuce. Even a romaine or butterhead will happily give you outer leaves while its heart keeps developing. Cut-and-come-again isn’t limited to one kind of plant, it’s a technique, not a variety.

    Choosing Varieties for Continuous Harvest

    While the technique works broadly, some varieties are true champions of regrowth. Loose-leaf types are the gold standard because they have no tight central core to disturb.

    Variety Type Why Grow It
    Black Seeded Simpson Loose-leaf Classic, fast, bounces back quickly after a trim
    Red Sails Loose-leaf Beautiful bronze-red leaves; slow to turn bitter
    Oakleaf Loose-leaf Tender lobed leaves; hardy and reliable
    Parris Island Cos Romaine Pick outer leaves while the heart keeps developing
    Jericho Romaine Bred in Israel for heat — excellent slow-bolt choice
    Nevada Summer crisp Heat-tolerant and resists bolting
    Mesclun mixes Blend Multiple colors, flavors, textures from one sowing

    A smart strategy: grow a mix. Different varieties mature at slightly different rates, so even after you harvest one section heavily, another is ready creating a seamless supply of greens. In warm weather, lean on slow-bolt varieties like ‘Jericho’ and ‘Nevada’.

    Many experienced gardeners actually grow lettuce two ways at once: a few full-size romaine or butterhead plants left to mature into proper heads, alongside a couple of densely sown rows of cut-and-come-again baby greens on constant rotation. It’s the best of both worlds, crisp whole heads for wedges and wraps, plus a permanent supply of tender leaves for everyday salads. The same technique also works beautifully on arugula, mizuna, mustard greens, and even young kale, so a single “salad bed” can deliver endless variety.

    How to Grow Lettuce: Step-by-Step

    • Step 1: Sow in Cool Weather

    Lettuce is a cool-season crop that thrives at roughly 55–65°F, so sow in early spring and again in late summer for a fall crop. Heat is lettuce’s enemy, it triggers bolting. So plan around the cool ends of the year. Our guide to what to plant in early spring helps with timing, and what to plant in late summer covers the fall round.

    • Step 2: Barely Cover the Seeds

    Lettuce seeds need light to germinate, so don’t bury them. Sprinkle them on the soil surface and press gently, or cover with the barest dusting of fine soil. Water gently and they’ll sprout in about three days. For full-size plants, space them 4 to 6 inches apart; for a baby-greens “salad bar,” scatter seeds thickly (think 40 seeds per foot in a two-inch-wide band) and skip thinning entirely.

    • Step 3: Enrich With Compost, Not Synthetic Nitrogen

    Lettuce loves rich, moisture-retentive soil. Work in a generous helping of compost before sowing. Here’s a subtle but important point: compost releases nitrogen slowly and steadily, whereas synthetic high-nitrogen fertilizers cause growth surges that can actually trigger early bolting. Gentle, steady feeding is what keeps lettuce sweet, our guide to making your own organic fertilizer has low-waste options.

    • Step 4: Water Consistently

    Dry soil is one of the fastest ways to send lettuce bolting and turn it bitter. Keep the soil evenly moist — never bone dry, never waterlogged. Shallow-rooted lettuce dries out quickly, especially in containers, so check often. Planting densely helps too: the leaves shade the soil and keep the roots cool.

    • Step 5: Succession Sow Every 2 to 3 Weeks

    This is the habit that turns lettuce into a season-long crop. Rather than sowing everything at once, plant a small batch every two to three weeks from early spring onward. As one planting starts to tire or bolt, the next is hitting its first harvest window. Our guide to succession planting covers the whole approach.

    Close-up of fresh green lettuce with curly leaves growing outdoors in sunlight.
    Close-up of fresh green lettuce with curly leaves growing outdoors in sunlight.

    The Cut-and-Come-Again Method (The Heart of It All)

    This is the technique that transforms one planting into a season-long feast, and it hinges on protecting a single part of the plant: the crown.

    The crown is the central growing point at the plant’s base, where all new leaves emerge. Lettuce grows from the center outward, so as long as the crown is intact and has sun and water, it keeps producing. Cut it off and the plant is finished. Think of the crown as the plant’s beating heart, many beginners accidentally “scalp” their lettuce and end the growing cycle prematurely.

    Here are the three harvesting methods, each with its place:

    1. Leaf-by-leaf (gentlest, most productive). Circle the plant and snip the three or four largest, lowest outer leaves with micro-tip snips or sharp scissors. The plant continues its normal growth pattern from the center, barely noticing. Perfect for grabbing enough for a single salad, and it typically yields three to four harvests per plant over a season. It’s also good housekeeping, remove any yellowing leaves or ones touching the soil while you’re there, since those invite slugs and fungal problems.
    2. The “ponytail chop” (faster, bigger harvests). Gather a handful of leaves as if making a ponytail, and cut below your hand with clean scissors about two to three inches above the crown. You get more leaves per trip and still leave the growing point intact. Expect two to three harvests this way.
    3. The “mow” (for densely sown baby greens). If you carpet-sowed for a spring-mix bed, simply cut a horizontal swath across the tops with shears when greens are about four inches tall, staying an inch or two above soil level. New leaves push up for another harvest in around two weeks, usually giving two to three cuts.

    Always use sharp, clean tools. A crisp cut heals far faster than a jagged tear, which leaves more open surface for pathogens and pests to enter. Micro-tip pruning shears or floral snips are ideal.

    In our experience, the single moment that decides whether lettuce becomes a season-long crop or a one-salad novelty is that first harvest. Beginners almost always cut too low, the instinct is to take the whole plant, because that’s what a head of lettuce looks like at the store. Gardeners who train themselves to leave a stubby two inches of stem behind, even though it looks unfinished, are the ones still picking from those same plants six weeks later. Keep your cuts high, err on the side of taking too little, and lettuce will keep rewarding you.

    How Fast Does Lettuce Regrow?

    Regrowth speed depends almost entirely on temperature:

    • Cool spring conditions (55–65°F): rapid regrowth, return to the same plant in 7 to 10 days.
    • Warm early-summer weather: slower, but still a harvest roughly every 10 to 14 days.
    • First full harvest: about four weeks from sowing, then every two to three weeks thereafter.

    Keep harvesting from each plant until it becomes tired or the leaves turn bitter, then pull it and let your next succession batch take over. If you have multiple rows at different stages, rotate which row you pick from, giving each one time to bounce back. This rotation is the quiet engine behind a truly continuous supply: while one row is regrowing, another is at its peak, and a third is just germinating.

    There’s also a simple test for whether a tiring plant is still worth eating. Cut a leaf and look at the stem, if it oozes a milky white sap and tastes bitter, the plant has turned and it’s time to pull it. If the sap is minimal and the leaf still tastes sweet, keep harvesting.

    Beating the Bolt: Keeping Lettuce Sweet

    Bolting is lettuce’s one real drama. When the plant gets stressed, usually by heat, but also by drought or general neglect, it stops making leaves and shoots up a thick central flower stalk to set seed. Once that happens, the leaves turn bitter and the party’s over.

    Spot it early. The tell is a plant growing taller instead of fuller, with leaves spacing out as a central stem rises. Leaves may also turn dull instead of glossy. Catch that and harvest immediately you can usually get one last good picking before the flavor turns.

    Prevent it. Bolting resistance comes down to a few simple habits:

    • Plant in the cool seasons. Spring and fall are lettuce’s happy places.
    • Never let the soil dry out. Drought stress is a bolting trigger.
    • Space densely. Closely planted leaves shade the soil and keep roots cool.
    • Feed with compost, not nitrogen surges.
    • Use shade. Row covers or shade cloth slow bolting in warm weather noticeably.
    • Choose slow-bolt varieties like ‘Jericho’ or ‘Nevada’ for late plantings.

    If your lettuce bolts anyway, it’s simply too warm, that’s not a failure, it’s a signal. Wait for cooler weather and sow a fall crop. And there’s a silver lining: a bolted plant will produce seed you can dry and save for next year’s sowings.

    Hands in gloves planting lettuce seedlings in a neat row on fertile garden soil
    Hands in gloves planting lettuce seedlings in a neat row on fertile garden soil

    Extending the Season Even Further

    Lettuce doesn’t have to stop when the weather turns. Because it’s so cold-tolerant, a little protection stretches your harvest dramatically. A cold frame or low tunnel will carry fresh greens well into winter, and row covers do double duty, shading lettuce in summer heat and buffering frost in fall.

    Lettuce is also one of the very best crops for indoor growing. A sunny windowsill or a simple grow light setup will keep a shallow tray of leaf lettuce producing through the dead of winter. Choose a small, fast variety, sow thickly, and mow for baby greens.

    Growing Lettuce in Containers

    Lettuce is practically made for pots. Its roots are shallow, so a container just 6 to 8 inches deep is plenty, a window box, a shallow bowl, even a repurposed storage tub with drainage holes. Fill with quality potting mix, scatter seeds thickly, and set it somewhere with morning sun and afternoon shade.

    The catch with containers is moisture: shallow soil dries fast, and dry lettuce bolts. Check daily in warm weather. The upside is portability. as summer heats up, simply move the pot into the shade to extend your harvest by weeks. Our container gardening guide for beginners covers the basics, and lettuce makes an excellent companion for a windowsill herb garden.

    Harvesting and Storing for Best Flavor

    One small detail makes a big difference: harvest early in the morning. Overnight, lettuce absorbs water and its leaves become fully turgid and sweet, before sun and heat begin to wilt them. Morning-picked lettuce is noticeably crisper and better-tasting than the same leaves cut at noon.

    To store it, wash the leaves, dry them thoroughly (a salad spinner is ideal), wrap them loosely in a dry paper towel, and seal them in a container in the fridge. The towel absorbs excess moisture and keeps leaves crisp for up to a week. That said, lettuce loses freshness and nutrition the longer it sits. one of the quiet joys of growing your own is harvesting exactly what you need, minutes before it hits the bowl. It’s zero-waste eating at its simplest.

    Common Problems and How to Fix Them

    Problem Likely Cause The Fix
    Bitter leaves, tall center stalk Bolting from heat, drought, or age Harvest immediately; sow slow-bolt types; use shade
    Plant died after harvesting Crown was cut off (“scalped”) Always cut 1–2 inches above the crown
    Seeds never germinated Buried too deep — lettuce needs light Surface-sow and barely cover
    Wilting, slow growth Dry soil; shallow roots drying out Water consistently; mulch or plant densely
    Ragged holes in leaves Slugs and snails Remove low/yellowing leaves; use barriers or traps
    Leaves rotting at the base Overcrowding, poor airflow, wet foliage Thin slightly; water at the soil line
    Sticky leaves, curling tips Aphids Rinse off; encourage ladybugs and lacewings

    For slugs and aphids especially, inviting beneficial insects does much of the work for you, see our guide to beneficial insects every gardener should know.

    Is Growing Lettuce Worth It?

    Enormously. Lettuce may be the highest-return crop in the entire vegetable garden: it’s cheap, it sprouts in days, it grows in shade and containers, and with cut-and-come-again, a single sowing keeps giving for months. Add succession sowing and a bit of shade, and you can eat homegrown salad most of the year while never buying another plastic clamshell of greens. A single seed packet costing a couple of dollars can genuinely replace a season’s worth of supermarket salad, with far better flavor and none of the packaging.

    Ready to round out your salad garden? Lettuce pairs beautifully with other cool-season crops, try growing kale in cool weather or spinach year-round, both of which respond to the very same cut-and-come-again technique. For warm-season company, see tomatoes in containers. Explore the full Vegetables collection, part of the broader EcoGardenHub Plant Library.

    Scatter a few seeds this week, protect that crown when you harvest, and sow again in a fortnight, before long you’ll be walking out with a bowl and coming back with dinner. There’s no fresher salad on earth than one that was still growing five minutes ago.

    Close-up of fresh green lettuce growing in a vegetable garden bed.
    Close-up of fresh green lettuce growing in a vegetable garden bed.

    Frequently Asked Questions

    • What is the cut-and-come-again method? It’s a harvesting technique where you take only the outer leaves or cut the plant 1 to 2 inches above soil, while leaving the central crown intact. Because lettuce grows from the center outward, the plant regrows and can be harvested three or four times.
    • How do I harvest lettuce so it keeps growing? Never cut the crown. Snip outer leaves individually with clean scissors, or gather a handful and cut two to three inches above the base. Leave that central growing point untouched and new leaves will keep emerging.
    • How often can you harvest cut-and-come-again lettuce? In cool weather (55–65°F), plants regrow in 7 to 10 days; in warmer weather, expect a harvest every 10 to 14 days. Most plants give three or four good harvests before turning bitter.
    • Why is my lettuce bitter? Bitterness means the plant is bolting, sending up a flower stalk in response to heat, drought, or age. Harvest immediately for one last picking, water consistently, use shade cloth, and choose slow-bolt varieties like ‘Jericho’ or ‘Nevada’.
    • How do you stop lettuce from bolting? Grow it in cool seasons, keep soil consistently moist, plant densely to shade the soil, feed with compost rather than high-nitrogen fertilizer, and use shade cloth or row covers in warm weather.
    • Can you grow lettuce in the shade? Yes. Lettuce is one of the few vegetables that grows well in partial shade, which actually helps in warm weather by slowing bolting. Morning sun with afternoon shade is close to ideal.
    • When is the best time of day to harvest lettuce? Early morning. Lettuce absorbs water overnight, so leaves are at their crispest and sweetest before the sun and heat begin to wilt them.

  • How to Grow Fig Trees: A Beginner’s Guide

    How to Grow Fig Trees: A Beginner’s Guide

    Here’s a fruit-growing secret the farmers market won’t tell you: that little pint of figs costing six dollars comes from one of the easiest, most forgiving fruit trees you can grow at home. Figs (Ficus carica) have been cultivated for over 5,000 years. some believe they were the very first fruit humans ever domesticated and learning how to grow fig trees is refreshingly beginner-friendly. Plant one, give it sun and decent drainage, and within a year or two it can be handing you soft, honey-sweet fruit warm from the branch.

    The best part? You don’t need a Mediterranean climate. With the right variety and a few simple cold-weather tricks, gardeners grow figs successfully from Southern California to Chicago. This friendly guide covers everything a first-timer needs, from choosing the perfect variety for your zone to protecting your tree through winter and harvesting your first perfect fig.

    Can Beginners Grow Fig Trees?

    Yes,  figs are one of the best fruit trees for beginners. Plant a variety suited to your climate in a hot, sunny spot with well-draining soil, water it consistently while it establishes, and protect it over winter in cold regions. Common figs are self-fruitful, so you only need one tree, and it can produce fruit within one to two years. In cold zones, grow figs in pots you can move indoors.

    The single most important decision is variety. Fig cultivars vary dramatically in flavor and cold-hardiness, and matching one to your zone is genuinely half the battle. Get that right, and figs reward you with more fruit for less effort than almost anything else in the garden.

    Meet the Fig Tree (Ficus carica)

    The common fig is a fast-growing deciduous tree or large shrub, prized for its lush, hand-shaped leaves and richly sweet fruit. Native to the Mediterranean and Middle East, it’s a plant of hot, sunny places, but it’s far hardier and more adaptable than its tropical reputation suggests.

    One detail makes figs especially beginner-friendly: the common fig is self-fruitful and needs no pollination to set fruit, so you only need a single tree and never have to worry about pollination partners or the famous fig wasp that some other fig types require. Most home varieties stay a manageable 10 to 20 feet (and can be kept smaller with pruning or in a pot), they’re deciduous, dropping their leaves each winter and flushing out fresh in spring and the fruit is a genuine superfood, rich in fiber, potassium, and calcium.

    Meet the Fig Tree (Ficus carica)
    Meet the Fig Tree (Ficus carica)

    There’s also something quietly special about growing figs: you’re tending a plant with thousands of years of history behind it. The same tree that fed ancient civilizations around the Mediterranean can grow on a modern patio, asking for little more than sunshine and the occasional drink. That combination of heritage, ease, and generosity is a big part of why, once gardeners grow their first fig, they rarely stop.

    Choosing the Right Fig Variety for Your Zone

    Because figs are so sensitive to their environment while ripening, choosing a variety suited to your climate is the key to success. Here are dependable, beginner-friendly cultivars:

    Variety Fruit Best For
    Chicago Hardy Purple skin, red flesh, sweet The most cold-hardy — great for zones 5–6 with protection
    Celeste Small, brown-purple, very sweet (“sugar fig”) Compact (7–10 ft), heat-tolerant, often fruits in year one
    Brown Turkey Medium, mild and sweet The popular all-rounder; among the most cold-hardy
    Black Mission Large, purple-black, jammy Hot, dry climates (zones 6–11)
    Kadota Small-medium, rich and sweet Warm areas; the classic canning fig

    Most figs are hardy in USDA zones 7 to 11 in the ground. In zones 5 and 6, choose the hardiest varieties (like Chicago Hardy) and provide winter protection, or grow figs in containers you can move indoors. Our regional guides for USDA Zone 5 and USDA Zone 7 gardening can help you match plants to your climate.

    How to Plant a Fig Tree in Pots indoor
    How to Plant a Fig Tree in Pots indoor

    How to Plant a Fig Tree: Step-by-Step

    Figs are forgiving, but getting the planting right sets you up for years of easy harvests.

    • Step 1: Choose the Right Variety and a Sunny Site

    Pick a variety suited to your zone, then find your hottest, sunniest spot. figs want at least six to eight hours of direct sun (more is better), and they love the reflected heat of a south-facing wall or fence, which speeds ripening and shelters the trunk in winter. Avoid low-lying frost pockets, since figs are more vulnerable to late spring frosts on tender new growth than to ordinary winter cold.

    • Step 2: Plant at the Right Time (and a Little Deep)

    Plant in early spring after the last frost, or in early fall in mild climates, giving roots time to establish. Dig a hole about twice as wide as the root ball. Here’s a fig-specific trick most guides skip: unlike other fruit trees, you can plant a fig slightly deeper than it grew in its pot, burying a couple of the lowest trunk nodes below the soil line. Those buried buds act as insurance, if a harsh winter kills the top, the tree can regrow from below.

    • Step 3: Enrich, Backfill, and Firm

    Mix a few handfuls of compost or well-rotted manure into the planting hole to boost fertility and structure. Set the tree, backfill around the roots, and firm gently to remove air pockets. Figs tolerate most soil types as long as it drains well and holds some organic matter.

    • Step 4: Water Well and Mulch

    Water thoroughly after planting to settle the soil, then spread a layer of organic mulch around the base, kept a few inches from the trunk, to conserve moisture and moderate soil temperature. Our guide to types of mulch helps you choose.

    • Step 5: (Optional) Grow a Free Fig From a Cutting

    One of the joys of figs is how easily they root from cuttings, giving you free trees. Take an 8- to 10-inch piece of dormant young wood, dip the cut end in rooting hormone, and plant it in moist, well-draining soil. Keep it warm and lightly moist, and it will often root and grow into a whole new tree.

    Fig Tree Care: Sun, Water, Feeding and Pruning

    Once established, fig tree care is wonderfully low-effort, figs are among the most drought-tolerant, resilient fruit trees you can grow.

    • Sun. More sun, more figs. Give your tree full sun (eight or more hours where possible); in too much shade, fruit production drops sharply.
    • Watering. Keep the soil consistently moist during the first year and through the growing season, especially as fruit develops erratic watering can cause fruit to drop or split. Once established, in-ground figs become quite drought-tolerant. Container figs, however, dry out fast and need more regular watering.
    • Feeding. In-ground figs in decent soil need very little feeding; in fact, over-fertilizing (especially with nitrogen) produces lush leaves at the expense of fruit. Container figs are the exception, they benefit from a high-nitrogen feed every four weeks or so through spring and early summer. Our guide to understanding NPK ratios keeps it simple, and homemade organic fertilizers offer gentle, low-waste options.
    • Pruning. Less is more with figs. Over-pruning disrupts the tree’s hormones and can reduce next year’s crop, so prune lightly while the tree is dormant in late winter or early spring, removing dead, diseased, or crossing branches and any suckers from the base. Always wear gloves, as fig sap can irritate skin.

    Understanding Fig Crops: Breba vs Main

    Here’s something that puzzles many new fig growers, so it’s worth understanding. Many fig trees produce two crops a year:

    • The breba crop forms in spring on the previous year’s wood. It’s earlier but smaller, and because the young fruitlets overwinter on the branch tips, they’re vulnerable to frost damage.
    • The main crop forms later in summer and fall on the current season’s new growth. It’s larger and the one most gardeners rely on.

    In cooler climates, the breba crop may be lost to frost and only the main crop ripens, which is exactly why winter protection matters so much for figs. It’s also why a tree can look healthy yet drop unripe fruitlets: often those were breba figs caught by cold.

    Growing Figs in Containers

    Growing a potted fig is a brilliant solution for small spaces and cold climates alike and figs genuinely thrive in pots, since they don’t mind having their roots a little restricted. A container also gives you a superpower: you can move the whole tree to shelter for winter.

    Start a young tree in a pot around a foot wide and deep, or one size up from its nursery pot, filled with a soil-based potting mix improved with bark chips, perlite, or pebbles for drainage. Keep it in full sun through summer, water regularly (pots dry out quickly), and feed every few weeks in spring and early summer. Because the roots are confined, repot every few years into fresh mix to keep the tree healthy and productive. Our container gardening guide for beginners covers pots, drainage, and repotting in detail.

    Fig Winter Protection: How to Overwinter Your Fig

    For gardeners north of zone 7, fig winter protection isn’t optional, it’s the difference between a thriving tree and a dead stump. The good news is that it’s straightforward, and there are several proven methods to suit your setup.

    • For potted figs (the easy route). Let the tree experience a light frost so it drops its leaves and goes dormant, then move the container into a cool, dark, frost-free spot like an unheated garage, shed, or basement (ideally around 20–50°F). Water only sparingly through winter to keep the roots from fully drying out, and bring it back into the sun in spring. Dormancy is far easier than trying to keep a fig actively growing indoors.
    • For in-ground figs — wrap it up. Once the tree drops its leaves in fall, tie the branches together loosely, then wrap the whole tree in burlap or landscape fabric, stuffing the interior with straw or dry leaves for insulation. A final layer of tarp or plastic sheds moisture. Unwrap gradually in early spring once nights stay reliably above about 25°F.
    • The mulch-and-cage method. Encircle the tree with a ring of chicken wire and fill it with insulating leaves, straw, or wood chips to protect the lower trunk and buds.
    • The bend-and-bury method. A traditional technique from Italian-American gardeners in the cold Northeast: prune to a few flexible branches, bend the whole tree to the ground, and bury it under six to eight inches of soil and mulch for winter.

    Whichever you choose, remember that young trees are the most vulnerable, so give newly planted figs extra care. And even if a hard winter kills the top growth, a hardy variety will usually resprout from the roots in spring, just remove the dead wood while the tree is still dormant. For more on shepherding tender plants through the cold, see our guides to overwintering plants and winter garden prep, and use your first and last frost dates to time everything.

    In our experience, the growers who succeed with figs in cold regions all share one habit: they don’t panic. A fig that looks like a lifeless stick in April often surprises everyone by pushing vigorous new shoots from the base once the soil warms. The trick is patience, wait until late spring before writing off any branch, scratch the bark to check for green underneath, and only then prune away what’s truly dead. Combined with a hardy variety and a little autumn wrapping, that calm, wait-and-see approach is what turns “figs won’t grow here” into a yearly harvest.

    Fresh Fig Tree (Ficus carica)
    Fresh Fig Tree (Ficus carica)

    How Long Until a Fig Tree Fruits & Harvesting

    Figs are fast rewarders. A nursery tree or rooted cutting often bears its first fruit within one to two years, with some compact varieties like Celeste fruiting in their very first season. Harvest usually comes in late summer to early fall.

    The golden rule of harvesting: figs do not ripen off the tree, so patience is essential. Pick only when a fig is fully colored, soft to a gentle squeeze, and starting to droop on its stem. A fully ripe fig detaches easily with the barest tug, and may show a drop of nectar at its base. Because birds and squirrels adore ripe figs, drape the tree with netting and harvest daily once fruit starts coloring up. Wear gloves or long sleeves while picking, since the sap can irritate skin.

    Figs are wonderfully perishable, which is part of their homegrown magic, enjoy them fresh within a couple of days, or preserve your surplus by freezing whole, drying, or making jam. Few things capture the taste of summer like a still-warm fig eaten straight off your own tree.

    Because a healthy fig tree can be remarkably generous, it pays to plan for a glut. Fresh figs keep only two to three days in the fridge, but they freeze beautifully whole for smoothies and baking, dry into chewy, candy-sweet snacks that store for months, and cook down into some of the finest jam and preserves you’ll ever taste. Figs also pair gorgeously with cheese, honey, and cured meats, or roasted alongside savory dishes, a luxurious ingredient that would cost a small fortune at the store but flows freely from a single backyard tree. It’s the kind of abundant, low-waste harvest that makes growing your own feel genuinely rewarding.

    Common Problems and How to Fix Them

    Figs are famously trouble-free, but a few issues can arise.

    Problem Likely Cause The Fix
    Fruit won’t ripen before season ends Cool climate or too much shade Choose an earlier variety; give maximum sun; a warm wall helps
    Tree dies back over winter Cold below the variety’s hardiness Wrap or bury; grow a hardier variety; expect regrowth from roots
    Dropping small unripe fruitlets Frost-damaged breba crop, or stress Protect in winter; keep watering steady
    Few figs despite lush leaves Over-fertilizing or over-pruning Ease off nitrogen; prune lightly only
    Birds and squirrels stealing fruit Ripe figs are irresistible Net the tree and harvest daily
    Sticky or webbed leaves Scale or spider mites (often indoors) Treat with insecticidal soap or neem oil

    Fruit flies can also target overripe or fallen figs, so pick promptly and clear away any dropped fruit.

    Is Growing Figs Worth It?

    Without question. Figs offer one of the best effort-to-reward ratios in all of gardening: a single sun-loving tree, a little patience, and a few winter precautions in cold regions, and you’re rewarded with basketfuls of luxurious, expensive-at-the-store fruit. They’re beautiful, ancient, low-maintenance, and easy to propagate for free, everything a sustainable home garden loves.

    If figs have you dreaming of more homegrown fruit, keep exploring: try growing pomegranate from seed, a compact kumquat tree in a pot, a pineapple from a top, or papaya from seed. For the full collection of exotic edibles, browse our hub on growing tropical and exotic fruits, part of the broader EcoGardenHub Plant Library.

    Plant a fig this spring, give it your sunniest corner, and get ready, that first warm, honey-sweet fig off your own tree is a moment you won’t forget. And with a tree that fruits fast, propagates for free, and can outlive you with basic care, it may just be the most generous plant you ever add to your garden.

    Frequently Asked Questions

    How long does it take for a fig tree to produce fruit? A nursery tree or rooted cutting often fruits within one to two years, and some compact varieties like Celeste can fruit in their first season. Figs are among the faster fruit trees to reward you.

    Do you need two fig trees to get fruit? No. The common fig is self-fruitful and needs no pollination, so a single tree will produce fruit on its own, one of the reasons figs are so beginner-friendly.

    Can you grow figs in cold climates? Yes. Choose a cold-hardy variety like Chicago Hardy, provide winter protection such as wrapping or mulching, or grow the fig in a container you can move indoors for winter. Gardeners grow figs well into cold northern zones this way.

    How do I protect a fig tree in winter? For potted figs, let them go dormant and store them in a cool, frost-free garage or basement. For in-ground trees, wrap them in burlap stuffed with straw, build a mulch-filled chicken-wire cage, or bend and bury the tree then uncover in spring.

    How do I know when a fig is ripe? A ripe fig is fully colored, soft to a gentle squeeze, and droops on its stem, detaching with the slightest tug. Figs do not ripen after picking, so always wait until they’re fully ripe on the tree.

    Can I grow a fig tree in a pot? Absolutely. Figs thrive in containers and even fruit well with restricted roots. Use a soil-based mix with added drainage, keep it in full sun, water and feed regularly, and repot every few years.

    Why won’t my fig tree fruit? The usual culprits are too little sun, a variety poorly matched to your climate, over-fertilizing, or over-pruning. Give it maximum sun, choose a zone-appropriate variety, and prune and feed sparingly.

  • How to Grow Pomegranate From Seed (Step-by-Step)

    How to Grow Pomegranate From Seed (Step-by-Step)

    Next time you crack open a pomegranate and scoop out those glittering, jewel-red arils, remember this: hiding inside each one is a seed that can become a whole tree. Learning how to grow pomegranate from seed is one of the most rewarding and genuinely easy, propagation projects a home gardener can try, turning a snack into a beautiful, long-lived fruit tree.

    Let’s be honest and encouraging in equal measure. Pomegranates are famously tough, sun-loving, drought-tolerant plants, and their seeds sprout readily with almost no fuss. The one caveat every good guide should share up front: seed-grown pomegranates don’t always match the fruit they came from. But with the right starting fruit and a little patience, you can grow a gorgeous tree with fiery orange-red blossoms and, in time, your own homegrown pomegranates. Here’s exactly how.

    Can You Grow a Pomegranate From Seed?

    Yes, you can grow a pomegranate from seed, and it’s one of the easiest fruit trees to start this way. Clean the seeds of all pulp, germinate them somewhere warm, and pot up the sprouts. Seeds sprout within a few weeks, and a seed-grown tree typically fruits in about three to five years. Just know that most store pomegranates are hybrids, so seedlings may produce fruit that differs from the parent.

    Think of seed-growing as a fun experiment with a beautiful guaranteed outcome (a striking ornamental tree) and a bonus possible outcome (delicious fruit). To improve your odds of tasty results, start with a large, sweet, ripe pomegranate, good parents tend to give good offspring.

    It’s worth understanding why seedlings vary. Pomegranate growers who want an exact copy of a known variety usually propagate from cuttings, which produce a clone of the parent. Seeds, by contrast, mix the genetics and can throw surprises, smaller or larger fruit, sweeter or more tart. That unpredictability is exactly how many of the world’s 500-plus named pomegranate cultivars first came to be, so a seed-grown tree isn’t “worse”, it’s just its own unique plant. If you specifically want fruit identical to a favorite variety, buy a nursery tree or take cuttings; if you love a bit of botanical adventure, seeds are a delight.

    Close-up of potted pomegranate plants in a garden, with bright fruit and lush foliage
    Close-up of potted pomegranate plants in a garden, with bright fruit and lush foliage

    Meet the Pomegranate (Punica granatum)

    The pomegranate (Punica granatum) is a deciduous shrub or small tree that has been cultivated across the Middle East, Mediterranean, and beyond for thousands of years. It’s a genuinely hardy, adaptable plant that revels in heat and sunshine, tolerates drought once established, and even shrugs off salty and poor soils that defeat fussier fruit.

    Beyond the famous fruit, with its leathery skin packed full of juicy, antioxidant-rich arils, the pomegranate is a knockout ornamental. Each year it produces vivid orange-red, trumpet-shaped flowers, followed by fruit that ripens in fall. Left to its own devices it grows into a rounded, multi-stemmed shrub of about 12 to 20 feet, but it takes beautifully to pruning and to container growing, and dwarf varieties stay small enough for a patio pot. Remarkably, a well-tended pomegranate can live for many decades.

    Pomegranate Zones: Where Pomegranates Grow

    Knowing your pomegranate zones helps you decide whether to grow yours in the ground or in a movable pot. Pomegranates grow best outdoors in USDA Hardiness Zones 8 to 11, thriving in hot, sunny, Mediterranean and mild-desert climates. In the US, that makes California, the Southwest, Texas, and the warmer South ideal for in-ground trees.

    If your winters dip much below about 20°F, don’t count yourself out, simply grow your pomegranate in a container you can move indoors for the coldest months. Some cultivars are more cold-hardy than others, so it’s worth checking the variety, and keeping an eye on your first and last frost dates helps you time winter protection. Gardeners in warmer areas can consult our USDA Zone 9 gardening guide for growing pomegranates outdoors year-round. Whatever your zone, one rule holds: pomegranates need real heat and full sun to fruit well, so give them the hottest, brightest spot you have.

    A quick word on varieties, since they affect both flavor and hardiness. ‘Wonderful’ is the classic large, tart-sweet commercial pomegranate you’ll recognize from the grocery store, while ‘Angel Red’ and ‘Parfianka’ are prized for sweetness and juice. Cold-climate gardeners often seek out hardier selections like ‘Salavatski’ (sometimes sold as ‘Russian 26’) and ‘Kazake’, which tolerate more cold than most. And for containers or small spaces, the dwarf ‘Nana’ is a compact charmer that flowers freely, though its small fruits are more ornamental than eating-quality. When you grow from seed you won’t know exactly what you’ll get, but knowing these named types helps you pick a good parent fruit to start with.

    A pile of ripe pomegranates on green grass, showcasing fresh fruit harvest
    pile of ripe pomegranates | Eco Garden Hub

    How to Grow Pomegranate From Seed: Step-by-Step

    Here’s the full process, from fruit to seedling. The active work takes only a few minutes.

    • Step 1: Choose a Big, Sweet, Ripe Pomegranate

    Because seedlings tend to resemble their parent, start with the best fruit you can find: a large, deep-red, fully ripe pomegranate with sweet, juicy arils. Inside, look for plump, firm seeds that are white or cream-coloured; green soft seeds aren’t mature enough to sprout well.

    • Step 2: Extract and Clean the Seeds

    Score the skin along the fruit’s natural ridges and pry it open, then scoop out the arils. Now do the most important part: remove every bit of the juicy red pulp from around each seed. Rinse the seeds in cool water and rub them gently with a paper towel, some gardeners even squish them lightly against the towel until the hard inner seeds are clean. Leftover pulp invites rot, so be thorough. Let the cleaned seeds air-dry for a few hours. Soaking them in water overnight beforehand can help soften the coating and speed germination.

    • Step 3: Germinate the Seeds

    You have two easy, reliable methods:

    • The potting method: Fill small, well-draining pots with light seed-starting mix. Sow two to three seeds per pot about a quarter-inch deep, mist to moisten, and place somewhere warm (around 70–80°F) and bright. Keep the soil lightly moist. Warmth and light are everything here. A sunny windowsill or a grow light setup with 10 or more hours of light dramatically speeds things up.
    • The baggie method: Dampen a coffee filter or paper towel, sprinkle the cleaned seeds on it, fold it up, and slip it into a sealed plastic bag. Keep it somewhere warm and check every few days. Once seeds sprout, transfer them gently to pots.

    Either way, expect sprouts within a few weeks. If you’re starting during cold weather, sow indoors so seedlings are ready to move out in spring. our seed starting guide covers the fundamentals.

    • Step 4: Pot Up and Thin to the Strongest Seedlings

    Once seedlings have a few sets of leaves, keep the strongest, healthiest plant in each pot and snip the weaker ones off at the soil line (pulling can disturb the keeper’s roots). Give them bright light and steady warmth, and mist occasionally, since young pomegranate seedlings appreciate humidity.

    • Step 5: Snip the Taproot and Pinch to Branch

    Here’s the pro tip most guides skip: pomegranates develop a deep taproot that doesn’t transplant well. To build a bushier, transplant-friendly root system, snip the taproot early while the seedling is young. Around the same time, pinch or cut back the top of the seedling by about a third, this encourages branching and a sturdier framework. These two small moves set your tree up for a much stronger start.

    Freshly harvested pomegranates in a black crate held outdoors in Miami , Florida
    Freshly harvested pomegranates in a black crate held outdoors.

    Transplanting and Growing On

    When your seedling is established, several inches tall, and all danger of frost has passed, it’s ready for its permanent home, a large container or a sunny garden spot. Choose a location with full sun (at least eight hours) and good drainage, sheltered from strong winds. Space in-ground trees about 15 feet from other plants and structures, since they can spread widely.

    Water the young tree well through its first year to encourage strong roots, then ease into a deep-but-infrequent watering rhythm as it establishes. A layer of organic mulch around the base, kept off the trunk to conserves moisture and suppresses weeds; our guide to types of mulch can help you choose.

    Pomegranate Tree Care: Sun, Soil, Water and Feeding

    The best news about pomegranate tree care is how little the tree asks for once it’s settled. This is a plant that genuinely thrives on a bit of benign neglect.

    • Sun. Full sun, and plenty of it, aim for eight or more hours daily. Heat and light are what drive flowering and fruiting, so a hot, sunny position is non-negotiable if you want fruit.
    • Soil. Pomegranates are famously unfussy about soil and adapt to sandy, loamy, or even clay soils as long as drainage is good. Interestingly, unlike most fruit trees, they actually prefer slightly alkaline soil (up to about pH 7.5). If your soil is very acidic, a little garden lime nudges it into the sweet spot, see our guide on how to raise soil pH with lime.
    • Water. Once established, pomegranates are impressively drought-tolerant. Water deeply but infrequently, roughly weekly in hot weather, easing to every ten to fourteen days otherwise let the soil dry between waterings. Deep, occasional soaks encourage strong, drought-hardy roots, while frequent shallow watering does the opposite. Keep watering consistent as fruit develops, though, since erratic moisture can cause fruit to split.
    • Feeding. Here’s a refreshingly easy rule: less is more. Pomegranates need very little fertilizer, and over-feeding especially with nitrogen which leads to lush leaves at the expense of fruit and can even cause fruit to drop. If your soil is poor, a light feed with a balanced fruit-tree fertilizer in spring is plenty. Our guide to understanding NPK ratios helps you keep it gentle.
    • Pruning. Prune in late winter or early spring before new growth begins, removing dead or crossing branches, thinning for airflow, and cutting back suckers from the base to maintain your chosen tree or shrub shape.

    Growing Pomegranate in Containers

    Container growing is the perfect solution for gardeners in cooler zones and pomegranates take to pots wonderfully, especially compact varieties like the dwarf ‘Nana’. A pot lets you give the tree a hot, sunny summer outdoors and then move it somewhere sheltered for winter dormancy.

    Choose a large container with excellent drainage, use a free-draining mix, and remember that snipped taproot from earlier, it makes container life far easier. Place the pot in your sunniest spot, water when the top of the soil dries, and feed lightly. In autumn your pomegranate will naturally drop its leaves and go dormant; that’s completely normal. Move it to a cool but bright frost-free spot, water only sparingly through winter, and bring it back into the sun in spring. Our container gardening guide for beginners and overwintering plants guide walk through the details.

    How Long Until a Pomegranate Fruits?

    Patience is the price of admission here. A pomegranate grown from seed typically takes about three to five years to produce its first fruit, sometimes a little sooner in ideal hot conditions. In the meantime, the tree rewards you with handsome foliage and those gorgeous orange-red blooms, many trees flower within a year or two, well before they set fruit.

    A few realities worth knowing:

    • Sun and heat drive fruiting. A pomegranate in too much shade or a cool spot may grow happily for years and never fruit. Give it maximum sun.
    • Pollination is usually self-handled. Pomegranates are self-fruitful, so a single tree can set fruit. If a container tree is shy to fruit, you can hand-pollinate the flowers with a small brush or cotton swab.
    • Seedlings vary. Because your tree is seed-grown, its fruit may be larger or smaller, sweeter or more tart than the parent part of the adventure.

    In our experience, the single biggest predictor of whether a seed-grown pomegranate ever fruits is simply how much sun and heat it gets. Trees planted against a warm, south-facing wall or kept in the hottest corner of a patio tend to bloom and fruit years earlier than identical seedlings tucked into partial shade. Gardeners often assume a fruitless pomegranate needs more water or feed, when in fact the opposite is usually true: it needs more sunshine, more warmth, and less pampering. Treat it like the sun-loving desert native it is, and it will reward you.

    Harvesting Pomegranates

    Pomegranates ripen in fall, and they don’t continue to ripen off the tree, so timing matters. Look for fruit that has developed its full, rich color, feels heavy for its size, and makes a slightly metallic sound when tapped. The skin often turns from glossy to more matte, and the fruit shape becomes a little squared-off around the arils as it fills out.

    Rather than pulling, snip ripe fruit from the branch with pruners to avoid damaging the tree. Whole pomegranates keep for weeks in a cool spot or the fridge, and the arils freeze beautifully. Enjoy them fresh by the handful, sprinkled over salads and yogurt, juiced, or added to countless dishes, a jewel-bright, antioxidant-rich reward for your patience.

    To free the arils without a mess, score the skin around the fruit’s equator, break it open, then hold each half cut-side down over a bowl and tap the back firmly with a wooden spoon, the arils tumble right out. Nutritionally, they’re a genuine superfood: rich in vitamin C, vitamin K, potassium, fiber, and powerful antioxidants, all in a naturally sweet-tart package. Because a mature tree can bear heavily, a good harvest year gives you plenty to eat fresh, juice, freeze, and share. a deeply satisfying, low-waste return on a few seeds you once might have thrown away.

    Common Problems and How to Fix Them

    Pomegranates are tough, but a few issues can crop up.

    Problem Likely Cause The Fix
    Seeds won’t sprout Pulp left on seeds, or too cold Clean seeds thoroughly; keep them warm (70–80°F)
    Lots of leaves, no fruit Too much shade or nitrogen; tree too young Give full sun; feed lightly; be patient
    Splitting fruit Irregular watering, especially near harvest Keep soil moisture steady as fruit ripens
    Dropping flowers or young fruit Over-feeding or stress Ease off fertilizer; water consistently
    Yellowing leaves in fall Natural dormancy None needed — pomegranates are deciduous
    Sticky leaves, pests Aphids, whiteflies, or scale Treat with neem oil or insecticidal soap

    If a mature tree stubbornly refuses to fruit, the culprit is almost always insufficient sun and heat — pomegranates simply need warmth to perform.

    Is Growing Pomegranate From Seed Worth It?

    Absolutely, especially if you enjoy the journey as much as the harvest. Growing a pomegranate from seed is inexpensive, genuinely easy, and quietly magical: a snack’s worth of seeds becomes a striking, long-lived tree that brightens your garden with fiery blooms and, eventually, fruit you grew yourself. Even if a seedling’s fruit surprises you, that’s part of the fun.

    If seed-starting fruit has you hooked, keep going: try growing a pineapple from a top, papaya from seed, fig trees for beginners, or a compact kumquat tree in a pot. For the full collection of exotic edibles, browse our hub on growing tropical and exotic fruits, part of the broader EcoGardenHub Plant Library.

    Save a handful of seeds from your next pomegranate, give them warmth and light, and watch a future tree emerge on your windowsill, sustainable, satisfying, and just a little bit wondrous. Few gardening projects offer this much reward for so little cost, and fewer still can be started tonight with nothing more than the fruit already sitting in your kitchen.

    beautiful Vibrant pomegranates hanging on tree branches.
    Vibrant pomegranates hanging on tree branches in a Florida orchad.

    Frequently Asked Questions

    How long does it take to grow a pomegranate from seed? Seeds usually sprout within a few weeks, and a seed-grown tree typically takes about three to five years to produce its first fruit. Trees often flower within a year or two, well before they begin fruiting.

    Can you grow a pomegranate from store-bought seeds? Yes. You can grow pomegranates from grocery-store fruit seeds, just clean off all the pulp first. Keep in mind that most store pomegranates are hybrids, so the resulting tree’s fruit may differ from the parent.

    Do pomegranate seeds need to be dried before planting? It helps. Remove all the pulp, rinse the seeds, and let them air-dry for a few hours before planting. Some gardeners soak them overnight first to soften the coating and encourage faster germination.

    What growing zones are best for pomegranates? Pomegranates grow best outdoors in USDA Hardiness Zones 8–11, in hot, sunny climates. In colder regions, grow them in containers you can move indoors for winter, choosing a cold-hardier variety if available.

    Why won’t my pomegranate tree fruit? The most common reason is not enough sun and heat, pomegranates need full sun and warmth to flower and fruit. A tree that’s still young, over-fertilized with nitrogen, or growing in shade may stay leafy but fruitless.

    Do you need two pomegranate trees to get fruit? No. Pomegranates are self-fruitful, so a single tree can produce fruit on its own. Hand-pollinating with a small brush can help boost fruit set, especially on container-grown trees.

    How big does a pomegranate tree get? Most pomegranates grow into a rounded shrub or small tree about 12 to 20 feet tall and wide, though they respond well to pruning. Dwarf varieties like ‘Nana’ stay small enough for container growing.

  • How to Grow Kumquat Trees in Pots (Complete Guide)

    How to Grow Kumquat Trees in Pots (Complete Guide)

    Pop a whole kumquat in your mouth and something delightful happens: the sweet, fragrant peel gives way to a burst of tart, tangy juice inside. No peeling, no fuss, just a perfect little two-in-one citrus you can eat straight off the tree. Even better, learning how to grow kumquat in pots is one of the easiest ways for almost anyone to grow their own citrus, because kumquats are the most cold-hardy and container-friendly of all the citrus family.

    If you’ve assumed homegrown citrus was only for gardeners in Florida or California, the humble kumquat is about to change your mind. These naturally compact, self-fertile little trees thrive in containers, produce heavy crops of jewel-bright fruit, and can be wheeled indoors when winter bites. This complete guide covers everything, from picking the right variety to harvesting your first glossy orange kumquats.

    Can You Grow a Kumquat Tree in a Pot?

    Yes, kumquats grow beautifully in pots. In fact, they’re among the best citrus for container growing. Plant a compact variety like ‘Nagami’ or ‘Meiwa’ in a large, well-draining container filled with citrus soil, give it 6–8 hours of full sun, water when the top of the soil dries, and feed through the growing season. In cold regions, simply move the pot indoors for winter. A grafted tree can fruit within one to two years.

    The magic of container growing is control and portability. Because kumquats can’t survive a hard freeze, keeping yours in a pot lets you enjoy fresh citrus anywhere in the country, outdoors soaking up summer sun, then tucked into a bright indoor spot when the cold arrives.

    Meet the Kumquat

    The kumquat (Citrus japonica, once classified as Fortunella) is the smallest of the true citrus fruits, native to southern China and eastern Asia, where it has been cultivated for centuries. The name comes from the Cantonese gam gwat, meaning “golden tangerine”, a fitting description for its glossy little orange fruits. Brought to Europe and then North America in the 19th century, it has been prized ever since as both an ornamental patio tree and a source of unusual, delicious fruit.

    Citrus japonica, once classified as Fortunella
    Citrus japonica, once classified as Fortunella

    What makes the kumquat truly distinctive is how you eat it. Where most citrus asks to be peeled, the kumquat is enjoyed whole: the thin, sweet, aromatic rind and the tart, tangy flesh are meant to be eaten together in one bright, contrasting bite. The trees themselves are compact evergreens with thornless branches, deep-green glossy leaves, and clusters of fragrant white flowers that perfume the air in spring as lovely to look at as they are to harvest.

    Why Kumquats Are the Perfect Potted Citrus

    Among all the citrus you could grow, the kumquat is arguably the friendliest for pots and here’s why it earns that reputation as the ideal potted citrus:

    • It’s the most cold-hardy citrus. Kumquats shrug off temperatures other citrus can’t, tolerating brief dips to around 18°F once established, so they grow in climates too cool for lemons or oranges.
    • It stays naturally compact. While many citrus trees stretch 20 feet tall, a potted kumquat typically maxes out around 4 to 6 feet, perfect for a patio, balcony, or sunny doorstep.
    • It’s self-fertile. You only need a single tree to get fruit, so there’s no need to find space for a pollination partner.
    • It’s a heavy bearer. Kumquats fruit generously for their size, often loading their branches with dozens of bright orange fruits.
    • It’s gorgeous and fragrant. Glossy evergreen leaves, fragrant white spring blossoms that bees adore, and vivid fruit make it as ornamental as it is productive.

    For small-space, cool-climate, and first-time citrus growers, the kumquat checks every box.

    Best Kumquat Varieties for Containers

    Choosing the right variety shapes both your harvest and how you’ll enjoy it. Here are the standouts for pots:

    Variety Fruit Best For
    Nagami Oval, deep-orange, bright sweet-tart, a few seeds The classic — eating whole, marmalade; most widely available
    Meiwa Round, larger, sweeter, nearly seedless Fresh eating straight off the tree
    Marumi Round, slightly tart Marmalades and preserves
    Centennial Variegated Variegated fruit and leaves, compact Ornamental appeal in small spaces

    ‘Nagami’ is the most popular and the one you’ll usually find at nurseries bold, snackable, and reliable. If you prefer a sweeter bite for eating fresh, seek out ‘Meiwa’. Either makes a wonderful container tree. Whatever you choose, buy a healthy grafted tree from a reputable nursery; kumquats can be grown from seed, but seedlings are weak and slow to fruit.

    What You’ll Need

    • A grafted kumquat tree in a compact variety
    • A large container (at least 5 gallons to start, 15 gallons ideal) with multiple drainage holes
    • A quality citrus/palm potting mix  well-draining, slightly acidic
    • Pot feet, bricks, or a rolling dolly to raise the pot off the ground
    • A sunny spot with 6–8 hours of direct light, or a grow light for indoors
    • Citrus fertilizer (or organic options like fish emulsion and kelp)
    • Mulch to help hold moisture in the pot
    A grafted kumquat tree already producing fruits
    A grafted kumquat tree already producing fruits

    How to Plant a Kumquat Tree in a Pot: Step-by-Step

    Spring is the ideal time to pot up a kumquat, giving it a full warm season to establish. Follow these steps.

    • Step 1: Choose a Big Pot With Great Drainage

    Here’s the single most important rule with potted kumquats: they hate being root-bound, so go big. Choose a container at least three times as wide as the root ball starting around 5 gallons for a young tree, sizing up to 15 gallons with several large drainage holes, since citrus can’t stand wet feet. Cover oversized holes with a scrap of fine screen so soil doesn’t wash out. A breathable fabric pot works wonderfully too.

    • Step 2: Use the Right Citrus Soil

    Soil choice prevents the majority of kumquat problems, so don’t reach for generic potting mix. Bark-heavy mixes break down and suffocate roots within months. Instead, use a quality citrus or palm potting mix that drains fast and stays slightly acidic (pH around 5.5–6.5). Good drainage plus the right acidity keeps roots healthy and leaves green.

    • Step 3: Plant Your Kumquat

    Fill the pot partway, then set the tree so the top of its root ball sits level with the final soil surface never buried deeper, which invites rot. Gently tease out any circling roots, backfill around them, and firm the soil lightly to remove air pockets, leaving an inch below the rim for watering.

    • Step 4: Water In, Mulch, and Raise the Pot

    Water thoroughly until it runs from the drainage holes. Add a two- to three-inch layer of mulch on the surface, keeping it several inches away from the trunk. Then raise the container off the ground on pot feet, bricks, or a rolling dolly this improves both drainage and air circulation, and a dolly makes it easy to chase the sun or dodge frost.

    • Step 5: Place in Full Sun

    Set your potted kumquat where it gets at least six to eight hours of direct sun a day; eight to ten is even better for fruiting. If you’re growing indoors, park it at your brightest window or add a grow light to keep it healthy through dim months.

    Kumquat Tree Care: Water, Feeding & Pruning

    Ongoing kumquat tree care is genuinely beginner-friendly once the tree is settled in the right pot and spot.

    Watering. Consistency is everything with citrus. Keep the soil moist but never soggy, watering thoroughly when the top inch or so feels dry the simple finger test works perfectly. Remember that potted plants dry out faster than those in the ground, especially in summer heat, so check often. Both overwatering and letting the pot go bone-dry cause stress, leaf drop, and poor fruit, so aim for that steady middle ground.

    Feeding. Kumquats are heavy feeders. Use a fertilizer formulated for citrus (ideally with a good portion of slow-release nitrogen) through spring and summer, and water well before and after feeding to avoid burning the roots. Organic gardeners get great results with citrus-friendly options like fish emulsion, liquid kelp, or homemade nettle tea and diluted manure a lovely low-waste approach that fits right into a natural feeding routine (see our guide to making your own organic fertilizer). If those fertilizer numbers are a mystery, our guide to understanding NPK ratios makes them clear. Yellowing leaves often signal watering issues or an iron deficiency, both easily corrected.

    Pruning. Kumquats grow slowly and need little pruning. To shape the tree or thin crowded, dead, or crossing branches, prune lightly in early spring after harvest but before the flowers open. Aim for a bushy, sturdy framework that can support the weight of all that fruit.

    Repotting. Because kumquats won’t tolerate being root-bound, plan to repot every two to three years into a slightly larger container with fresh mix. Root-bound trees show it through twig dieback and leaf loss, so give the roots room before they run out.

    In our experience, the two habits that make the biggest difference to a potted kumquat’s health are unglamorous but powerful: watering by feel rather than by schedule, and never letting the tree outgrow its pot. Gardeners who check the soil with a finger before every watering and who bump their tree up a pot size the moment growth slows and roots start circling the drainage holes tend to have lush, heavy-bearing trees. Those who water on autopilot or leave a tree cramped for years are usually the ones battling yellow leaves and sparse fruit. Kumquats are forgiving plants, but they reward a little attentiveness generously.

    Growing Kumquats Indoors

    Because they’re compact and self-fertile, kumquats also make rewarding indoor citrus trees a glossy, fragrant, fruit-bearing houseplant that brightens a sunny room. The trick indoors is light: place your tree at the brightest window you have (a south-, east-, or west-facing one is ideal), and supplement with a grow light if the spot falls short of six hours of direct sun. Indoor air is often dry, so an occasional misting or a nearby humidity tray keeps the foliage happy, and rotating the pot every week or two encourages even, balanced growth.

    Whenever the weather allows, kumquats appreciate a summer holiday outdoors, where natural sunlight and visiting bees improve growth and fruit set. Just move the tree gradually to avoid shocking it, and bring it back inside before the first cold nights. Whether it lives indoors full-time or splits its year between patio and windowsill, a kumquat is one of the most forgiving citrus trees you can grow under a roof.

    Overwintering Your Potted Kumquat

    The container advantage really shines in winter. While kumquats are the toughest citrus, they still can’t survive a hard freeze, and potted roots are more exposed to cold than in-ground ones. As temperatures drop toward freezing, move your tree to a sheltered spot, a bright indoor room, or an unheated but well-lit garage or conservatory.

    A few tips for a smooth winter: give the tree the brightest indoor spot you can, since sudden drops in light trigger leaf drop; keep it somewhere cool rather than next to a hot radiator; and ease back on watering while growth slows. If you can only protect it outdoors, group pots together and drape them with a frost blanket on the coldest nights. Our overwintering plants guide walks through the whole routine, and keeping an eye on your first and last frost dates helps you time the move. Gardeners in warmer regions can check our USDA Zone 9 gardening guide for growing kumquats outdoors year-round.

    How Long Until a Kumquat Tree Fruits & When to Harvest

    Good news for the impatient: kumquats fruit relatively quickly. A grafted nursery tree often bears its first fruit within about one to two years, while seed-grown trees are slow and unreliable another reason to start with a nursery tree.

    Here’s the yearly rhythm to expect:

    • Late spring to summer: clusters of fragrant white flowers open and are visited by bees.
    • Summer into fall: small green fruits form and slowly swell.
    • Late fall through spring: fruit ripens to bright orange, typically ready to harvest from around November into April depending on variety and climate.

    Your kumquat harvest is ready when the fruits are fully, richly orange. Conveniently, they hold well on the tree, so you can pick as needed over several months rather than all at once. Snip or gently twist off the fruit, and enjoy them the best way of all; whole, skin and all. Beyond fresh snacking, kumquats make superb marmalade, preserves, and candied treats, and they’re a bright, cheerful addition to both sweet and savory dishes.

    In the kitchen, a bowl of homegrown kumquats opens up all kinds of possibilities. Slice them into salads for a citrus pop, simmer them into a glossy marmalade, candy them for cakes and cheese boards, or tuck a few into a roasting pan with chicken for a bright, tangy glaze. They’re rich in vitamin C, keep well for a couple of weeks, and because a healthy tree bears so heavily, you’ll likely have plenty to preserve and share. It’s the kind of small, sustainable abundance that makes growing your own citrus feel genuinely special.

    White dog standing on hind legs among vibrant kumquat plants in a sunny garden.
    White dog standing on hind legs among vibrant kumquat plants in a sunny garden.

    Common Problems and How to Fix Them

    Most kumquat troubles trace back to water, cold, or a cramped pot.

    Problem Likely Cause The Fix
    Yellowing leaves Over- or under-watering, or iron deficiency Even out watering; use citrus feed with micronutrients
    Sudden leaf drop Temperature or light change; rootbound Avoid drastic moves; give a bright, stable spot; repot if needed
    Twig dieback, stalled growth Root-bound in too small a pot Repot into a larger container with fresh mix
    Mushy roots, wilting Overwatering / poor drainage Improve drainage; let soil dry between waterings
    Sticky leaves, cottony spots Aphids, mealybugs, or scale Treat with neem oil or insecticidal soap
    Few flowers or fruit Not enough light or nutrients Move to full sun; feed regularly through the growing season

    A quick note for pet owners: while kumquats aren’t severely toxic, the acidity and sugars could upset a pet’s stomach if they eat a lot, so it’s worth keeping curious nibblers in mind.

    Is Growing Kumquats in Pots Worth It?

    Wonderfully so. A potted kumquat gives you glossy evergreen good looks, sweetly fragrant blossoms, and months of eat-them-whole citrus all in a compact, portable package that works whether you’re in sunny Florida or snowy New England. For anyone who’s ever wanted to grow their own citrus but thought their climate ruled it out, the kumquat is the joyful, achievable answer.

    If your container citrus dreams are growing, keep exploring more exotic edibles: try growing star fruit at home, a lychee tree, guava trees in containers, or fig trees for beginners. For the full collection, browse our hub on growing tropical and exotic fruits, part of the broader EcoGardenHub Plant Library. New to pots in general? Our container gardening guide for beginners covers all the fundamentals.

    Pot up a kumquat this spring, give it sun, the right soil, and a big enough home, and before long you’ll be plucking bright little suns from your own tree the easiest, cheeriest citrus you’ll ever grow. And once you’ve tasted that first homegrown kumquat, sweet peel and tangy center in a single bite, you’ll understand why this little golden fruit has charmed gardeners for centuries.

    Frequently Asked Questions

    How long does it take for a potted kumquat tree to fruit? A grafted nursery tree usually produces its first fruit within one to two years. Seed-grown kumquats are weak and slow, taking several years and often disappointing, so a nursery tree is the reliable choice.

    What size pot does a kumquat tree need? Start with at least a 5-gallon container and size up to around 15 gallons, choosing a pot at least three times as wide as the root ball. Kumquats hate being root-bound, so repot every two to three years in a larger container.

    Which kumquat variety is best for containers? ‘Nagami’ is the most popular and widely available, with bright sweet-tart fruit ideal for eating whole or making marmalade. If you prefer a sweeter, nearly seedless fruit for fresh snacking, choose ‘Meiwa’.

    Do kumquat trees need full sun? Yes. Kumquats need at least six to eight hours of direct sunlight daily for healthy growth and good fruiting, with eight to ten hours even better. Indoors, use your brightest window or add a grow light.

    How cold-hardy are kumquats? Kumquats are the most cold-hardy citrus, tolerating brief dips to around 18°F once established. Even so, they can’t survive a hard freeze, so potted trees should be moved to shelter during cold snaps.

    Can you eat kumquats whole? Yes, and it’s the best part. Unlike most citrus, kumquats are eaten whole, the peel is sweet and the flesh is tart, giving a burst of contrasting flavor in one bite. They’re also excellent in marmalades and preserves.

    Why are my kumquat leaves turning yellow? Yellow leaves usually point to inconsistent watering (too much or too little) or an iron deficiency. Check that the soil drains well and stays evenly moist, and feed with a citrus fertilizer that includes micronutrients.

  • How to Grow Zucchini in a Small Garden (Easy Guide)

    How to Grow Zucchini in a Small Garden (Easy Guide)

    Zucchini has a legendary reputation among gardeners, the vegetable so productive that growers famously leave surplus on their neighbors’ doorsteps. It’s also a plant with a reputation for sprawling, gobbling up nine square feet of garden and elbowing everything else aside. So here’s the good news: learning how to grow zucchini in a small garden is entirely doable, and with the right variety you can get that famous abundance from a single pot on a patio.

    The secret isn’t a bigger garden, it’s choosing a compact bush variety, giving it a generous container, and understanding one quirk about pollination that trips up nearly every beginner. Get those three things right and one plant can keep your kitchen in summer squash from midsummer to frost. This guide covers all of it, from picking a variety to harvesting at the perfect moment.

    Can You Grow Zucchini in a Small Space?

    Yes, zucchini grows very well in small gardens and containers. Choose a compact “bush” variety like ‘Eight Ball’ or ‘Bush Baby’, plant one per large container (at least 5 gallons, ideally bigger, and 12+ inches deep), give it 6 to 10 hours of full sun, water consistently, and hand-pollinate the flowers if bees are scarce. A single plant can produce dozens of zucchini through the summer.

    The two things that decide your success are variety and pollination. A sprawling vining type will overwhelm a small space, and even a healthy plant will drop every fruit if its flowers aren’t pollinated. Solve both, and zucchini becomes one of the most rewarding crops a small-space gardener can grow.

    Vibrant close-up of fresh green zucchinis showcasing texture and color.
    Vibrant close-up of fresh green zucchinis showcasing texture and color.

    Why Zucchini Suits Small Gardens So Well

    It might seem counterintuitive to grow a famously big plant in a small space, but zucchini earns its spot better than almost anything:

    • Extraordinary yield per square foot. One plant occupying a single pot can produce dozens of fruits over a season few crops give back so much from so little ground.
    • Speed. Many varieties are ready to harvest in 35 to 50 days, so you’re eating within weeks rather than months.
    • It’s nearly foolproof. Zucchini germinates readily, grows fast, and forgives beginner mistakes.
    • Purpose-bred compact varieties exist. Breeders have done the hard work, giving us bush types with a 3-foot footprint that still crop heavily.
    • It’s beautiful. Big architectural leaves and huge golden flowers make it an ornamental plant in its own right.

    The one honest caveat: zucchini needs real sun and real water. Give it a bright spot and consistent moisture and it will astonish you.

    Meet the Zucchini (Summer Squash)

    Zucchini (Cucurbita pepo), also called courgette, is a warm-season summer squash and a member of the cucurbit family alongside cucumbers, melons, and pumpkins. Unlike winter squash, it’s harvested young, while the skin is still tender and edible, which is why it’s ready so fast and produces so relentlessly.

    It’s also genuinely good for you. Zucchini delivers vitamins A, C, and K, plus folate, manganese, and potassium. most of those nutrients live in the skin, so there’s no need to peel it. As a general rule, the darker the zucchini, the more nutrients it carries. Best of all, zucchini is quick: many varieties go from seed to first harvest in just 35 to 50 days.

    Bush vs Vining: The Most Important Choice for Small Gardens

    If you take one thing from this guide, make it this. Zucchini comes in two growth habits, and the difference is dramatic in a small space:

    • Vining varieties send out long, rambling vines that can swallow an entire garden row. Wonderful if you have space, disastrous if you don’t.
    • Bush (compact) varieties grow as a tidy, upright clump. These are bred for small gardens and containers, and they’re what you want.

    Here are proven compact performers for small spaces:

    Variety Why It Works Notes
    Eight Ball Round, baseball-sized fruit; only ~3-foot spread Harvest in about 40 days; powdery mildew resistant
    Bush Baby Compact plant bred for smaller, striped fruit Great for pots; harvest at ~4 inches
    Patio Star Purpose-bred for container growing Compact and productive
    Fordhook Zucchini Classic reliable bush type Widely available
    Buckingham Patio One of the smallest; manages in a 5-gallon bucket Ideal for balconies

    “The balcony gardener’s secret weapon: look for a parthenocarpic variety. These remarkable plants set fruit without any pollination at all, no bees required. If you’re gardening on a high balcony, in a dense city, or anywhere pollinators are scarce, a parthenocarpic zucchini removes the single biggest obstacle to a harvest.”

    Choosing a Container

    Compact doesn’t mean small roots. Even bush zucchini are big, thirsty plants, so give them room:

    • Minimum size: 5 gallons for the smallest varieties.
    • Ideal: at least 12 inches deep and 16 to 18 inches across, bigger is genuinely better, and a 15- to 25-gallon container produces noticeably healthier, more productive plants.
    • One plant per pot. Zucchini leaves are enormous; crowding invites disease and cuts your yield.

    Material matters. Porous containers like terra cotta, unglazed ceramic, or fabric grow bags provide excellent drainage and airflow (they dry faster, so watch watering). Plastic works but raises the risk of waterlogged roots, so make sure it has plenty of drainage holes. Large fabric grow bags are a great, affordable option at bigger sizes. Whatever you choose, start with a clean container to avoid carrying over disease. Our container gardening guide for beginners covers pot selection in more depth.

    The Right Soil

    Never fill a container with garden soil, it compacts, smothers roots, and can carry weed seeds, disease, and squash vine borer larvae. Use a quality, lightweight potting mix built around peat or coco coir, bark, and perlite or vermiculite for drainage and aeration, then blend in some compost for fertility. Fill to about two inches below the rim. Zucchini are hungry plants, so that compost-enriched start pays dividends all season. If you’re growing in a bed rather than a pot, work in a generous few inches of compost before planting, zucchini thrives in rich, loose, moisture-retentive soil that still drains freely.

    How to Plant Zucchini: Step-by-Step

    • Step 1: Wait for Warm Soil

    Zucchini is frost-tender and hates cold ground. Plant one to three weeks after your last frost, once soil is 70–85°F and daytime temperatures are consistently above 70°F. Check your last frost date to time it. Planting into cold soil causes rot and stunted plants.

    • Step 2: Sow Seeds Directly (or Transplant Carefully)

    Zucchini prefers to be direct-sown, because its roots dislike disturbance. Plant two or three seeds about an inch deep in the center of the container, at least four inches from the edges. Seeds sprout in 7 to 10 days. If you’d like a head start in a short season, sow directly into pots indoors about a month before the last frost, then move them out once it’s warm or buy transplants and handle the root ball very gently.

    • Step 3: Thin to One Strong Seedling

    Once seedlings are a few inches tall, choose the strongest and snip the others off at soil level. It’s tempting to keep them all resist. A single plant with room to breathe outproduces two crowded ones every time.

    • Step 4: Add Vertical Support

    Here’s a small-space trick worth doing at planting time: put a sturdy tomato cage over the seedling, or set a stake for tying. Zucchini leaves and fruits get big and heavy, and unsupported stems dangling over a pot edge can snap under their own weight. Training the plant upward also saves precious floor space and dramatically improves airflow. If you’re growing a vining type on a trellis, anchor the pot to a railing so it can’t topple.

    • Step 5: Position for Full Sun and Pollinators

    Zucchini wants at least six hours of direct sun, with eight to ten being ideal, a south-facing spot is perfect. Just as importantly, place it near flowers that attract bees. Borage, alyssum, nasturtiums (which also repel squash bugs), lavender, mint, and bee balm are all excellent. Our companion planting guide has more pairings, and attracting more pollinators to your space pays off across the whole garden.

    Zucchini Plant Care: Water, Feeding and Airflow

    • Watering. Consistency is everything. Zucchini’s huge leaves transpire a lot of water, and containers dry out fast, check daily and water as soon as the top inch of soil is dry, going deeper and more often in heat. Erratic watering is the direct cause of blossom end rot. Water at the base and keep the leaves dry, since wet foliage invites powdery mildew. A DIY drip irrigation system makes this effortless.
    • Feeding. Zucchini are heavy feeders. Mix a slow-release fertilizer into the potting mix at planting, or feed every four weeks with a balanced, water-soluble fertilizer. Container plants need more feeding than garden ones since there’s less soil to draw from. Our guides to understanding NPK ratios and homemade organic fertilizer can help.
    • Airflow and pruning. Powdery mildew, that white dusty coating on leaves is zucchini’s most common ailment, and it thrives where air is still and humid. You can prune away some of the largest lower leaves to open the plant up and let light reach the base. Just don’t strip it bare; those leaves are the plant’s engine.
    A detailed close-up of fresh organic zucchinis, showcasing their vibrant green color and texture.
    A detailed close-up of fresh organic zucchinis, showcasing their vibrant green color and texture.

    The Pollination Problem (and How to Fix It)

    This is the number one complaint about zucchini: “My plant is covered in flowers but I’m not getting any fruit.” Here’s what’s happening.

    Zucchini produces separate male and female flowers on the same plant. Male flowers appear first, often for a week or two before any females opens sitting on a thin, plain stem. Female flowers have a thick base behind the bloom that looks like a tiny baby zucchini. That miniature fruit only swells into a real zucchini if pollen travels from a male flower to the female. Without pollination, the little fruit yellows, shrivels, and rots off.

    So if you’re seeing flowers drop early in the season. Relax, those are almost certainly males, and females will follow. But if baby zucchini keep rotting at the blossom end, you have a pollination problem.

    Hand-pollinating takes thirty seconds. In the morning, when flowers are open:

    1. Find an open male flower (thin stem) and snip it off.
    2. Peel away the petals to expose the pollen-covered stamen in the center.
    3. Brush the stamen gently against the stigma inside an open female flower (the one with the baby fruit at its base). A cotton swab or small brush works just as well.

    That’s it. Do this each morning you spot a fresh female flower and your fruit set will improve dramatically. Good news for small gardens: you only need one plant, zucchini is self-pollinating, so a single plant can produce a full harvest. Growing two just raises the odds that flowers overlap and get pollinated naturally.

    In our experience, hand-pollination is the habit that transforms a frustrating zucchini season into an overwhelming one. Gardeners who write off their plant as “a dud” after weeks of dropped fruit are almost never dealing with a sick plant, they’re dealing with a pollination gap, often because the flowers only stay open for a single morning and the bees didn’t happen to show up in that window. Once you get into the rhythm of checking the plant with your morning coffee and dabbing any open female flower, the fruit set becomes reliable almost overnight. It takes less time than watering, and it’s the single highest-return thirty seconds you’ll spend in a small garden.

    Harvesting Zucchini

    Here’s the productivity secret that separates a good zucchini harvest from a legendary one: harvest early and harvest often.

    Most zucchini are ready in just 35 to 50 days, and the temptation is to let them grow big. Don’t. Baseball-bat zucchini are watery, seedy, and bland, and more importantly, a plant carrying oversized fruit slows down and stops producing. Picking constantly tricks the plant into making more.

    Harvest at about 4 to 6 inches long for most varieties (compact types produce smaller fruit than the supermarket ones, so don’t wait), or at baseball size for round varieties like ‘Eight Ball’. Cut the stem with a sharp knife or snips rather than twisting, and check the plant every day or two at peak season, zucchini can double in size overnight.

    Don’t overlook the blossoms, either. Male flowers (which you have in surplus) are a delicacy. stuff them, batter them, or fry them. It’s a wonderfully low-waste way to enjoy even more from a single plant. Store harvested zucchini in the fridge for about a week, or grate and freeze it for zucchini bread and soups all winter.

    And when the famous glut arrives and it will, zucchini’s mildness becomes its superpower in the kitchen. It’s brilliant sliced and roasted or grilled, grated into fritters and bread, spiralized into noodles, folded into soups and curries, or simply sautéed with garlic. Grated zucchini freezes especially well in measured portions, so a productive summer plant quietly stocks your freezer for winter baking. Few crops turn so little space into so much genuinely useful food.

    Common Problems and How to Fix Them

    Problem Likely Cause The Fix
    Flowers but no fruit Male flowers only, or poor pollination Wait for females; hand-pollinate; add pollinator plants
    Baby zucchini rot and drop Unpollinated female flowers Hand-pollinate each morning
    White powdery coating on leaves Powdery mildew (still air, wet foliage) Improve airflow; prune some leaves; water at the base
    Rot at the blossom end of fruit Inconsistent watering Water evenly as soon as the top inch dries
    Sudden wilting of whole plant Squash vine borer Inspect stems; use row covers early in the season
    Ragged holes in leaves and flowers Cucumber beetles (can spread bacterial wilt) Use floating row covers; neem oil; sticky traps
    Small, misshapen fruit Incomplete pollination Hand-pollinate; encourage more bees

    A note on row covers: they’re excellent protection from borers and beetles, but they also block bees. so remove them once flowering starts, or commit to hand-pollinating. It’s also worth planting a second zucchini a few weeks after the first, so that if borers take out your original plant midsummer, a healthy successor is already coming along behind it.

    Vibrant zucchini plant with blossoms captured in natural setting, showcasing growth and freshness
    Vibrant zucchini plant with blossoms captured in natural setting, showcasing growth and freshness

    Is Growing Zucchini Worth It?

    Wonderfully so. Zucchini is one of the most generous plants in the vegetable world: fast, forgiving, and so productive that one healthy plant in a single pot can feed a household all summer. For small-space gardeners, it’s proof that you don’t need a big yard to grow real, satisfying quantities of food. just a sunny corner, a big container, and thirty seconds a morning with a cotton swab.

    Ready to build out your small-space vegetable garden? Zucchini pairs well with other easy crops. Try growing tomatoes in containers, bell peppers from seed, or cucumbers grown vertically ,  a fellow cucurbit that loves the same conditions. Explore the full Vegetables collection, part of the broader EcoGardenHub Plant Library, or see our roundup of the best vegetables for container gardening.

    Pick a compact variety, give it a big pot and your sunniest corner, and get ready, by midsummer you may be the one leaving zucchini on your neighbors’ doorstep. It’s a wonderful problem to have, and proof that a small garden can be every bit as abundant as a big one.

    Frequently Asked Questions

    • Can you grow zucchini in a container? Yes, easily. Choose a compact bush variety, use a container at least 5 gallons (ideally 12+ inches deep and 16 to 18 inches wide), plant one per pot, and give it full sun and consistent water.
    • Why does my zucchini have flowers but no fruit? Early in the season, the plant produces male flowers first, which naturally drop off, followed by female Flowers. If baby zucchini rot and fall, the female flowers aren’t being pollinated, so hand-pollinate in the morning or attract more bees with nearby flowers.
    • Do you need two zucchini plants to get fruit? No. Zucchini is self-pollinating, so one plant can produce a full harvest. Growing more than one simply increases the chance that male and female flowers open at the same time and get pollinated naturally.
    • How do you hand-pollinate zucchini? In the morning, snip an open male flower (thin stem), peel back the petals to expose the stamen, and brush it gently inside a female flower (the one with a tiny fruit at its base). A cotton swab works too.
    • What is the best zucchini variety for small gardens? Compact bush varieties are best. ‘Eight Ball’ has only a 3-foot spread and matures in about 40 days, while ‘Bush Baby’, ‘Patio Star’, and ‘Buckingham Patio’ are all bred for containers. For balconies without bees, choose a parthenocarpic variety.
    • How big should zucchini be when you pick it? Harvest at about 4 to 6 inches long for most varieties, or baseball size for round types. Smaller zucchini taste far better, and frequent picking keeps the plant producing, oversized fruit slows it down.
    • Why do my zucchini leaves have white powder on them? That’s powdery mildew, a common fungal issue caused by still, humid air and wet foliage. It rarely kills the plant. Improve airflow, prune a few large leaves, and water at the soil line rather than overhead.

  • How to Grow Star Fruit (Carambola) at Home

    How to Grow Star Fruit (Carambola) at Home

    Slice a ripe star fruit crosswise and you’re rewarded with a row of perfect little edible stars, golden, glossy, and almost too pretty to eat. Behind that whimsical shape is a genuinely delicious fruit, crisp and juicy with a bright flavor that lands somewhere between apple, grape, pear, and citrus. If you’ve fallen for it at the market, here’s the good news: learning how to grow star fruit at home is easier and faster than most tropical fruits, and the tree itself is a stunning, productive addition to a warm-climate garden.

    Star fruit, or carambola, has a reputation among experienced growers for being wonderfully rewarding when you get a few key things right chiefly warmth, wind protection, and the right variety. This friendly, complete guide walks you through all of it, from choosing a sweet cultivar to slicing into your first homegrown stars.

    Can You Grow Star Fruit at Home?

    Yes, you can grow star fruit at home if you live in a warm climate (USDA zones 9–11) or can grow it in a movable container. Plant a grafted, sweet-variety carambola in full sun with wind protection and rich, well-draining soil. Water regularly without waterlogging, feed through the growing season, and you can expect fruit in as little as one to three years.

    The two things that most determine your success are climate and variety. Carambola is a subtropical tree that can’t take hard frost and dislikes wind, and its fruit ranges from lusciously sweet to mouth-puckeringly tart depending on the cultivar. Nail those two choices and the rest of carambola tree care is refreshingly manageable.

    Meet the Star Fruit Tree (Carambola)

    The star fruit tree (Averrhoa carambola) is a tropical-to-subtropical evergreen native to Southeast Asia, where it has been cultivated for centuries. It’s a member of the wood sorrel family, and it makes a genuinely beautiful landscape tree: a bushy, multi-branched, rounded canopy of glossy green compound leaves, dotted through the year with delicate pink-to-lavender flowers that pollinators adore.

    Left unpruned, a carambola can reach 20 to 30 feet tall and nearly as wide, but it responds beautifully to pruning and is easily kept to a tidy 6 to 12 feet perfect for an average backyard. The fruit itself is 2 to 6 inches long with five prominent ribs, turning from green to a waxy golden-yellow when ripe. The thin skin and small seeds are edible, so the whole fruit can be enjoyed. And carambola is famously generous: a mature, well-cared-for tree can produce hundreds of pounds of fruit in a year. Even setting the harvest aside, many gardeners grow carambola purely for its looks the year-round glossy foliage, the clouds of pretty lilac-pink blooms, and the ornamental fruit make it a standout feature tree, patio specimen, or informal privacy screen.

    Star Fruit Climate: Where Carambola Grows Best

    Getting the star fruit climate right is the single biggest factor in your success. Carambola thrives in warm, humid, subtropical-to-tropical conditions and grows best in USDA Hardiness Zones 10 and 11, with zone 9 possible if you can protect the tree from frost. In the US, that makes South Florida, Hawaii, and warm pockets of California and southern Texas the natural home for in-ground carambola.

    A few climate details make all the difference:

    • Temperature. The ideal fruiting range is roughly 68–85°F. Growth slows to a stop around 55–60°F, and while mature trees tolerate brief dips, prolonged temperatures below freezing can seriously damage or kill a tree. Young trees are especially tender.
    • Wind is the hidden enemy. More than almost any other fruit tree, carambola resents strong wind, which can shred foliage, drop fruit, and stunt growth. A sheltered, wind-protected spot is essential this is the detail most beginners overlook.
    • Salt intolerance. Carambola doesn’t tolerate salty conditions, so it isn’t a great choice for exposed coastal properties.
    Close-up of a starfruit tree with vibrant green fruits and leaves, showcasing nature's beauty.
    Close-up of a starfruit tree with vibrant green fruits and leaves, showcasing nature’s beauty.

    If you live in a cooler zone, don’t count yourself out dwarf carambola grows well in a large container you can move indoors for winter. Keep an eye on your first and last frost dates to time protection, and if you’re in a borderline region, our USDA Zone 9 gardening guide shares helpful microclimate tricks.

    In our experience, wind protection is the factor that separates a struggling carambola from a thriving one, and it’s the one new growers most often underestimate. Trees tucked into a sheltered corner beside a warm wall, behind a hedge, or in the lee of the house consistently recover faster from stress, hold their fruit better, and grow more densely than trees left exposed in an open yard. If you can offer only one thing beyond sunshine, make it a windbreak.

    Sweet vs. Tart: Choosing the Right Carambola Variety

    Here’s a make-or-break tip that too many guides skip: carambola varieties fall into two camps, sweet and tart, and choosing well determines whether you’re eating fruit fresh or reaching for the sugar. Older, unnamed seedlings often produce tart fruit, while modern named cultivars from Thailand, Taiwan, and Malaysia have been selected for sweetness.

    • Sweet varieties:  ‘Arkin’ (the reliable US favorite), ‘Fwang Tung’, ‘Sri Kembangan’, and ‘Kary’ are crisp and mild, perfect for eating fresh, juicing, or slicing into salads.
    • Tart varieties: such as ‘Golden Star’, ‘Newcombe’, and ‘Star King’  are brighter and more acidic, shining in curries, chutneys, jams, and juices.

    For the best chance of sweet, dependable fruit, buy a grafted, named cultivar from a reputable nursery rather than gambling on a random seedling.

    Seed or Grafted Tree?

    You can grow carambola from seed, but it comes with two big caveats. First, the seeds lose viability within just a few days of leaving the fruit, so they must be sown fresh. Second and more importantly seedlings are unpredictable and often produce tart fruit, and they can take years to mature. 

    A grafted or air-layered nursery tree, by contrast, gives you a known sweet variety and fruits far sooner, sometimes within a year or two. If you want reliable, sweet star fruit without a long wait, a grafted tree is the way to go. If you’d like to try seeds for fun, sow them fresh in a warm (around 70°F), well-draining, peat-based mix in bright indirect light, and be prepared to grow the seedling in a container for two to three years before planting out.

    How to Plant a Star Fruit Tree: Step-by-Step

    Spring, after all danger of frost has passed, is the best time to plant. Follow these steps for a strong start.

    • Step 1: Choose a Sunny, Wind-Sheltered Spot

    Pick the sunniest place in your yard carambola wants at least six to eight hours of direct sun for good fruiting that’s also protected from strong winds by a wall, fence, or other trees. Give it room: plant 20 to 30 feet from buildings and other trees so it isn’t shaded or crowded.

    • Step 2: Prepare Well-Draining, Slightly Acidic Soil

    Carambola isn’t fussy about soil type, but it does need good drainage and grows best in soil rich in organic matter with a moderately acidic to neutral pH (around 4.5–7). If your soil is alkaline (above pH 7), the tree is prone to iron and zinc deficiencies, so it’s worth testing first our guide on how to test your garden soil shows you how, and how to lower soil pH for acid-loving plants helps you adjust it.

    • Step 3: Plant Your Carambola

    Dig a hole as deep as the root ball and about twice as wide. Choose a healthy nursery tree that isn’t root-bound, gently loosen any circling roots, and set it so the top of the root ball sits level with the surrounding soil. Backfill and firm gently to remove air pockets.

    • Step 4: Water In and Mulch

    Water the newly planted tree deeply to settle the roots, then spread a layer of organic mulch around the base kept a few inches from the trunk to conserve moisture and suppress weeds. A good layer of organic mulch helps young trees establish quickly.

    • Step 5: Tip-Prune Young Shoots to Shape

    In the first year or two, tip back any shoots that grow beyond about 2 to 3 feet. This simple pruning encourages bushy branching and sets up a strong, well-shaped, easy-to-harvest tree and a lower, denser tree also stands up far better to wind.

    Carambola Tree Care: Water, Feeding & Pruning

    Day-to-day carambola tree care is straightforward once your tree is in the right spot.

    Watering. Star fruit likes regular, consistent watering to keep the soil evenly moist but it’s also sensitive to overwatering, so never let the roots sit in soggy soil. Aim for steady moisture, easing off during rainy spells, and pay special attention while fruit is developing, since inconsistent watering can cause fruit drop.

    Feeding. Feed young trees regularly through the growing season a balanced fertilizer such as 10-10-10 monthly (skip winter) works well then shift mature trees to a few feedings a year. Carambola benefits from a fertilizer that also includes magnesium, and it can develop yellowing leaves (chlorosis) in high-pH soils; a foliar spray of chelated iron and micronutrients corrects this. Compost, worm castings, or aged manure are excellent organic options. If those fertilizer numbers feel cryptic, our guide to understanding NPK ratios makes them simple.

    Pruning. Happily, carambola responds very well to pruning and generally needs only light annual attention. Selectively remove a few upper limbs each year to keep the tree at a manageable 6 to 12 feet and to stop the upper canopy from shading out the lower branches but never strip the lower limbs, which carry easy-to-reach fruit and shade the ground. A smaller tree is easier to harvest, easier to protect, and far more wind-resistant.

    Growing Star Fruit in Containers

    If your winters are too cold for in-ground carambola, a container is the perfect solution and star fruit takes to pots surprisingly well, especially dwarf varieties. Container growing lets you give the tree a warm, sunny summer outdoors and then move it to a frost-free spot when the cold arrives.

    how to grow star fruit in containers at home
    This is how to grow star fruit in containers at home


    Start young trees in a 5–7 gallon pot, then size up to a 15–25 gallon container as they grow. Use a deep, sturdy pot with excellent drainage, filled with a well-draining, slightly acidic mix enriched with compost. Give it full sun, rotate the pot occasionally for even growth, and supplement with a grow light if you’re keeping it indoors through a dim winter. Our container gardening guide for beginners covers pot sizing and repotting, and our overwintering guide walks through cold-season care.

    How Long Until Star Fruit Fruits?

    Here’s some genuinely cheering news: compared to slow tropical fruits like lychee, carambola is a sprinter. A grafted or air-layered tree can begin fruiting within one to two years, while a seedling typically takes about three years, with abundant harvests by year three or four.

    Here’s a realistic picture once your tree is fruiting:

    • Flowering: clusters of pink-lavender blooms appear, often with two main flushes (roughly spring and fall) and sometimes more.
    • Fruit set to ripe: individual fruits mature in about 60 to 75 days after the flowers set.
    • Multiple crops: in warm climates, established trees often fruit two or even three times a year.
    • Yield: a healthy mature tree is remarkably prolific, capable of hundreds of pounds of fruit annually.

    A lovely quirk of carambola: once a shoot is a few months old and has “learned” to flower, it can flower again and again on the same wood, one reason these trees become so productive with age.

    Harvesting Star Fruit

    Timing your harvest is easy and satisfying. Wait until the fruit is fully colored  a rich, even yellow to golden  and the ribs’ edges just begin to turn light brown. At that point the fruit is crisp, juicy, and at its best. You can pick fruit by hand with a gentle twist, and very ripe fruit will even drop on its own.

    If you harvest a touch early while it’s still yellow, star fruit will continue to sweeten on the counter until golden. Enjoy it fresh (skin and all), sliced into salads, juiced, or as a striking garnish. Because a productive tree gives so generously, star fruit is a wonderful, low-waste way to fill your kitchen and share stars with the whole neighborhood.

    One optional pro trick worth knowing: about three to four weeks after flowering, you can thin the developing fruit, removing the smallest ones from each cluster so the tree channels its energy into fewer, larger, better-formed fruits. It feels ruthless, but it noticeably improves the size and quality of your harvest. Nutritionally, the payoff is worth every bit of care star fruit is low in calories yet rich in vitamin C, fiber, potassium, and antioxidants, making each golden slice as wholesome as it is beautiful.

    A Note on Star Fruit and Kidney Health

    One important, responsible heads-up: star fruit naturally contains oxalic acid and a compound that can be harmful to people with kidney problems. For most people, star fruit is a healthy, low-calorie treat rich in vitamin C, fiber, and antioxidants. But anyone with kidney disease or impaired kidney function should avoid star fruit unless a doctor confirms it’s safe, as it can cause serious reactions in those individuals. When in doubt, check with a healthcare professional.

    Common Problems and How to Fix Them

    Most carambola troubles come down to wind, water, cold, or a few familiar pests.

    Problem Likely Cause The Fix
    Torn leaves, dropped fruit, stunting Wind exposure Plant in a sheltered spot; keep the tree pruned low and dense
    Yellowing leaves (chlorosis) High-pH soil, iron/zinc deficiency Test and acidify soil; apply chelated iron as a foliar spray
    Wilting, mushy roots Overwatering / root rot Improve drainage; water evenly, never leaving soil soggy
    Tart, disappointing fruit Grown from a seedling of unknown parentage Choose a grafted, named sweet cultivar like ‘Arkin’
    Damaged leaves and stems Frost on a tender tree Cover during cold snaps; move containers indoors
    Blemished fruit, maggots Fruit flies, stink bugs, scale Treat with neem oil; bag fruit; clean up fallen fruit

    Birds also love ripe star fruit, so netting can help protect your harvest as fruit colors up.

    One last responsible-gardening note: in some warm regions, star fruit can self-seed and naturalize where it isn’t wanted. It’s easy to be a good steward,harvest fruit promptly, don’t toss seeds into wild areas, and pull up any volunteer seedlings you spot. A little care keeps carambola a welcome guest rather than a nuisance.

    Is Growing Star Fruit from Tree Worth It?

    Absolutely. Few fruit trees offer this much: fast fruiting, generous yields, year-round ornamental beauty, and fruit that’s as fun to look at as it is to eat. For gardeners in warm climates or anyone willing to grow a dwarf tree in a pot. carambola is a joyful, rewarding, and genuinely sustainable way to enjoy fresh tropical fruit at home.

    If star fruit has whetted your appetite for more, keep exploring: try growing a lychee tree, guava trees in containers, papaya from seed, or a pineapple from a top. For the whole collection of exotic edibles, browse our hub on growing tropical and exotic fruits, part of the broader EcoGardenHub Plant Library.

    Plant a sweet carambola this spring, give it sun and shelter from the wind, and before long you’ll be slicing your own golden stars, a little piece of the tropics, grown right at home.

    Frequently Asked Questions

    How long does it take for a star fruit tree to fruit? A grafted or air-layered carambola can begin fruiting within one to two years, while a seed-grown tree usually takes about three years, with abundant harvests by year three or four. Star fruit is one of the faster-fruiting tropical trees.

    What climate do star fruit trees need? Carambola grows best in warm, humid USDA zones 10–11, with zone 9 possible if protected from frost. It needs temperatures ideally between 68 and 85°F, shelter from wind, and protection from freezing, which can kill young trees.

    Are all star fruit sweet? No. Carambola comes in sweet and tart types. Seedlings are often tart, so for reliably sweet fruit, choose a grafted, named sweet cultivar such as ‘Arkin’, ‘Fwang Tung’, or ‘Sri Kembangan’.

    Can you grow star fruit in a pot? Yes. Dwarf carambola grows well in a large container, starting in a 5–7 gallon pot and sizing up to 15–25 gallons. Containers are ideal in cooler climates, since you can move the tree indoors for winter.

    How do you know when star fruit is ripe? Harvest when the fruit is fully yellow to golden and the edges of the ribs just start to brown. It will be crisp and juicy; fruit picked slightly early will continue to sweeten on the counter until golden.

    Is star fruit safe to eat? For most people, yes it’s a healthy, low-calorie fruit. However, people with kidney disease or impaired kidney function should avoid star fruit unless cleared by a doctor, as it contains compounds that can be harmful to them.

    How big does a star fruit tree get? Unpruned, carambola reaches about 20 to 30 feet tall and wide, but it responds well to pruning and is easily kept to 6 to 12 feet for easier harvesting and better wind resistance. Dwarf varieties stay smaller still.

  • How to Grow Bell Peppers From Seed to Harvest

    How to Grow Bell Peppers From Seed to Harvest

    Few garden vegetables are as cheerful as a bell pepper, glossy, crunchy, and ripening into brilliant shades of red, orange, yellow, and even purple. They’re a staple in kitchens everywhere, and at the store the colorful ones cost a small fortune. Learning how to grow bell peppers means you can pick them at their sweetest, straight from the plant, for pennies.

    Here’s the honest truth up front: bell peppers reward patience more than almost any other vegetable. They’re slow starters, they love warmth, and the sweetest peppers ask you to wait a few extra weeks. But they’re genuinely easy once you understand their handful of needs, and a single healthy plant can keep producing right up until frost. This complete guide walks you through the whole journey, from starting seeds indoors to harvesting your first perfectly ripe pepper.

    Can You Grow Bell Peppers From Seed?

    Yes, and starting from seed is the best approach in most climates. Sow bell pepper seeds indoors 8 to 10 weeks before your last spring frost, keeping the soil at 80–85°F for good germination. Transplant seedlings outdoors 2 to 3 weeks after the last frost, once soil reaches 65°F. Give them full sun, consistent water, and low-nitrogen feed. Expect green peppers 60 to 90 days after transplanting, with colored peppers taking 2 to 3 weeks longer.

    Because peppers need such a long, warm season, starting seeds indoors isn’t just convenient, it’s often essential. That head start is what lets gardeners in cooler regions harvest ripe, colorful peppers before frost arrives.

    Prefer to skip the seed stage? There’s no shame in buying nursery transplants, many experienced gardeners do, and it’s a perfectly good route if you’re short on time, space, or indoor light. Plant them out 2 to 3 weeks after your last frost, once the soil has properly warmed. That said, starting from seed opens up hundreds of varieties you’ll never see on a garden-center bench, costs a fraction as much, and lets you grow exactly the colors and sizes you love. If you have a sunny window or a simple grow light, it’s well worth trying.

    Fresh green bell peppers growing in pots in a garden setting.
    Fresh green bell peppers growing in pots in a garden setting.

    The Secret Most Beginners Miss: Green Peppers Aren’t a Variety

    Here’s the single most useful thing to understand about growing peppers, and it surprises almost everyone: green bell peppers are simply unripe peppers. They aren’t a separate variety. Left on the plant, a green pepper will gradually turn yellow, then orange, and finally red, growing sweeter and more nutritious at every stage.

    That’s why green peppers taste slightly bitter and cost less at the store, they’re picked early. It’s also why the timeline matters so much:

    • Green (mature size): roughly 60–70 days after transplanting. Crisp, mildly bitter, perfectly edible.
    • Full color (red, yellow, orange): another 2–3 weeks on the plant. Sweeter, richer, and higher in vitamins.

    There’s a trade-off worth knowing. Picking peppers green encourages the plant to produce more fruit overall, while letting them ripen to full color gives you better flavor but fewer total peppers. Many experienced gardeners split the difference letting peppers start to blush on the plant, then finishing the ripening indoors on the counter. Both approaches are right; it depends on whether you want quantity or sweetness.

    Meet the Bell Pepper

    The bell pepper (Capsicum annuum) is a warm-season vegetable in the same genus as chili peppers but bells are the gentle members of the family, larger, rounder, crunchier, and completely without heat. They’re grown as annuals in most of the US, forming bushy plants about 2 to 3 feet tall that produce hollow, thick-walled fruits packed with vitamin C.

    A myth worth busting: you may have read that peppers with three bumps on the bottom are “male” and four-bump peppers are “female” and sweeter. It’s completely false. Pepper flowers contain both male and female parts, and the number of lobes is simply a result of variety and growing conditions. Feel free to pick whichever pepper looks best.

    Colorful mix of bell peppers in varying shades. Perfect for healthy and organic food concepts.
    Colorful mix of bell peppers in varying shades. Perfect for healthy and organic food concepts.

    Choosing the Right Bell Pepper Variety

    Variety choice matters more than beginners expect, especially if your summers are short. Days-to-maturity ranges widely,  early types like ‘Ace’ can produce in about 60 days, while large specialty peppers may need 90 or more. If you garden in a cool or short-season region, choosing an early variety is the difference between ripe red peppers and a plant full of green ones when frost arrives.

    Reliable home-garden picks include ‘California Wonder’ (the classic thick-walled green-to-red bell), ‘Ace’ (fast, productive, and forgiving in cool summers), ‘King of the North’ (bred for northern gardens), ‘Golden California Wonder’ (a sunny yellow), and ‘Purple Beauty’ (a striking purple that ripens to red). Snack-sized “lunchbox” peppers are wonderfully prolific and perfect for containers and kids.

    One tip if you’d like to save seeds: choose open-pollinated or heirloom varieties. Let the peppers ripen fully on the plant, scoop out the seeds, dry them thoroughly for a couple of weeks, and store them somewhere cool and dry. Hybrid varieties won’t grow true from saved seed, so they’re best repurchased each year.

    What You’ll Need

    • Bell pepper seeds (or a nursery transplant if you’re short on time)
    • Seed trays or small pots with drainage
    • Seed-starting mix and a heat mat (or a warm spot)
    • A grow light or very bright window
    • Rich, well-draining soil with a pH around 6.0–6.8
    • A sunny site or a 5-gallon-plus container
    • Low-nitrogen fertilizer and compost
    • Small cages or stakes — pepper stems are brittle

    How to Grow Bell Peppers From Seed: Step-by-Step

    Follow these five steps from seed to established plant.

    • Step 1: Start Seeds Indoors, Early and Warm

    Sow bell pepper seeds indoors about 8 to 10 weeks before your last spring frost, check your local last frost date to time it. Fill trays with seed-starting mix, plant seeds a quarter-inch deep, water gently, and here’s the crucial part: keep the soil at 80–85°F. Peppers are famously slow, stubborn germinators in cool soil, and a seedling heat mat makes a dramatic difference. Keep the mix moist but never soggy, since overwatering causes damping-off. Our seed starting guide for beginners covers the whole indoor setup.

    • Step 2:  Give Seedlings Strong Light

    Once seeds sprout, remove the heat mat and get them under bright light immediately, a grow light a few inches above the seedlings, or your sunniest window. Weak light produces leggy, floppy seedlings that struggle later. Our DIY grow light setup guide shows an easy, affordable arrangement. Feed lightly with a quarter-strength liquid fertilizer every couple of weeks once true leaves appear.

    • Step 3: Harden Off Before Transplanting

    About a week before planting out, start hardening off your seedlings, setting them outdoors for gradually longer stretches each day so they acclimate to sun, wind, and cooler nights. Skipping this step shocks tender plants badly. Our guide on how to harden off seedlings walks through the schedule.

    • Step 4: Transplant Into Warm Soil

    Patience pays here. Wait until 2 to 3 weeks after your last frost, when soil has warmed to at least 65°F and nights stay above 60°F. Peppers planted into cold soil sulk for weeks and never fully recover. Choose a spot with at least 6 to 8 hours of full sun and rich, well-draining, slightly acidic soil (pH 6.0–6.8) amended with compost. Space plants 18 to 24 inches apart, setting them at the same depth they grew, and water in well.

    • Step 5: Mulch and Add Support

    Mulch around plants to hold moisture, suppress weeds, and keep soil warm, black plastic works well in cool regions, while grass clippings or straw are great organic options (see our types of mulch guide). Then add a small tomato cage or stake at planting time. Pepper stems are surprisingly brittle and snap under a load of fruit, so support is cheap insurance.

    Close-up of colorful bell peppers on plant in a greenhouse, showcasing organic farming.
    Close-up of colorful bell peppers on plant in a greenhouse, showcasing organic farming.
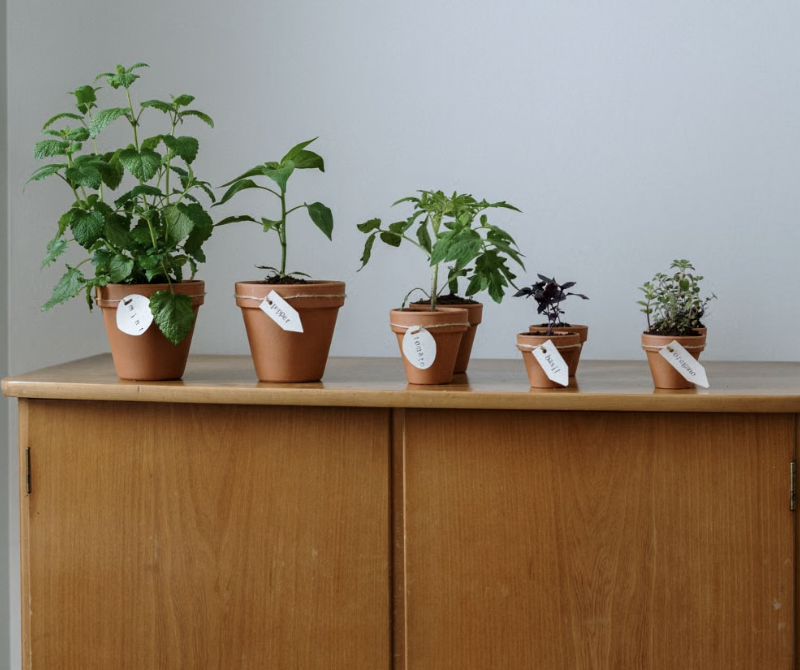
    Pepper Plant Care: Sun, Water, Feeding and Pinching

    Good pepper plant care is mostly about consistency and restraint.

    • Sun. Peppers want full sun, six to eight hours minimum. In regions where summer regularly tops 90°F, however, a little afternoon shade or shade cloth actually helps, preventing sunscald and heat-induced flower drop. Morning sun is the most valuable. Keep in mind that peppers also appreciate warm soil, which is why black plastic mulch is popular in northern gardens and why containers, which heat up faster than the ground, often produce earlier peppers in cool climates.
    • Watering. Aim for about one to two inches of water per week, delivered deeply rather than in frequent sips, which trains roots to grow deep and drought-resistant. Water at the base and keep the leaves dry. Consistency matters enormously: dry conditions make peppers bitter, while erratic watering causes blossom end rot. In extreme heat, container plants may need water twice daily.
    • Feeding. This is where many gardeners go wrong, peppers need surprisingly little nitrogen. Too much produces a beautiful, leafy green bush with almost no fruit. Feed a balanced fertilizer a couple of weeks after transplanting, then switch to a low-nitrogen, higher-phosphorus feed once flowering begins, applied every two to three weeks. Ease off late in the season as the final fruits set. Our guide to understanding NPK ratios explains the numbers, and homemade organic fertilizer offers gentle, low-waste options.

    Pinching. When plants reach 6 to 8 inches tall, pinch out the top set of leaves. It feels brutal, but it triggers lateral branching, producing shorter, bushier, sturdier plants that carry far more fruit. In long-season climates, some gardeners also remove the very first flowers so the plant puts its energy into growth before fruiting. though in short seasons, every flower counts, so skip that step.

    Growing Bell Peppers in Containers

    Peppers are excellent container plants, compact, ornamental, and perfectly happy on a sunny patio. Use a container of at least 5 gallons per plant, though 7 to 10 gallons produces noticeably bigger plants and better yields. Make sure it has good drainage, fill it with quality potting mix, and keep it in your sunniest spot.

    Container peppers dry out faster and use up nutrients quicker than garden plants, so check moisture daily in hot weather and feed regularly. Otherwise, care is identical. Peppers also make lovely companions for container tomatoes on a patio, and our container gardening guide for beginners covers pot sizing and drainage in detail.

    Why Your Peppers Aren’t Setting Fruit

    If there’s one frustration that unites pepper growers, it’s watching flowers appear and then drop off without setting fruit. Almost always, the culprit is temperature. Peppers are picky: they need nights above 55–60°F and days below 90°F for successful pollination. Outside that window, blossoms simply fall.

    Other common causes include too much nitrogen fertilizer, inconsistent watering, low humidity, and a lack of pollinators. The fixes are straightforward: feed low-nitrogen once flowering starts, water consistently, use shade cloth in extreme heat, and invite pollinators with flowers nearby our companion planting guide suggests good pepper partners, and basil and marigolds are classic choices that also help deter pests. If a heat wave stalls your plants, don’t panic; they usually resume setting fruit once temperatures moderate.

    In our experience, the most common mistake with peppers isn’t neglect, it’s impatience and over-care. Gardeners rush their seedlings into cold spring soil, then, when the plants sit there doing nothing, they respond by feeding them heavily. The result is a lush, leafy plant with hardly a pepper on it. The growers who consistently harvest baskets of sweet, colorful peppers do the opposite: they wait for genuinely warm soil, plant into compost-rich ground, then feed sparingly and water steadily. Peppers reward restraint, and a plant that’s been allowed to settle in slowly will out-produce a pampered one every time.

    Harvesting Bell Peppers

    The moment of truth. Bell peppers can be harvested at any size once they’re full-sized and firm, but flavor peaks at full color. Here’s how to do it right:

    • Always cut, never pull. Use sharp snips, scissors, or a knife to cut the stem, leaving about an inch attached. Twisting or tugging at the fruit will damage the brittle plant. a small detail that protects your harvest for the rest of the season.
    • Harvest often. This is the productivity secret: the more you pick, the more the plant produces. A pepper plant carrying mature fruit slows down flowering, so removing peppers every three to four days keeps it pushing out new blossoms right up until frost.
    • Storing your harvest. Unwashed peppers keep for one to two weeks in the fridge’s crisper drawer, wash them just before use. For longer storage, chop and freeze them (no blanching needed), or dry them in a dehydrator or low oven. Green peppers left on the counter will slowly color up, though vine-ripened ones always taste best.

    It’s worth appreciating just how nutritious a fully ripe pepper is. Bell peppers are famously rich in vitamin C. a ripe red one contains substantially more than an orange, along with vitamin A, fiber, and antioxidants, and the levels climb as the fruit ripens from green to red. In the kitchen they’re endlessly versatile: crisp and sweet raw in salads and with dips, wonderful roasted until the skins blister and slip off, essential in stir-fries and fajitas, and of course perfect for stuffing. Because a healthy plant keeps producing until frost, even two or three peppers can supply a household through late summer, with plenty left to freeze for winter cooking.

    A farmer picking ripe yellow bell peppers amidst lush green plants in a greenhouse
    A farmer picking ripe yellow bell peppers amidst lush green plants in a greenhouse

    Common Problems and How to Fix Them

    Problem Likely Cause The Fix
    Flowers dropping, no fruit Nights below 55°F or days above 90°F Wait for moderate temps; use shade cloth in heat
    Blossom end rot (sunken dark spots) Inconsistent watering, calcium uptake issues Water evenly and consistently; mulch to buffer moisture
    Big leafy plant, few peppers Too much nitrogen Switch to a low-nitrogen, higher-phosphorus feed
    Bitter-tasting peppers Picked green, or drought-stressed Let peppers ripen to color; water consistently
    Broken stems or branches Brittle stems under fruit weight Stake or cage plants; pinch early for a bushier form
    Pale patches on fruit Sunscald in intense heat Provide afternoon shade; maintain leafy cover
    Clusters of tiny insects on new growth Aphids Blast off with water; use insecticidal soap or neem oil

    Seedlings that collapse at the soil line are suffering from damping-off, caused by overwatering, keep seed-starting mix moist, never soggy, with good airflow. Whiteflies, spider mites, and pepper hornworms can also appear in summer, but a quick weekly inspection of leaf undersides catches nearly every problem while it’s still small and easy to handle.

    Is Growing Bell Peppers Worth It?

    Absolutely. Bell peppers reward a little patience with weeks of steady harvests, brilliant color, and a sweetness that store-bought peppers simply can’t match especially the red, orange, and yellow ones you’d otherwise pay a premium for. They’re compact enough for containers, beautiful enough to grow among flowers, and productive right through to frost. They’re also remarkably economical: a single seed packet costs about the same as two or three grocery-store peppers, yet can produce plants that yield dozens over a season.

    Ready to build out your vegetable garden? Peppers pair beautifully with other warm-season crops. Try growing tomatoes in containers, zucchini in a small garden, or cucumbers grown vertically. Explore the full Vegetables collection, part of the broader EcoGardenHub Plant Library.

    Start your seeds early, keep them warm, and be patient through that slow first month, by late summer you’ll be picking glossy, sweet, sun-ripened peppers from plants you grew from a pinch of seed. There are few better illustrations of what a little patience and a lot of sunshine can produce.

    Frequently Asked Questions

    • How long does it take to grow bell peppers from seed? Expect roughly 120 days total: 8 to 10 weeks of indoor seedling growth, then 60 to 90 days after transplanting to harvest green peppers. Colored peppers take another 2 to 3 weeks on the plant to fully ripen.
    • Why are my pepper flowers falling off? Temperature is the usual cause, peppers need nights above 55°F and days below 90°F to set fruit. Too much nitrogen, inconsistent watering, and a lack of pollinators can also cause flower drop. Plants typically recover once conditions moderate.
    • Are green peppers just unripe red peppers? Yes. Green bell peppers are simply unripe. Left on the plant, they ripen to yellow, orange, then red, becoming sweeter and more nutritious. Green peppers are perfectly edible but slightly more bitter.
    • Can I grow bell peppers in containers? Yes, peppers do very well in pots. Use at least a 5-gallon container per plant (7 to 10 gallons is even better for bigger yields), with good drainage, quality potting mix, and full sun.
    • What temperature do pepper seeds need to germinate? Pepper seeds germinate best in soil around 80–85°F. They’re slow and unreliable in cool soil, so a seedling heat mat dramatically improves germination speed and success.
    • Should I pinch my pepper plants? Yes. Pinching out the top set of leaves when plants are 6 to 8 inches tall encourages lateral branching, producing shorter, bushier, sturdier plants that carry more fruit and resist breaking.
    • How do I harvest bell peppers without hurting the plant? Always cut the stem with sharp snips or scissors, leaving about an inch attached, rather than twisting or pulling. Pepper stems are brittle and tearing fruit off can damage or break the plant.
  • How to Grow Tomatoes in Containers (Beginner’s Guide)

    How to Grow Tomatoes in Containers (Beginner’s Guide)

    There’s nothing quite like a sun-warmed, homegrown tomato and you don’t need a sprawling garden to grow one. A single pot on a sunny patio, balcony, or doorstep can produce pounds of juicy, flavor-packed fruit. Learning how to grow tomatoes in containers is one of the most satisfying and beginner-friendly ways to start growing your own food, and it comes with some surprising perks: better pest control, fresh soil every season, and the freedom to chase the sun.

    The secret to thriving container tomatoes really comes down to a few key choices: the right variety, a big enough pot, and consistent watering. Get those right and even a first-time gardener can harvest baskets of tomatoes from a container. This complete guide walks you through every step, from picking your plant to slicing into your first ripe tomato.

    Can You Grow Tomatoes in Pots?

    Yes, tomatoes grow beautifully in containers, and it’s one of the best crops for pots. Choose a compact or determinate variety for the easiest results, plant it in a 5-gallon (or larger) container filled with quality potting mix, give it at least 6 to 8 hours of full sun, water consistently, and feed regularly. Add a stake or cage at planting time, and you’ll be harvesting patio tomatoes all season.

    The two biggest keys to success are choosing the right variety for your space and giving the plant a large enough container with steady moisture. Tomatoes have big, thirsty root systems, so the more soil volume you give them, the easier they are to keep happy.

    Four potted tomato seedlings on a window sill, perfect for home gardening enthusiasts
    Four potted tomato seedlings on a window sill, perfect for home gardening enthusiasts

    Why Grow Tomatoes in Containers?

    Even gardeners with plenty of ground space often choose pots for their tomatoes, and for good reason:

    • Grow anywhere. A patio, balcony, deck, driveway, or sunny doorstep becomes a productive tomato garden  no yard required.
    • Chase the sun. Because containers are movable, you can shift plants to the sunniest spot as the season changes, or roll them out of harsh weather.
    • Fresh, controlled soil. You start each season with clean potting mix, sidestepping the soil-borne diseases that build up in garden beds.
    • Fewer pests and diseases. Raised off the ground and easy to inspect, container tomatoes are simpler to keep healthy.
    • Convenience. Keeping plants near the kitchen door makes watering, tending, and harvesting effortless.

    For beginners especially, containers make tomato growing more forgiving and far less intimidating than committing to a full garden bed.

    Rows of young tomato plants grow in a modern greenhouse setting, optimizing indoor farming techniques
    Rows of young tomato plants grow in a modern greenhouse setting, optimizing indoor farming techniques

    Determinate vs Indeterminate: Choose the Right Tomato

    Before you buy a single plant, understand this one distinction, it’s the most important decision you’ll make for container success. Tomatoes come in two growth habits:

    • Determinate (bush) tomatoes grow to a compact, predetermined size, then set most of their fruit in one big flush. Often labeled “bush,” “patio,” or “dwarf,” these are the easiest choice for containers because they stay manageable and need little pruning.
    • Indeterminate (vining) tomatoes keep growing and fruiting all season long, reaching 6 to 8 feet or more. They can be grown in pots, but they need a very large container, sturdy support, and regular pruning and watering. more work, but a longer harvest.

    For your first container tomato or any small space start with a determinate or dwarf variety. Cherry and grape tomatoes (which are usually compact bush types) are especially forgiving and productive. Great container picks include ‘Patio’, ‘Bush Early Girl’, ‘Tiny Tim’, ‘Tumbling Tom’ (lovely in hanging baskets), and reliable cherries like ‘Sweet 100’. For a deeper look at your options, see our guide to the best tomato varieties for home gardens.

    Seedling or seed? The quickest, easiest route is to buy a healthy young transplant from a garden center in spring perfect for beginners and anyone short on time. If you’d like a much wider choice of compact and dwarf varieties, though, starting from seed indoors six to eight weeks before your last frost opens up hundreds of options you’ll never find as transplants. Our seed starting guide for beginners walks you through it step by step.

    Choosing the Right Container

    When it comes to container tomatoes, bigger is almost always better. A cramped pot restricts roots, dries out fast, and cuts your harvest, so err on the generous side. Here’s a quick sizing guide:

    Tomato Type Minimum Container Size
    Miniature / micro-dwarf 1–2 gallons (8–10 inch pot)
    Cherry / patio / determinate 5 gallons
    Dwarf with full-size fruit 5–7 gallons
    Indeterminate / vining 15–25 gallons (bigger is better)

    Material matters too. Plastic pots are cheap and light but hold heat and moisture (watch for root rot). Fabric grow bags breathe beautifully and “air-prune” roots for a healthier system, but they drain fast, so you’ll water and feed a bit more. Wooden containers work well, just use untreated rot-resistant wood like cedar. A self-watering container, with its built-in water reservoir, is a fantastic option for thirsty tomatoes, since it buffers the plant against the inconsistent watering that causes so many problems you can even build a self-watering planter yourself. Whatever you choose, make sure it has good drainage holes (fabric bags excepted), and raise it off the ground on pot feet so roots don’t bake on hot paving and water can drain freely. Grow just one tomato plant per container for the best airflow and yields. If you’re new to pots in general, our container gardening guide for beginners covers the fundamentals.

    The Best Soil for Container Tomatoes

    Never fill a container with garden soil or straight compost, both compact and drain poorly in pots. Instead, use a loose, well-draining potting mix. You can buy a quality potting mix or make your own by blending equal parts coco coir (or peat), compost, and perlite or vermiculite for drainage and moisture retention. Tomatoes prefer slightly acidic soil, around pH 5.5 to 6.5. Mixing a little slow-release fertilizer or extra compost into the mix at planting gives your plant a strong start. Many gardeners also add a handful of crushed eggshells or a calcium supplement to the planting hole, since a steady calcium supply together with even watering helps ward off blossom end rot. For a homemade, low-waste feeding approach, our guide to making your own organic fertilizer is a great companion.

    How to Plant Tomatoes in Containers: Step-by-Step

    With variety, pot, and soil sorted, planting is quick and easy.

    • Step 1: Pick a Big Container and a Full-Sun Spot

    Choose your appropriately sized container with good drainage, and place it where it will get at least six to eight hours of direct sun, more is better. A bonus of containers is portability: position them to catch the sun and, ideally, somewhat sheltered from strong wind. On timing, wait until all danger of frost has passed and nights are reliably warm (above about 50°F) before setting tomatoes outside, they’re warm-season plants that sulk or stall in the cold. If you started or bought plants early, harden them off by moving them outdoors for gradually longer periods over a week before planting. Knowing your local last frost date makes this timing easy.

    • Step 2: Fill With Quality Potting Mix

    Fill the container most of the way with your well-draining potting mix, leaving room for the root ball. Moisten the mix so it’s evenly damp before planting.

    • Step 3: Plant Deep

    Here’s a tomato-specific trick that makes a real difference: plant deep. Pinch off the lower leaves and bury up to two-thirds of the stem, leaving just the top cluster of leaves above the soil. Tomatoes grow new roots all along any buried stem, so deep planting creates a much stronger, more drought-resistant root system.

    • Step 4: Add Support Now

    Install your stake, cage, or trellis at planting time, not later adding it once the plant is established risks damaging the roots. A determinate plant is happy with a standard cage or stake; an indeterminate one needs a tall, sturdy support, ideally anchored to a wall or railing so a top-heavy plant can’t tip the pot over late in the season.

    • Step 5: Water In and Mulch

    Water thoroughly until it runs from the drainage holes to settle the soil around the roots. Then add a couple of inches of mulch straw, shredded leaves, or bark on the surface to conserve moisture and keep roots cool. Our guide to types of mulch can help you pick.

    Close-up of a tomato seedling held in a hand against a white background, showcasing gardening basics.
    Close-up of a tomato seedling held in a hand against a white background, showcasing gardening basics.

    Tomato Care: Watering, Feeding and Support

    Consistent, attentive care is what separates a struggling pot tomato from a thriving one. Good tomato care in containers comes down to three things.

    • Watering. This is the single most important task. Containers dry out far faster than garden beds, so check daily and water whenever the top inch of soil feels dry in hot summer weather, large plants may need water once or even twice a day. Water deeply at the soil line until it drains from the bottom, and try to keep the leaves dry to discourage disease. Above all, be consistent: erratic watering is the direct cause of the two classic container-tomato problems, blossom end rot and fruit cracking. A DIY drip irrigation system or a self-watering planter takes the guesswork out.

    In our experience, watering is where nearly every disappointing container tomato goes wrong and it’s almost always inconsistency rather than the total amount. A plant that’s parched on Monday and flooded on Thursday will drop blossoms, split its fruit, and develop that frustrating dark patch of blossom end rot, even in perfect soil with plenty of feed. The gardeners who succeed are simply the ones who water little and often enough to keep the soil evenly, steadily moist. If your schedule makes daily watering unrealistic, invest in a self-watering container or a simple drip timer before you invest in anything else, it will do more for your harvest than any fertilizer.

    • Feeding. Tomatoes are heavy feeders, and container plants need more feeding than garden ones because there’s less soil to draw from. Start with a balanced fertilizer (like 10-10-10) about four to six weeks after planting, then switch to one higher in phosphorus and potassium once flowering begins to encourage fruit. Feed roughly every couple of weeks, or use a slow-release feed monthly (and about 25% more often for fast-draining fabric bags). Our guides to understanding NPK ratios and how and when to fertilize tomatoes explain the details.
    • Support. As the plant grows, loosely tie the main stems to your stake or guide them up the cage. Keeping foliage and fruit off the soil improves airflow, reduces disease, and makes harvesting easy.

    Pruning and Training Your Tomatoes

    How much you prune depends on your tomato type. Determinate (bush) tomatoes need very little pruning, in fact, heavy pruning reduces their single main harvest, so just remove any yellowing lower leaves.

    Indeterminate (vining) tomatoes, on the other hand, benefit from regular pruning. Pinch out the “suckers”, the small shoots that form in the crook between the main stem and a branch to keep the plant to one or two main stems. This channels energy into fruit rather than endless foliage, improves airflow, and keeps a vigorous vine from overwhelming its container. Pinch suckers when they’re small and do it regularly through the season.

    Whatever type you grow, it’s good practice to remove the lowest leaves once the plant is established, especially any that touch the soil. Soil can splash fungal spores up onto low foliage when you water, so keeping the bottom few inches of stem bare is a simple, effective way to prevent many common leaf diseases. Good airflow around and through the plant is one of your best defenses against the fungal problems that thrive in damp, crowded foliage.

    Healthy young tomato plants growing in black pots under sunlight, perfect for gardening enthusiasts.
    Healthy young tomato plants growing in black pots under sunlight, perfect for gardening enthusiasts.

    Preventing Common Container Tomato Problems

    Most container tomato troubles are easy to prevent once you know the cause.

    Problem Likely Cause The Fix
    Blossom end rot (dark sunken base) Inconsistent watering; calcium uptake issues Water evenly and consistently; don’t let soil dry out
    Cracked or split fruit Irregular watering, especially after dry spells Keep soil evenly moist; mulch to buffer moisture
    Flowers or fruit dropping Heat stress, dryness, or erratic watering Water consistently; provide some afternoon shade in extreme heat
    Few fruits, lots of leaves Too much nitrogen; not enough sun Switch to a higher-phosphorus feed; ensure full sun
    Yellow-orange fruit in heat Temperatures above 90°F block red pigment Normal in heat; provide light afternoon shade
    Pale, leggy plants Not enough light Move to a sunnier spot

    Happily, container tomatoes often suffer fewer soil-borne diseases than garden plants, since you start each season with fresh, sterile potting mix. Birds and squirrels can nibble ripening fruit, so drape netting over plants if critters are a problem.

    Harvesting Container Tomatoes

    The best part! Let tomatoes ripen fully on the plant for the sweetest, richest flavor, they’re ready when the fruit is a uniform, mature color (red, yellow, orange, depending on variety) and gives slightly to a gentle squeeze. Harvest by gently twisting the fruit from the vine or snipping the stem with clean scissors.

    Pick regularly, since frequent harvesting encourages the plant to keep producing. If cracking, pests, or birds threaten your ripening fruit, you can pick tomatoes when they’re just beginning to color and let them finish ripening on the kitchen counter, they’ll develop excellent flavor indoors. And if a frost threatens at season’s end, harvest all the mature green tomatoes and ripen them inside, so nothing goes to waste.

    A quick tip on storage: never refrigerate fresh tomatoes if you can help it, as cold temperatures dull their flavor and turn the texture mealy. Keep them on the counter, stem-side down, out of direct sun. When your plants hit their summer stride and you have more tomatoes than you can eat fresh, they freeze, roast, and cook into sauce beautifully. a single productive container plant can keep a small household in salads, sandwiches, and homemade sauce for weeks, which is exactly the kind of low-waste, homegrown abundance that makes container gardening so rewarding. And because you can grow container tomatoes right outside the kitchen door, you get to harvest each one at the exact peak of ripeness, something no grocery store can ever match.

    Is Growing Tomatoes in Containers Worth It?

    Absolutely. Few things reward a little effort as generously as a container tomato, pounds of sun-ripened fruit from a single pot, no garden plot required, and the pure joy of eating a tomato you grew yourself. Container growing also puts you in control: fresh soil, easy pest monitoring, and the flexibility to garden on a balcony, patio, or fire escape. It’s also the perfect gateway crop, master a pot of tomatoes and you’ll have learned the core skills of container gardening that carry over to almost every other vegetable you might want to grow. why grow Tomato?

    Ready to fill out your container garden? Tomatoes pair perfectly with other easy container crops. Try growing bell peppers from seed, cucumbers grown vertically, or a pot of leaf lettuce for continuous harvest. For more ideas, see our roundup of the best vegetables for container gardening, explore the full Vegetables collection, or browse the broader EcoGardenHub Plant Library. Planting companions nearby? Our companion planting guide for vegetables shows which plants love growing together.

    Grab a big pot, a compact tomato, and your sunniest corner, and get growing. Your first homegrown tomato is closer than you think. Once you’ve tasted the difference between a store-bought tomato and one still warm from your own patio, there’s no going back.

    Growing Tomatoes in Containers Worth It
    Growing Tomatoes in Containers Worth It

    Frequently Asked Questions

    • What size container do I need to grow tomatoes? Use at least a 5-gallon container for most tomatoes; cherry and mini varieties can manage in 2 gallons, while large indeterminate types need 15 to 25 gallons. In general, the bigger the pot, the healthier and more productive the plant.
    • Which tomatoes are best for containers? Compact determinate, bush, patio, and dwarf varieties are easiest for containers, along with cherry and grape tomatoes. Good picks include ‘Patio’, ‘Tiny Tim’, ‘Tumbling Tom’, and ‘Sweet 100’. Indeterminate types work too but need bigger pots and more support.
    • How often should I water container tomatoes? Check daily and water whenever the top inch of soil is dry, often once a day, and up to twice a day in hot weather, since containers dry out quickly. Consistent moisture is key to preventing blossom end rot and cracking.
    • Do container tomatoes need fertilizer? Yes. Container tomatoes are heavy feeders with limited soil, so feed every couple of weeks with a balanced fertilizer, switching to a higher-phosphorus feed once flowering starts. Fabric grow bags need feeding a bit more often.
    • Should I plant tomatoes deep in a container? Yes. Remove the lower leaves and bury up to two-thirds of the stem. Tomatoes grow roots all along the buried stem, creating a stronger, more drought-resistant root system and a sturdier plant.
    • Do tomatoes in pots need a cage or stake? Most do. Add a cage, stake, or trellis at planting time to avoid disturbing roots later. Determinate plants need modest support, while tall indeterminate vines need a sturdy, anchored structure to keep the pot from tipping.
    • How much sun do container tomatoes need? Tomatoes need at least six to eight hours of direct sun daily for strong growth and good fruiting. A big advantage of containers is that you can move them to catch the sunniest spot around your home.
  • How to Grow Guava Trees in Containers (Full 2026 Guide)

    How to Grow Guava Trees in Containers (Full 2026 Guide)

    Imagine stepping onto your balcony on a cool morning, brushing past a glossy-leaved little tree, and picking a warm, fragrant guava for breakfast no tropical vacation required. If you have ever assumed guavas were only for gardeners with sprawling, frost-free backyards, here is some genuinely good news: learning how to grow guava in containers puts this sweet, vitamin-packed fruit within reach of almost anyone, even on a patio in a chilly climate.

    Guava trees are tough, adaptable, and surprisingly happy in pots. Growing them in containers even comes with bonus perks — you can control the soil, keep the tree compact, and simply wheel it indoors when frost threatens. This guide covers everything from choosing the right variety to picking your first perfectly ripe fruit, in plain, friendly language.

    Can You Grow Guava in a Pot at Home?

    Yes, guava grows very well in a pot. Choose a compact variety, plant it in a large container (at least 18–24 inches wide) filled with fast-draining, slightly acidic soil, and give it 6–8 hours of full sun. Water deeply but sparingly, feed every 6–8 weeks in the growing season, and protect it from frost. Potted guavas can fruit in as little as one to two years.

    The real advantage of container growing is portability. Because guava is a tropical-to-subtropical plant that dislikes hard freezes, keeping it in a pot lets you move it to a sheltered spot or indoors when the temperature drops which is exactly how gardeners well outside the tropics grow them successfully.

    Starting fresh Guava before transplanting in bigger pots
    Starting fresh Guava before transplanting in bigger pots

    Why Containers Are Perfect for Guava

    You might assume in-ground planting is always better, but guava is one of those fruits that genuinely thrives in a pot. Here’s why container growing works so well:

    • Beat your climate. A movable pot lets you grow a frost-tender tropical almost anywhere, wheeling it to shelter when cold threatens and back into the sun when it warms.
    • Keep it compact. Restricting the roots naturally limits the tree’s size, so a plant that could top 20 feet in the ground stays a tidy, pickable few feet tall.
    • Control the soil. You get to provide the exact fast-draining, slightly acidic mix guava loves, instead of fighting whatever’s in your yard.
    • Fewer pests and problems. Raised off the ground and easy to inspect, potted guavas are simpler to keep clean and healthy.
    • Contain a spreader. In some warm regions guava can seed itself aggressively; a pot keeps this vigorous grower politely in bounds.

    For small-space, urban, and cool-climate gardeners especially, a container isn’t a compromise it’s often the smartest way to grow guava.

    Meet the Guava (and Its Look-Alikes)

    The classic guava (Psidium guajava) is a tropical tree native to Mexico, Central America, and the Caribbean, prized for sweet, aromatic fruit bursting with vitamin C. Left in the ground it can reach 10 to 30 feet, but in a container with a little pruning it stays a manageable few feet tall, making it ideal for pots.

    It helps to know the guava “family” you’ll see at nurseries, because they aren’t all the same plant:

    • Tropical guava (Psidium guajava): the true guava, with the largest, juiciest fruit. It’s the most frost-tender of the group and the star of this guide.
    • Strawberry guava (Psidium cattleianum): a shrubbier tree with smaller, tarter red fruit and higher cold tolerance (hardy to around 25°F).
    • Pineapple guava (Feijoa sellowiana): technically a different plant with citrusy fruit and beautiful twisting trunks, and the most cold-hardy of the bunch (down to about 15°F).

    All three grow well in containers, but when someone says “guava,” they usually mean the tropical guava so that’s our main focus.

    As a bonus, guava is a handsome plant in its own right. Its paired, leathery green leaves stay on the tree year-round in mild conditions, and its small white flowers are lightly fragrant and attractive to pollinators. Even before it fruits, a potted guava earns its place as an evergreen, ornamental little tree on a patio or balcony.

    Best Guava Varieties for Containers

    Not every guava stays pot-friendly, so choosing a compact, self-fruiting variety sets you up for success. Here are reliable performers for container growing:

    Variety Fruit & Flesh Why It Works in Pots
    Ruby Supreme Sweet, pink-red flesh Popular, productive, container-friendly
    Homestead Classic sweet guava, pink flesh Reliable cropper, easy to keep compact
    Thai White Crisp, mildly sweet, white flesh Naturally smaller, great for small spaces
    Peruvian White Green ripening to white-yellow Proven in cool-climate container setups
    Barbie Pink Aromatic, pink flesh Compact habit, ornamental and tasty

    Guavas are self-pollinating, so a single tree will fruit on its own. That said, growing two different varieties nearby often boosts fruit set noticeably a nice option if you have the room. Buying a young grafted sapling rather than starting from seed also gets you fruit far faster: roughly one to two years, versus three to seven years from seed.

    What You’ll Need

    • A compact guava variety (a grafted sapling for fastest fruiting)
    • A large container with plenty of drainage holes (start smaller, size up over time)
    • A fast-draining potting mix  potting soil, compost, and sand or perlite
    • A sunny, sheltered spot getting 6–8 hours of direct sun
    • A balanced fertilizer (organic granular, fish emulsion, or 10-10-10)
    • Mulch to hold moisture and insulate the roots
    • Frost protection  a sheet, fleece, or the ability to move the pot indoors

    How to Plant a Guava Tree in a Container: Step-by-Step

    Follow these five steps to get your potted guava off to a strong start.

    • Step 1: Pick the Right Pot

    Guavas have shallow, vigorous roots and need room. If you’re starting with a small sapling, a 12-inch pot is fine, but plan to move up to a final container at least 18–24 inches across and roughly as deep (larger is even better for mature trees). Make sure it has several drainage holes. A lightweight plastic or fiberglass pot or one on wheels makes it far easier to chase the sun and dodge frost.

    • Step 2: Mix a Fast-Draining Soil

    Guava thrives in loose, well-draining soil that’s slightly acidic to neutral (pH around 5–7). A dependable blend is roughly two parts quality potting soil, one part compost or aged manure, and one part sand or perlite for drainage. Good drainage is non-negotiable, soggy soil is the fastest way to lose a guava to root rot.

    • Step 3:  Plant Your Guava

    Fill the pot about halfway with your mix. Set the sapling so the top of its root ball sits level with the final soil surface, never buried deeper. Backfill around the roots, firming gently to remove air pockets, and leave an inch or so of space below the rim for watering.

    • Step 4: Water It In and Place in Full Sun

    Water thoroughly right after planting until moisture runs from the drainage holes, then move the container to its sunny home. Guavas want at least six to eight hours of direct light daily; in very hot regions, a little afternoon shade prevents leaf scorch. Add a layer of organic mulch on top, keeping it away from the trunk.

    • Step 5: Pot Up as It Grows

    Your guava won’t stay small forever. As roots fill the container (you’ll see them circling at the drainage holes, or notice the soil drying out unusually fast and growth slowing), move the tree into the next size up, ideally in spring. Refresh with fresh mix each time. Gradual potting-up keeps the tree vigorous without shocking it and new to containers overall? Our container gardening guide for beginners covers drainage and repotting in friendly detail.

    Guava Tree Care: Sun, Water, Feeding & Pruning

    Dialed-in guava tree care is genuinely low-effort once you understand the rhythm.

    Sunlight. More sun means more fruit. Aim for 6–8 hours of direct light, rotating the pot every week or two for even growth. If winter light is weak, a full-spectrum grow light keeps the tree ticking over the same DIY grow light setup you’d use for seedlings works nicely.

    Watering. Here’s the balance guavas ask for: they like deep watering but hate soggy roots. Water thoroughly only when the top 1–2 inches of soil feel dry, then let it drain freely. Overwatering is the single most common mistake with potted guavas, so check the soil before you reach for the hose. As a rough seasonal guide, that often means a deep soak two to three times a week in the heat of summer, easing to once a week or less as temperatures cool. In winter, when growth slows to a crawl, water only sparingly, guavas are surprisingly drought-tolerant during their rest period, and letting them dry out slightly is far safer than keeping them wet in the cold.

    Feeding. Container guavas are hungry, potted trees use up nutrients faster than those in the ground. Feed with a balanced fertilizer (like 10-10-10) or organic options such as compost tea or fish emulsion every 6–8 weeks during the growing season, and feed again after any hard pruning. A useful refinement as your tree matures: while it’s young and putting on growth, a nitrogen-forward blend encourages leafy development, but once it starts flowering and fruiting, shifting to a formula higher in potassium supports better fruit set and sweetness. If those N-P-K numbers look cryptic, our guide to understanding NPK ratios makes them simple, and kitchen staples like banana peels and eggshells can gently supplement feeding. Ease off feeding in winter, when the tree slows down and rests.

    Pruning. Here’s a grower’s secret: guavas fruit on new growth, so smart pruning actually increases your harvest. Trim after fruiting or in late winter to remove dead and crossing branches, open up airflow, and keep the tree compact and easy to pick. Removing any shoots below the graft union keeps energy going to the fruiting variety. It also pays to thin the fruit itself: allow no more than about four fruits per branch, and remove any developing on thin, weak stems, so the tree channels its energy into fewer, larger, sweeter guavas. A layer of organic mulch on the soil surface conserves moisture and shields shallow roots.

    Pink guava tree care at nursery before plantig
    Pink guava tree care at nursery before plantig

    Growing Guava in Cold Climates

    One of the joys of a potted guava is that you’re no longer limited by your zone. Guava’s native range is roughly USDA zones 9–12, but plenty of gardeners in far cooler regions grow thriving container guavas simply by moving them to shelter when the cold arrives.

    The strategy is straightforward: as nights approach freezing, bring the pot into a garage, greenhouse, or bright indoor room, or protect it in place. For short cold snaps, you can cover the tree with a frost cloth or old sheet, run a small fan for air circulation, or even string old-fashioned incandescent holiday lights through the branches for a touch of gentle warmth. Knowing your first and last frost dates makes this timing effortless, and our guide to overwintering tender plants walks through the whole cold-season routine. If you happen to garden in a warm zone, our USDA Zone 9 gardening guide covers growing guava outdoors year-round.

    In our experience, the gardeners who succeed with cool-climate container guavas treat it as a simple seasonal routine rather than a battle. They keep their trees in lightweight pots on rollers, watch the ten-day forecast in autumn, and move the plants under cover the first night temperatures are set to dip near freezing. Guavas are remarkably resilient once that one habit is in place many growers in regions as cool as USDA zone 7 harvest fragrant fruit year after year simply by giving their potted trees a warm place to wait out the coldest weeks.

    How Long Until Guava Fruits?

    Patience pays off quickly with guava especially if you start from a sapling. Here’s a realistic timeline:

    • From a grafted sapling: flowering can begin within 6–8 months of healthy growth, with fruit often in the first one to two years.
    • From seed: expect three to seven years before fruiting, which is why most container growers buy young trees.
    • Flower to ripe fruit: roughly a few months, with most guavas ripening in the cooler months.

    Give your tree strong sun, steady feeding, and thoughtful pruning, and it will reward you with fragrant fruit sooner than you might expect.

    Harvesting Guava

    Guavas tell you when they’re ready. Watch for the skin color to shift from deep green to a lighter yellow-green, yellow, or blush of pink, depending on the variety. Ripe fruit gives slightly to a gentle squeeze and the surest sign releases a wonderfully sweet, floral fragrance.

    Pick fruit by hand, twisting gently or clipping with a short stalk. If you harvest a touch early, guavas will continue to soften and sweeten at room temperature over a few days. Firm, green guavas even store for a couple of weeks. Once ripe, they’re a delight fresh, and equally lovely as juice, jam, jelly, chutney, or a tropical addition to desserts, a genuinely zero-waste, homegrown treat. Nutritionally, guavas are little powerhouses: they’re famously rich in vitamin C (often several times more than an orange, ounce for ounce), plus fiber and antioxidants, so every fruit you grow is as good for you as it is delicious. Ripe guavas are best eaten within a few days, but you can refrigerate them to extend their life, or freeze the pulp to enjoy your harvest long after the season ends.

    fresh Barbie Pink Gauva ready to consume
    fresh Barbie Pink Gauva ready to consume

    Common Problems and How to Fix Them

    Most potted-guava troubles come down to water, cold, or a few familiar pests.

    Problem Likely Cause The Fix
    Yellowing leaves, wilting, mushy roots Overwatering / root rot Let soil dry between waterings; improve drainage
    Leaf scorch or brown edges Harsh midday sun or dryness Add afternoon shade in hot climates; mulch and water deeply
    Few or no flowers/fruit Too little sun or over-feeding on nitrogen Move to full sun; use balanced feed; prune to spur new growth
    Maggots or premature fruit drop Fruit flies Bag developing fruit; remove and dispose of fallen fruit
    Leggy, sparse growth Insufficient light Relocate to a brighter spot or add a grow light
    Cold, blackened leaves Frost damage Move indoors or cover before freezes; prune damage in spring

    Is Growing Guava in Containers Worth It?

    Absolutely. A potted guava gives you lush evergreen foliage, fragrant flowers, and sweet, nutritious fruit, all in a footprint small enough for a balcony, and portable enough to outsmart frost. Few tropical fruits are this forgiving or this rewarding for small-space and cool-climate gardeners. Better still, a container guava is a project that grows with you: start with one compact sapling, learn its simple rhythm of sun, water, and seasonal shelter, and you may soon find yourself adding a second variety and turning a corner of your patio into a miniature tropical orchard.

    If your container orchard is calling for more, keep going: try growing papaya from seed, growing a pineapple from a top, a citrusy kumquat tree in a pot, or fig trees for beginners. For the full lineup of exotic edibles, browse our hub on growing tropical and exotic fruits, part of the broader EcoGardenHub Plant Library.

    Pot up a young guava this season, give it sun and a little patience, and you’ll be picking fragrant, homegrown fruit before you know it. Sustainable, small-space gardening at its sweetest.

    Frequently Asked Questions

    How big a pot does a guava tree need? Start a young sapling in a 12-inch pot, then move up to a final container at least 18–24 inches wide and deep as it matures. Bigger pots support more roots and more fruit, so err on the larger side once the tree is established.

    How long does it take for a potted guava to fruit? A grafted sapling can fruit within one to two years, while a tree grown from seed may take three to seven years. That speed difference is why most container gardeners start with a young nursery tree.

    Do you need two guava trees to get fruit? No. Guavas are self-pollinating, so a single tree will produce fruit on its own. Growing a second variety nearby can improve pollination and increase yields, but it isn’t required.

    Can guava survive winter in a container? Yes, if you protect it. Guava is frost-sensitive, so in cold regions move the pot to a garage, greenhouse, or bright indoor room during freezes, or cover it and reduce watering until warmth returns.

    How much sun does a container guava need? Give it at least 6–8 hours of direct sunlight daily for good growth and fruiting. In very hot climates, light afternoon shade helps prevent leaf scorch, and in dim winters a grow light keeps it productive.

    How do I know when a guava is ripe? Ripe guavas lighten in color from green toward yellow or pink, soften slightly to the touch, and give off a strong, sweet fragrance. You can pick them a little early and let them finish ripening indoors over a few days.

    Should I prune my potted guava tree? Yes. Guavas fruit on new growth, so pruning after harvest or in late winter to remove dead, crossing, or overgrown branches both keeps the tree compact and encourages more fruit.