Author: Eddy Green

  • How to Grow a Lychee Tree: Care & Harvest Guide

    How to Grow a Lychee Tree: Care & Harvest Guide

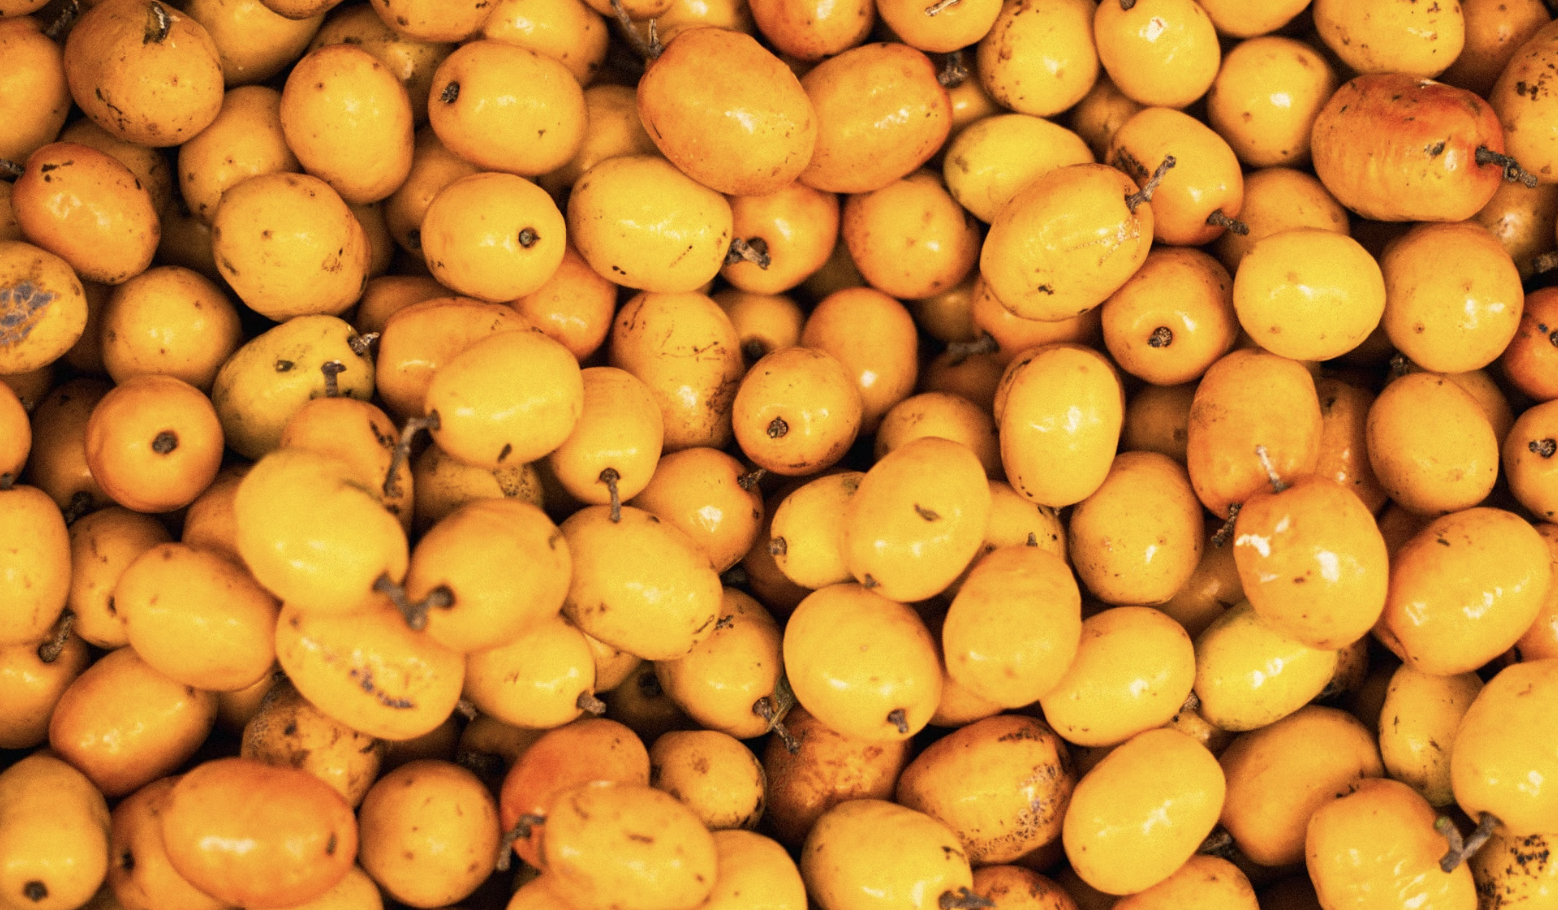
    Peel back the bumpy rose-red skin of a fresh lychee and you’ll find one of the most enchanting fruits on earth: a translucent, pearl-like bite that tastes of roses, honey, and summer. If you’ve ever paid a small fortune for a punnet of them at the market and thought, “I wish I could just grow these,” here’s the happy news you can. Learning how to grow a lychee tree is a wonderful long-game project, and the reward is a gorgeous evergreen tree that hands you fistfuls of fragrant fruit for decades.

    Let’s be honest up front: lychees ask for patience. They’re slow to fruit and a little particular about climate. But once you understand their few real needs; warmth, drainage, the right winter chill, and time. they’re a genuinely rewarding tree to grow, and a stunning ornamental even before the first harvest. This guide walks you through everything, from picking the right plant to the moment you pick your first perfect cluster.

    Can You Grow a Lychee Tree at Home?

    Yes, you can grow a lychee tree at home if you live in a warm climate or can protect the tree from frost. Plant a grafted sapling in full sun and rich, well-draining, slightly acidic soil, water deeply, and feed through the growing season. Lychees thrive in USDA zones 10–11, need a cool, dry winter spell to flower well, and typically fruit within three to five years from a nursery tree.

    The single biggest factor in your success is climate. Lychees are subtropical trees that love warm, humid summers but also require a brief cool, dry winter to trigger flowering. Get the climate right or recreate it with a movable container and the rest of lychee care is refreshingly straightforward.

    Grow a Lychee Tree at Home | Eco Garden Hub
    Grow a Lychee Tree at Home | Eco Garden Hub

    Meet the Lychee Tree

    The lychee (Litchi chinensis) is a slow-growing tropical evergreen native to southern China, where it has been cultivated for thousands of years. Its name is often translated as “gift for a joyful life,” which feels exactly right once you’ve tasted the fruit. Beyond the harvest, it’s a beautiful landscape tree: a dense, rounded canopy of glossy compound leaves that reaches nearly to the ground, making it equally useful as a shade tree, a privacy screen, or a specimen centerpiece.

    In spring, clusters of tiny pale-yellow flowers appear, followed by summer fruit. Each lychee has that signature bumpy, leathery skin in shades of pink to deep red, wrapping a sweet, translucent white pulp around a single glossy brown seed. Left unpruned in ideal conditions, a lychee can reach 30 to 40 feet tall and wide, but most home growers keep them pruned to a friendly 10 to 15 feet for easy care and harvesting. This is a tree that rewards a long view: plant one thoughtfully, and it can shade your garden and feed your family for generations.

    Lychee Climate Zone: Where Lychees Grow Best

    Understanding the lychee climate zone is the make-or-break part of growing this tree, so let’s get it right. Lychees grow best in USDA Hardiness Zones 10 through 11, in tropical-to-subtropical regions with warm, humid summers and mild winters. In the United States, that means places like South Florida, Hawaii, and pockets of coastal California and southern Texas are naturally suited to in-ground lychees.

    Here’s the nuance that trips up many hopeful growers: lychees actually need a short spell of cool, dry weather in winter roughly 30 to 60 days of temperatures in the 40s to low 60s°F to signal the tree to set flower buds. Too warm and wet year-round, and a healthy tree may grow beautifully but stubbornly refuse to fruit.

    Cold is the other limit. Mature lychee trees can shrug off brief dips to around 25°F, but young trees are far more tender and can be damaged by even a light freeze. If you garden in a cooler zone, don’t give up you can grow lychee in a large container and move it to shelter for winter, which we cover below. To time your seasonal moves, keep an eye on your first and last frost dates, and if you’re in a borderline-warm region, our USDA Zone 9 gardening guide offers useful microclimate tips.

    Seed vs. Sapling: The Fastest Way to Homegrown Lychees

    You can grow a lychee from seed, and it’s a fun experiment but here’s the reality every honest guide should share. Lychees do not grow “true” from seed, meaning a seedling won’t reliably match its parent’s fruit quality, and it can take a patience-testing seven to ten years to fruit, if it fruits at all.

    By contrast, a grafted or air-layered nursery sapling fruits far sooner usually within three to five years and gives you a known, reliable variety. For most gardeners who actually want to eat lychees this decade, a nursery tree is the smart choice.

    If you’d still like to try seeds for the joy of it, use them fresh lychee seeds lose viability within days of leaving the fruit. Rinse a seed from a ripe lychee, soak it in water for about three days (changing the water daily), or wrap it in a moist paper towel inside a sealed bag in a warm spot. Keep germinating seeds warm, around 82–86°F, and you may see a sprout in a few weeks. Just go in knowing it’s the scenic route, not the express lane.

    A quick word on varieties, since choosing well makes a real difference. In the US, dependable home-garden lychees include ‘Brewster’ and ‘Mauritius’ (vigorous, productive classics popular in Florida), ‘Sweetheart’ (large fruit with a small, shriveled “chicken-tongue” seed and lots of flesh), and ‘Emperor’ or ‘Hak Ip’ (prized for flavor). If you can, buy from a local specialty nursery and ask which cultivar performs best in your microclimate — a variety matched to your conditions will fruit more reliably than a random seedling ever could.

    How to Plant a Lychee Tree: Step-by-Step

    Once you have a healthy sapling, spring after all danger of frost has passed is the ideal time to plant. Follow these steps.

    • Step 1: Choose a Sunny, Sheltered, Well-Drained Spot

    Pick a location in full sun that receives at least six to eight hours of direct light daily, sheltered from strong winds that can batter young trees. Give it room: plant at least 20 to 25 feet from buildings, power lines, and other trees, since a mature lychee needs space and dislikes being crowded. Avoid low spots prone to flooding.

    • Step 2: Prepare Acidic, Well-Draining Soil

    Lychees love rich, well-draining, slightly acidic soil with plenty of organic matter and they absolutely hate “wet feet.” Standing water and soggy roots are a fast track to root rot. If your soil is heavy or your area gets heavy summer rain, plant on a raised mound to improve drainage. Because lychees prefer acidic conditions, it’s worth learning how to lower soil pH for acid-loving plants if your soil runs alkaline.

    • Step 3: Plant Your Tree

    Dig a hole as deep as the root ball and twice as wide. Gently remove the tree from its nursery pot, tease out any circling roots, and set it so the top of the root ball sits level with (or slightly above) the surrounding soil. A sprinkle of mycorrhizal fungi on the roots at planting helps lychees take up phosphorus and establish more strongly. Backfill, firming gently.

    • Step 4: Water In and Mulch

    Water the newly planted tree deeply to settle the soil around the roots. Then spread a layer of organic mulch around the base, keeping it a few inches away from the trunk to conserve moisture, moderate soil temperature, and suppress weeds. A good organic mulch makes a real difference to a young lychee’s survival.

    • Step 5: Water Regularly While It Establishes

    For the first few weeks, water your new tree two to three times a week to help it develop a strong root system, then ease off as it establishes. Consistent moisture during this early phase is one of the biggest predictors of long-term success.

    Lychee Tree Care: Water, Feeding & Pruning

    Ongoing lychee tree care revolves around three things: careful watering, seasonal feeding, and light pruning.

    Watering. Lychees like deep, thorough watering rather than frequent shallow sips. Water deeply, then let the top inch or two of soil dry slightly before watering again, keeping the soil moist but never soggy. Established trees tolerate the occasional dry spell, but pay close attention during fruiting season: inconsistent moisture is a common cause of fruit splitting and drop, so water steadily as the fruit swells.

    Feeding. Feed young trees several times through the growing season (roughly quarterly, from late winter into summer) with a balanced organic fruit-tree fertilizer. As trees mature, one or two feedings each spring and summer are usually enough. A fertilizer higher in potassium and phosphorus supports flowering and fruiting and it helps to ease back on high-nitrogen feeds before harvest, so the tree pours its energy into ripening fruit rather than leafy growth. If those nutrient numbers are a mystery, our guide to understanding NPK ratios makes them clear.

    Pruning. Lychees need only light pruning. The best time is right after harvest, giving the tree the rest of the season to push new growth before winter. Remove dead, crossing, or inward-growing branches to improve airflow, and cut back the top over time to keep the tree at a manageable height. Keep the lower limbs they’re the easiest to harvest from and shade out weeds beneath the canopy. As a rule of thumb, avoid removing branches thicker than about an inch, which can reduce your fruit yield.

    How Long Until a Lychee Tree Fruits?

    Ah, the patience question. Lychee fruiting timelines depend heavily on how you started your tree:

    • From a grafted or air-layered sapling: first fruit typically in three to five years, with bigger crops building over time.
    • From seed: seven to ten years, and sometimes never, since seedlings are unpredictable.
    • Peak production: many trees hit their stride around ten years old and then produce for decades.

    Here’s a realistic season-by-season picture once a tree is old enough to fruit:

    • Late winter: a cool, dry spell triggers flower-bud formation.
    • Spring: clusters of small flowers open and are pollinated by bees and flies.
    • Early-to-mid summer: fruit clusters swell and gradually blush from green to pink-red.
    • Mid-to-late summer: a short, glorious harvest window arrives.

    One gentle heads-up: lychee fruiting can be delightfully erratic. Some years bring a bumper crop, others just a few clusters, depending on winter chill, weather, and the tree’s cycle. That’s normal  and it makes a big harvest year all the sweeter.

    In our experience, the growers who get the most reliable crops treat that winter chill period as the key to the whole year. They resist the urge to pamper the tree with water and high-nitrogen feed through late fall and winter, letting it experience the cooler, drier rest it evolved for, and then ramp care back up as spring flowers appear. Working with the lychee’s natural rhythm, rather than keeping it lush and comfortable year-round, is often the difference between a tree that’s merely handsome and one that actually fruits.


    Growing Lychee in Containers

    If you live outside the lychee’s comfort zone, a large container is your best friend. Container growing lets you give the tree a warm, sunny summer outdoors and then move it to a frost-free spot in a greenhouse, sunroom, or bright garage for the winter.

    Choose a big, sturdy pot at least 16 to 20 inches wide and deep (a half wine barrel with drainage holes is a classic choice), and fill it with a rich, well-draining mix formulated for acid-loving plants. Plant, water in, and mulch just as you would in the ground. One crucial caveat: lychees need to be outdoors in spring and summer to be pollinated, so a tree kept permanently indoors will grow but usually won’t fruit. Think of the container as a movable home, not a houseplant. Our container gardening guide for beginners covers pot selection and repotting, and our overwintering guide walks through cold-season care.

    Harvesting Lychee

    Harvest time is the payoff and getting it right matters, because of one important quirk: lychees do not continue to ripen after they’re picked. Whatever sweetness and color the fruit has when you harvest it is what you get, so patience at the end pays off.

    Wait until the fruit is fully colored a rich red or pink, depending on the variety and gives slightly when gently squeezed. Rather than pulling individual fruits (which can damage both fruit and tree), snip off the entire cluster with a short piece of stem attached. Handle the fruit gently; the skin is tougher than it looks but can still bruise.

    Fresh lychees are a fleeting treasure with a short shelf life. Enjoy them within about a week refrigerated, or peel and freeze the fruit to savor your harvest for months. Beyond eating them out of hand, lychees shine in fruit salads, sorbets, cocktails, and Asian-inspired dishes, and they’re a good source of vitamin C and antioxidants so every fruit is a small, sweet nutritional bonus. Few homegrown treats feel as luxurious, and because a mature tree can produce heavily, a good year often means enough to share with the whole neighborhood.

    Lychees grow best in USDA Hardiness Zones 10
    Lychees grow best in USDA Hardiness Zones 10

    Common Problems and How to Fix Them

    Most lychee troubles trace back to water, cold, or a couple of persistent pests.

    Problem Likely Cause The Fix
    Yellowing leaves, wilting, stunted growth Overwatering / root rot Improve drainage; water deeply but less often; plant on a mound
    Healthy tree but no fruit No cool, dry winter spell; tree too young Ensure a winter chill period; be patient; feed for fruiting, not leaves
    Silvery or felty patches on leaves Erinose or eriophyid mites Treat promptly with insecticidal soap or neem oil; remove affected leaves
    Sticky leaves, distorted new growth Aphids or scale Rinse off; apply insecticidal soap or neem oil
    Splitting or dropping fruit Inconsistent watering during fruiting Keep soil evenly moist as fruit swells
    Frost-damaged leaves and stems Cold snap on a tender tree Protect or move containers before freezes; prune damage in spring

    Fruit flies can also be a nuisance at harvest, so pick fallen fruit up promptly and use traps if needed.

    Is Growing a Lychee Tree Worth It?

    If you love the fruit and have a little patience, absolutely. A lychee tree is a long-term investment that pays you back generously a striking evergreen that shades your yard, screens a view, and once a year delivers clusters of rose-scented fruit you simply can’t buy this fresh. There’s a quiet magic in peeling a lychee you grew yourself.

    If your tropical fruit ambitions are growing, keep the momentum going. Try growing guava trees in containers, growing papaya from seed, starting a pineapple from a top, or a compact kumquat tree in a pot. For the whole collection of exotic edibles, explore our hub on growing tropical and exotic fruits, part of the broader EcoGardenHub Plant Library.

    Plant a lychee this spring, give it sun, drainage, and time, and one summer not too far off you’ll be handing warm, fragrant fruit to everyone who visits your garden — the very definition of a gift for a joyful life. And remember, the tree earns its keep long before the first harvest: as a lush, evergreen centerpiece, a lychee makes your garden more beautiful every single day you wait.

    Is Growing a Lychee Tree Worth It
    Is Growing a Lychee Tree Worth It

    Frequently Asked Questions

    How long does it take for a lychee tree to fruit? A grafted or air-layered sapling usually fruits in three to five years, while a seed-grown tree can take seven to ten years, if it fruits at all. Peak production often arrives around ten years, after which trees can produce for decades.

    What climate zone do lychees grow in? Lychees grow best in USDA Hardiness Zones 10–11, in warm, humid climates with a brief cool, dry winter. In cooler zones, grow them in containers you can move to a frost-free spot for winter.

    Can I grow a lychee tree from seed? Yes, but it’s slow and unreliable seedlings don’t grow true to the parent and may take up to ten years to fruit. Use fresh seed and keep it warm, but for dependable fruit, choose a grafted nursery tree instead.

    Do lychees ripen after picking? No. Lychees do not ripen off the tree, so wait until the fruit is fully red or pink and gives slightly before harvesting. Pick a whole cluster with a bit of stem attached rather than pulling individual fruits.

    Do you need two lychee trees to get fruit? No, lychees are self-fruitful, so a single tree can produce a crop. That said, planting more than one cultivar nearby can improve pollination and increase yields.

    Why won’t my lychee tree flower or fruit? The most common reasons are a lack of the cool, dry winter spell that triggers flowering, a tree that’s still too young, or too much nitrogen fertilizer driving leafy growth instead of fruit. Ensure a winter chill, be patient, and feed for fruiting.

    How big does a lychee tree get? In ideal conditions a lychee can reach 30 to 40 feet tall and wide, but home growers usually prune them to 10 to 15 feet for easier care and harvesting. In containers they stay considerably smaller.

  • How to Grow Papaya From Seed: A Complete Guide for 2026

    How to Grow Papaya From Seed: A Complete Guide for 2026

    The next time you slice open a ripe papaya, pause before you scrape those glossy black seeds into the compost. Tucked inside that spoonful of “waste” is a whole grove of fast-growing tropical trees just waiting for a little warmth and patience. Learning how to grow papaya from seed is one of the most satisfying and surprisingly quick fruit projects a home gardener can take on.

    Here is the encouraging part: papayas are among the fastest-fruiting fruit plants you can grow, sometimes going from seed to harvest in under a year. They are also forgiving in all the ways that matter and fussy in only a couple, and once you understand those few quirks, success gets a whole lot easier. This guide walks you through every step, from saving seeds to picking your first sun-ripened fruit.

    Can You Grow Papaya From Store Bought Seeds?

    Yes, you can grow papaya from the seeds of a store-bought fruit. Scoop out the seeds, rinse off their jelly-like coating, and dry them for a few days. Sow several seeds half an inch deep in warm, well-draining soil, keep them around 80°F, and they will sprout in two to three weeks. With good care, plants can fruit in as little as six to twelve months.

    One honest caveat: many supermarket papayas are hybrids, so their seedlings will not always match the parent fruit exactly. That is part of the adventure. For the most reliable results, start with seeds from a fresh, locally grown papaya, and simply plant plenty, you will have more than enough seeds to spare.

    Grow Papaya From Store Bought Seeds
    Grow Papaya From Store Bought Seeds

    Meet the Papaya Plant: Fast, Tall, and Surprisingly Easy

    Before we dig in, it helps to know what you are actually growing. The papaya (Carica papaya) is a fast-growing, short-lived tropical originally from the lowland rainforests of Central and South America. Botanically it is not really a tree at all; it is a giant herbaceous plant with a single, soft trunk topped by a crown of huge, umbrella-like leaves, giving it a distinctly palm-tree look.

    That speed is the papaya’s superpower. In warm conditions it can shoot up several feet in a season, flower within a few months, and hand you ripe fruit before its first birthday. The trade-off is that papayas are frost-tender and relatively short-lived, often declining after a few productive years. The happy solution for most gardeners: grow them in containers you can move, and keep a few new seedlings coming along behind your mature plants.

    If you love the idea of turning kitchen scraps into edible plants, papaya pairs perfectly with our guide on how to grow a pineapple from a top another tropical treat you can start straight from the grocery store.

    What You’ll Need to Grow Papaya From Seed

    Gather a few simple supplies before you start:

    • A fresh, ripe papaya (ideally locally grown) for seeds
    • A fine sieve or colander and a paper towel for cleaning and drying seeds
    • Seed-starting mix or a light, well-draining potting mix
    • Small pots or a large final container (15–20 gallons for dwarf varieties)
    • A warm, bright spot a sunny windowsill, heat mat, or DIY grow light setup works well
    • A balanced fertilizer for feeding hungry, fast-growing seedlings

    That is genuinely all you need to get from spoonful of seeds to thriving tropical plant.

    How to Grow Papaya From Seed: Step-by-Step

    Follow these five steps and you will have healthy papaya seedlings on their way to becoming fruit-bearing plants. The active work takes maybe twenty minutes, spread across a couple of sessions.

    Step 1: Choose the Right Papaya and Save the Seeds

    Pick a papaya that is fully ripe, with deep yellow to reddish-orange skin that yields slightly to a gentle press. Riper fruit means more mature, viable seeds. Slice it open lengthwise and you will find the central cavity packed with round, dark seeds, each wrapped in a clear, gel-like sac.

    Scoop out a generous spoonful. Because you cannot tell a seed’s future sex by looking, always save far more than you think you need a couple of dozen is a comfortable starting point.

    Step 2: Clean and Dry the Seeds (Don’t Skip This)

    This is the step beginners most often rush, and it makes all the difference. Each papaya seed is coated in a slippery, jelly-like membrane called the sarcotesta, which contains germination inhibitors. Leave it on and your seeds may simply refuse to sprout.

    Rinse the seeds in a sieve under running water, gently rubbing them between your fingers to slip off that gel coating. You can even pinch each seed lightly to pop the outer casing and expose the bumpy inner seed. Once they are clean, spread them on a paper towel and let them dry in a cool, shady spot for a few days. Dry seeds can be sown right away or stored in a sealed, airtight container for later.

    Step 3: Sow Warm and Shallow

    Papayas germinate best in warmth. Fill your pots with a light, well-draining seed-starting mix, moisten it, and poke holes about half an inch deep. Drop three to five seeds per pot or planting spot planting several improves your odds of landing a fruitful female or bisexual plant. Cover lightly, mist the surface, and place the pots somewhere warm and bright.

    Aim for soil temperatures around 70–85°F (21–29°C); a sunny window or a seedling heat mat is ideal. Keep the mix lightly moist but never soggy, and be patient germination usually takes two to three weeks, though some batches take longer.

    Step 4: Germinate and Thin to the Strongest Seedlings

    When your seedlings emerge, you will quickly notice they are not all equal — some race ahead while others lag. That is exactly why you planted extra. Once seedlings are two to three inches tall, choose the single strongest, healthiest plant in each pot and snip the others off at the soil line with scissors.

    Snip rather than pull. Papaya roots are delicate and intertwined, and yanking seedlings out can disturb the keeper you want to protect.

    Step 5: Plant in Their Final Home (Roots Hate Moving)

    Here is the papaya’s biggest quirk: it strongly dislikes having its roots disturbed. The less you move it, the better it grows. So plan to transplant seedlings into their permanent home a large container or a sunny garden spot while they are still small, ideally at six to twelve inches tall.

    Handle the root ball as gently as possible, settle the plant at the same depth it was growing, water it in well, and keep the soil evenly moist while it settles. From here on, your papaya wants to stay put.

    The Male, Female, and Bisexual Puzzle (Papaya Sex Explained)

    If there is one thing that trips up first-time papaya growers, it is plant sex so let’s make it simple. Papayas come in three types, and you cannot tell which you have until the plant flowers, usually a few months in when it is roughly knee- to waist-high.

    • Male plants produce small flowers on long, branching stalks and generally do not bear fruit. You only need them to pollinate females one male can service ten to fifteen female plants.
    • Female plants produce larger single flowers close to the trunk and set fruit, but only if a male or bisexual plant pollinates them.
    • Bisexual (hermaphrodite) plants have “perfect” flowers with both male and female parts, so they self-pollinate and fruit on their own. These are the jackpot for home growers.

    The practical strategy: grow five or six seedlings, wait for flowering, then keep the females and bisexuals and remove most males (leaving one nearby if you need a pollinator). Better yet, if you want to skip the guessing game entirely, start with seeds from a known self-pollinating hermaphrodite variety like Red Lady or a Solo type.

    Papaya plant with large green leaves thriving in a backyard garden setting.
    Papaya plant with large green leaves thriving in a backyard garden setting.

    Growing Papaya in Containers

    You do not need tropical acreage to grow papaya a large pot on a sunny patio or balcony works beautifully, and it hands you a superpower: the ability to wheel your frost-tender plant to shelter when the weather turns. Container growing is often the best route for gardeners outside truly tropical regions.

    The keys to papaya container growing are choosing a compact variety, giving the roots enough room, and never letting the soil get waterlogged. Here is a quick reference:

    Factor Recommendation
    Best varieties for pots Red Lady, Solo Sunrise, Tainung (compact, self-pollinating hybrids)
    Minimum container size 15–20 gallons (about 18–22 inches wide, 16 inches deep)
    Soil Rich, loose, fast-draining mix; slightly acidic to neutral (pH 6–7)
    Plants per pot One (after thinning)
    Sunlight 6–8 hours of direct sun daily
    Portability perk Move indoors or to a sheltered spot before frost

    Choose a container with generous drainage holes, and consider raising it on pot feet so water never pools underneath. If containers are new territory for you, our container gardening guide for beginners covers drainage, soil, and pot sizing in friendly detail.

    Papaya Tree Care: Sun, Water, and Feeding

    Good papaya tree care comes down to three things: bright sun, careful watering, and generous feeding. Get those right and your plant practically grows itself.

    Sunlight. Papayas are unapologetic sun lovers. Give them at least six to eight hours of direct sun a day. Too little light produces leggy, sparse plants and poor fruiting, so pick your sunniest spot.

    Watering. This is where papayas ask for balance. Their big leaves transpire a lot of water, so they need regular moisture — but they are extremely prone to root rot, and overwatering is the single most common reason papayas fail. Aim for evenly moist soil that drains freely, letting the surface dry slightly between waterings. Mulch to conserve moisture, but always keep mulch pulled back from the trunk, since the soft stem rots easily.

    Feeding. Papayas are hungry, fast growers and heavy feeders. Feed young plants with a dilute balanced fertilizer every couple of weeks, then a balanced or potassium-rich fertilizer roughly monthly through the growing season as they mature. If those fertilizer numbers look like a secret code, our plain-English guide to understanding NPK ratios breaks it down, and our roundup of banana peels and eggshells in the garden offers gentle, low-waste ways to feed them.

    Because papayas cannot tolerate frost, gardeners in cooler regions should grow them in movable containers and bring them in when temperatures dip toward the 40s°F. Knowing your first and last frost dates makes that timing easy, and our guide to overwintering tender plants will help them coast through the cold months.

    How Long Until Papaya Fruits?

    Here is the reward for a little patience and with papaya, it comes remarkably fast. Under warm, sunny conditions, papayas often flower within four to six months of sowing and produce ripe fruit in as little as six to twelve months. From flower to picked fruit is typically another four to eight months of gradual swelling.

    Here is a realistic timeline of what to watch for:

    • Weeks 2–3: Seeds germinate and the first true leaves appear.
    • Months 1–3: Rapid growth; you thin and settle plants into their final home.
    • Months 4–6: Flowering begins and you can finally identify plant sex.
    • Months 6–12: Fruit sets, swells, and begins ripening on the trunk.
    • Beyond year one: A healthy plant keeps producing for a few productive years before it should be replaced with a fresh seedling.

    Because a single plant can yield anywhere from fifteen to thirty fruits in a cycle, even one thriving papaya can keep your kitchen well supplied.

    In our own container trials, the seedlings that fruited fastest all shared the same conditions: a large pot from the start (so their roots were never disturbed again), a full-sun position against a warm wall, and steady feeding without ever letting the soil go soggy. The plants we lost, almost without exception, were lost to overwatering in cool weather a reminder that with papaya, restraint at the watering can is a virtue. Warmth is the other non-negotiable: papayas sulk below about 60°F and thrive in the balmy 70–90°F range, which is why gardeners in cooler regions lean on containers and sheltered, sun-trapping corners to keep their plants happy.

    Harvesting Papaya

    Fruits form and ripen along the trunk from the bottom up, so your lowest fruit ripens first. You will know a papaya is ready when its skin shifts from green to yellow-orange and the fruit gives slightly to a gentle press.

    To harvest, clip the fruit from the trunk with a short piece of stalk attached, handling it gently to avoid bruising. Papayas do not sweeten much after picking, so let fruit ripen as much as safely possible on the plant, then finish ripening any firmer fruit indoors at room temperature over a few days.

    Do not overlook green papaya, either. Picked while still firm and unripe, it is a beloved vegetable in salads, slaws, and curries around the world a wonderful, zero-waste way to enjoy fruit you might otherwise leave on the plant. Ripe papaya, meanwhile, is prized for being rich in vitamins A, C, and E and the digestive enzyme papain, making every homegrown fruit as nourishing as it is delicious. A quick note of care: papaya stems and unripe fruit contain a milky latex sap that can irritate sensitive skin, so wear gloves if you are prone to reactions.

    Common Papaya Problems and How to Fix Them

    Most papaya troubles trace back to water, cold, or a few familiar pests. Here is a quick troubleshooting guide.

    Problem Likely Cause The Fix
    Seeds won’t germinate Gel coating left on, or seeds too cold Clean off the sarcotesta thoroughly; keep soil at 80°F
    Yellowing, wilting, mushy base Overwatering and root or stem rot Improve drainage, water less, keep mulch off the trunk
    Tall, leggy, few leaves Not enough sunlight Move to the sunniest spot available
    No fruit at all Plant is male, or female with no pollinator Keep bisexual/female plants; add a male or hand-pollinate
    Sticky leaves, cottony spots Aphids, mealybugs, or whiteflies Rinse off; treat with insecticidal soap or neem oil
    Mottled, distorted leaves Papaya ringspot virus Remove affected plants; control aphids that spread it

    For pollination troubles specifically, hand-pollinating is easy: use a small, clean brush to move pollen from a male (or bisexual) flower onto the stigma of a female flower.

    Is Growing Papaya From Seed Worth It?

    Without a doubt. Few plants reward you as quickly or as generously as papaya, and starting from seeds you would otherwise toss makes it a genuinely sustainable, budget-friendly project. You get lush tropical foliage, fast growth, and a steady supply of vitamin-rich fruit all from a spoonful of scraps.

    If papaya has you dreaming of a homegrown tropical harvest, keep the momentum going. Try growing guava trees in containers, starting a citrusy kumquat tree in a pot, or planting fig trees for beginners. For the whole collection of exotic edibles, browse our hub on growing tropical and exotic fruits, part of the broader EcoGardenHub Plant Library. And if you garden in a warm region, our USDA Zone 9 gardening guide will help your papayas thrive outdoors year-round.

    Save your seeds this week, give them warmth and light, and in a matter of months you could be picking papayas from a plant you grew from scratch. That is sustainable gardening at its most delicious.

    Frequently Asked Questions

    How long does it take to grow papaya from seed? Seeds germinate in two to three weeks, and plants often flower within four to six months and fruit in six to twelve months under warm, sunny conditions. Papayas are among the fastest fruit plants you can grow from seed.

    Can I grow papaya from store-bought fruit seeds? Yes. Just clean off the gel coating, dry the seeds, and sow them. Keep in mind that many grocery-store papayas are hybrids, so seedlings may not exactly match the parent fruit but they will still grow into productive plants.

    Why won’t my papaya seeds sprout? The most common culprit is the slippery sarcotesta coating, which contains germination inhibitors. Rinse it off completely before sowing, and keep the soil consistently warm (around 80°F) and lightly moist.

    Do I need more than one papaya plant to get fruit? It depends on the plant’s sex. Bisexual (hermaphrodite) plants self-pollinate and fruit alone, while female plants need a nearby male or bisexual plant to pollinate them. Growing several seedlings ensures you end up with a fruiting plant.

    Can papaya grow in a pot? Absolutely. Choose a compact, self-pollinating variety like Red Lady, use a 15–20 gallon container with excellent drainage, and give it full sun. Container growing also lets you move the frost-tender plant to shelter in cold weather.

    How do I know when papaya is ripe? Ripe papayas turn from green to yellow-orange and feel slightly soft when gently pressed. Fruit ripens on the trunk from the bottom up, and since papayas barely sweeten after picking, let them ripen as much as possible on the plant.

    How big do papaya plants get? Standard papayas can reach 10 to 20 feet tall, but compact hybrid varieties bred for containers stay under about 8 feet, making them far more manageable for patios and small gardens.

  • How to Grow Pineapple From a Top at Home (Easy Guide)

    How to Grow Pineapple From a Top at Home (Easy Guide)

    That leafy green crown you twist off a grocery-store pineapple and toss in the compost? It is actually a free, ready-to-plant houseplant in disguise. Learning how to grow pineapple from a top is one of the most rewarding kitchen-scrap projects you can try, and it costs you nothing more than a fruit you were already going to eat.

    Here is the honest, encouraging truth: rooting a pineapple crown is genuinely easy, and watching those spiky leaves push out new growth on your windowsill is a small daily joy. Growing the fruit takes patience; we will be upfront about the timeline, but the plant itself is gorgeous, forgiving, and a brilliant way to turn “waste” into something alive. This guide walks you through every step, from choosing the right pineapple to the day you finally slice into homegrown fruit.

    Can You Really Grow a Pineapple From the Top?

    Yes. You can grow a brand-new pineapple plant from the leafy top (called the crown) of a store-bought fruit. Twist or cut off the crown, remove the lower leaves and any fruit flesh, let it dry for a few days, then root it in water or soil. Roots form in about four to eight weeks, and the plant can fruit in two to three years.

    Grow a Pineapple From the Top
    Grow a Pineapple From the Top

    The pineapple (Ananas comosus) is a bromeliad, a herbaceous perennial, not a tree. That surprises many first-time growers who picture pineapples dangling from branches. In reality, each pineapple grows from the center of a low, rosette-shaped plant, and the crown on top of the fruit carries everything it needs to become a whole new plant. Commercial growers propagate this way too, so you are using the same trick the pros use, just on your kitchen counter.

    What You’ll Need to Regrow a Pineapple

    One of the best parts of this project is how little you need. Gather these before you start:

    • A fresh, ripe pineapple with a healthy, green crown (this is your “seed”)
    • A sharp knife or clean hands for twisting the top off
    • A jar or glass of water (for the water method) or a 6–8 inch pot with drainage holes (for the soil method)
    • Well-draining potting mix — a cactus/succulent mix, or regular potting soil cut with perlite or coarse sand
    • A clear plastic bag (optional, to make a humidity tent)
    • A warm, bright windowsill — or a DIY grow light setup for indoor plants if your home is short on natural light

    That is it. No special equipment, no seeds to buy, no greenhouse required to get started.

    How to Grow a Pineapple From a Top: Step-by-Step

    Follow these six steps and you will have a rooted pineapple plant ready to grow. The whole hands-on process takes about fifteen minutes of active work, plus a few weeks of patient waiting while roots form.

    Step 1: Choose a Ripe, Healthy Pineapple

    Your future plant is only as good as the fruit you start with, so choose well. Look for a pineapple that smells sweet at the base, gives slightly when pressed, and has a firm, deep-green crown. Avoid crowns that are brown, mushy, dried out, or pulling apart in the center.

    If you can find a locally grown pineapple at a farmers market, even better, it has usually traveled less and the crown is fresher. Fresh, green leaves in the center of the crown are the single best predictor of success.

    Step 2: Remove the Crown (Twist or Cut)

    There are two easy ways to separate the crown from the fruit:

    • The twist method: Grip the fruit in one hand and the leafy crown in the other, then twist firmly, as if opening a stubborn jar. The crown pops off with a little stem attached is exactly what you want.
    • The cut method: Slice off the top about an inch below the leaves, then carefully cut or break away all the remaining fruit flesh down to the tough inner core.

    Whichever you choose, the goal is a clean crown with no juicy fruit left clinging to it. Leftover flesh rots easily and can take your whole crown down with it.

    Step 3: Strip the Lower Leaves and Expose the Root Buds

    Peel away the lowest ring of leaves, working upward, until about an inch of bare stem is showing. As you strip the leaves, look closely at the exposed base, you should see small, brown, bumpy nodes. Those are root primordia, the buds that will sprout your first roots. Uncovering them gives your plant a head start.

    Trim off any remaining fruit at the very bottom until the base looks clean and dry. This is the most important rot-prevention step, so do not rush it.

    Step 4: Cure the Crown So It Doesn’t Rot

    Set the prepared crown on its side in a dry, shaded spot for two to seven days. This “curing” period lets the cut base callus over, forming a protective seal that dramatically lowers the risk of rot once it meets water or soil. It feels counterintuitive to wait, but this single step separates thriving crowns from mushy failures.

    Step 5:  Root It (Water Method vs. Soil Method)

    Now choose how to grow those first roots. Both methods work well, and we compare them in detail below.

    • Water method: Suspend the crown in a jar so only the bare stem sits in water, using toothpicks pushed into the stem to rest on the rim if needed. Place it in bright, indirect light and change the water every two to three days to keep it fresh. Roots usually appear in one to two months. Bonus eco tip: pour the old water onto your other houseplants instead of down the drain.
    • Soil method: Skip the jar entirely. Plant the cured crown directly in a small pot of moist, well-draining mix, burying the bare stem up to the base of the leaves. Water it in, then slip a clear plastic bag over the pot to trap humidity, and keep it warm and bright. Roots typically establish in five to eight weeks.

    Step 6: Pot Up Your Rooted Pineapple

    Once your water-rooted crown has roots two to three inches long, it is ready for soil. Fill a 6–8 inch pot with a coarse, fast-draining mix, make a hole, and settle the crown so the base of the leaves rests right at the soil surface. Firm the soil gently and water well, letting the excess drain away.

    If you rooted directly in soil, simply remove the plastic bag once you see new central growth and move the pot into brighter light. Congratulations, you now have a living pineapple plant.

    Water Method vs. Soil Method: Which Should You Choose?

    Neither method is “correct” — they simply suit different gardeners. Water-rooting lets you watch roots form (wonderful with kids), while soil-rooting skips a transplant and mimics how the plant grows in nature. Here is a side-by-side to help you decide.

    Factor Water Method Soil Method
    Best for Watching progress, beginners, curious kids Fewer steps, sturdier roots, hands-off growers
    Time to root 1–2 months 5–8 weeks
    Transplant shock Slightly higher (moving from water to soil) Lower (roots start in their final medium)
    Maintenance Change water every 2–3 days Keep soil lightly moist under a humidity bag
    Rot risk Low if base is cured and water stays fresh Low if mix drains well and is not soggy
    The “wow” factor High — visible roots Lower — hidden roots

    If this is your first time, try starting two crowns using both methods. It costs nothing extra, doubles your odds of success, and teaches you which approach you prefer.

    Growing Pineapple Indoors: Light, Temperature & Humidity

    For most US gardeners, growing pineapple indoors is the only realistic option, because pineapples cannot survive frost. The good news is that a pineapple makes a striking, low-drama houseplant that asks for the same things you would give a sun-loving succulent.

    Light. Pineapples are sun worshippers. Give your plant the brightest window you have, a south- or west-facing sill is ideal aiming for at least six hours of bright light a day. If your home is dim, especially through winter, supplement with a grow light. Pale, floppy, stretching leaves are the plant’s way of telling you it wants more light.

    Temperature. Pineapples love warmth. Growth is happiest between 68°F and 86°F (20–30°C). Below about 60°F growth stalls, above 90°F it also slows, and any frost is fatal. Keep your plant away from cold drafts, single-pane winter windows, and air-conditioning blasts.

    Humidity. As a tropical bromeliad, your pineapple appreciates moisture in the air. A light misting of the leaves a couple of times a week keeps it happy, especially in dry, heated winter rooms. During rooting, that clear plastic bag doubles as a mini humidity chamber.

    Once summer arrives and nights stay reliably warm, you can move the pot outdoors to a sheltered, partly sunny spot to soak up real sunshine  just bring it back inside well before the first frost. Knowing your first and last frost dates makes this timing effortless, and if you want a deeper primer on cold protection, our guide to overwintering plants indoors has you covered.

    Pineapple Plant Care: Watering, Feeding & Repotting

    Solid pineapple plant care comes down to three easy rhythms: water evenly, feed lightly, and give the plant room to grow.

    Watering. Pineapples are somewhat drought-tolerant, but indoors it is easy to overdo it. Aim for evenly, moderately moist soil — let the top inch or two dry out between waterings, then water thoroughly and let the excess drain. Soggy soil invites root rot, while bone-dry soil turns leaves pale, then reddish and curled. A cheap moisture meter takes the guesswork out at root level. Because pineapples are bromeliads, you can also pour a little water into the central “cup” of leaves, mimicking how they collect rain in the wild.

    Feeding. Feed during the active growing season with a balanced houseplant fertilizer (a roughly even N-P-K such as 20-20-20) or a gentle slow-release organic option (something like 5-5-5). A good rhythm is every four weeks in spring and summer, tapering to every eight weeks in fall and winter. If fertilizer numbers feel like alphabet soup, our plain-English guide to understanding NPK ratios breaks it all down. In keeping with our low-waste ethos, you can also lean on gentle homemade amendments  see how banana peels and eggshells fit into a natural feeding routine.

    Repotting. Your pineapple will grows a lot. A mature plant can reach three to four feet tall and nearly as wide, so plan to move it up a pot size roughly once a year as the roots fill in. Always choose a container with drainage holes and refresh it with a coarse, well-draining mix. If containers are new to you, our container gardening guide for beginners covers pot sizes, drainage, and soil in friendly detail.

    How Long Until Your Pineapple actually grows Fruits?
    How Long Until Your Pineapple actually grows Fruits?

    How Long Until Your Pineapple Fruits?

    Here is where patience becomes part of the fun. A pineapple grown from a top typically takes two to three years to flower and fruits sometimes longer if light, warmth, or feeding are less than ideal. In that time you are rewarded with a bold, sculptural plant, so think of the fruit as the grand finale rather than the whole show.

    Want to nudge things along? Once your plant is mature (at least a couple of years old and a good size), you can try the classic ripe-apple trick. Enclose the whole plant in a clear plastic bag with a ripe apple or two for about a week. As the apples release ethylene gas, they can coax the pineapple into flowering. It does not always work, but it is a harmless, free experiment that has delighted growers for generations.

    After flowering, a small fruit forms in the center of the plant and slowly swells over several months. When it turns golden and smells sweet at the base, it is ready to harvest and enjoy.

    To set expectations, here is a realistic timeline of what to watch for along the way:

    • Weeks 1–2: Curing and the very first root nubs appearing on water-rooted crowns.
    • Weeks 4–8: A healthy root system establishes and the central leaves begin to grow.
    • Months 3–12: Steady leaf growth; the rosette widens and you move up a pot size.
    • Years 1–2: The plant approaches full size (three to four feet across) and matures.
    • Years 2–3: Flowering, followed by a single fruit that ripens over several months.
    • After fruiting: Pups and suckers form, ready to become your next generation of plants.

    In our own windowsill trials, the crowns that succeeded fastest shared three things: a fresh green top, a proper few-day cure before rooting, and consistently bright light. The ones that failed almost always rotted early from skipped curing or leftover fruit which is exactly why we labor the point in Step 3 and Step 4 above.

    After the Harvest: Pups, Suckers & Endless Free Plants

    Here is the beautiful twist that makes pineapples so sustainable: the mother plant fruits only once, and then she begins to fade. But before she goes, she produces offsets, ittle clones called pups, suckers, or slips around her base and stem.

    Simply twist or cut these offsets off once they are a few inches tall, then root and pot them exactly like you did the original crown. Each one grows faster than the crown did (often fruiting in a year or two rather than three), which means one grocery-store pineapple can launch a rotating, never ending supply of plants. It is the ultimate low-waste gardening loop a single fruit that keeps on giving.

    Common Problems and How to Fix Them

    Most pineapple troubles trace back to water, light, or rot. Here is a quick troubleshooting guide to keep your plant thriving.

    Problem Likely Cause The Fix
    Base turns mushy and brown Rot from leftover fruit or soggy conditions Remove all fruit flesh, cure the crown before rooting, use fast-draining mix
    No roots after 8+ weeks Too cold, too dark, or a damaged crown Move somewhere warm and bright; start a fresh crown as backup
    Pale, stretched leaves Not enough light Move to a brighter window or add a grow light
    Leaf tips turning brown Over- or under-watering Even out watering; trim brown tips with clean scissors
    Center of plant yellow/brown Crown rot — often fatal Improve drainage next time; the plant may not recover
    White cottony spots or sticky leaves Mealybugs, aphids, thrips, or scale Wipe with insecticidal soap; isolate from other houseplants

    A quick note on pests: mealybugs, aphids, thrips, and scale are the usual suspects on indoor pineapples. Catch them early, wipe them off, and keep your plant well-lit and unstressed, and they rarely become a serious problem.

    A detailed close-up of a pineapple fruit growing in an Indian field, showcasing natural textures.
    A detailed close-up of a pineapple fruit growing in the field, showcasing natural textures.

    Is Growing Pineapple Worth It? A Sustainable Kitchen-Scrap Win

    Absolutely and not just for the fruit. Regrowing a pineapple from a top is a feel-good, waste-reducing habit that turns a would-be scrap into a beautiful, air-freshening houseplant and, eventually, homegrown fruit. It is proof that sustainable living can be genuinely fun rather than a chore.

    This project also pairs wonderfully with other easy tropical growing adventures. If you have caught the bug, try growing papaya from seed, growing guava trees in containers, or keeping a citrusy kumquat tree in a pot. For the full collection of exotic edibles you can grow at home, browse our hub on growing tropical and exotic fruits, part of the broader EcoGardenHub Plant Library. And if you are lucky enough to live in a warm region, our USDA Zone 9 gardening guide will help you grow your pineapple outdoors year-round.

    Start one crown this week. In a few days you will spot the first roots, in a few weeks a whole new plant and somewhere down the line, a pineapple you grew yourself, from a scrap you almost threw away.

    Frequently Asked Questions

    How long does it take to grow a pineapple from a top? Roots form in about four to eight weeks, but the plant needs roughly two to three years to flower and produce fruit. The plant itself is attractive the entire time, so enjoy it as a houseplant while you wait for the fruit.

    Should I grow my pineapple top in water or soil? Both work. Water rooting lets you watch the roots develop and is great for beginners and kids; soil rooting skips a transplant and tends to produce sturdier roots. If you are unsure, start one crown each way.

    Do I have to root the pineapple top in water first? No. Rooting in water is popular because it is fun to watch, but you can plant a cured crown straight into well-draining soil under a humidity bag and skip the water stage entirely.

    Can you grow a pineapple indoors? Yes, and for most US gardeners indoors is the way to go, since pineapples cannot survive frost. Give it a bright window (or a grow light), warmth between 68–86°F, and occasional misting, and it will thrive as a houseplant.

    Why is my pineapple top rotting instead of rooting? Rot almost always comes from leftover fruit flesh on the crown or from conditions that are too wet. Remove every bit of fruit, cure the crown for a few days until the base dries, and use a fast-draining mix or fresh water to prevent it.

    Does the pineapple plant die after fruiting? The main plant fruits once and then slowly declines, but it first produces offsets called pups or suckers around its base. Root those and you will have new plants that often fruit faster than the original.

    How big does a pineapple plant get? A mature pineapple can reach about three to four feet tall and nearly as wide, so give it room to spread and plan to move it into a larger pot roughly once a year.

  • How to Recycle Batteries in 2026 : From AAs to EVs

    How to Recycle Batteries in 2026 : From AAs to EVs

    Key Takeaways for 2026 Battery Recycling:

      • Tape battery terminals before disposal to prevent short circuits
      • Separate batteries by chemistry type (alkaline, Li-ion, lead-acid)
      • Use Call2Recycle or Earth911 to find local drop-off points
      • Never put batteries in curbside recycling bins
      • Store used batteries in a cool, dry place away from metal objects
      • Check state regulations, as 22 states now have battery disposal laws

    The USA recycling industry recovered over 100,000 metric tons of battery materials in 2025. With new facilities from Redwood Materials, Li-Cycle, and Ascend Elements coming online, recycling capacity will double by 2027. Proper battery disposal in 2026 directly supports the circular economy and reduces demand for virgin mining.

    Safely Recycling Household and Tech Batteries

    Battery recycling in 2026 involves sorting batteries by chemistry type, preparing them safely for transport, and delivering them to certified collection points or mail-in programs. The process keeps toxic metals like lead, cadmium, and cobalt out of landfills while recovering valuable materials for new products.

    There are 3 main benefits of recycling batteries in 2026: preventing hazardous waste from contaminating soil and water, recovering critical minerals for domestic supply chains, and reducing the need for new mining operations. The United States generates over 3 billion used batteries annually, yet only about 15% get recycled through proper channels.

    Recycling Household Batteries | Picture by Julia Krasnoperova
    Recycling Household Batteries | Picture by Julia Krasnoperova

    Battery recycling applies to 3 primary use cases: household battery disposal for consumers, corporate compliance programs for businesses, and end-of-life management for electric vehicle (EV) fleets. Each use case requires different handling protocols and collection methods.

    The battery recycling system has 4 main components: collection infrastructure (drop-off bins and mail-in containers), sorting facilities that separate batteries by chemistry, processing plants that extract materials through hydrometallurgical or pyrometallurgical recycling, and material recovery operations that produce black mass for new battery manufacturing.

    How to Recycle Batteries

    To recycle batteries in 2026, identify the battery type first, then follow the specific disposal method for that chemistry. Each battery type requires different handling due to varying material compositions and hazard levels.

    Non-Rechargeable / Single Use

    Standard alkaline batteries (AAA, AA, C, D, 9-volt) manufactured after 1996 contain no mercury and can go in household trash in most states, but recycling is the better option. Call2Recycle reports that over 40 states now have laws restricting alkaline battery disposal in landfills. Tape the terminals with clear packing tape to prevent sparking, then place them in a sealed plastic bag. Drop them at The Home Depot, Lowe’s, or local municipal collection centers.

    Lithium primary batteries (CR123A, CR2032, lithium button cells) require special handling. These contain lithium metal that can cause fires if damaged. Tape both terminals completely with non-conductive tape. Store them in a fireproof container away from flammable materials. Take them to household hazardous waste facilities or use Earth911’s recycling locator to find drop-off points.

    Zinc-air batteries (hearing aid batteries) are small but contain valuable materials. Place tape over the air holes and positive terminal. Drop them at participating audiologists or mail them through TerraCycle’s hearing aid battery recycling program. These batteries contain silver and zinc that recovery facilities can extract.

    Rechargeable Batteries

    Lithium-ion battery recycling (Li-ion) requires immediate attention in 2026. These batteries power smartphones, laptops, power tools, and electric scooters. They pose fire risks if damaged or improperly stored. Tape the terminals, place each battery in a separate plastic bag, and store them at room temperature away from heat sources. Take them to Call2Recycle drop-off points at Staples, Best Buy, or Lowes. Redwood Materials and Li-Cycle operate processing facilities that recover up to 95% of cobalt, nickel, and lithium from Li-ion batteries.

    Nickel-metal hydride (NiMH) and nickel-cadmium (NiCd) batteries need separate handling. NiCd batteries contain cadmium, a toxic heavy metal regulated under Universal Waste Regulations. Tape terminals and drop them at Battery Solutions collection points or participate in manufacturer take-back programs. NiMH batteries are less hazardous but still contain valuable nickel that recycling centers recover.

    Sealed lead-acid (SLA) batteries (UPS backups, emergency lighting) follow vehicle battery protocols. Take them to Interstate Batteries locations or auto parts stores. These batteries have a 99% recycling rate in the United States, the highest of any consumer product.

    Vehicle Batteries

    Lead-acid car batteries are the most recycled product in America. Return them to any auto parts store (AutoZone, Advance Auto Parts) when purchasing a replacement. Retailers accept them for free under Battery Council International guidelines. The lead and plastic casings get 100% recycled into new batteries.

    Vehicle Batteries Recycling | Man throwing old empty car battery in garbage disposal with recycling symbol
    Vehicle Batteries Recycling | Man throwing old empty car battery in garbage disposal with recycling symbol |

    EV battery recycling in 2026 uses advanced recovery methods. Lithium-ion battery packs from electric vehicles contain up to 8 kg (18 lbs) of lithium, 35 kg (77 lbs) of nickel, and 12 kg (26 lbs) of cobalt. Take them to certified EV battery recycling centers operated by Cirba Solutions or American Battery Technology Company. These facilities use direct cathode recycling to preserve the battery’s crystal structure, reducing energy consumption by 40% compared to traditional methods.

    Second-life batteries extend EV battery life before recycling. Battery management systems (BMS) assess remaining capacity. Batteries with 70-80% capacity get repurposed for stationary energy storage. Ascend Elements processes end-of-life EV batteries using hydrometallurgical recycling to produce new cathode materials.

    Where to Recycle Batteries

    • The Home Depot and Lowe’s accept rechargeable batteries and cell phones at their front-of-store collection bins. These retailers participate in Call2Recycle’s national program. They do not accept alkaline batteries or large industrial batteries.
    • Best Buy accepts all rechargeable batteries up to 11 lbs (5 kg) per day. They also accept alkaline batteries in states with disposal restrictions. Check the store’s recycling kiosk near the entrance.
    • Waste Management Inc. offers curbside battery recycling in select cities. Residents place batteries in special bags or containers provided by the municipality. Check local waste district websites for availability.
    • Earth911’s recycling locator provides the most comprehensive directory. Enter your ZIP code and battery type to find nearby drop-off locations. The database includes municipal collection events, retail partners, and mail-in options.
    • Mail-in programs work for households without local drop-off options. Big Green Box sells containers starting at $55 for a 5-gallon (19-liter) box. Battery Solutions offers pre-paid shipping labels for $25 per 5 lb (2.3 kg) box. Call2Recycle provides free shipping for businesses through their corporate compliance kits.
    • Hazardous waste facilities accept all battery types. Search for “household hazardous waste collection” in your county. These facilities follow EPA battery recycling guidelines and accept batteries free of charge.

    Some Battery Recycling FAQs: From Household AAs to EVs

    1. Why is it so important to recycle batteries instead of throwing them away? Batteries contain heavy metals and toxic chemicals (like lead, cadmium, and lithium) that can leach into soil and water supplies if left in landfills. Furthermore, recycling recovers rare, highly valuable materials (like cobalt and nickel), reducing the need for destructive and carbon-intensive mining operations.

    2. Can I still throw regular AA and AAA alkaline batteries in the trash? In many regions, it is legally permissible to throw standard, single-use alkaline batteries in the normal trash because they no longer contain mercury. However, it is highly discouraged. Even alkaline batteries contain steel, zinc, and manganese that can be recovered and reused if taken to a dedicated recycling drop-off.

    3. How should I safely store old batteries before recycling them? Safety is critical, especially with lithium batteries, which can cause fires if they short-circuit. Store old batteries in a cool, dry place inside a non-conductive container (like a plastic or cardboard box). To prevent short-circuiting, place a small piece of clear tape over the positive and negative terminals, or store each battery in its own small plastic bag.

    4. Where can I drop off rechargeable household batteries (phones, laptops, power tools)? You should never put rechargeable lithium-ion batteries in your standard recycling bin, as they are a major fire hazard at standard sorting facilities. Instead, take them to dedicated e-waste centers, municipal hazardous waste drop-off events, or retail stores that partner with battery recycling networks (such as major hardware or electronics stores).

    5. What happens to my smartphone and laptop batteries when they get recycled? Once collected, these lithium-ion batteries are sorted and discharged safely. They are then usually shredded into a mixture known as “black mass.” Recyclers use advanced chemical processes (hydrometallurgy) or heat (pyrometalurgy) to extract the valuable lithium, cobalt, copper, and nickel from this mass so it can be sold back to manufacturers.

    6. What happens to Electric Vehicle (EV) batteries when they no longer hold a good charge? When an EV battery degrades to about 70-80% capacity, it is no longer ideal for driving, but it still holds a massive amount of energy. Before being completely broken down, they are often evaluated for “second-life” applications, such as stationary energy storage for solar panels or grid stabilization.

    7. How are EV batteries actually recycled once they reach the end of their life? If an EV battery cannot be reused, it is sent to a specialized recycling facility. By 2026, many facilities use automated robots to safely dismantle the massive battery packs. The individual cells are then crushed and processed to reclaim up to 95% of the critical metals, which are then used to manufacture brand new EV batteries in a closed-loop system.

    8. What are the most valuable materials recovered during battery recycling? The most sought-after materials are cobalt, lithium, nickel, and copper. Because global demand for these metals has skyrocketed due to the EV boom, recovering them from old batteries is both environmentally crucial and highly profitable.

    9. Are there new recycling technologies improving this process in 2026? Yes. “Direct recycling” is becoming more common. Instead of shredding and melting the battery down to its base elements, direct recycling carefully removes the cathode material intact so it can be refreshed and reused with far less energy and waste. Hydrometallurgical (water and chemical-based) extraction has also become much cleaner and more efficient than traditional smelting.

    10. How can I find the exact rules and drop-off locations for my specific area? Because regulations vary heavily by city and state/province, the best method is to check your local municipal waste management website. You can also use online locator tools like Call2Recycle or Earth911 to find the nearest drop-off bins for specific battery types.

  • Grow Meyer Lemons at Home: Step-by-Step Planting to Harvest

    Grow Meyer Lemons at Home: Step-by-Step Planting to Harvest

    Introduction to Growing Meyer Lemon

    Welcome, fellow gardeners and citrus enthusiasts! Whether you’re a seasoned horticulturist or a budding backyard gardener, growing Meyer lemons can be a rewarding and delightful experience. Known for their sweeter taste and less acidic bite, Meyer lemons offer a distinct twist on the classic citrus flavor. Not only do they serve well in culinary endeavors from zesting into desserts to infusing beverages but they also hold ornamental value as an exotic Fruit, especially when integrated into container gardens. However, their charm is not just culinary; the plant’s manageable size and adaptable growth habits make it a favorite choice for container gardening and orchard enthusiasts alike.

    Growing Meyer Lemon at home in Pots
    Growing Meyer Lemon at home in Pots

    Why Meyer Lemon Is Different From Other Lemons

    First discovered by Frank N. Meyer in China during the early 1900s, the Meyer lemon isn’t just your typical lemon. Unlike the more acidic Eureka and Lisbon lemons we find in grocery stores, the Meyer lemon offers a unique blend of sweet and tangy flavors, thanks to its likely hybrid origins from citron, mandarin, and pomelo parents. Its smaller stature, compared to other lemons, makes it particularly appealing for those with space constraints or those wishing to grow citrus indoors or on patios. Whether you’re aiming for a fruity addition to your meals or a decorative conversation piece, the Meyer lemon fits the bill perfectly.

    Quick Snapshot: Ideal Conditions at a Glance

    Before diving into the rich history and growth habits, let’s ponder over the ideal set of conditions for these charming trees. Thriving in warmth, Meyer lemons prefer temperatures between 50 to 80°F and require ample sunlight—around 8 to 12 hours daily—whether grown indoors or outdoors. The soil should be slightly acidic, with good drainage to prevent root rot. If you’re indoors, choosing a south-facing window can mimic outdoor sun exposure effectively. With these conditions set, patience is key; from planting to first harvest, you can expect a timeline of about two to three years.

    Botanical Background & History of the Meyer Lemon

    Origin and Discovery

    Meyer lemons owe their name to Frank N. Meyer, a plant explorer who introduced this citrus wonder to the United States. Discovered in the early 1900s on his travels through China, Meyer stumbled upon what locals had long cherished—a small, sweet citrus fruit that was a delightful culinary ingredient and an attractive garden addition. As genetic studies suggest, its hybrid nature is the result of crossing citron, mandarin, and pomelo, lending it a unique profile distinct from western lemon varieties.

    Once introduced to the United States, the Meyer lemon quickly gained popularity, primarily for its ornamental appeal. Its appealing lush green foliage and fragrant blossoms drew gardeners’ attention, long before the fruit became a staple in culinary circles.

    From “Improved” Meyer Lemon to Modern Cultivars

    Initially, the Meyer lemon had its shortcomings; it was susceptible to diseases, notably the Citrus tristeza virus, which prompted significant agricultural challenges. Fortunately, through determined breeding efforts and the release of the “Improved Meyer Lemon” in the 1950s, these concerns were largely mitigated. Today’s cultivars boast enhanced disease resistance and are notably more productive and hardy than their predecessors, making them ideal for modern gardens. These improvements make the Meyer lemon a reliable and rewarding choice even for novice gardeners.

    “Improved” Meyer Lemon to Modern Cultivars
    “Improved” Meyer Lemon to Modern Cultivars

    Climate Requirements and Site Selection

    Ideal Climate and Hardiness Zones

    For those contemplating where to plant their Meyer lemons, understanding the climate prerequisites is paramount. Meyer lemons flourish in USDA Hardiness Zones 8b through 11, where the climate supports their growth most effectively. These regions offer the warm temperatures that lemons love, with minimal risk of frost. In terms of temperature tolerance, while Meyer lemons can endure brief periods of cooler temperatures, prolonged exposure to conditions below 50°F may hinder their growth, and anything below 30°F could potentially damage the plant.

    In zones outside 8b-11, particularly where temperatures drop significantly, growing in containers becomes advantageous. This approach allows for mobility, enabling gardeners to shift the plant indoors when outdoor conditions become unfavorable. By doing so, you can maintain the plant’s health and productive cycles through consistent temperature management.

    Choosing the Right Location (Indoors and Outdoors)

    Placement is everything when gardening with Meyer lemons. If opting for an outdoor spot, ensure the location is sun-soaked for a good portion of the day. A full 8 to 12 hours of sunlight is ideal. Equally critical is selecting a spot protected from excessive wind and with good air circulation to deter disease and pests.

    For indoor growers, situating the trees near south-facing windows will mimic their natural outdoor light conditions best. If necessary, supplementing with grow lights can provide the additional light needed during shorter winter days. Additionally, placing the container near heat-reflective surfaces like patios or brick walls can capitalize on heat accumulation, further nurturing your lemon tree’s growth.

    Soil Chemistry, Drainage, and Potting Media

    Understanding Citrus Soil Preferences

    At the root of a thriving Meyer lemon tree is its soil environment. Citrus trees prefer well-draining, slightly acidic soils with a pH of 5.5 to 6.5. This range ensures optimal root function and nutrient uptake, vital for robust growth and fruit production. The soil should ideally be loamy—a texture providing the right balance between draining excess water while retaining enough moisture for nourishment.

    Textures such as heavy clay or overly sandy soils can pose challenges; the former retains too much water, risking root rot, while the latter drains too quickly, starving the tree of moisture. Hence, knowing your soil type and adjusting it accordingly can make a substantial difference.

    Soil Chemistry in Detail: pH, Nutrients, and Salinity

    The nuances of soil chemistry significantly affect the health of your Meyer lemon tree. pH levels influence the availability of critical nutrients like iron, manganese, and zinc—imbalances of which can cause symptoms such as leaf chlorosis. Understanding this dynamic is crucial, as is recognizing the roles macronutrients play—nitrogen for foliage growth, phosphorus for roots and flowers, and potassium for overall plant vitality.

    It’s also essential to address potential salinity issues, especially when using tap water, which might contain salts capable of harming the plant. In container situations, micronutrient deficiencies are common, often requiring supplementation with fertilizers rich in iron, magnesium, zinc, and manganese. Keeping an eye on these elements—and adjusting pH with sulfur or lime when necessary—will ensure that your Meyer lemon tree stays healthy and productive.

    By understanding your soil’s needs and making informed adjustments, you can cultivate a thriving environment that supports your Meyer lemon tree’s growth at every stage. In the next sections, we’ll explore more about propagation, choosing seedlings, and the exacting science behind crafting the ideal potting mix for these beloved citrus plants. Stay tuned!

    Meyer Lemon Tree Care: Irrigation Schedules for Healthy Growth

    Proper irrigation is fundamental in Meyer lemon tree care to ensure vibrant foliage and abundant fruit. Whether you are growing citrus in containers or in-ground, understanding the tree’s water needs throughout the seasons optimizes health and yield.

    How Often to Water Meyer Lemon Trees

    Meyer lemons prefer consistently moist soil but are susceptible to root rot if overwatered. The general rule: water deeply but infrequently, allowing the top few inches of soil to dry out between watering sessions.

    • In warmer months (spring and summer): Water your Meyer lemon tree about twice a week. Check soil moisture by feeling 2-3 inches below the surface; if dry, it’s time to irrigate. For container-grown trees, daily watering may be necessary during hot spells, as pots dry more quickly.
    • During cooler months (fall and winter): Reduce watering frequency to once every 10-14 days. This aligns with the tree’s slowed growth phase, especially important as part of lemon tree winter care.

    Using a drip irrigation system or soaker hoses ensures slow, deep watering that promotes strong root development while conserving water. Mulching around the base with organic matter can also help retain soil moisture and moderate root temperature.

    Fertilizer N-P-K Ratios for Meyer Lemon Tree Care

    Fertilizing correctly supports vigorous growth and maximizes fruit production. Meyer lemon trees have particular nutrient demands reflected in precise N-P-K ratios: nitrogen (N), phosphorus (P), and potassium (K).

    Ideal N-P-K Fertilizer Ratios

    • Early growth and leaf development: Use a balanced fertilizer such as 6-6-6 or 8-8-8 to encourage healthy foliage and root growth.
    • Flowering and fruit set: Shift to a higher potassium formulation like 8-10-10 or 10-10-10. Potassium improves flower bud formation, fruit size, and disease resistance.
    • Maintenance feeding: A standard citrus fertilizer with approximately 12-6-6 provides adequate nutrients during the growing season.

    Applying Fertilizer on Meyer Lemons

    For potted Meyer lemon trees described in guides to growing citrus in containers, use a slow-release fertilizer formulated specifically for citrus, applying every 6-8 weeks during active growth (early spring through early fall). In-ground trees benefit from granular or liquid feeds applied 3-4 times a year.

    To prevent nutrient burn:

    – Avoid over-fertilizing; always follow label instructions.
    – Water thoroughly after feeding to help nutrients penetrate the root zone.
    – Apply fertilizer under the canopy, extending slightly beyond the drip line where feeder roots are concentrated.

    Supplemental micronutrients such as magnesium, zinc, and iron are also crucial—deficiencies can cause chlorosis (yellowing leaves) and reduce fruit yield. Chelated micronutrient sprays or soil amendments may be used seasonally.

    Pruning Techniques for Maximum Fruit Production on Meyer Lemon Trees

    Strategic pruning enhances Meyer lemon pollination and fruit quality by improving light penetration, air circulation, and encouraging productive growth.

    When to Prune Meyer Lemon Trees

    – The best time to prune is late winter or early spring, just before the tree begins its active growth cycle.
    – Avoid heavy pruning in late summer or fall, which may stimulate tender new growth vulnerable to cold damage during lemon tree winter care.
    – Light formative pruning can also be done throughout the year to remove dead, damaged, or crossing branches.

    A joyful woman in a cap smiles surrounded by a well pruned meyer lemon trees in Florida
    woman in a cap smiles surrounded by a well pruned meyer lemon trees in Florida

    How to Prune Meyer Lemon Trees Effectively

    1. Remove suckers and water sprouts: These vigorous, vertical shoots drain energy but rarely produce fruit.
    2. Thin crowded branches: Open the canopy by cutting back branches that cross or grow inward. This enhances sunlight exposure and air movement essential for disease prevention and better flower development.
    3. Shorten long branches: Trim overly long limbs by one-third to encourage lateral fruiting branches.
    4. Cut above outward-facing buds: Encourages outward growth, maintaining an open vase shape that facilitates meyer lemon pollination by allowing pollinators easy access.
    5. Sanitize pruning tools: Prevent disease spread by disinfecting shears between cuts, especially when removing diseased wood.

    Pruning for Container-Grown Meyer Lemons

    For Meyer lemon trees grown in containers, pruning is also necessary to manage size and shape, preventing the tree from becoming root-bound or top-heavy. Regular trimming supports energy allocation to developing fruit rather than excessive canopy growth.

    Integrating Irrigation, Fertilization, and Pruning for Optimal Meyer Lemon Tree Care

    Combining consistent irrigation schedules with appropriate feeding and pruning practices creates the perfect environment for Meyer lemon trees to thrive. Remember these key points:

    • Keep soil moisture even but avoid waterlogging.
    •  Match fertilizer N-P-K ratios to growth stages.
    •  Prune thoughtfully to support healthy structure and expose flowers to pollinators.

    When these factors align, home gardeners can expect enhanced fruit set, improved lemon quality, and robust tree health.

    Should you be practicing meyer lemon pollination in a greenhouse or indoor setting, remember that maintaining good airflow and regularly pruning to reduce overcrowding are essential. For outdoor trees, attracting pollinators like bees or hand-pollinating blossoms can further boost fruit yield.

    By integrating these horticultural techniques, your Meyer lemon tree will reward you with bountiful harvests season after season.

  • 20 Unique Tundra Biome Plants And How They Survive This harsh Environment

    20 Unique Tundra Biome Plants And How They Survive This harsh Environment

    What is the Tundra Biome?

    The tundra is the coldest, harshest, and most unforgiving biome on Earth. The name itself comes from the Finnish word tunturi, which translates to “treeless plain.” You can think of the tundra as a freezing desert. It is characterized by frost-molded landscapes, extremely low temperatures, little precipitation, poor nutrients, and short growing seasons.

    Here are the defining characteristics that make the Tundra Biome Plants environment so unique:

    • Permafrost: This is perhaps the most crucial feature of the tundra. Beneath the top layer of soil is a layer of ground that remains permanently frozen all year round. Because plant roots cannot penetrate this ice layer, trees cannot grow here. Only shallow-rooted plants like mosses, lichens, and small shrubs can survive.

    • Extreme Cold: Winter temperatures average around -30°F (-34°C), but can drop much lower. Summers are incredibly short (only lasting about 50 to 60 days) and temperatures barely creep above freezing, averaging 37°F to 54°F (3°C to 12°C).

    • Low Precipitation: The tundra receives very little rain or snow—usually less than 10 inches (25 cm) per year.

    • High Winds: Without trees to block the wind, tundra landscapes are often swept by continuous, freezing gales.

    Why Agronomists Must Study Tundra Flora

    The tundra biome is hostile. Temperatures drop below -30 degrees Celsius. The subsoil remains permanently frozen. Nutrients are scarce. Growing seasons last just 50 days.

    You face similar challenges in commercial agriculture. Unseasonal frosts destroy millions of dollars in crops annually. High winds damage tall cultivars. Shortened growing windows threaten yield security.

    Consider this.

    By examining Tundra Biome Plants, you identify structural and genetic solutions. These species produce antifreeze proteins. They utilize dehydration tolerance to prevent cellular rupture. They develop morphological adaptations like pubescent stems to trap heat.

    You can extract these genetic markers. You can breed these traits into commercial varieties. This is applied science. It provides direct financial returns. Let’s examine the 20 plants that master this hostile environment.

    1. Arctic Willow (Salix arctica)

    The Arctic Willow is a woody shrub. It rarely exceeds a few inches in height. It grows completely flat against the soil. This prostrate habit keeps the plant below the freezing winds that rip across the tundra.

    • Adaptation Mechanism: Shallow root systems bypass impenetrable permafrost.

    • Agronomic Value: High cold tolerance offers genetic markers for frost-resistant woody crops.

    • Growth Habit: Prostrate, creeping stems.

    Arctic Poppy Plant on a bright day
    Arctic Poppy Plant on a bright day | Flora.dempstercountry.org

    Agronomists analyze the Arctic Willow for its rapid growth cycle. It completes its reproductive phase in a narrow summer window. You can isolate the genes responsible for this accelerated phenology. Applying these traits to commercial fruit trees limits frost damage during late-spring freezes. The leaves feature a fuzzy coating. This fuzz traps heat. It creates a warm microclimate directly around the plant tissue. Growers developing crops for high-altitude regions benefit from replicating this physical trait.

    2. Arctic Poppy (Papaver radicatum)

    The Arctic Poppy is a perennial flower in the Tundra Biome Plants category. It tracks the sun across the sky. Botanists call this behavior heliotropism.

    • Adaptation Mechanism: Heliotropic flowers focus solar radiation to warm reproductive organs.

    • Agronomic Value: Sun-tracking traits improve seed viability in low-light environments.

    • Growth Habit: Clumping basal rosettes with hairy stems.

    • Genera: Salix (Willows) (Classic Latin name for willow)
    • Species: arctica (Gk arktikos from the constelation Bear or Northern)
    • Synonym(s): S.anglorum, S.crassijulis, S.hudsonensis
    Beautiful yellow Arctic Poppy blooming in a natural setting with selective focus
    Arctic Poppy | picture Credit: Павел Гавриков

    The cup-shaped flower acts as a parabolic reflector. It directs sunlight straight to the center of the bloom. This increases the temperature inside the flower. The added heat speeds up seed development. Commercial breeders study this mechanism. Integrating heliotropic behaviors into short-season cash crops accelerates maturity. The plant also relies on a dense root network to anchor itself against severe gales. You can use these rooting characteristics to stabilize topsoil in wind-prone agricultural zones.

    3. Purple Saxifrage (Saxifraga oppositifolia)

    Purple Saxifrage is an early bloomer. It often flowers while snow still covers the ground. It forms dense, low-lying mats.

    • Adaptation Mechanism: Mat-forming structure reduces surface area exposed to wind.

    • Agronomic Value: Extreme early-season flowering traits extend functional growing seasons.

    • Growth Habit: Cushion-forming evergreen.

    Vibrant Purple Saxifrage flowers blossoming on rocky terrain, showcasing natural beauty
    Purple Saxifrage | Picture by Majanda Fens

    This Purple Flower plant survives freezing temperatures by packing its cells with soluble sugars. These sugars act as a biological antifreeze. They lower the freezing point of water inside the cell. This stops ice crystals from puncturing cell walls. Agriculture experts can extract the metabolic pathways responsible for this sugar concentration. Transferring this capability to vulnerable crops like citrus protects them from sudden cold snaps. The tight foliage also minimizes moisture loss. This represents a highly useful trait for drought-resistant crop breeding.

    4. Bearberry (Arctostaphylos uva-ursi)

    Bearberry features thick, leathery leaves. These leaves remain on the plant year-round. This saves the plant massive amounts of energy. It does not need to grow new leaves every spring.

    • Adaptation Mechanism: Evergreen foliage conserves energy in nutrient-poor soils.

    • Agronomic Value: Low-maintenance ground cover for erosion control in cold climates.

    • Growth Habit: Trailing woody vine.

    Macro shot of red Bearberry among green leaves, capturing the essence of autumnArctostaphylos among green leaves, capturing the essence of autumn
    Macro shot of red berries among green leaves, capturing the essence of autumn | Picture by Daniela Bártová

    The leathery texture of the leaves prevents moisture evaporation. High winds pull moisture from plant tissues rapidly. Bearberry blocks this desiccation. The plant also houses mutualistic fungi in its roots. These fungi break down organic matter in frigid soils. They feed nutrients directly to the plant. You isolate these cold-active mycorrhizal fungi. Introducing them to commercial soil profiles improves nutrient uptake for winter cover crops.

    5. Pasque Flower (Pulsatilla patens)

    The Pasque Flower blooms early in the spring. It produces large, cup-shaped blossoms. Fine hairs cover the entire plant.

    • Adaptation Mechanism: Dense trichomes (hairs) insulate stems and leaves.

    • Agronomic Value: Trichome density presents a physical barrier against early-season pests.

    • Growth Habit: Clumping perennial.

    Close-up of purple pasque flowers (Pulsatilla vulgaris) blooming among green foliage
    Purple pasque flowers (Pulsatilla vulgaris) blooming among green foliage | Picture Credit: Roman Biernacki

    The hairs on the Pasque Flower trap a layer of still air against the epidermis. This functions exactly like thermal insulation. It keeps the plant tissues warmer than the ambient air. Commercial growers face heavy losses when unseasonal frosts kill early shoots. Studying the genetic triggers for dense trichome production offers a non-chemical frost defense. The plant also develops a deep taproot. This root stores carbohydrates over the long winter. This storage system provides immediate energy for rapid spring emergence.

    6. Diamond-leaf Willow (Salix planifolia)

    This willow species grows in wet, boggy tundra areas. It survives in waterlogged, freezing soils. Most plants drown in these exact conditions.

    • Adaptation Mechanism: Anaerobic root respiration pathways allow survival in saturated ground.

    • Agronomic Value: Genetic solutions for crop survival in poorly drained soils.

    • Growth Habit: Multi-stemmed shrub.

    Detailed image of willow catkins blooming in spring against a soft background.
    Diamond-leaf Willow (Salix planifolia) blooming in spring | Picture Credit: Roman Biernacki

    The Diamond-leaf Willow pulls nutrients from soils with zero oxygen. It stores massive amounts of vitamin C. This high vitamin concentration protects its cells from oxidative stress during freezing and thawing cycles. You study these anti-oxidant pathways. Breeding crops with similar vitamin C spikes during cold stress limits cellular degradation. The plant also sheds its leaves rapidly at the first sign of autumn. This hard-wired dormancy trigger prevents winter tissue damage.

    7. Arctic Moss (Calliergon giganteum)

    Arctic Moss lives entirely underwater in tundra lakes. It functions as an aquatic plant. It survives under solid ice for nine months of the year.

    • Adaptation Mechanism: Extreme metabolic slowdown during ice cover prevents starvation.

    • Agronomic Value: Insights into extreme metabolic dormancy for long-term seed storage.

    • Growth Habit: Aquatic, bottom-dwelling moss.

    Detailed macro shot of Arctic Moss plants in a natural setting,
    Detailed shot of Arctic Moss plants in a natural setting | Picture Credit : Сергей ЮССтудия

    This moss grows incredibly slowly. It adds less than one centimeter of growth per year. It stores nutrients effectively to survive the long, dark winter under the ice. When you manage commercial algae or aquatic crops, winter die-off represents a major expense. The genetic markers that allow Arctic Moss to survive freezing water offer a solution. The moss also requires very few nutrients to build biomass. Agronomists analyze its cellular efficiency to reduce fertilizer dependency in aquatic farming operations.

    8. Caribou Moss (Cladonia rangiferina)

    Caribou Moss functions differently. It is actually a lichen. It represents a symbiotic relationship between a fungus and an alga. It has absolutely no roots.

    • Adaptation Mechanism: Spongy tissue absorbs moisture directly from the air.

    • Agronomic Value: Models for soil-independent nutrient absorption.

    • Growth Habit: Ground-covering, spongy mats.

    Caribou Moss (Cladonia rangiferina)
    | Picture Credit: Rose S.

    This lichen survives extreme desiccation. It can dry out completely and become brittle. When moisture returns, it rehydrates and resumes photosynthesis instantly. Biologists call this poikilohydry. Commercial agriculture wastes massive amounts of water. You analyze the cellular structure of Caribou Moss to understand extreme drought tolerance. Sequencing the genes responsible for this rapid recovery helps breeders develop drought-impervious cover crops. The lichen also produces acidic compounds that break down solid rock into usable soil over time.

    9. Tufted Saxifrage (Saxifraga cespitosa)

    Tufted Saxifrage grows directly in rocky crevices. It anchors itself in minimal soil. It produces tight clusters of white flowers.

    • Adaptation Mechanism: Crevice-dwelling root systems exploit micro-fissures for stability.

    • Agronomic Value: Rock-splitting root mechanics inform soil-penetration traits.

    • Growth Habit: Dense, tufted cushions.

    Tufted Saxifrage (Saxifraga cespitosa)
    Tufted Saxifrage (Saxifraga cespitosa)

    The tightly packed leaves trap dead plant matter. This decaying matter creates a localized compost pile. The plant feeds on its own debris. This self-fertilization proves highly efficient in barren environments. Agronomists observe this closed-loop nutrient cycling closely. Developing crops that retain decaying basal leaves to build localized organic matter reduces external fertilizer needs. The root system also excretes enzymes that dissolve minerals. This action extracts phosphorus directly from raw stone.

    10. Arctic Lupine (Lupinus arcticus)

    Arctic Lupine operates as a legume. It adds nitrogen to the tundra soil. It features deep blue, spire-like flowers.

    • Adaptation Mechanism: Nitrogen-fixing root nodules function in near-freezing temperatures.

    • Agronomic Value: Cold-active rhizobia bacteria offer winter cover crop applications.

    • Growth Habit: Erect, herbaceous perennial.

    Detailed view of purple lupine flowers with lush green leaves in a spring garden.
    Detailed view of purple lupine flowers with lush green leaves in a spring garden.

    Most nitrogen-fixing bacteria stop working in cold soil. The bacteria associated with Arctic Lupine continue to fix nitrogen at extremely low temperatures. You extract these cold-adapted bacteria. Inoculating winter cover crops with these strains allows continuous soil improvement during the off-season. The seeds of the Arctic Lupine are incredibly durable. Researchers successfully grew a plant from an Arctic Lupine seed trapped in permafrost for 10,000 years. This extreme seed longevity presents opportunities for improving commercial seed vault viability.

    11. Moss Campion (Silene acaulis)

    Moss Campion looks exactly like a patch of green moss. It produces tiny pink flowers. It grows strictly in a dome shape.

    • Adaptation Mechanism: Aerodynamic dome shape deflects high-velocity winds.

    • Agronomic Value: Aerodynamic plant structures limit wind-lodging in open-field crops.

    • Growth Habit: Low, hemispherical cushion.

    Moss Campion (Silene acaulis) by Ecogarden
    Moss Campion (Silene acaulis) | Picture credit: Светлана

    The dome shape serves a specific purpose. It forces freezing winds to flow over the plant. This creates an aerodynamic slipstream. It prevents windburn and structural damage entirely. The center of the dome acts as a heat trap. Internal temperatures inside the cushion routinely read 20 degrees warmer than the outside air. Agronomists fighting wind damage in flat agricultural regions learn from this geometry. Breeding low, domed cover crops protects the topsoil from wind erosion while creating a warmer microclimate for intercropping.

    12. Arctic Dryad (Dryas integrifolia)

    The Arctic Dryad serves as a foundational species in the tundra. It features small, leathery leaves with distinctly curled edges.

    • Adaptation Mechanism: Curled leaf margins minimize stomatal exposure to dry air.

    • Agronomic Value: Leaf morphology modifications reduce agricultural water consumption.

    • Growth Habit: Creeping, mat-forming dwarf shrub.

    Arctic Dryad (Dryas integrifolia) Close-up of a solitary Dryas octopetala flower blooming amidst rocky terrain
    Arctic Dryad (Dryas integrifolia)

    The plant utilizes heliotropic flowers, matching the behavior of the Arctic Poppy. The curled edges of the leaves restrict airflow directly over the stomata. This drastically limits transpiration. In commercial farming, transpiration causes massive water loss during dry spells. You target the genetic traits that cause leaves to curl downward under stress. The Arctic Dryad also associates with ectomycorrhizal fungi. These fungi scavenge nitrogen aggressively from frozen organic matter.

    13. Cotton Grass (Eriophorum callitrix)

    Cotton Grass produces fluffy, white seed heads. It resembles common cotton. It grows aggressively in acidic tundra bogs.

    • Adaptation Mechanism: Hollow stems transport oxygen down to submerged roots.

    • Agronomic Value: Aerenchyma tissue development prevents root rot in flooded fields.

    • Growth Habit: Clumping sedge.

    Cotton Grass (Eriophorum callitrix)
    Cotton Grass (Eriophorum callitrix)

    The hollow stems act like snorkels. They pipe oxygen from the air directly into the root system. This allows the plant to thrive in stagnant, oxygen-depleted water. Flooding destroys commercial crops by suffocating the roots. Agronomists study the genetic pathways that trigger aerenchyma (hollow tissue) formation. Breeding these pathways into staple crops like maize or wheat prevents total crop loss during heavy flood events. The fluffy seed heads also trap heat to protect the developing seeds from sudden frosts.

    14. Snow Buttercup (Ranunculus nivalis)

    The Snow Buttercup pushes right through the snowpack to bloom. It never waits for the snow to melt completely.

    • Adaptation Mechanism: Thermogenic tissues generate internal heat to melt surrounding snow.

    • Agronomic Value: Bio-heating mechanisms prevent frost damage in early-flowering crops.

    • Growth Habit: Small, herbaceous perennial.

    Snow Buttercup (Ranunculus nivalis)
    Snow Buttercup (Ranunculus nivalis)

    This plant actively melts the snow around it. It utilizes an inefficient respiration process to generate waste heat. Biologists term this thermogenesis. Commercial fruit trees suffer heavily from late-spring frosts destroying their blossoms. If you isolate the genes responsible for this localized heat generation, you develop self-warming blossoms. This removes the need for expensive smudge pots or wind machines in orchards. The glossy yellow petals also reflect sunlight to the center of the flower to speed up maturation.

    15. Alpine Azalea (Kalmia procumbens)

    Alpine Azalea is a miniature evergreen shrub. It grows prostrate on exposed, rocky ridges. It turns dark red in the winter.

    • Adaptation Mechanism: Anthocyanin pigment accumulation acts as cellular antifreeze and sunscreen.

    • Agronomic Value: Pigment-based stress tolerance improves winter hardiness in fruiting shrubs.

    • Growth Habit: Creeping, woody mat.

    Alpine Azalea A close-up view of vivid pink azaleas flourishing in a lush spring garden in Boise, Idaho
    Alpine Azalea (Kalmia procumbens)

    The red coloration comes directly from anthocyanins. These pigments protect the cellular machinery from high-intensity ultraviolet light reflecting off the snow. They also lower the freezing point of the cell sap. Agronomists use this knowledge to breed high-anthocyanin crop varieties. These varieties tolerate colder temperatures and resist solar radiation damage. The Tundra plant maintains a very low transpiration rate. Its stomata close completely when wind speeds increase. This conserves every single drop of water.

    16. Labrador Tea (Rhododendron groenlandicum)

    Labrador Tea produces thick leaves with a fuzzy, rust-colored underside. It defends itself aggressively against herbivores.

    • Adaptation Mechanism: Toxic secondary metabolites deter grazing.

    • Agronomic Value: Natural chemical defenses reduce dependency on synthetic pesticides.

    • Growth Habit: Upright, evergreen shrub.

    Labrador Tea (Rhododendron groenlandicum)
    Labrador Tea (Rhododendron groenlandicum)

    The plant produces toxic compounds called ledol. These compounds make the plant unpalatable and mildly toxic to most animals. In the tundra, losing leaves to a herbivore proves fatal because regeneration takes too long. Commercial growers spend millions on pest control. You extract and synthesize these natural deterrents. Alternatively, breeders introduce similar metabolic pathways into cash crops. This makes them naturally resistant to grazing insects and mammals. The fuzzy leaf undersides also limit moisture loss.

    17. Mountain Sorrel (Oxyria digyna)

    Mountain Sorrel produces kidney shaped leaves. It grows mostly in high altitude tundra regions. It turns red under environmental stress.

    • Adaptation Mechanism: High oxalic acid content prevents cellular freezing and deters pests.

    • Agronomic Value: Oxalic acid pathways offer dual-purpose frost and pest resistance.

    • Growth Habit: Herbaceous perennial.

    Mountain Sorrel (Oxyria digyna)
    Mountain Sorrel (Oxyria digyna)

    The plant stores massive amounts of oxalic acid. This acid tastes highly sour. This flavor profile deters grazing animals. More importantly, the acid acts as a powerful biological antifreeze. It lowers the freezing temperature of the cellular fluids. You study this chemical defense mechanism. Agronomists breed crops with localized oxalic acid accumulation in vulnerable tissues, like buds or young stems. The plant also uses a deep taproot to secure water from deep underground during the dry summer months.

    18. Dwarf Birch (Betula nana)

    Dwarf Birch represents a tiny version of the common birch tree. It grows flat against the ground. It rarely exceeds 30 centimeters in height.

    • Adaptation Mechanism: Prostrate growth habit exploits the boundary layer of warmer air near the soil.

    • Agronomic Value: Height-restricting genes facilitate mechanical harvesting and limit wind damage.

    • Growth Habit: Deciduous, creeping shrub.

    Dwarf Birch | Betula nana
    Dwarf Birch | Betula nana | Tundra Biome Flower

    The tree exploits a microclimate. The air immediately above the soil surface registers significantly warmer than the air one meter higher. By growing flat, the Dwarf Birch stays firmly in this warm zone. It also gets buried by insulating snow in the winter. Agronomists isolate the dwarfing genes present in this species. Applying these genes to commercial orchards allows for high-density planting. Smaller, more compact trees are easier to harvest and require fewer resources to maintain.

    19. Arctic White Heather (Cassiope tetragona)

    Arctic White Heather produces scale-like leaves. These leaves press tightly against the stem. The plant resembles a braided cord.

    • Adaptation Mechanism: Imbricate (overlapping) leaves eliminate wind exposure to the stem.

    • Agronomic Value: Structural leaf modifications reduce water loss in arid-climate crops.

    • Growth Habit: Evergreen, dwarf shrub.

    Arctic White Heather (Cassiope tetragona)
    Arctic White Heather (Cassiope tetragona)

    The overlapping leaves seal the inner stem completely away from the harsh environment. This drastically cuts down on moisture loss and protects the vascular tissue from freezing winds. Commercial crops in arid regions suffer heavily from desiccation. You study the genetics behind this overlapping leaf structure. Breeding crops with tighter, more compact foliage reduces the surface area exposed to dry air. The plant also relies on a shallow but highly branched root system to quickly absorb surface meltwater.

    20. Lapland Rosebay (Rhododendron lapponicum)

    Lapland Rosebay is a tough, dwarf rhododendron. It thrives in highly acidic, nutrient-poor tundra soils.

    • Adaptation Mechanism: Extreme tolerance to low pH and aluminum toxicity.

    • Agronomic Value: Genetic markers for cultivating crops in highly degraded, acidic soils.

    • Growth Habit: Small, highly branched shrub.

    Lapland Rosebay (Rhododendron lapponicum) | Tundra Biome
    Lapland Rosebay (Rhododendron lapponicum) | Tundra Biome

    Many commercial soils become highly acidic over time due to synthetic fertilizer use. Acidic soils release toxic levels of aluminum. This aluminum destroys crop roots. Lapland Rosebay ignores aluminum toxicity completely. It excretes organic acids from its roots. These acids bind to the aluminum, rendering it harmless. Agronomists must sequence this specific trait. Transferring this aluminum-binding capability to staple crops like wheat or soybeans allows farmers to maintain high yields on degraded, acidic farmland without applying expensive lime treatments.

    The Physiology of Extreme Cold Tolerance

    You must understand how these plants survive at a cellular level. Tundra Biome Plants do not simply endure the cold. They actively manage it.
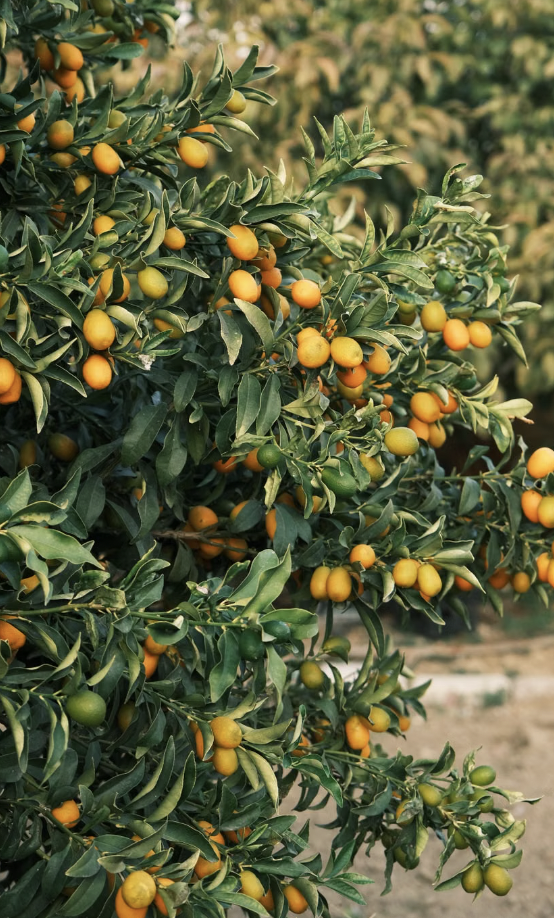
    Here is the truth.

    Plants lack the ability to generate body heat like mammals. They rely strictly on biochemical and structural defenses. Agronomists extract these defenses to build better crops.

    Antifreeze Proteins and Soluble Sugars

    Plants like Purple Saxifrage synthesise antifreeze proteins. They pump their cells full of soluble sugars. Water expands when it freezes. In a normal plant cell, expanding ice crystals puncture the cell membrane. This causes internal bleeding and rapid death. High sugar concentrations lower the freezing point of the cytoplasm. The antifreeze proteins bind to tiny ice crystals. They stop them from growing larger. You apply these exact mechanisms directly to commercial agriculture to prevent frost damage.

    Controlled Cellular Dehydration

    Some tundra species survive by pushing the water out of their cells entirely before it freezes. They move the water into the extracellular spaces. The water freezes harmlessly outside the cell walls. The cell itself shrinks. It enters a state of suspended animation. When temperatures rise, the ice melts. The cell reabsorbs the water and resumes normal function. You study this osmotic regulation to build better drought and freeze resistance in commercial seeds.

    Morphological Heat Trapping

    The Tundra Biome Plants use physical structures to capture heat. Domed shapes, dense hairs, and parabolic flowers create functional microclimates. The ambient temperature outside a Moss Campion dome reads well below freezing. The inside remains warm enough for active photosynthesis. Agronomists use these structural blueprints. You design crops that physically protect themselves from the elements without external inputs.

    How Commercial Growers Leverage Tundra Genetics

    Why invest time in studying the tundra biome? The answer is yield security.

    Climate volatility destroys predictability. Late frosts kill fruit blossoms. High winds flatten cereal crops. Droughts starve cash crops of water. The genetics found in tundra plants hold the solutions to these exact problems.

    You cannot control the weather. You can control your crop genetics.

    Identify Target Traits

    Stop relying on broad-spectrum chemical inputs. Look for structural solutions. Notice how the Diamond-leaf Willow survives waterlogged soils. Note how the Pasque Flower uses hairs to stop frost. You identify the specific traits your crops lack. You look to the tundra for the biological equivalent.

    Apply CRISPR and Cross-Breeding

    Traditional cross-breeding takes decades. Modern genomic tools like CRISPR allow you to edit plant DNA directly. You sequence the cold-hardy genes from the Arctic Lupine. You insert them into vulnerable legume cash crops. This speeds up the development of resilient cultivars dramatically.

    Field Testing in Marginal Environments

    You deploy these genetically upgraded crops in marginal farmland. Soils previously considered too cold, too wet, or too acidic suddenly become viable. The Lapland Rosebay proves you can grow in high-aluminum soils. You apply these traits to expand your operational footprint without buying premium land.

    Final Assessment

    The tundra is not a wasteland. It functions as a highly specialized genetic laboratory. The 20 Tundra Biome Plants listed above survive the harshest environment on earth through ruthless efficiency and complex chemical engineering. The original draft provided to you missed this entirely.

    By understanding and extracting these botanical adaptations, you build stronger, more resilient agricultural systems. Stop viewing these plants as academic curiosities. Start viewing them as the genetic blueprints for the future of commercial farming. You extract the data. You implement the genetics. You secure your yield.
  • How to Grow Passion Fruit (Maracuyá): Complete Guide from Seed to Heavy Yields

    How to Grow Passion Fruit (Maracuyá): Complete Guide from Seed to Heavy Yields

     What Is Passion Fruit?

    Passion fruit, also known as maracuyá, granadilla, and numerous other regional names, is a tropical delight that belongs to the genus *Passiflora*. The most commonly cultivated species include *Passiflora edulis*, which notably splits into two primary forms: the purple passion fruit (P. edulis edulis) and the yellow passion fruit (P. edulis flavicarpa). These luscious fruits are not only prized for their aromatic and tangy flavor but are also popularly consumed fresh, used in juices, desserts, or even for their medicinal properties. The captivating flowers of the plant, from which it draws its name, further make it a garden favorite.

    Grow Passion Fruit at Home
    Grow Passion Fruit at Home

    Why Grow Passion Fruit at Home?

    Growing passion fruit at home offers several compelling advantages over purchasing them from the store. For one, homegrown fruits are likely to be fresher, more flavorful, and richer in nutrients, largely because they can ripen naturally on the vine. Passion fruit vines are highly productive, with each mature vine capable of yielding a considerable number of fruits. This productivity, combined with the space-efficiency of the vines’ growing habit, makes passion fruit an excellent choice for gardeners, even those with limited space. Additionally, the fragrant flowers and fruits provide a habitat and food source for pollinators like bees and butterflies, thereby enhancing garden biodiversity and health.

    Botanical Background and History

     Taxonomy and Species Overview

    Passion fruit plants belong to the genus *Passiflora*, part of the larger family Passifloraceae. Among the approximately 550 species in this genus, those widely cultivated for their edible fruit include *Passiflora edulis*, *Passiflora ligularis* (sweet granadilla), and *Passiflora quadrangularis* (giant granadilla). *P. edulis edulis* (purple passion fruit) and *P. edulis flavicarpa* (yellow passion fruit) are especially popular in agricultural and horticultural circles. While both share a common core of flavor, each has distinct characteristics regarding size, vigor, and climate tolerance. The purple variety tends to be sweeter and thrives in cooler subtropical regions, whereas the yellow variety is more robust and suited to tropical environments.

    Origin and Natural Habitat

    The origins of passion fruit trace back to the tropical and subtropical regions of South America, specifically encompassing regions within Brazil, Paraguay, and northern Argentina. In their native environment, they often grow along forest edges and in subtropical hillsides where the conditions foster their climbing growth habit. Adapted to these habitats, passion fruit vines are naturally perennial and exhibit vigorous climbing behavior, using tendrils to secure themselves to surrounding foliage and structures.

    Vibrant green passion fruits growing on vines in a tropical setting, showcasing natural beauty and agriculture
    Vibrant green passion fruits growing on vines in a tropical setting, showcasing natural beauty and agriculture

    Cultural and Historical Significance

    To grow passion fruit’s journey from the heart of South America to other parts of the world is both fascinating and culturally rich. Following its domestication, the fruit spread beyond its native continent to Africa, Asia, and Oceania. Indigenous cultures have long utilized passion fruit not only as a source of sustenance but also in traditional medicine practices. The intriguing name “passion flower” is derived from the symbolism ascribed by European missionaries, who saw aspects of Christ’s crucifixion in the intricate structure of the flowers.

    Growth Habit and Plant Physiology

    Passion fruit plants showcase a unique growth habit characterized by their sprawling, perennial vines. These vines possess nodes from which tendrils, leaves, and axillary shoots emerge, facilitating their climbing and sprawling nature. New plants transition from a juvenile phase, characterized by rapid vegetative growth, to a mature phase where flowering and fruiting commence. A well-cared-for vine can remain productive for many years. The plant’s striking flowers are crucial to its reproductive cycle, employing distinct structures that foster pollination by insects. From pollination to harvest, the fruit development timeline typically spans several weeks, resulting in plump, ripe fruits ready for consumption.

    Climate and Site Requirements

     Ideal Climate Conditions

    Grow Passion Fruit plants that thrive in warm, humid environments, making them ideal candidates for growth in USDA Hardiness Zones 9-11. In these regions, the optimal temperature range during the day is between 68°F and 84°F (20°C to 29°C), with night temperatures preferably not dropping below 50°F (10°C). Passion fruit vines Growth are sensitive to frost and can be adversely affected by temperatures approaching freezing. Conversely, extreme heat can also stress the plants, particularly if accompanied by low humidity. A consistent supply of rainfall is beneficial, though they also need good drainage to prevent root rot.

    Passion Fruit Flowering
    Passion Fruit Flowering

    Sunlight and Exposure

    For robust growth and fruiting, passion fruit vines demand full sun, ideally receiving at least six to eight hours of sunlight per day. While partial shade may be tolerated in very hot climates, it often results in reduced flowering and fruit yield. Strategic placement in the garden is crucial; vines should be oriented in a way that maximizes sunlight exposure while still considering prevailing wind patterns to prevent damage.
    Wind, Frost, and Microclimates

    Given their sprawling nature, passion fruit vines are susceptible to wind damage, which can harm both the plant’s foliage and its flowers. Erecting windbreaks or situating vines in naturally protected areas can mitigate such risks. In terms of microclimates, seeking or creating warmer niches in the garden, such as south-facing walls or trellises, can provide added protection against unexpected cold snaps. Frost pockets should be avoided, and utilizing slopes and raised beds can further enhance air circulation and warmth retention.

    Irrigation Schedules for Growing Passion Fruit from Seed

    When growing passion fruit from seed, consistent and appropriate watering is essential to establish a healthy maracuya vine. Young seedlings require a moist but well-drained environment to promote vigorous root development. During the initial stages, aim to water the plants lightly every two to three days, ensuring the soil remains damp but not waterlogged.

    As the passion fruit vine matures, the irrigation schedule can be adjusted based on climate and soil conditions. Generally, mature passion fruit vines benefit from deep watering once or twice a week, depending on rainfall and temperature. Deep watering encourages roots to grow deeper into the soil, enhancing drought tolerance. Avoid frequent shallow watering, which can cause the roots to remain near the surface and reduce the plant’s overall resilience.

    For gardeners cultivating passion fruit on a passion fruit trellis, irrigation techniques such as drip irrigation or soaker hoses are highly recommended. These methods deliver water directly to the root zone, minimizing water waste and reducing the risk of fungal diseases associated with wet foliage. Consistent moisture levels also support optimal passion fruit pollination by ensuring flowers develop properly and remain viable for pollinators like bees.

    Fertilizer N-P-K Ratios for Maracuya Vine Care

    Providing the right balance of nutrients is critical for vigorous growth and abundant fruit production when growing passion fruit from seed. Maracuya vines have specific nutrient requirements that change throughout their life cycle, particularly during flowering and fruiting stages.


    Early Growth Stage Fertilization (High Nitrogen)

    In the first six months after germination, focus on stimulating healthy vegetative growth by applying a fertilizer with a higher nitrogen (N) content relative to phosphorus (P) and potassium (K). An N-P-K ratio of approximately 10-5-10 is effective during this phase. Nitrogen encourages lush foliage development, which provides the necessary support for future flower and fruit production.

    Apply fertilizer every four to six weeks, incorporating it into the soil around the root zone to maximize uptake. Avoid excessive fertilizer application, which can lead to nutrient burn or promote excessive leaf growth at the expense of flowering.

    Flowering and Fruiting Stage Fertilization (Balanced N-P-K)

    Once the maracuya vine begins flowering, switch to a balanced fertilizer with a higher emphasis on phosphorus and potassium to support passion fruit pollination and fruit set. A typical N-P-K ratio for this stage is 8-15-30. Phosphorus promotes strong flower development, while potassium enhances fruit quality, size, and overall vine health.

    Fertilize every six to eight weeks during the growing season, reducing nitrogen slightly to prevent excessive vegetative growth that can shade flowers and reduce pollination efficiency. Using organic fertilizers like composted manure or well-balanced commercial blends can improve soil structure and microbial activity, further benefiting maracuya vine care.

    Micronutrient Supplementation

    In addition to primary macronutrients, ensure adequate levels of micronutrients such as magnesium, calcium, and iron. Deficiencies can result in poor passion fruit pollination and suboptimal fruit development. Conduct soil tests periodically to tailor micronutrient amendments and avoid imbalances.

    Pruning Techniques for Maximum Fruit Production

    Pruning is a key cultural practice in maracuya vine care that supports strong growth, improves air circulation, and maximizes passion fruit pollination and yield. Proper pruning also aids in managing the size and shape of the passion fruit trellis, making harvesting easier and more efficient.

    Initial Pruning whe you  Grow Passion Fruit from Seed

    When growing passion fruit from seed, prune seedlings once they reach a height of about 60 cm (24 inches). Pinching back the main stem encourages lateral branching, leading to a bushier vine with more potential flowering sites. This early pruning shapes the young plant for vigorous growth on its trellis.

    Training and Maintenance Pruning on the Passion Fruit Trellis

    As the maracuya vine grows, regular pruning is necessary to maintain an open canopy that allows sunlight penetration and air movement both critical factors for effective passion fruit pollination and disease prevention.

    • Remove Dead or Diseased Wood: Inspect the vine monthly and prune out dead, damaged, or diseased branches to maintain vine health.
    • Thin Excess Branches: Excessive branching can create too much shade, reducing flower production and limiting pollinator access. Remove weak or overcrowded shoots.
    • Encourage New Growth: Prune older woody stems annually during the dormant season to stimulate new growth from basal shoots, which tend to be more productive.
    • Control Vine Spread: Since passion fruit vines can become vigorous climbers, prune to keep the vine within the trellis structure, preventing tangling or overshadowing other plants.

    Post-Harvest Pruning

    After the fruiting season, conduct a thorough pruning to prepare the passion fruit vine for the next cycle. Cut back overly long or weak shoots to maintain the vigor of the plant. This renewal pruning encourages the development of strong new shoots that will support flower clusters in the coming season.

    Sunlit passion fruit (Passiflora edulis) hanging from lush green vines in a vibrant orchard setting.
    Sunlit passion fruit (Passiflora edulis) hanging from lush green vines in a vibrant orchard setting.

    Summary

    Implementing an effective irrigation schedule tailored to the developmental stage of your maracuya vine ensures consistent moisture that supports seedling establishment and mature fruiting. Use fertilizer formulations with the appropriate N-P-K ratios: higher nitrogen during early growth and balanced phosphorus and potassium during flowering and fruiting to maximize blossom formation, passion fruit pollination, and Great fruit quality. Regular, strategic pruning maintains an open canopy for air circulation, encourages fruitful lateral growth, and keeps the passion fruit trellis organized. Together, these practices form the foundation for successful maracuya vine care and abundant, flavorful passion fruit harvests.

  • How to Plant and Grow Ataulfo Mangoes: Complete Honey Mango Care Guide

    How to Plant and Grow Ataulfo Mangoes: Complete Honey Mango Care Guide

    Welcome to your ultimate resource for learning how to grow Ataulfo mango right at home. Whether you’re a curious gardener or an enthusiastic fruit grower, this guide will lead you through the essentials of nurturing this delightful tropical tree from its roots to its juicy fruits. We’ll traverse the botanical history, explore seedling selection, and dive deep into soil and climate needs. Get ready to embark on a gardening adventure!

    Fresh Ataulfo mango
    Fresh Ataulfo mango

    Understanding Ataulfo Mango: Origins, Traits & Growing Potential

    Botanical Background & History of Ataulfo Mango

    The Ataulfo mango, cherished for its honey-like sweetness and creamy texture, is more than just a tropical delicacy. It belongs to the species Mangifera indica, positioning it in the diverse spectrum of mango varieties. This particular cultivar, recognized for its golden color and petite kidney shape, owes its genesis to Mexican breeders.

    • Origin and Selection: Ataulfo mangoes trace their development back to Soconusco in Chiapas, where they were initially cultivated by Ataulfo Morales Gordillo. The naming pays homage to this pioneer grower. Known interchangeably as “Honey” or “Champagne” mango, this variant quickly earned prestige due to its disease tolerance and fiberless flesh, making it a sought-after choice for both commercial and small-scale growers.
    • Key Genetic Traits
      The Ataulfo’s genetic composition endows it with several desirable traits, including a compact growth habit conducive to dense planting and adaptability to various growing conditions. Its fiberless flesh adds to the appeal, ensuring a silky consumption experience that’s superior to many fibrous mango varieties.
    • Commercial Rise
      In recent decades, the Ataulfo has captured global markets. Its predisposition for vibrant coloring and outstanding flavor, coupled with its export-friendly nature (owing to firmness and transport resilience), enhances its appeal. This has spurred increased cultivation among small growers who value its consistent yield and growing familiarity.

    Choosing the Right Planting Method: Grafted Trees vs Seedlings

    Seed-Grown Ataulfo Mango: Pros, Cons & Genetic Reality

    If you’re considering starting Ataulfo mango trees from seeds, understanding the genetic implications is crucial. Ataulfo seeds are polyembryonic, meaning a single seed can produce multiple seedlings. Notably, at least one of these seedlings is genetically identical to the parent plant, offering a novel opportunity for preserving desirable traits.

    • Advantages of Seed Propagation
      Opting for seed-grown trees can be cost-effective and often facilitates availability, enabling easy dissemination of the plant across different regions. The robust root systems developed from seeds establish adaptability, especially in varying soil conditions, while contributing to outperformance in root vigor compared to grafted counterparts.
    • Disadvantages
      Despite these perks, seedlings may take longer to fruit, typically extending to several years. There’s also inherent unpredictability regarding the eventual fruit quality due to potential genetic diversity among seedlings.

    Climate Requirements & Site Selection

    Ideal Climate for Growing Ataulfo Mang

    The Ataulfo mango flourishes best in climates that mirror its native environment. Familiarity with these parameters will enhance your success rate in cultivating them:

    • Temperature and Humidity
      Native to Mexico’s tropical climate, Ataulfo mangoes thrive in temperatures ranging from 80°F to 100°F (27°C to 38°C). Maintaining high humidity levels is essential for optimal growth, mirroring the conditions found in its native range. However, caution is advised as temperatures dip toward winter; protecting the trees from cold snaps is imperative, with their lower threshold hovering around 30°F (-1°C).
    • Rainfall Patterns
      Adequate and strategically timed rainfall supports Ataulfo growth. Ideally, a balance is struck with dry conditions during flowering and fruit set to minimize fungal risks, contrasting with sufficient moisture levels around the growing season.
    Richard Campbell, senior vice president of global operations, checks Champagne (ataulfo) mangoes in Chiapas, Mexico.Photo courtesy of Ciruli Bros.)
    Richard Campbell, senior vice president of global operations, checks Champagne (ataulfo) mangoes in Chiapas, Mexico.| Picture by Ciruli Bros.

    Growing Ataulfo Mango Outside the Tropics: Zone-by-Zone Strategy

    Ataulfo mangoes can succeed beyond tropical regions with mindful site selection and protective measures:

    • USDA Zones 10–11
      These zones offer ideal conditions for unprotected outdoor growth of Ataulfo mangoes. Consistently warm temperatures and minimal frost risk render them conducive to year-round flourishing.
    • USDA Zone 9
      In these transitional zones, proactive measures like windbreaks and frost cloths during unexpected cold spells are recommended. Selecting microclimates within your garden—areas that trap heat better due to sun exposure or thermal mass from nearby structures—can also contribute to success.
    • USDA Zone 8b and Cooler Climates
      If you reside in climates pushing past Zone 9, consider container growing or greenhouse cultivation. Heated conservatories can extend the growing season, creating an artificial tropics to accommodate Ataulfo’s warmth desires.

    Selecting the Best Site in Your Garden

    Optimal site selection is foundational to mango cultivation success. Ensuring proper exposure and elements plays a pivotal role:

    1. Sun Exposure
      Ataulfo mangoes demand full sun, basking in a minimum of 8–10 hours of direct sunlight daily. This exposure is crucial for promoting robust flowering and the delectable sweet fruit that follows.
    2. Wind and Air Movement
      Moderate air circulation reduces disease pressure and supports dry conditions that mitigate pest proliferation. Nevertheless, strong winds may necessitate shielding to prevent flower and fruit drop, especially during vulnerable stages of fruit set.
    3. Microclimates and Proximity to Structures
      Clever use of your landscape’s microclimates enhances frost protection areas benefiting from reflected heat off walls can foster more favorable growth conditions, especially for marginal climates which are often compared to Tommy Atkins Mango.

    Stay tuned for the remaining sections of this guide, where we delve deeper into soil preparation, advanced care techniques, and tackling pest challenges for thriving Ataulfo mango cultivation!

     Ataulfo Mango Tree Care: Irrigation, Fertilization, and Pruning for Optimal Yield

    Honey Mango Step-by-Step Care Guide

    Proper  ataulfo mango tree care is essential to ensure your tree thrives and produces the signature sweet, buttery fruit that makes this variety a standout among sweet mango varieties. Whether you have an outdoor mango tree or are experimenting with growing mangoes in pots, understanding the right irrigation schedules, fertilizer N-P-K ratios, and pruning techniques is key to maximizing fruit production. This section provides detailed, actionable guidance to help your Ataulfo mango tree flourish.

    Irrigation Schedule for Ataulfo Mango Trees

    Understanding Water Needs

    Adequate watering is one of the most critical factors in ataulfo mango tree care. Mango trees are somewhat drought-tolerant once established, but consistent moisture during the growing season improves flowering and fruit set. Whether you are tending to a ground-planted mango or **growing mangoes in pots**, adjusting irrigation according to developmental stages will boost yield and fruit quality.

     Seasonal Watering Guidelines

    • Young trees (1-3 years old):  Require more frequent watering as their root systems are still developing. Water deeply 2-3 times per week during dry spells to keep the  mango tree soil moist but not soggy.
    • Mature trees: Once established, your Ataulfo mango tree needs watering about once a week during dry periods. Overwatering can lead to root rot and poor aeration, so always ensure the soil drains well.
    • Flowering and fruit setting stage: Increase watering slightly to encourage healthy blossom development and minimize flower drop. However, excess moisture can cause fungal issues, so balance is essential.

    Tips for Growing Mangoes in Pots

    Potted Ataulfo mango trees dry out faster than those in the ground due to limited soil volume. Water whenever the top inch of potting medium feels dry. Use containers with excellent drainage and consider a self-watering system during hot months to provide consistent moisture.

    Fertilizer N-P-K Ratios for Ataulfo Mango Tree Care

    Nutrient management is fundamental to maintaining healthy foliage, strong flowering, and bountiful fruit production. Selecting the correct fertilizer and applying it at the right times will prevent common deficiencies and support your tree’s vigorous growth.

    Recommended N-P-K Ratios

    Ataulfo mango trees respond well to balanced fertilizers, but the emphasis should shift through the growing season:

    Ataulfo Mango Recommended N-P-K Ratios
    Ataulfo Mango Recommended N-P-K Ratios

     Fertilizer Application Schedule

    • Early spring (pre-flowering): Apply a balanced fertilizer high in nitrogen (N) to stimulate leaf growth.
    • Flowering stage: Switch to a fertilizer with higher phosphorus (P) and potassium (K) ratios to promote blooms and fruit set.
    • Fruit development period: Increase potassium to improve fruit quality and storage life.
    • Late season or post-harvest: Apply a moderate balanced fertilizer to aid tree recovery.

     Organic and Supplemental Options

    In addition to synthetic fertilizers, incorporating organic matter like compost or well-rotted manure into the mango tree soil enriches microbial activity and nutrient availability. Foliar feeding with micronutrients such as magnesium, zinc, and boron can correct specific deficiencies common in mango cultivation and improve fruit quality.

    Pruning Techniques to Maximize Ataulfo Mango Fruit Production

    Pruning is often overlooked in home mango gardening but is critical for shaping the tree, enhancing air circulation, and increasing fruit yield. Proper pruning helps control tree size, making it easier to harvest especially when  growing mangoes in pots  or limited spaces.

    When to Prune

    • Post-harvest:  The best time to prune your Ataulfo mango tree is shortly after harvesting the fruit, usually late winter or early spring before new growth begins.
    • Light summer pruning:  Can be performed to remove dead or diseased branches and encourage lateral growth, but heavy pruning during flowering or fruiting is discouraged.

    Pruning Steps for Ataulfo Mango Tree Care

    1. Remove dead, damaged, or diseased wood: This reduces the risk of pest infestation and disease spread.
    2. Thin out crowded branches: Opening the canopy allows sunlight penetration and improves airflow, which helps prevent fungal infections.
    3. Cut back overly vigorous shoots: Mango trees often produce strong vertical shoots (“water sprouts”) that divert energy away from fruit production. Remove these to encourage lateral branch growth where flowers emerge.
    4. Shape the tree: Aim for a broad, open canopy with a central leader or vase shape. This architecture supports more flowering sites and simplifies fruit harvest.

     Special Considerations for Growing Mangoes in Pots

    Mango trees grown in containers tend to have restricted growth. Pruning helps maintain a manageable size while encouraging fruiting. Focus on removing suckers and maintaining a compact canopy. Annual pruning combined with repotting every 2-3 years ensures roots have enough space and nutrients.

    Pruning Steps for Ataulfo Mango Tree Care
    Good Pruning Guide for Ataulfo Mango Tree Care

    Integrating Ataulfo Mango Tree Care Practices for Healthy Growth

    Combining the right irrigation schedule, balanced fertilization, and strategic pruning will keep your Ataulfo mango tree vigorous and prolific. Remember, healthy soil conditions, proper drainage, and monitoring for pests complement these practices.

    By tailoring watering routines based on growth phases, applying the proper N-P-K ratios aligned with the tree’s nutrient demands, and employing pruning techniques that focus the tree’s energy toward fruit production, you can enjoy abundant Ataulfo mango harvests. These techniques also extend the lifespan of your tree and enhance its resilience against common tropical horticultural challenges.

     Summary Checklist for Ataulfo Mango Tree Care

    • Irrigation: Water 2-3 times weekly for young trees; reduce to weekly for mature trees; increase slightly during flowering.
    • Fertilization:  Use 8-3-9 during vegetative growth; switch to 6-12-12 at flowering; and apply 5-10-15 for fruit maturation.
    • Pruning: Prune after harvest; remove diseased and crowded branches; shape canopy for light and airflow; control “water sprouts.”
    • Growing in pots: Monitor soil moisture closely; use nutrient-rich compost; prune regularly to control size.

    Mastering these cultural care elements will position your Ataulfo mango tree for a robust, delicious yield, whether you cultivate it in your backyard garden or a container patio setup. Enjoy the sweet rewards of your efforts with this prized member of the sweet mango varieties!

  • How to Plant, Grow, and Care for Purple Dragon Fruit The Complete Guide

    How to Plant, Grow, and Care for Purple Dragon Fruit The Complete Guide

    How to Grow Purple Dragon Fruit (Hylocereus costaricensis)

    So, you’ve decided to embark on an adventure into the vibrant world of purple dragon fruit cultivation. That’s fantastic! Let’s delve into this captivating plant’s intriguing botanical history, advise on selecting the perfect seedlings, and intensely discuss how climate and soil affect its growth.

    Purple Dragon Fruit (Red Pitaya) | Hylocereus costaricensis
    Purple Dragon Fruit | Hylocereus costaricensis

    Botanical Background & History of Purple Dragon Fruit

    Taxonomy and Species Overview

    Purple dragon fruit, often referred to as pitaya or pitahaya, is a fascinating member of the cactus family. At its core, we’re dealing with cactus species within the Hylocereus genus although recent taxonomic adventures have seen some reclassified under Selenicereus. The purple-fleshed varieties are a particularly captivating subset, with popular cultivars like ‘Purple Haze’, ‘American Beauty’, and ‘Physical Graffiti’. These varieties boast unique flavor profiles and dazzlingly vibrant interiors. Importantly, they can be self-fertile or self-sterile, a critical consideration for growers with limited space or interest in hands-on pollination, check the other grow guides at our Eco garden plant library.

    Purple Dragon Fruit vs. Red Dragon Fruit: Are They the Same?

    Yes, purple dragon fruit and red dragon fruit represent the exact same fruit category. Botanists classify both as red-fleshed pitaya (Hylocereus costaricensis or Selenicereus guatemalensis).

    While agricultural growers sometimes draw minor distinctions based on exact pigment shades, these fruits share identical flavor profiles, physical characteristics, and health benefits.

    Here is how these red-fleshed pitaya varieties break down:

    • Physical Appearance: You can easily identify both varieties by their striking pink-to-red scaly outer skin. When you cut them open, they reveal a vivid magenta, fuchsia, or deep red center speckled with tiny, edible black seeds.

    • Flavor Profile: Consumers enjoy a sweet, refreshing taste that blends the flavor notes of kiwi, pear, and grape. As a general rule, red and purple pitayas taste significantly sweeter than the white-fleshed varieties.

    • Nutritional Value: These fruits deliver exceptional health benefits. A powerful antioxidant called betalain produces the vibrant red and purple pigments. Furthermore, a single serving provides abundant dietary fiber, iron, and magnesium to support a healthy diet.

    Native Habitat and Natural Ecology

    Hailing from the tropical dry forests stretching from Central to South America, purple dragon fruit has some impressive survival tactics. It thrives as both an epiphyte and lithophyte, meaning it can elegantly scramble over trees or rugged rocks. This adaptive growth habit equips it to withstand harsh environmental conditions including punishing heat, prolonged droughts, and sun-drenched days typical of its native habitats.

    Global Spread and Modern Cultivation

    Our purple protagonist has transcended its native roots, marking its presence across continents most notably throughout Asia in nations like Vietnam, Thailand, and Taiwan. The journey didn’t stop there; it’s now an agricultural star in Israel, Australia, Southern Europe, and subtropical regions of the USA, such as Florida, California, Texas, and Hawaii. Commercially, breeding programs have honed in on optimizing color vibrancy, sweetness, and shelf life, expanding the fruit’s culinary and market appeal.

    Botanical Features Relevant to Growers

    From a structural perspective, these climbing cacti are architecturally fascinating. They boast segmented stems that are triangular in shape, complete with aerial roots that aid in their climbing ascents. Their aptitude for CAM photosynthesis allows them to maximize water use efficiency—saving water by closing stomata during the day. Flower biology is another compelling aspect, as these plants produce majestic nocturnal blooms reliant on specialized pollinators such as moths and bats. Understandably, these features dictate a grower’s approach to pruning, providing structural support, and facilitating pollination. After pollination, you must anticipate a specific timeline from flowering to fruit maturation, influencing harvesting strategies.

    A woman harvesting dragon fruit in a field | Picture by ROMAN ODINTSOV
    A woman harvesting dragon fruit in a field | Picture by ROMAN ODINTSOV

    Choosing the Right Purple Dragon Fruit Variety

    Popular Purple-Fleshed Cultivars

    Among the delectable purple-fleshed cultivars, ‘Purple Haze’ shines with robust growth vigor and distinctive flavor. ‘American Beauty’ dazzles with its intense color and commendable sweetness. The ‘Physical Graffiti’ and other hybrids add variety to the table with differing growth habits and productivity metrics. Understanding their unique needs concerning pollination and environmental adaptations is crucial in selecting the right match for your growing conditions.

    Matching Varieties to Your Climate and Space

    Not every cultivar will thrive everywhere; some are ideally adapted to cool-summer climates, while others flourish in hot-desert conditions. If you’re considering container gardening or have limited space, prioritize compact or self-fertile varieties to simplify cultivation and increase success rates.

    Where to Source Quality Planting Material

    When you’re on the hunt for quality seedlings or cuttings, looking beyond the appealing storefront of a big-box store is often wise. Instead, seek out reputable nurseries or experienced online sellers who specialize in dragon fruit. Their plant stock tends to have stronger genetics and fewer identity mishaps. Remember, choosing between cuttings, grafted plants, and seedlings is pivotal—each carries different benefits, from vigor in grafted forms to cost-effectiveness in seed-propagated plants.

    Climate and Hardiness

    Ideal Temperature, Light, and Humidity

    You’re diving into a world where temperature, light, and humidity converge to power dragon fruit’s growth. Aim for a sweet spot with daytime temperatures hovering around 65°F to 85°F (18°C to 29°C). The boundaries can be stretched, but anything below 32°F (0°C) or above 100°F (38°C) can damage your plant. Full sun reigns supreme, although filtered light may suffice in regions where the intensity is overwhelming. Humidity plays its part, too—a moderate range helps limit disease likelihood, especially those borne from excessive moisture.

    USDA Hardiness Zones 9-11

    For those nestled in the balmy retreats of USDA Hardiness Zones 9 to 11, you’re in for a treat. These zones cater beautifully to dragon fruit, with their mild winters and hot, languid summers. Outside these zones? Fear not! Consider growing in containers for easy relocation to sheltered spots or employing greenhouses and polytunnels to buffer against temperature extremes. Microclimate optimization, through clever utilization of walls as windbreaks or reflective surfaces to amplify sunlight, can transform marginal conditions into thriving success.

    Photoperiod and Flowering Behavior

    Unlike many plants swayed by day length, dragon fruit dances primarily to the tunes of temperature and plant maturity when it comes to flowering. Typically blooming occurs as the weather warms, with a lively succession of flowerings—known as flushes—that seasonally pepper the landscape. The number and vigor of these flushes hinge partly on climate, an aspect worth noting when scheduling your horticultural calendar.

    Soil Chemistry and Growing Medium

    To properly cater to your dragon fruit’s needs, let’s dig a little deeper into soil selection and preparation (we’ll leave this as a teaser for our continuation!). Your choice here can make a substantial difference in root development, nutrient uptake, and overall health of your plants.

    We’ve now laid the vital groundwork of climate and hardiness, preparing you to dive into dragon fruit cultivation with informed enthusiasm. The nuances of taxonomy, optimal variety selection, and climate adaptability are your keys to a fruitful—pun fully intended—endeavor. Stay tuned as we unravel more secrets in the cultivation saga of the purple dragon fruit!

    Irrigation Schedules for Growing Pitaya from Seed

    When growing pitaya from seed, establishing a consistent and appropriate irrigation schedule is crucial for developing a healthy plant that can produce abundant purple dragon fruit varieties. Young seedlings have delicate root systems that require evenly moist soil without becoming waterlogged, as overly saturated conditions can lead to root rot and fungal diseases.

    Watering Frequency

    • Seedlings: After germination, water the seedlings lightly every 2-3 days to maintain soil moisture in the upper 1-2 inches. Use a gentle watering method such as a spray bottle or drip irrigation to avoid dislodging seeds or seedlings.
    • Juvenile Stage: As the plants mature (6-12 months), increase watering frequency to 2-3 times per week depending on temperature and humidity.
    • Established Plants: Mature pitaya plants, especially when trained on dragon fruit trellis ideas, require deep watering about once a week during dry periods. Thoroughly saturate the soil to a depth of at least 12 inches to encourage robust root development.

    Monitoring Soil Moisture and Adjusting Irrigation

    Maintaining the ideal dragon fruit soil pH (around 6.0 to 7.0) helps optimize nutrient uptake and water retention capacity. Use a moisture meter or simply check the soil by hand to ensure it remains consistently moist but not soggy. During rainy seasons or cooler temperatures, reduce watering frequency accordingly.

    Mulching around the base of the plant also minimizes moisture evaporation and regulates soil temperature, promoting healthier root growth essential for maximum fruit production.

    Fertilizer N-P-K Ratios for Purple Dragon Fruit Varieties

    Nutrient management plays a pivotal role in the health and productivity of purple dragon fruit varieties. When growing pitaya from seed, applying appropriate fertilizers with balanced N-P-K ratios ensures strong vegetative growth, enhanced flowering, and robust fruit development.

    Fertilizer Recommendations by Growth Stage

    • Seedling Stage: Use a balanced fertilizer with an N-P-K ratio of 10-10-10 at ¼ strength every 4 weeks to avoid nutrient burn. This encourages balanced root and shoot development.
    • Vegetative Growth: For established plants during active growth periods, apply a fertilizer with a higher nitrogen content such as 12-6-6 or 10-5-10. Nitrogen encourages the production of vigorous stems and fleshy cladodes necessary for photosynthesis.
    • Flowering and Fruiting: Switch to a fertilizer rich in phosphorus and potassium like 5-15-15 or 8-24-24 once flower buds appear to boost flower retention and fruit size. Phosphorus supports bloom development while potassium strengthens fruit quality and plant immunity.
    Fertilizer Ratios Guide for Purple Dragon
    Fertilizer Ratios Guide for Purple Dragon| Eco Garden Hub

    Application Tips

    1. Fertilize every 6-8 weeks during the growing season, reducing frequency in cooler months when plant growth slows.
      – Use slow-release granules or dilute water-soluble fertilizers to prevent nutrient leaching, especially in sandy or well-draining soils.
    2. Foliar feeding with a diluted micronutrient spray containing iron, magnesium, and calcium can correct deficiencies and improve overall plant vigor.

    Regularly monitor leaf color and growth patterns to adjust fertilizer regimes as necessary. Over-fertilizing, particularly with nitrogen, may increase vegetative growth at the expense of fruit production.

    Pruning Techniques for Maximum Fruit Production

    Pruning is a vital cultural practice for optimizing sunlight exposure, airflow, and energy allocation in purple dragon fruit varieties. Proper pruning leads to healthier plants, easier management on a dragon fruit trellis, and significantly increased fruit yields.

    When to Prune

    • Perform major pruning after the harvest season, typically in late winter or early spring before the new growth flush.
    • Light pruning can be done throughout the growing season to remove dead or damaged stems and manage excessive growth.

    Pruning Steps and Tips

    1. Remove Dead and Diseased Cladodes: Identify and cut out any stems that show signs of rot, pests, or fungal infections. Use sterilized pruning shears and dispose of removed material to prevent disease spread.
    2. Thin Out Crowded Stems: Thin overcrowded stems to enhance airflow and light penetration, reducing the risk of fungal diseases and encouraging uniform flower development.
    3. Shorten Long Stems: Cut back overly long branches to 12-15 inches to promote lateral branching. These side branches will produce more fruiting sites the following season.
    4. Maintain Structure: When growing pitaya on a trellis, prune to maintain an open “Y” or “T” shape framework for easier harvesting and support. Removing weak or unproductive stems directs the plant’s energy towards fruit production on main branches.
    5. Pinching Tips: Pinch the growing tips of vigorous new shoots during the active growing season to stimulate branching and increase the number of flowering sites.

    Tools and Care

    • Always use clean, sharp tools to make smooth cuts.
    • Apply a fungicide or sealant to large pruning wounds if necessary to prevent infections.
    • Monitor the plants closely after pruning for any signs of stress.
    Smiling woman holding dragon fruit in a lush green farm | Lan Anh Hoàng
    Smiling woman holding dragon fruit in a lush green farm | Lan Anh Hoàng

    Integrating Dragon Fruit Trellis Ideas for Improved Irrigation and Pruning

    Employing effective dragon fruit trellis ideas enhances both irrigation efficiency and pruning outcomes. Vertical supports increase air circulation, facilitate sunlight access, and allow even water distribution to each plant.

    Popular trellis designs include:

    • T-post with Wire Supports: Durable and simple to build, facilitating easy pruning access.
    • Vertical Poles with Horizontal Crossbeams: Supports the plant’s weight and allows systematic pruning of side branches.
    • A-frame or Ladder Style Trellises: Great for maximizing space and promoting airflow.

    Incorporating drip irrigation lines along the trellis ensures water is delivered directly to the root zone while keeping stems dry, minimizing disease risk.

    Conclusion

    Optimizing irrigation schedules, applying precise fertilizer N-P-K ratios, and adopting effective pruning techniques are foundational elements for successfully growing pitaya from seed, especially when cultivating purple dragon fruit varieties. Understanding and managing dragon fruit soil pH alongside the use of strategic dragon fruit trellis ideas will further support healthy growth and maximize fruit production in your home garden.

  • Japanese Garden Design Ideas: Master Zen Elements & Plants

    Japanese Garden Design Ideas: Master Zen Elements & Plants

    The Core Philosophy of Japanese Garden Design

    Authentic Japanese garden design ideas do not simply replicate a visual style; they embody a profound philosophical tradition rooted in Zen Buddhism and Shintoism. Western landscapes often conquer nature, forcing geometric symmetry and overwhelming the eye with a riot of colorful blooms. In contrast, Japanese garden design actively distills nature to its purest essence. Designers strip away the superfluous to create an environment that encourages mindfulness, reflection, and a deep connection to the natural world. This approach requires extreme intentionality. Every rock, branch, and pathway serves a specific purpose, contributing to a harmonious ecosystem rather than a mere collection of attractive plants.

    To master this discipline, you must stop viewing the garden as an empty canvas to fill. Instead, treat it as a living sculpture where you carefully reveal the underlying structure of the natural world.

    Balancing the Elements: Earth, Water, and Sky

    A successful Japanese garden thrives on the delicate balance of three primary forces: earth, water, and sky. Earth anchors the design. You represent earth through heavy, immovable elements like boulders, gravel, and the topography itself. These elements provide a sense of permanence and grounding. Water introduces the necessary dynamic energy. Whether you incorporate a flowing stream, a placid koi pond, or the symbolic ripples raked into a dry gravel bed, water represents the continuous flow of life and time.

    The sky represents the infinite. You invite the sky into the garden through careful framing—using overhanging branches or architectural eaves to draw the eye upward and expand the perceived boundaries of the space. When you balance these three forces correctly, the garden ceases to feel like a constructed plot of land and instead feels like a naturally occurring microcosm of the broader universe.

    The Power of Ma (Negative Space) in Modern Landscapes

    If Western gardens fear emptiness, Japanese gardens revere it. This reverence manifests in the concept of Ma, which translates to “gap,” “space,” or “pause.” In a negative space landscape, the empty areas hold as much structural weight as the physical objects. Ma is the quiet breath between musical notes; it is the undisturbed expanse of white gravel that makes a single, moss-covered boulder look magnificent.

    Modern landscape designers use Ma to combat the visual clutter of urban living. By deliberately leaving large sections of the garden unplanted and unpaved, you give the viewer’s eyes a place to rest. You force attention onto the few, highly curated elements you do include. To effectively wield Ma, resist the urge to fill every corner. Let a sweeping bed of raked sand or a low, unbroken carpet of moss define the space. The emptiness creates the serenity.

    Essential Elements of an Authentic Japanese Garden

    Moving from philosophy to physical execution requires a strict vocabulary of materials. Authentic Zen garden elements rely heavily on raw, unpolished nature. You will rarely find painted surfaces, symmetrical concrete casting, or plastics in a traditional layout.

    Stone Arrangements and Rock Formations (Asymmetry Rules)

    Stones form the skeletal structure of the garden. Long before you plant a single fern, you must establish the “bones” of the landscape through Ishi-gumi (the art of stone setting). Designers select stones for their character, weathering, and patina. You never place rocks in straight lines or symmetrical pairs. Instead, you arrange them in asymmetrical groupings, most commonly in odd numbers like three, five, or seven.

    Asymmetric Stone Arrangements and Rock Formations
    Japanese Asymmetric Stone Arrangements and Rock Formations

    The classic triad arrangement features one tall, dominant vertical stone (representing heaven or a mountain peak) flanked by two smaller, subordinate stones (representing humanity and earth). Bury at least one-third of every stone in the soil. This technique, known as “rooting,” convinces the viewer that the rock is a natural outcropping erupting from the earth, rather than a loose boulder dropped on the surface.

    Water Features: From Tsukubai Basins to Shishi-odoshi (Deer Scarers)

    Water introduces sound, movement, and life. Even in small spaces, water plays a critical purifying role. Many gardens feature a Tsukubai, a low stone water basin originally used by guests to wash their hands and mouths before participating in a traditional tea ceremony. You place the basin low to the ground, forcing the visitor to physically bow and humble themselves to use it.

    rocks-and-trees-around-stream Japan garden Design
    rocks-and-trees-around-stream Japan garden Design

    For kinetic energy, nothing beats the iconic Shishi-odoshi (deer scarer). Originally designed by farmers to frighten grazing animals away from crops, this device features a hollow bamboo tube operating on a pivot. Water slowly fills the upper tube. Once the weight tips the balance, the tube drops, spills the water, and the heavy bottom end strikes a stone base with a sharp, rhythmic clack. In modern Zen gardens, this sound marks the passage of time and creates a startling contrast that deepens the surrounding silence.

    Architectural Accents: Stone Lanterns, Bridges, and Bamboo Fencing

    Architectural elements serve as human touches that guide the viewer through the naturalistic landscape. Stone lanterns (Tōrō) originally lined the paths to Buddhist temples to light the way. In a garden setting, you place them strategically near water basins, at path intersections, or partially hidden by foliage to draw the eye deeper into the landscape.

    Architectural Accents: Stone Lanterns, Bridges
    Architectural Japanese Design | picture by Gera Cejas

    Bridges (Hashi) connect different zones of the garden and force visitors to slow down. An arched bridge requires careful footing, breaking your normal walking rhythm and forcing you to look closely at your surroundings. Finally, you enclose the garden using bamboo fencing (Takegaki). Bamboo provides a natural, visually soft barrier that blocks out the chaotic modern world while maintaining an organic aesthetic that complements the internal plantings.

    Selecting Authentic Japanese Garden Plants

    While Western gardens celebrate the ephemeral beauty of spring and summer blooms, Japanese gardens prioritize year-round structure. The botanical palette emphasizes varied shades of green, subtle textures, and architectural silhouettes. Restraint dictates your choices; you select Japanese garden plants for their longevity and form rather than a brief explosion of color.

    Structural Trees: Japanese Maples (Acer palmatum) and Black Pines

    Trees anchor the garden’s visual weight. The Japanese Maple (Acer palmatum) provides delicate, lacy texture and acts as the primary source of seasonal transition. Designers position maples where their spectacular autumn foliage—burning reds, fiery oranges, and deep purples—can reflect in a water feature or contrast sharply against a dark evergreen backdrop.

    Red Dragon Japanese Maple Tree |Acer palmatum dissectum 'Red Dragon'
    Red Dragon Japanese Maple Tree |
    Acer palmatum dissectum ‘Red Dragon’

    Japanese Black Pines (Pinus thunbergii) represent longevity and endurance. These rugged evergreens withstand harsh coastal winds in nature, and in the garden, they provide masculine, bold energy. You use pines to frame specific views or to serve as a solitary focal point in a dry gravel landscape.

    Potted japanese black pines | Picture by Zaaran S
    Potted japanese black pines | Picture by Zaaran S

    Groundcovers and Textures: Moss Alternatives for Low-Moisture Zones

    Moss (Koke) thrives in the humid climate of Kyoto, blanketing the ground in a velvet layer that absorbs sound and softens the hard edges of stone. However, attempting to cultivate traditional moss in arid or heavily sunlit climates often ends in failure.

    To achieve that seamless, rolling green aesthetic in low-moisture zones, designers use drought-tolerant moss alternatives. Irish Moss (Sagina subulata), creeping thyme, or dwarf mondo grass (Ophiopogon japonicus ‘Nana’) mimic the visual texture of traditional moss while surviving harsher conditions. These groundcovers tie the disparate elements of the garden together, acting as the green glue that unites stones, trees, and pathways into a single cohesive landscape.

    Pruning Styles: The Art of Niwaki (Cloud Pruning)

    In a Japanese garden, you do not let trees grow wild; you sculpt them. Niwaki (often translated as “garden tree”) refers to the highly skilled art of shaping trees to emphasize their character and mimic the weathered, dramatic shapes of ancient trees growing in harsh natural conditions.

    The Art of Niwaki (Cloud Pruning) | Picture by |雄一 田山
    The Art of Niwaki (Cloud Pruning) | Picture by |雄一 田山

    Unlike topiary, which forces plants into unnatural geometric shapes, Niwaki distills the tree’s natural essence. The most famous technique, “cloud pruning,” involves stripping bare the lower branches and tightly clipping the foliage at the branch tips into flat, undulating pads that resemble drifting clouds. This intense, calculated pruning forces forced perspective, making a relatively young tree appear ancient and weathered by centuries of wind and snow.

    Designing for Perspective and Borrowed Scenery (Shakkei)

    A masterfully designed Japanese garden rarely reveals itself all at once. It unfolds sequentially, inviting exploration and rewarding careful observation. Spatial planning relies heavily on manipulating the viewer’s perspective and blurring the lines between the garden and the world beyond it.

    How to Create a Zen Walkway Using Stepping Stones (Tobi-ishi)

    Pathways dictate the visitor’s physical and emotional journey. The Tobi-ishi (flying stones) walkway uses flat stepping stones set slightly above the soil or gravel. Tea masters originally developed these paths to keep guests’ kimono hems clean, but they serve a deeper psychological purpose.

    Creating a japanese Zen Walkway
    Creating a japanese Zen Walkway

    Because the stones are unevenly spaced and require focus to navigate, they force you to look down, effectively bringing you into the present moment. When the designer wants you to stop and admire a specific view—perhaps a carefully framed maple or a stone lantern—they will place a wider, flatter “resting stone.” By controlling your physical cadence, the Tobi-ishi path controls your mental state, transitioning you from the rush of daily life into the tranquility of the garden.

    Small Yard Optimization: Creating a Courtyard Garden (Tsuboniwa)

    You do not need an expansive estate to implement Japanese garden design ideas. At Eco garden, The Tsuboniwa is a traditional courtyard garden designed for incredibly tight spaces often less than a few square meters between the rooms of a traditional merchant house.

    To build a successful Tsuboniwa, you must aggressively edit your elements. Select one focal point—a single, beautifully shaped Niwaki tree, a weathered stone basin, or a solitary lantern. Surround this focal point with shade-tolerant ferns or moss, and lay a bed of dark river stones or white gravel. Because walls enclose the Tsuboniwa on multiple sides, it acts as a private, open-air skylight that draws natural light, rain, and fresh air into the center of the home.

    Designing for Perspective and Borrowed Scenery (Shakkei)

    When space allows, designers employ the brilliant optical illusion of Shakkei (borrowed scenery). This technique incorporates distant background features—such as a mountain peak, a neighboring forest canopy, or a distant architectural structure—into the composition of the garden itself.

    To execute Shakkei, you manipulate the garden’s boundaries. You prune your foreground trees to frame the distant mountain, or you design your boundary wall just low enough to hide the modern road but high enough to seamlessly blend your garden’s foliage with the distant tree line. By capturing the background and pulling it visually into the foreground, Shakkei makes a modest garden feel infinitely expansive, effectively stealing the horizon to serve your design.

    How to Model a Japanese Garden Using AI Landscape Tools

    Historically, planning a Japanese layout required years of apprenticeship and meticulous hand-drawn elevations. Today, you can leverage advanced AI landscape tools and CAD software to visualize complex concepts before moving a single rock.

    Tools like Remodel Ai App with rendering plugins, or specialized AI landscape generators (such as iScape or Midjourney for conceptualization), allow you to mock up stone arrangements and test water feature placements instantly. You can input your yard’s exact dimensions and run sun-path simulations to ensure your Japanese maples receive adequate afternoon shade while your pines get full sun.

    Japanese Garden Using Remodel AI Landscape
    Japanese Garden Using Remodel AI Landscape

    More importantly, AI tools help you solve the geometry of Ma. By rendering the space from multiple eye-level perspectives—such as the view from the living room window or the tea house bench—you can adjust the negative space and perfectly align your borrowed scenery (Shakkei) before breaking ground.

    Maintenance Reality Check: Keeping Clean Lines Sharp

    The ultimate paradox of a Japanese garden is that its natural, effortless appearance requires relentless, artificial control. A Zen landscape is not a low-maintenance install-and-forget project. It demands an ongoing conversation between the gardener and the environment.

    Gravel requires weekly raking to maintain the crisp, fluid lines that represent water ripples. Weeds will ruthlessly invade your moss beds or gravel seas, necessitating meticulous hand-pulling—chemical herbicides often ruin the delicate pH balance needed for moss to thrive. Your Niwaki pines and maples demand bi-annual structural pruning to maintain their scale and architectural forms.

    However, within the philosophy of Zen, this maintenance is not a chore. The act of raking the gravel, plucking the weeds, and sweeping the fallen leaves becomes an active meditation. The process of maintaining the garden’s clean lines is precisely what sharpens the mind of the gardener.