Day: July 17, 2026

  • How to Grow Pomegranate From Seed (Step-by-Step)

    How to Grow Pomegranate From Seed (Step-by-Step)

    Next time you crack open a pomegranate and scoop out those glittering, jewel-red arils, remember this: hiding inside each one is a seed that can become a whole tree. Learning how to grow pomegranate from seed is one of the most rewarding and genuinely easy, propagation projects a home gardener can try, turning a snack into a beautiful, long-lived fruit tree.

    Let’s be honest and encouraging in equal measure. Pomegranates are famously tough, sun-loving, drought-tolerant plants, and their seeds sprout readily with almost no fuss. The one caveat every good guide should share up front: seed-grown pomegranates don’t always match the fruit they came from. But with the right starting fruit and a little patience, you can grow a gorgeous tree with fiery orange-red blossoms and, in time, your own homegrown pomegranates. Here’s exactly how.

    Can You Grow a Pomegranate From Seed?

    Yes, you can grow a pomegranate from seed, and it’s one of the easiest fruit trees to start this way. Clean the seeds of all pulp, germinate them somewhere warm, and pot up the sprouts. Seeds sprout within a few weeks, and a seed-grown tree typically fruits in about three to five years. Just know that most store pomegranates are hybrids, so seedlings may produce fruit that differs from the parent.

    Think of seed-growing as a fun experiment with a beautiful guaranteed outcome (a striking ornamental tree) and a bonus possible outcome (delicious fruit). To improve your odds of tasty results, start with a large, sweet, ripe pomegranate, good parents tend to give good offspring.

    It’s worth understanding why seedlings vary. Pomegranate growers who want an exact copy of a known variety usually propagate from cuttings, which produce a clone of the parent. Seeds, by contrast, mix the genetics and can throw surprises, smaller or larger fruit, sweeter or more tart. That unpredictability is exactly how many of the world’s 500-plus named pomegranate cultivars first came to be, so a seed-grown tree isn’t “worse”, it’s just its own unique plant. If you specifically want fruit identical to a favorite variety, buy a nursery tree or take cuttings; if you love a bit of botanical adventure, seeds are a delight.
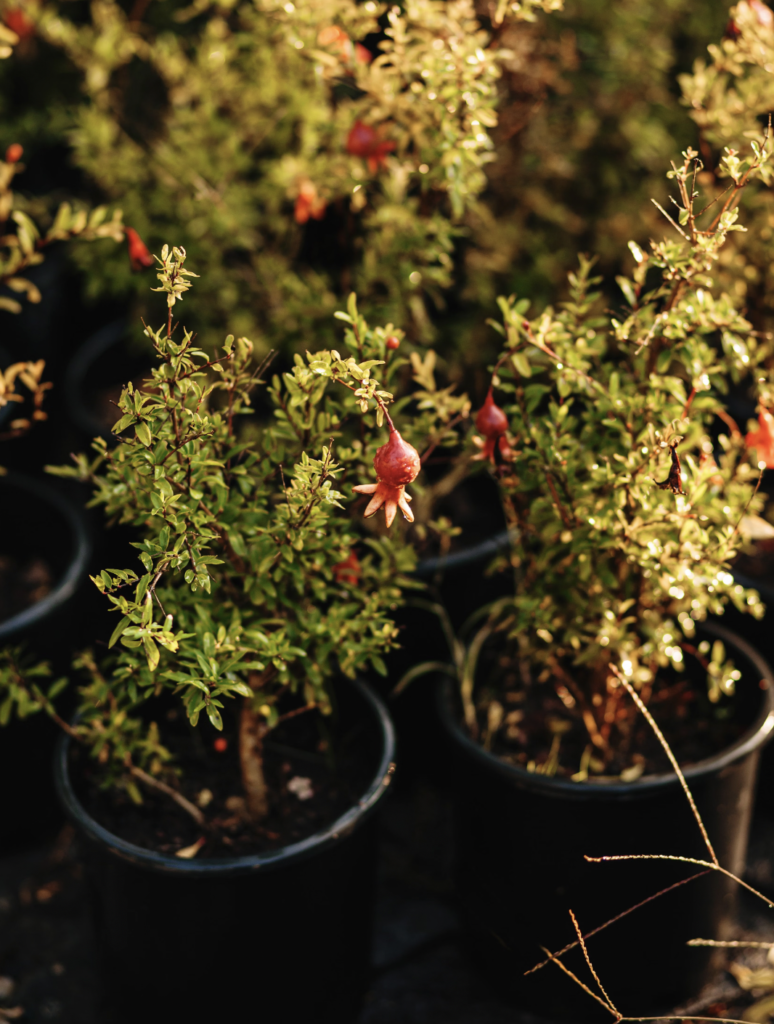
    Close-up of potted pomegranate plants in a garden, with bright fruit and lush foliage
    Close-up of potted pomegranate plants in a garden, with bright fruit and lush foliage

    Meet the Pomegranate (Punica granatum)

    The pomegranate (Punica granatum) is a deciduous shrub or small tree that has been cultivated across the Middle East, Mediterranean, and beyond for thousands of years. It’s a genuinely hardy, adaptable plant that revels in heat and sunshine, tolerates drought once established, and even shrugs off salty and poor soils that defeat fussier fruit.

    Beyond the famous fruit, with its leathery skin packed full of juicy, antioxidant-rich arils, the pomegranate is a knockout ornamental. Each year it produces vivid orange-red, trumpet-shaped flowers, followed by fruit that ripens in fall. Left to its own devices it grows into a rounded, multi-stemmed shrub of about 12 to 20 feet, but it takes beautifully to pruning and to container growing, and dwarf varieties stay small enough for a patio pot. Remarkably, a well-tended pomegranate can live for many decades.

    Pomegranate Zones: Where Pomegranates Grow

    Knowing your pomegranate zones helps you decide whether to grow yours in the ground or in a movable pot. Pomegranates grow best outdoors in USDA Hardiness Zones 8 to 11, thriving in hot, sunny, Mediterranean and mild-desert climates. In the US, that makes California, the Southwest, Texas, and the warmer South ideal for in-ground trees.

    If your winters dip much below about 20°F, don’t count yourself out, simply grow your pomegranate in a container you can move indoors for the coldest months. Some cultivars are more cold-hardy than others, so it’s worth checking the variety, and keeping an eye on your first and last frost dates helps you time winter protection. Gardeners in warmer areas can consult our USDA Zone 9 gardening guide for growing pomegranates outdoors year-round. Whatever your zone, one rule holds: pomegranates need real heat and full sun to fruit well, so give them the hottest, brightest spot you have.

    A quick word on varieties, since they affect both flavor and hardiness. ‘Wonderful’ is the classic large, tart-sweet commercial pomegranate you’ll recognize from the grocery store, while ‘Angel Red’ and ‘Parfianka’ are prized for sweetness and juice. Cold-climate gardeners often seek out hardier selections like ‘Salavatski’ (sometimes sold as ‘Russian 26’) and ‘Kazake’, which tolerate more cold than most. And for containers or small spaces, the dwarf ‘Nana’ is a compact charmer that flowers freely, though its small fruits are more ornamental than eating-quality. When you grow from seed you won’t know exactly what you’ll get, but knowing these named types helps you pick a good parent fruit to start with.
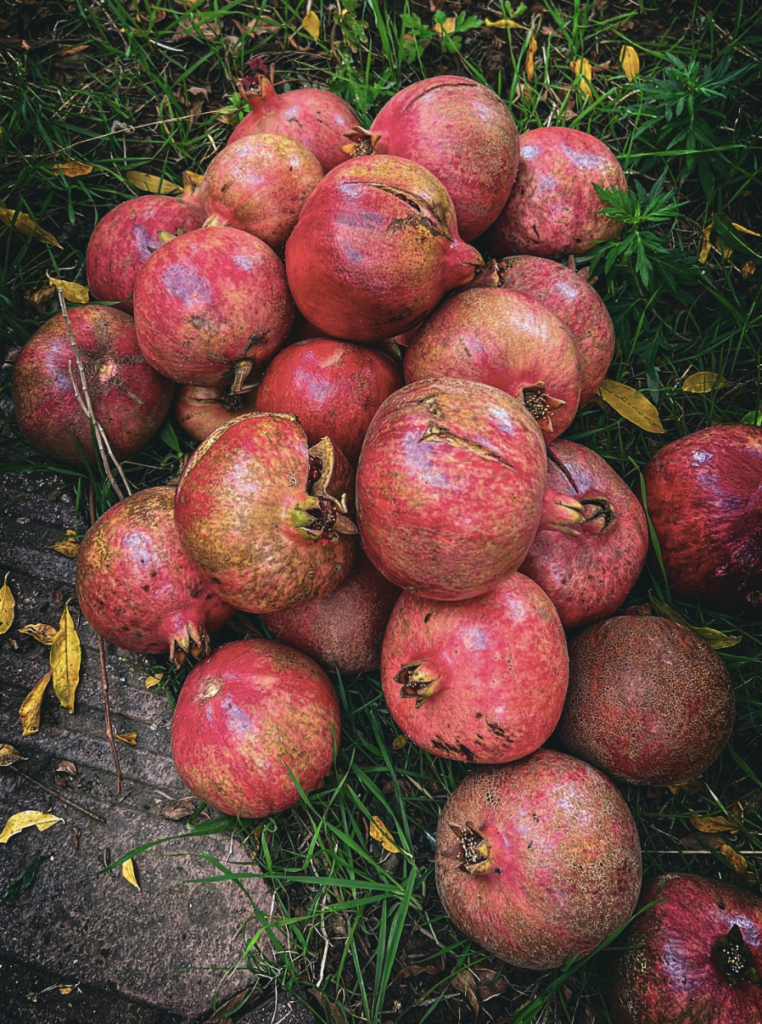
    A pile of ripe pomegranates on green grass, showcasing fresh fruit harvest
    pile of ripe pomegranates | Eco Garden Hub

    How to Grow Pomegranate From Seed: Step-by-Step

    Here’s the full process, from fruit to seedling. The active work takes only a few minutes.

    • Step 1: Choose a Big, Sweet, Ripe Pomegranate

    Because seedlings tend to resemble their parent, start with the best fruit you can find: a large, deep-red, fully ripe pomegranate with sweet, juicy arils. Inside, look for plump, firm seeds that are white or cream-coloured; green soft seeds aren’t mature enough to sprout well.

    • Step 2: Extract and Clean the Seeds

    Score the skin along the fruit’s natural ridges and pry it open, then scoop out the arils. Now do the most important part: remove every bit of the juicy red pulp from around each seed. Rinse the seeds in cool water and rub them gently with a paper towel, some gardeners even squish them lightly against the towel until the hard inner seeds are clean. Leftover pulp invites rot, so be thorough. Let the cleaned seeds air-dry for a few hours. Soaking them in water overnight beforehand can help soften the coating and speed germination.

    • Step 3: Germinate the Seeds

    You have two easy, reliable methods:

    • The potting method: Fill small, well-draining pots with light seed-starting mix. Sow two to three seeds per pot about a quarter-inch deep, mist to moisten, and place somewhere warm (around 70–80°F) and bright. Keep the soil lightly moist. Warmth and light are everything here. A sunny windowsill or a grow light setup with 10 or more hours of light dramatically speeds things up.
    • The baggie method: Dampen a coffee filter or paper towel, sprinkle the cleaned seeds on it, fold it up, and slip it into a sealed plastic bag. Keep it somewhere warm and check every few days. Once seeds sprout, transfer them gently to pots.

    Either way, expect sprouts within a few weeks. If you’re starting during cold weather, sow indoors so seedlings are ready to move out in spring. our seed starting guide covers the fundamentals.

    • Step 4: Pot Up and Thin to the Strongest Seedlings

    Once seedlings have a few sets of leaves, keep the strongest, healthiest plant in each pot and snip the weaker ones off at the soil line (pulling can disturb the keeper’s roots). Give them bright light and steady warmth, and mist occasionally, since young pomegranate seedlings appreciate humidity.

    • Step 5: Snip the Taproot and Pinch to Branch

    Here’s the pro tip most guides skip: pomegranates develop a deep taproot that doesn’t transplant well. To build a bushier, transplant-friendly root system, snip the taproot early while the seedling is young. Around the same time, pinch or cut back the top of the seedling by about a third, this encourages branching and a sturdier framework. These two small moves set your tree up for a much stronger start.
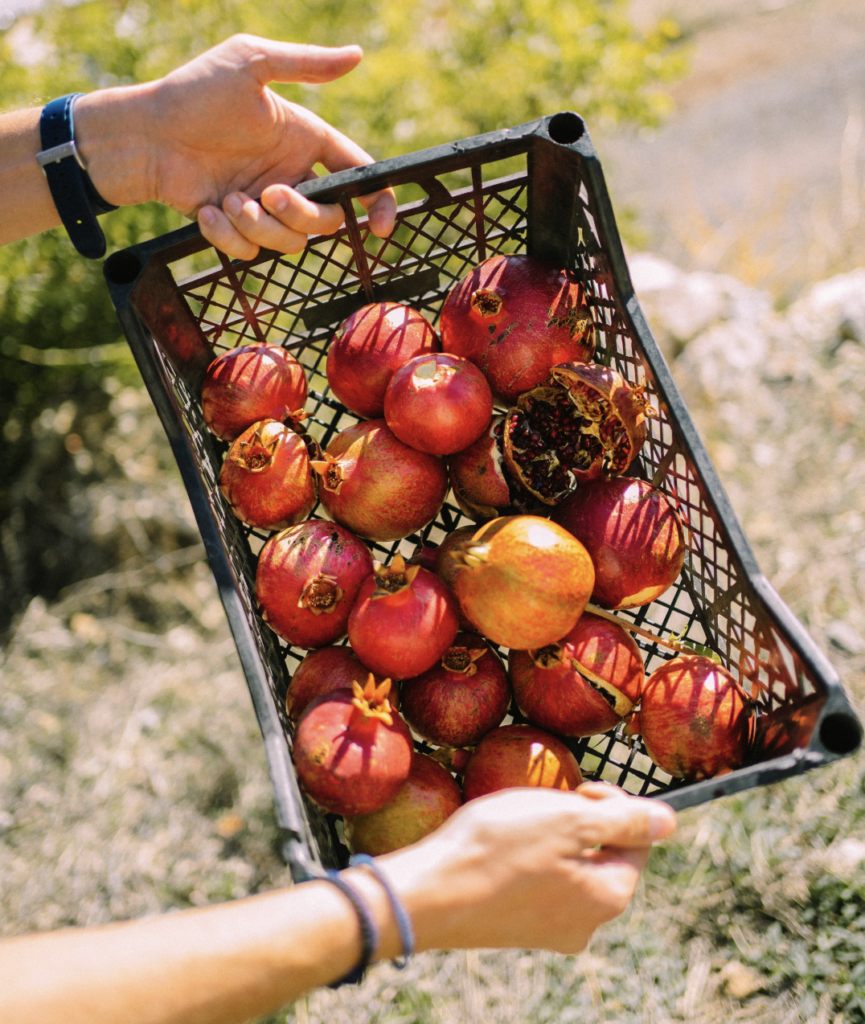
    Freshly harvested pomegranates in a black crate held outdoors in Miami , Florida
    Freshly harvested pomegranates in a black crate held outdoors.

    Transplanting and Growing On

    When your seedling is established, several inches tall, and all danger of frost has passed, it’s ready for its permanent home, a large container or a sunny garden spot. Choose a location with full sun (at least eight hours) and good drainage, sheltered from strong winds. Space in-ground trees about 15 feet from other plants and structures, since they can spread widely.

    Water the young tree well through its first year to encourage strong roots, then ease into a deep-but-infrequent watering rhythm as it establishes. A layer of organic mulch around the base, kept off the trunk to conserves moisture and suppresses weeds; our guide to types of mulch can help you choose.

    Pomegranate Tree Care: Sun, Soil, Water and Feeding

    The best news about pomegranate tree care is how little the tree asks for once it’s settled. This is a plant that genuinely thrives on a bit of benign neglect.

    • Sun. Full sun, and plenty of it, aim for eight or more hours daily. Heat and light are what drive flowering and fruiting, so a hot, sunny position is non-negotiable if you want fruit.
    • Soil. Pomegranates are famously unfussy about soil and adapt to sandy, loamy, or even clay soils as long as drainage is good. Interestingly, unlike most fruit trees, they actually prefer slightly alkaline soil (up to about pH 7.5). If your soil is very acidic, a little garden lime nudges it into the sweet spot, see our guide on how to raise soil pH with lime.
    • Water. Once established, pomegranates are impressively drought-tolerant. Water deeply but infrequently, roughly weekly in hot weather, easing to every ten to fourteen days otherwise let the soil dry between waterings. Deep, occasional soaks encourage strong, drought-hardy roots, while frequent shallow watering does the opposite. Keep watering consistent as fruit develops, though, since erratic moisture can cause fruit to split.
    • Feeding. Here’s a refreshingly easy rule: less is more. Pomegranates need very little fertilizer, and over-feeding especially with nitrogen which leads to lush leaves at the expense of fruit and can even cause fruit to drop. If your soil is poor, a light feed with a balanced fruit-tree fertilizer in spring is plenty. Our guide to understanding NPK ratios helps you keep it gentle.
    • Pruning. Prune in late winter or early spring before new growth begins, removing dead or crossing branches, thinning for airflow, and cutting back suckers from the base to maintain your chosen tree or shrub shape.

    Growing Pomegranate in Containers

    Container growing is the perfect solution for gardeners in cooler zones and pomegranates take to pots wonderfully, especially compact varieties like the dwarf ‘Nana’. A pot lets you give the tree a hot, sunny summer outdoors and then move it somewhere sheltered for winter dormancy.

    Choose a large container with excellent drainage, use a free-draining mix, and remember that snipped taproot from earlier, it makes container life far easier. Place the pot in your sunniest spot, water when the top of the soil dries, and feed lightly. In autumn your pomegranate will naturally drop its leaves and go dormant; that’s completely normal. Move it to a cool but bright frost-free spot, water only sparingly through winter, and bring it back into the sun in spring. Our container gardening guide for beginners and overwintering plants guide walk through the details.

    How Long Until a Pomegranate Fruits?

    Patience is the price of admission here. A pomegranate grown from seed typically takes about three to five years to produce its first fruit, sometimes a little sooner in ideal hot conditions. In the meantime, the tree rewards you with handsome foliage and those gorgeous orange-red blooms, many trees flower within a year or two, well before they set fruit.

    A few realities worth knowing:

    • Sun and heat drive fruiting. A pomegranate in too much shade or a cool spot may grow happily for years and never fruit. Give it maximum sun.
    • Pollination is usually self-handled. Pomegranates are self-fruitful, so a single tree can set fruit. If a container tree is shy to fruit, you can hand-pollinate the flowers with a small brush or cotton swab.
    • Seedlings vary. Because your tree is seed-grown, its fruit may be larger or smaller, sweeter or more tart than the parent part of the adventure.

    In our experience, the single biggest predictor of whether a seed-grown pomegranate ever fruits is simply how much sun and heat it gets. Trees planted against a warm, south-facing wall or kept in the hottest corner of a patio tend to bloom and fruit years earlier than identical seedlings tucked into partial shade. Gardeners often assume a fruitless pomegranate needs more water or feed, when in fact the opposite is usually true: it needs more sunshine, more warmth, and less pampering. Treat it like the sun-loving desert native it is, and it will reward you.

    Harvesting Pomegranates

    Pomegranates ripen in fall, and they don’t continue to ripen off the tree, so timing matters. Look for fruit that has developed its full, rich color, feels heavy for its size, and makes a slightly metallic sound when tapped. The skin often turns from glossy to more matte, and the fruit shape becomes a little squared-off around the arils as it fills out.

    Rather than pulling, snip ripe fruit from the branch with pruners to avoid damaging the tree. Whole pomegranates keep for weeks in a cool spot or the fridge, and the arils freeze beautifully. Enjoy them fresh by the handful, sprinkled over salads and yogurt, juiced, or added to countless dishes, a jewel-bright, antioxidant-rich reward for your patience.

    To free the arils without a mess, score the skin around the fruit’s equator, break it open, then hold each half cut-side down over a bowl and tap the back firmly with a wooden spoon, the arils tumble right out. Nutritionally, they’re a genuine superfood: rich in vitamin C, vitamin K, potassium, fiber, and powerful antioxidants, all in a naturally sweet-tart package. Because a mature tree can bear heavily, a good harvest year gives you plenty to eat fresh, juice, freeze, and share. a deeply satisfying, low-waste return on a few seeds you once might have thrown away.

    Common Problems and How to Fix Them

    Pomegranates are tough, but a few issues can crop up.

    Problem Likely Cause The Fix
    Seeds won’t sprout Pulp left on seeds, or too cold Clean seeds thoroughly; keep them warm (70–80°F)
    Lots of leaves, no fruit Too much shade or nitrogen; tree too young Give full sun; feed lightly; be patient
    Splitting fruit Irregular watering, especially near harvest Keep soil moisture steady as fruit ripens
    Dropping flowers or young fruit Over-feeding or stress Ease off fertilizer; water consistently
    Yellowing leaves in fall Natural dormancy None needed — pomegranates are deciduous
    Sticky leaves, pests Aphids, whiteflies, or scale Treat with neem oil or insecticidal soap

    If a mature tree stubbornly refuses to fruit, the culprit is almost always insufficient sun and heat — pomegranates simply need warmth to perform.

    Is Growing Pomegranate From Seed Worth It?

    Absolutely, especially if you enjoy the journey as much as the harvest. Growing a pomegranate from seed is inexpensive, genuinely easy, and quietly magical: a snack’s worth of seeds becomes a striking, long-lived tree that brightens your garden with fiery blooms and, eventually, fruit you grew yourself. Even if a seedling’s fruit surprises you, that’s part of the fun.

    If seed-starting fruit has you hooked, keep going: try growing a pineapple from a top, papaya from seed, fig trees for beginners, or a compact kumquat tree in a pot. For the full collection of exotic edibles, browse our hub on growing tropical and exotic fruits, part of the broader EcoGardenHub Plant Library.

    Save a handful of seeds from your next pomegranate, give them warmth and light, and watch a future tree emerge on your windowsill, sustainable, satisfying, and just a little bit wondrous. Few gardening projects offer this much reward for so little cost, and fewer still can be started tonight with nothing more than the fruit already sitting in your kitchen.
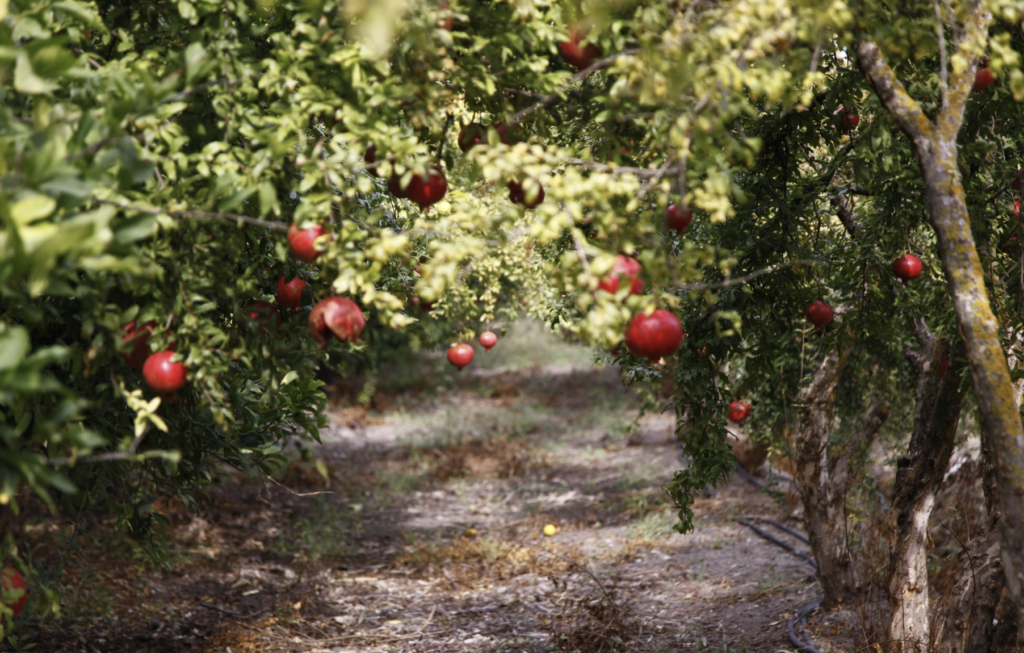
    beautiful Vibrant pomegranates hanging on tree branches.
    Vibrant pomegranates hanging on tree branches in a Florida orchad.

    Frequently Asked Questions

    How long does it take to grow a pomegranate from seed? Seeds usually sprout within a few weeks, and a seed-grown tree typically takes about three to five years to produce its first fruit. Trees often flower within a year or two, well before they begin fruiting.

    Can you grow a pomegranate from store-bought seeds? Yes. You can grow pomegranates from grocery-store fruit seeds, just clean off all the pulp first. Keep in mind that most store pomegranates are hybrids, so the resulting tree’s fruit may differ from the parent.

    Do pomegranate seeds need to be dried before planting? It helps. Remove all the pulp, rinse the seeds, and let them air-dry for a few hours before planting. Some gardeners soak them overnight first to soften the coating and encourage faster germination.

    What growing zones are best for pomegranates? Pomegranates grow best outdoors in USDA Hardiness Zones 8–11, in hot, sunny climates. In colder regions, grow them in containers you can move indoors for winter, choosing a cold-hardier variety if available.

    Why won’t my pomegranate tree fruit? The most common reason is not enough sun and heat, pomegranates need full sun and warmth to flower and fruit. A tree that’s still young, over-fertilized with nitrogen, or growing in shade may stay leafy but fruitless.

    Do you need two pomegranate trees to get fruit? No. Pomegranates are self-fruitful, so a single tree can produce fruit on its own. Hand-pollinating with a small brush can help boost fruit set, especially on container-grown trees.

    How big does a pomegranate tree get? Most pomegranates grow into a rounded shrub or small tree about 12 to 20 feet tall and wide, though they respond well to pruning. Dwarf varieties like ‘Nana’ stay small enough for container growing.
  • How to Grow Kumquat Trees in Pots (Complete Guide)

    How to Grow Kumquat Trees in Pots (Complete Guide)

    Pop a whole kumquat in your mouth and something delightful happens: the sweet, fragrant peel gives way to a burst of tart, tangy juice inside. No peeling, no fuss, just a perfect little two-in-one citrus you can eat straight off the tree. Even better, learning how to grow kumquat in pots is one of the easiest ways for almost anyone to grow their own citrus, because kumquats are the most cold-hardy and container-friendly of all the citrus family.

    If you’ve assumed homegrown citrus was only for gardeners in Florida or California, the humble kumquat is about to change your mind. These naturally compact, self-fertile little trees thrive in containers, produce heavy crops of jewel-bright fruit, and can be wheeled indoors when winter bites. This complete guide covers everything, from picking the right variety to harvesting your first glossy orange kumquats.

    Can You Grow a Kumquat Tree in a Pot?

    Yes, kumquats grow beautifully in pots. In fact, they’re among the best citrus for container growing. Plant a compact variety like ‘Nagami’ or ‘Meiwa’ in a large, well-draining container filled with citrus soil, give it 6–8 hours of full sun, water when the top of the soil dries, and feed through the growing season. In cold regions, simply move the pot indoors for winter. A grafted tree can fruit within one to two years.

    The magic of container growing is control and portability. Because kumquats can’t survive a hard freeze, keeping yours in a pot lets you enjoy fresh citrus anywhere in the country, outdoors soaking up summer sun, then tucked into a bright indoor spot when the cold arrives.

    Meet the Kumquat

    The kumquat (Citrus japonica, once classified as Fortunella) is the smallest of the true citrus fruits, native to southern China and eastern Asia, where it has been cultivated for centuries. The name comes from the Cantonese gam gwat, meaning “golden tangerine”, a fitting description for its glossy little orange fruits. Brought to Europe and then North America in the 19th century, it has been prized ever since as both an ornamental patio tree and a source of unusual, delicious fruit.

    Citrus japonica, once classified as Fortunella
    Citrus japonica, once classified as Fortunella

    What makes the kumquat truly distinctive is how you eat it. Where most citrus asks to be peeled, the kumquat is enjoyed whole: the thin, sweet, aromatic rind and the tart, tangy flesh are meant to be eaten together in one bright, contrasting bite. The trees themselves are compact evergreens with thornless branches, deep-green glossy leaves, and clusters of fragrant white flowers that perfume the air in spring as lovely to look at as they are to harvest.

    Why Kumquats Are the Perfect Potted Citrus

    Among all the citrus you could grow, the kumquat is arguably the friendliest for pots and here’s why it earns that reputation as the ideal potted citrus:

    • It’s the most cold-hardy citrus. Kumquats shrug off temperatures other citrus can’t, tolerating brief dips to around 18°F once established, so they grow in climates too cool for lemons or oranges.
    • It stays naturally compact. While many citrus trees stretch 20 feet tall, a potted kumquat typically maxes out around 4 to 6 feet, perfect for a patio, balcony, or sunny doorstep.
    • It’s self-fertile. You only need a single tree to get fruit, so there’s no need to find space for a pollination partner.
    • It’s a heavy bearer. Kumquats fruit generously for their size, often loading their branches with dozens of bright orange fruits.
    • It’s gorgeous and fragrant. Glossy evergreen leaves, fragrant white spring blossoms that bees adore, and vivid fruit make it as ornamental as it is productive.

    For small-space, cool-climate, and first-time citrus growers, the kumquat checks every box.

    Best Kumquat Varieties for Containers

    Choosing the right variety shapes both your harvest and how you’ll enjoy it. Here are the standouts for pots:

    Variety Fruit Best For
    Nagami Oval, deep-orange, bright sweet-tart, a few seeds The classic — eating whole, marmalade; most widely available
    Meiwa Round, larger, sweeter, nearly seedless Fresh eating straight off the tree
    Marumi Round, slightly tart Marmalades and preserves
    Centennial Variegated Variegated fruit and leaves, compact Ornamental appeal in small spaces

    ‘Nagami’ is the most popular and the one you’ll usually find at nurseries bold, snackable, and reliable. If you prefer a sweeter bite for eating fresh, seek out ‘Meiwa’. Either makes a wonderful container tree. Whatever you choose, buy a healthy grafted tree from a reputable nursery; kumquats can be grown from seed, but seedlings are weak and slow to fruit.

    What You’ll Need

    • A grafted kumquat tree in a compact variety
    • A large container (at least 5 gallons to start, 15 gallons ideal) with multiple drainage holes
    • A quality citrus/palm potting mix  well-draining, slightly acidic
    • Pot feet, bricks, or a rolling dolly to raise the pot off the ground
    • A sunny spot with 6–8 hours of direct light, or a grow light for indoors
    • Citrus fertilizer (or organic options like fish emulsion and kelp)
    • Mulch to help hold moisture in the pot
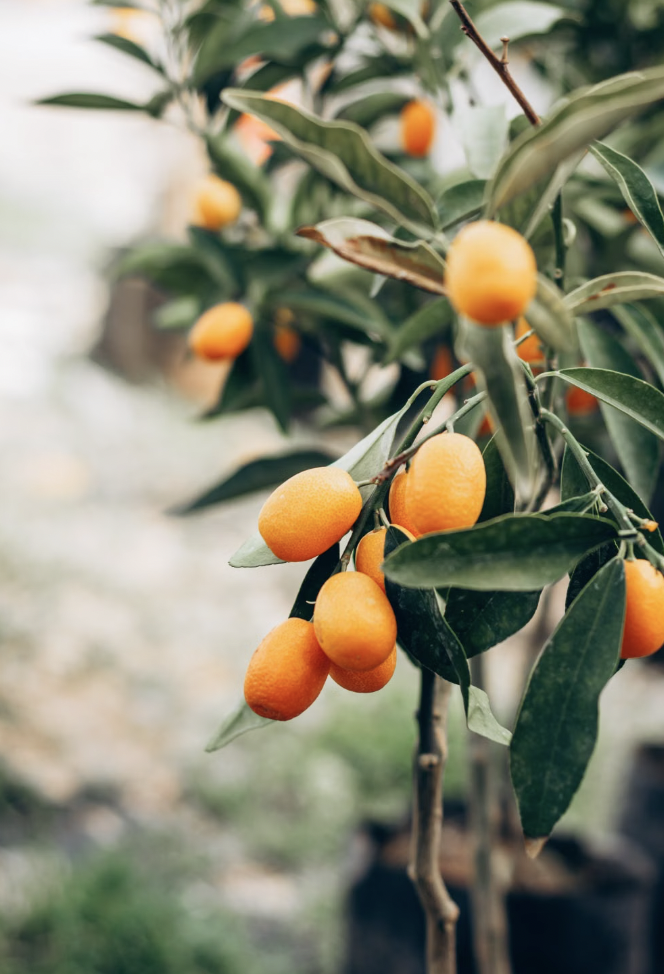
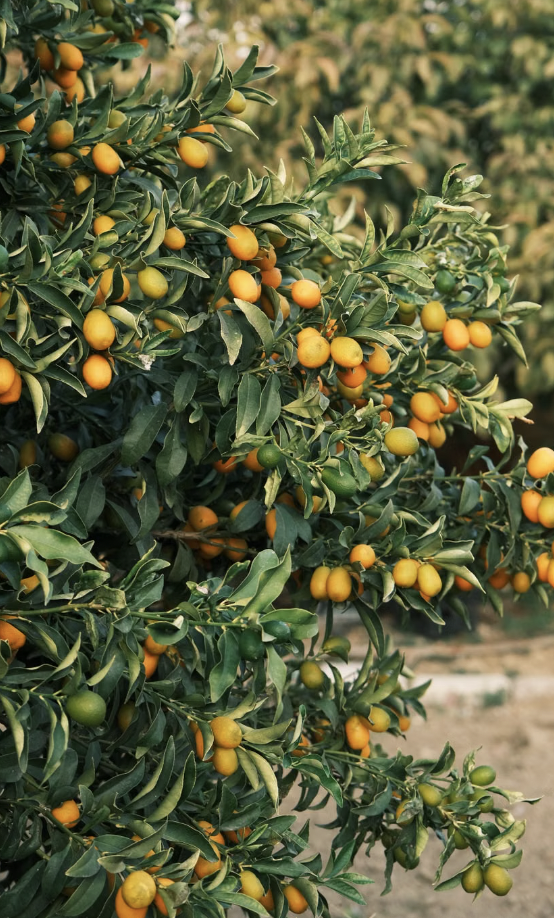
    A grafted kumquat tree already producing fruits
    A grafted kumquat tree already producing fruits

    How to Plant a Kumquat Tree in a Pot: Step-by-Step

    Spring is the ideal time to pot up a kumquat, giving it a full warm season to establish. Follow these steps.

    • Step 1: Choose a Big Pot With Great Drainage

    Here’s the single most important rule with potted kumquats: they hate being root-bound, so go big. Choose a container at least three times as wide as the root ball starting around 5 gallons for a young tree, sizing up to 15 gallons with several large drainage holes, since citrus can’t stand wet feet. Cover oversized holes with a scrap of fine screen so soil doesn’t wash out. A breathable fabric pot works wonderfully too.

    • Step 2: Use the Right Citrus Soil

    Soil choice prevents the majority of kumquat problems, so don’t reach for generic potting mix. Bark-heavy mixes break down and suffocate roots within months. Instead, use a quality citrus or palm potting mix that drains fast and stays slightly acidic (pH around 5.5–6.5). Good drainage plus the right acidity keeps roots healthy and leaves green.

    • Step 3: Plant Your Kumquat

    Fill the pot partway, then set the tree so the top of its root ball sits level with the final soil surface never buried deeper, which invites rot. Gently tease out any circling roots, backfill around them, and firm the soil lightly to remove air pockets, leaving an inch below the rim for watering.

    • Step 4: Water In, Mulch, and Raise the Pot

    Water thoroughly until it runs from the drainage holes. Add a two- to three-inch layer of mulch on the surface, keeping it several inches away from the trunk. Then raise the container off the ground on pot feet, bricks, or a rolling dolly this improves both drainage and air circulation, and a dolly makes it easy to chase the sun or dodge frost.

    • Step 5: Place in Full Sun

    Set your potted kumquat where it gets at least six to eight hours of direct sun a day; eight to ten is even better for fruiting. If you’re growing indoors, park it at your brightest window or add a grow light to keep it healthy through dim months.

    Kumquat Tree Care: Water, Feeding & Pruning

    Ongoing kumquat tree care is genuinely beginner-friendly once the tree is settled in the right pot and spot.

    Watering. Consistency is everything with citrus. Keep the soil moist but never soggy, watering thoroughly when the top inch or so feels dry the simple finger test works perfectly. Remember that potted plants dry out faster than those in the ground, especially in summer heat, so check often. Both overwatering and letting the pot go bone-dry cause stress, leaf drop, and poor fruit, so aim for that steady middle ground.

    Feeding. Kumquats are heavy feeders. Use a fertilizer formulated for citrus (ideally with a good portion of slow-release nitrogen) through spring and summer, and water well before and after feeding to avoid burning the roots. Organic gardeners get great results with citrus-friendly options like fish emulsion, liquid kelp, or homemade nettle tea and diluted manure a lovely low-waste approach that fits right into a natural feeding routine (see our guide to making your own organic fertilizer). If those fertilizer numbers are a mystery, our guide to understanding NPK ratios makes them clear. Yellowing leaves often signal watering issues or an iron deficiency, both easily corrected.

    Pruning. Kumquats grow slowly and need little pruning. To shape the tree or thin crowded, dead, or crossing branches, prune lightly in early spring after harvest but before the flowers open. Aim for a bushy, sturdy framework that can support the weight of all that fruit.

    Repotting. Because kumquats won’t tolerate being root-bound, plan to repot every two to three years into a slightly larger container with fresh mix. Root-bound trees show it through twig dieback and leaf loss, so give the roots room before they run out.

    In our experience, the two habits that make the biggest difference to a potted kumquat’s health are unglamorous but powerful: watering by feel rather than by schedule, and never letting the tree outgrow its pot. Gardeners who check the soil with a finger before every watering and who bump their tree up a pot size the moment growth slows and roots start circling the drainage holes tend to have lush, heavy-bearing trees. Those who water on autopilot or leave a tree cramped for years are usually the ones battling yellow leaves and sparse fruit. Kumquats are forgiving plants, but they reward a little attentiveness generously.

    Growing Kumquats Indoors

    Because they’re compact and self-fertile, kumquats also make rewarding indoor citrus trees a glossy, fragrant, fruit-bearing houseplant that brightens a sunny room. The trick indoors is light: place your tree at the brightest window you have (a south-, east-, or west-facing one is ideal), and supplement with a grow light if the spot falls short of six hours of direct sun. Indoor air is often dry, so an occasional misting or a nearby humidity tray keeps the foliage happy, and rotating the pot every week or two encourages even, balanced growth.

    Whenever the weather allows, kumquats appreciate a summer holiday outdoors, where natural sunlight and visiting bees improve growth and fruit set. Just move the tree gradually to avoid shocking it, and bring it back inside before the first cold nights. Whether it lives indoors full-time or splits its year between patio and windowsill, a kumquat is one of the most forgiving citrus trees you can grow under a roof.

    Overwintering Your Potted Kumquat

    The container advantage really shines in winter. While kumquats are the toughest citrus, they still can’t survive a hard freeze, and potted roots are more exposed to cold than in-ground ones. As temperatures drop toward freezing, move your tree to a sheltered spot, a bright indoor room, or an unheated but well-lit garage or conservatory.

    A few tips for a smooth winter: give the tree the brightest indoor spot you can, since sudden drops in light trigger leaf drop; keep it somewhere cool rather than next to a hot radiator; and ease back on watering while growth slows. If you can only protect it outdoors, group pots together and drape them with a frost blanket on the coldest nights. Our overwintering plants guide walks through the whole routine, and keeping an eye on your first and last frost dates helps you time the move. Gardeners in warmer regions can check our USDA Zone 9 gardening guide for growing kumquats outdoors year-round.

    How Long Until a Kumquat Tree Fruits & When to Harvest

    Good news for the impatient: kumquats fruit relatively quickly. A grafted nursery tree often bears its first fruit within about one to two years, while seed-grown trees are slow and unreliable another reason to start with a nursery tree.

    Here’s the yearly rhythm to expect:

    • Late spring to summer: clusters of fragrant white flowers open and are visited by bees.
    • Summer into fall: small green fruits form and slowly swell.
    • Late fall through spring: fruit ripens to bright orange, typically ready to harvest from around November into April depending on variety and climate.

    Your kumquat harvest is ready when the fruits are fully, richly orange. Conveniently, they hold well on the tree, so you can pick as needed over several months rather than all at once. Snip or gently twist off the fruit, and enjoy them the best way of all; whole, skin and all. Beyond fresh snacking, kumquats make superb marmalade, preserves, and candied treats, and they’re a bright, cheerful addition to both sweet and savory dishes.

    In the kitchen, a bowl of homegrown kumquats opens up all kinds of possibilities. Slice them into salads for a citrus pop, simmer them into a glossy marmalade, candy them for cakes and cheese boards, or tuck a few into a roasting pan with chicken for a bright, tangy glaze. They’re rich in vitamin C, keep well for a couple of weeks, and because a healthy tree bears so heavily, you’ll likely have plenty to preserve and share. It’s the kind of small, sustainable abundance that makes growing your own citrus feel genuinely special.

    White dog standing on hind legs among vibrant kumquat plants in a sunny garden.
    White dog standing on hind legs among vibrant kumquat plants in a sunny garden.

    Common Problems and How to Fix Them

    Most kumquat troubles trace back to water, cold, or a cramped pot.

    Problem Likely Cause The Fix
    Yellowing leaves Over- or under-watering, or iron deficiency Even out watering; use citrus feed with micronutrients
    Sudden leaf drop Temperature or light change; rootbound Avoid drastic moves; give a bright, stable spot; repot if needed
    Twig dieback, stalled growth Root-bound in too small a pot Repot into a larger container with fresh mix
    Mushy roots, wilting Overwatering / poor drainage Improve drainage; let soil dry between waterings
    Sticky leaves, cottony spots Aphids, mealybugs, or scale Treat with neem oil or insecticidal soap
    Few flowers or fruit Not enough light or nutrients Move to full sun; feed regularly through the growing season

    A quick note for pet owners: while kumquats aren’t severely toxic, the acidity and sugars could upset a pet’s stomach if they eat a lot, so it’s worth keeping curious nibblers in mind.

    Is Growing Kumquats in Pots Worth It?

    Wonderfully so. A potted kumquat gives you glossy evergreen good looks, sweetly fragrant blossoms, and months of eat-them-whole citrus all in a compact, portable package that works whether you’re in sunny Florida or snowy New England. For anyone who’s ever wanted to grow their own citrus but thought their climate ruled it out, the kumquat is the joyful, achievable answer.

    If your container citrus dreams are growing, keep exploring more exotic edibles: try growing star fruit at home, a lychee tree, guava trees in containers, or fig trees for beginners. For the full collection, browse our hub on growing tropical and exotic fruits, part of the broader EcoGardenHub Plant Library. New to pots in general? Our container gardening guide for beginners covers all the fundamentals.

    Pot up a kumquat this spring, give it sun, the right soil, and a big enough home, and before long you’ll be plucking bright little suns from your own tree the easiest, cheeriest citrus you’ll ever grow. And once you’ve tasted that first homegrown kumquat, sweet peel and tangy center in a single bite, you’ll understand why this little golden fruit has charmed gardeners for centuries.

    Frequently Asked Questions

    How long does it take for a potted kumquat tree to fruit? A grafted nursery tree usually produces its first fruit within one to two years. Seed-grown kumquats are weak and slow, taking several years and often disappointing, so a nursery tree is the reliable choice.

    What size pot does a kumquat tree need? Start with at least a 5-gallon container and size up to around 15 gallons, choosing a pot at least three times as wide as the root ball. Kumquats hate being root-bound, so repot every two to three years in a larger container.

    Which kumquat variety is best for containers? ‘Nagami’ is the most popular and widely available, with bright sweet-tart fruit ideal for eating whole or making marmalade. If you prefer a sweeter, nearly seedless fruit for fresh snacking, choose ‘Meiwa’.

    Do kumquat trees need full sun? Yes. Kumquats need at least six to eight hours of direct sunlight daily for healthy growth and good fruiting, with eight to ten hours even better. Indoors, use your brightest window or add a grow light.

    How cold-hardy are kumquats? Kumquats are the most cold-hardy citrus, tolerating brief dips to around 18°F once established. Even so, they can’t survive a hard freeze, so potted trees should be moved to shelter during cold snaps.

    Can you eat kumquats whole? Yes, and it’s the best part. Unlike most citrus, kumquats are eaten whole, the peel is sweet and the flesh is tart, giving a burst of contrasting flavor in one bite. They’re also excellent in marmalades and preserves.

    Why are my kumquat leaves turning yellow? Yellow leaves usually point to inconsistent watering (too much or too little) or an iron deficiency. Check that the soil drains well and stays evenly moist, and feed with a citrus fertilizer that includes micronutrients.

  • How to Grow Zucchini in a Small Garden (Easy Guide)

    How to Grow Zucchini in a Small Garden (Easy Guide)

    Zucchini has a legendary reputation among gardeners, the vegetable so productive that growers famously leave surplus on their neighbors’ doorsteps. It’s also a plant with a reputation for sprawling, gobbling up nine square feet of garden and elbowing everything else aside. So here’s the good news: learning how to grow zucchini in a small garden is entirely doable, and with the right variety you can get that famous abundance from a single pot on a patio.

    The secret isn’t a bigger garden, it’s choosing a compact bush variety, giving it a generous container, and understanding one quirk about pollination that trips up nearly every beginner. Get those three things right and one plant can keep your kitchen in summer squash from midsummer to frost. This guide covers all of it, from picking a variety to harvesting at the perfect moment.

    Can You Grow Zucchini in a Small Space?

    Yes, zucchini grows very well in small gardens and containers. Choose a compact “bush” variety like ‘Eight Ball’ or ‘Bush Baby’, plant one per large container (at least 5 gallons, ideally bigger, and 12+ inches deep), give it 6 to 10 hours of full sun, water consistently, and hand-pollinate the flowers if bees are scarce. A single plant can produce dozens of zucchini through the summer.

    The two things that decide your success are variety and pollination. A sprawling vining type will overwhelm a small space, and even a healthy plant will drop every fruit if its flowers aren’t pollinated. Solve both, and zucchini becomes one of the most rewarding crops a small-space gardener can grow.

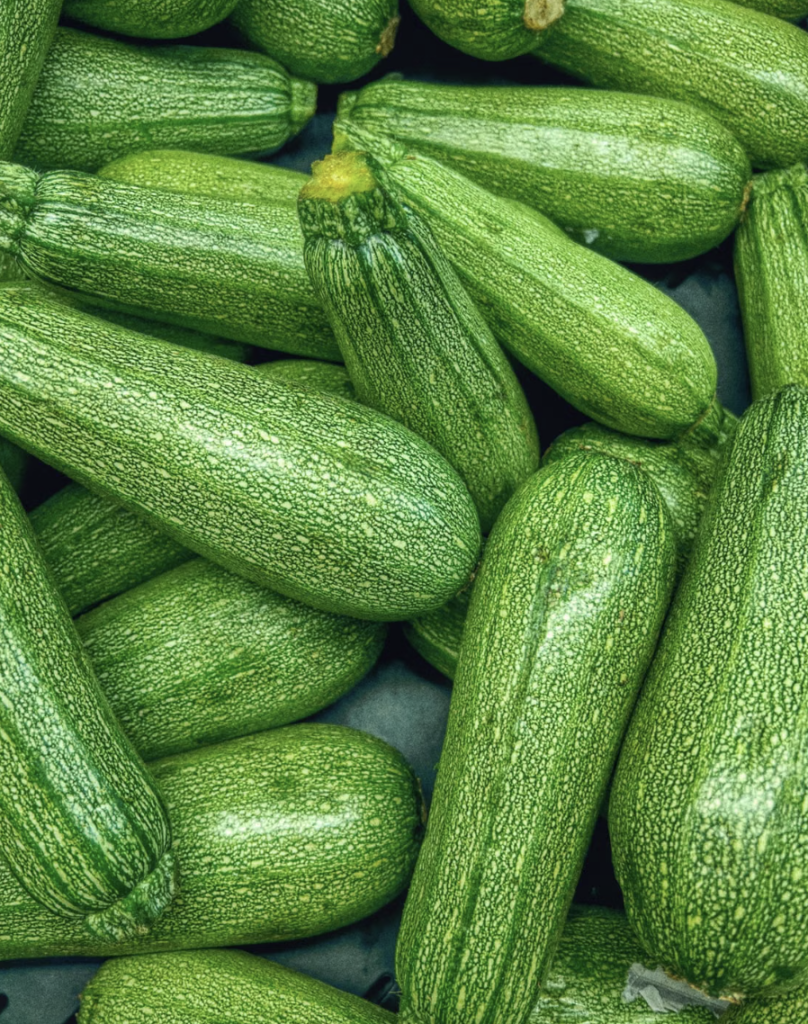
    Vibrant close-up of fresh green zucchinis showcasing texture and color.
    Vibrant close-up of fresh green zucchinis showcasing texture and color.

    Why Zucchini Suits Small Gardens So Well

    It might seem counterintuitive to grow a famously big plant in a small space, but zucchini earns its spot better than almost anything:

    • Extraordinary yield per square foot. One plant occupying a single pot can produce dozens of fruits over a season few crops give back so much from so little ground.
    • Speed. Many varieties are ready to harvest in 35 to 50 days, so you’re eating within weeks rather than months.
    • It’s nearly foolproof. Zucchini germinates readily, grows fast, and forgives beginner mistakes.
    • Purpose-bred compact varieties exist. Breeders have done the hard work, giving us bush types with a 3-foot footprint that still crop heavily.
    • It’s beautiful. Big architectural leaves and huge golden flowers make it an ornamental plant in its own right.

    The one honest caveat: zucchini needs real sun and real water. Give it a bright spot and consistent moisture and it will astonish you.

    Meet the Zucchini (Summer Squash)

    Zucchini (Cucurbita pepo), also called courgette, is a warm-season summer squash and a member of the cucurbit family alongside cucumbers, melons, and pumpkins. Unlike winter squash, it’s harvested young, while the skin is still tender and edible, which is why it’s ready so fast and produces so relentlessly.

    It’s also genuinely good for you. Zucchini delivers vitamins A, C, and K, plus folate, manganese, and potassium. most of those nutrients live in the skin, so there’s no need to peel it. As a general rule, the darker the zucchini, the more nutrients it carries. Best of all, zucchini is quick: many varieties go from seed to first harvest in just 35 to 50 days.

    Bush vs Vining: The Most Important Choice for Small Gardens

    If you take one thing from this guide, make it this. Zucchini comes in two growth habits, and the difference is dramatic in a small space:

    • Vining varieties send out long, rambling vines that can swallow an entire garden row. Wonderful if you have space, disastrous if you don’t.
    • Bush (compact) varieties grow as a tidy, upright clump. These are bred for small gardens and containers, and they’re what you want.

    Here are proven compact performers for small spaces:

    Variety Why It Works Notes
    Eight Ball Round, baseball-sized fruit; only ~3-foot spread Harvest in about 40 days; powdery mildew resistant
    Bush Baby Compact plant bred for smaller, striped fruit Great for pots; harvest at ~4 inches
    Patio Star Purpose-bred for container growing Compact and productive
    Fordhook Zucchini Classic reliable bush type Widely available
    Buckingham Patio One of the smallest; manages in a 5-gallon bucket Ideal for balconies

    “The balcony gardener’s secret weapon: look for a parthenocarpic variety. These remarkable plants set fruit without any pollination at all, no bees required. If you’re gardening on a high balcony, in a dense city, or anywhere pollinators are scarce, a parthenocarpic zucchini removes the single biggest obstacle to a harvest.”

    Choosing a Container

    Compact doesn’t mean small roots. Even bush zucchini are big, thirsty plants, so give them room:

    • Minimum size: 5 gallons for the smallest varieties.
    • Ideal: at least 12 inches deep and 16 to 18 inches across, bigger is genuinely better, and a 15- to 25-gallon container produces noticeably healthier, more productive plants.
    • One plant per pot. Zucchini leaves are enormous; crowding invites disease and cuts your yield.

    Material matters. Porous containers like terra cotta, unglazed ceramic, or fabric grow bags provide excellent drainage and airflow (they dry faster, so watch watering). Plastic works but raises the risk of waterlogged roots, so make sure it has plenty of drainage holes. Large fabric grow bags are a great, affordable option at bigger sizes. Whatever you choose, start with a clean container to avoid carrying over disease. Our container gardening guide for beginners covers pot selection in more depth.

    The Right Soil

    Never fill a container with garden soil, it compacts, smothers roots, and can carry weed seeds, disease, and squash vine borer larvae. Use a quality, lightweight potting mix built around peat or coco coir, bark, and perlite or vermiculite for drainage and aeration, then blend in some compost for fertility. Fill to about two inches below the rim. Zucchini are hungry plants, so that compost-enriched start pays dividends all season. If you’re growing in a bed rather than a pot, work in a generous few inches of compost before planting, zucchini thrives in rich, loose, moisture-retentive soil that still drains freely.

    How to Plant Zucchini: Step-by-Step

    • Step 1: Wait for Warm Soil

    Zucchini is frost-tender and hates cold ground. Plant one to three weeks after your last frost, once soil is 70–85°F and daytime temperatures are consistently above 70°F. Check your last frost date to time it. Planting into cold soil causes rot and stunted plants.

    • Step 2: Sow Seeds Directly (or Transplant Carefully)

    Zucchini prefers to be direct-sown, because its roots dislike disturbance. Plant two or three seeds about an inch deep in the center of the container, at least four inches from the edges. Seeds sprout in 7 to 10 days. If you’d like a head start in a short season, sow directly into pots indoors about a month before the last frost, then move them out once it’s warm or buy transplants and handle the root ball very gently.

    • Step 3: Thin to One Strong Seedling

    Once seedlings are a few inches tall, choose the strongest and snip the others off at soil level. It’s tempting to keep them all resist. A single plant with room to breathe outproduces two crowded ones every time.

    • Step 4: Add Vertical Support

    Here’s a small-space trick worth doing at planting time: put a sturdy tomato cage over the seedling, or set a stake for tying. Zucchini leaves and fruits get big and heavy, and unsupported stems dangling over a pot edge can snap under their own weight. Training the plant upward also saves precious floor space and dramatically improves airflow. If you’re growing a vining type on a trellis, anchor the pot to a railing so it can’t topple.

    • Step 5: Position for Full Sun and Pollinators

    Zucchini wants at least six hours of direct sun, with eight to ten being ideal, a south-facing spot is perfect. Just as importantly, place it near flowers that attract bees. Borage, alyssum, nasturtiums (which also repel squash bugs), lavender, mint, and bee balm are all excellent. Our companion planting guide has more pairings, and attracting more pollinators to your space pays off across the whole garden.

    Zucchini Plant Care: Water, Feeding and Airflow

    • Watering. Consistency is everything. Zucchini’s huge leaves transpire a lot of water, and containers dry out fast, check daily and water as soon as the top inch of soil is dry, going deeper and more often in heat. Erratic watering is the direct cause of blossom end rot. Water at the base and keep the leaves dry, since wet foliage invites powdery mildew. A DIY drip irrigation system makes this effortless.
    • Feeding. Zucchini are heavy feeders. Mix a slow-release fertilizer into the potting mix at planting, or feed every four weeks with a balanced, water-soluble fertilizer. Container plants need more feeding than garden ones since there’s less soil to draw from. Our guides to understanding NPK ratios and homemade organic fertilizer can help.
    • Airflow and pruning. Powdery mildew, that white dusty coating on leaves is zucchini’s most common ailment, and it thrives where air is still and humid. You can prune away some of the largest lower leaves to open the plant up and let light reach the base. Just don’t strip it bare; those leaves are the plant’s engine.
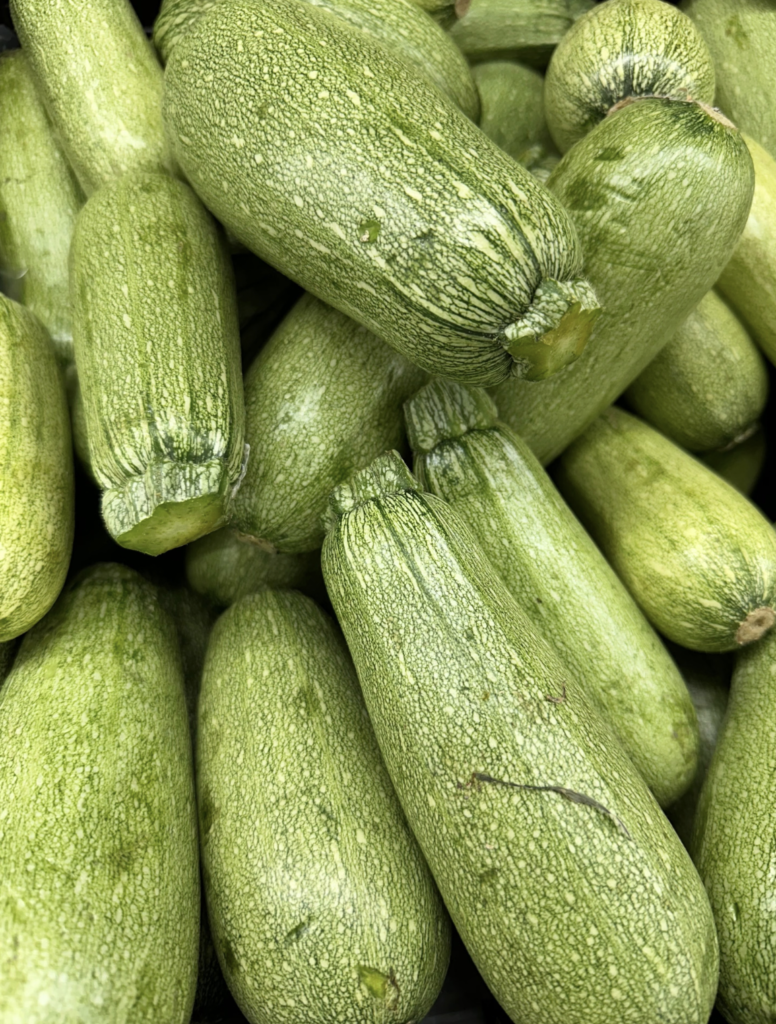
    A detailed close-up of fresh organic zucchinis, showcasing their vibrant green color and texture.
    A detailed close-up of fresh organic zucchinis, showcasing their vibrant green color and texture.

    The Pollination Problem (and How to Fix It)

    This is the number one complaint about zucchini: “My plant is covered in flowers but I’m not getting any fruit.” Here’s what’s happening.

    Zucchini produces separate male and female flowers on the same plant. Male flowers appear first, often for a week or two before any females opens sitting on a thin, plain stem. Female flowers have a thick base behind the bloom that looks like a tiny baby zucchini. That miniature fruit only swells into a real zucchini if pollen travels from a male flower to the female. Without pollination, the little fruit yellows, shrivels, and rots off.

    So if you’re seeing flowers drop early in the season. Relax, those are almost certainly males, and females will follow. But if baby zucchini keep rotting at the blossom end, you have a pollination problem.

    Hand-pollinating takes thirty seconds. In the morning, when flowers are open:

    1. Find an open male flower (thin stem) and snip it off.
    2. Peel away the petals to expose the pollen-covered stamen in the center.
    3. Brush the stamen gently against the stigma inside an open female flower (the one with the baby fruit at its base). A cotton swab or small brush works just as well.

    That’s it. Do this each morning you spot a fresh female flower and your fruit set will improve dramatically. Good news for small gardens: you only need one plant, zucchini is self-pollinating, so a single plant can produce a full harvest. Growing two just raises the odds that flowers overlap and get pollinated naturally.

    In our experience, hand-pollination is the habit that transforms a frustrating zucchini season into an overwhelming one. Gardeners who write off their plant as “a dud” after weeks of dropped fruit are almost never dealing with a sick plant, they’re dealing with a pollination gap, often because the flowers only stay open for a single morning and the bees didn’t happen to show up in that window. Once you get into the rhythm of checking the plant with your morning coffee and dabbing any open female flower, the fruit set becomes reliable almost overnight. It takes less time than watering, and it’s the single highest-return thirty seconds you’ll spend in a small garden.

    Harvesting Zucchini

    Here’s the productivity secret that separates a good zucchini harvest from a legendary one: harvest early and harvest often.

    Most zucchini are ready in just 35 to 50 days, and the temptation is to let them grow big. Don’t. Baseball-bat zucchini are watery, seedy, and bland, and more importantly, a plant carrying oversized fruit slows down and stops producing. Picking constantly tricks the plant into making more.

    Harvest at about 4 to 6 inches long for most varieties (compact types produce smaller fruit than the supermarket ones, so don’t wait), or at baseball size for round varieties like ‘Eight Ball’. Cut the stem with a sharp knife or snips rather than twisting, and check the plant every day or two at peak season, zucchini can double in size overnight.

    Don’t overlook the blossoms, either. Male flowers (which you have in surplus) are a delicacy. stuff them, batter them, or fry them. It’s a wonderfully low-waste way to enjoy even more from a single plant. Store harvested zucchini in the fridge for about a week, or grate and freeze it for zucchini bread and soups all winter.

    And when the famous glut arrives and it will, zucchini’s mildness becomes its superpower in the kitchen. It’s brilliant sliced and roasted or grilled, grated into fritters and bread, spiralized into noodles, folded into soups and curries, or simply sautéed with garlic. Grated zucchini freezes especially well in measured portions, so a productive summer plant quietly stocks your freezer for winter baking. Few crops turn so little space into so much genuinely useful food.

    Common Problems and How to Fix Them

    Problem Likely Cause The Fix
    Flowers but no fruit Male flowers only, or poor pollination Wait for females; hand-pollinate; add pollinator plants
    Baby zucchini rot and drop Unpollinated female flowers Hand-pollinate each morning
    White powdery coating on leaves Powdery mildew (still air, wet foliage) Improve airflow; prune some leaves; water at the base
    Rot at the blossom end of fruit Inconsistent watering Water evenly as soon as the top inch dries
    Sudden wilting of whole plant Squash vine borer Inspect stems; use row covers early in the season
    Ragged holes in leaves and flowers Cucumber beetles (can spread bacterial wilt) Use floating row covers; neem oil; sticky traps
    Small, misshapen fruit Incomplete pollination Hand-pollinate; encourage more bees

    A note on row covers: they’re excellent protection from borers and beetles, but they also block bees. so remove them once flowering starts, or commit to hand-pollinating. It’s also worth planting a second zucchini a few weeks after the first, so that if borers take out your original plant midsummer, a healthy successor is already coming along behind it.

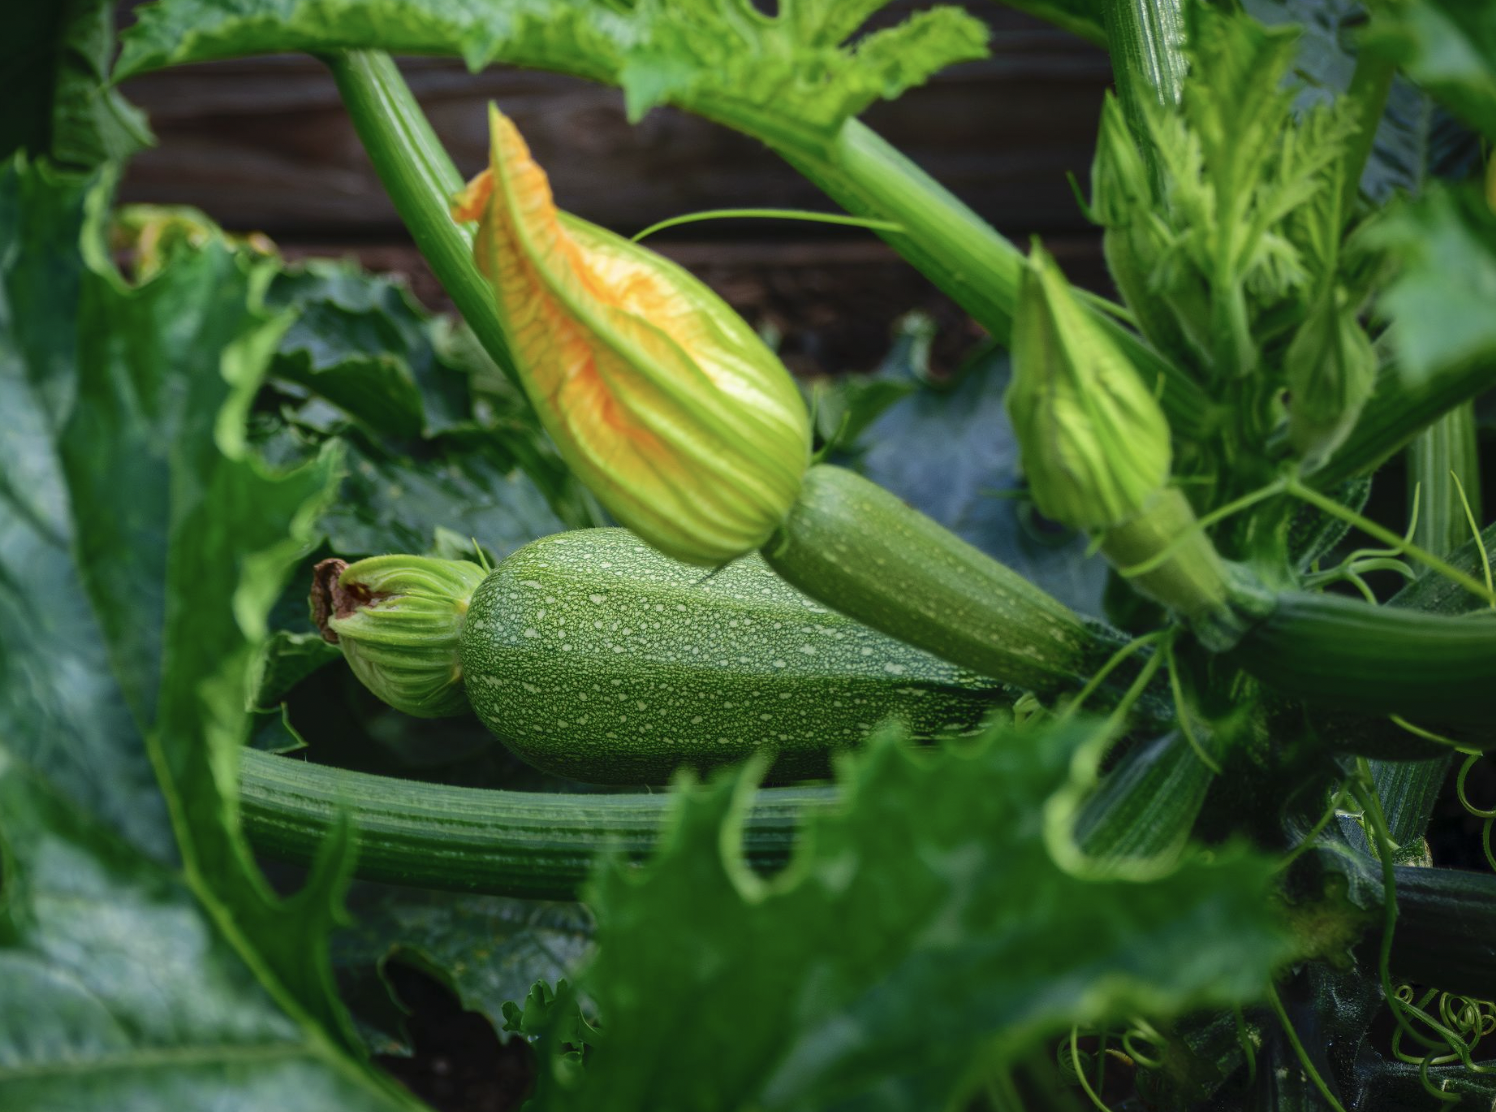
    Vibrant zucchini plant with blossoms captured in natural setting, showcasing growth and freshness
    Vibrant zucchini plant with blossoms captured in natural setting, showcasing growth and freshness

    Is Growing Zucchini Worth It?

    Wonderfully so. Zucchini is one of the most generous plants in the vegetable world: fast, forgiving, and so productive that one healthy plant in a single pot can feed a household all summer. For small-space gardeners, it’s proof that you don’t need a big yard to grow real, satisfying quantities of food. just a sunny corner, a big container, and thirty seconds a morning with a cotton swab.

    Ready to build out your small-space vegetable garden? Zucchini pairs well with other easy crops. Try growing tomatoes in containers, bell peppers from seed, or cucumbers grown vertically ,  a fellow cucurbit that loves the same conditions. Explore the full Vegetables collection, part of the broader EcoGardenHub Plant Library, or see our roundup of the best vegetables for container gardening.

    Pick a compact variety, give it a big pot and your sunniest corner, and get ready, by midsummer you may be the one leaving zucchini on your neighbors’ doorstep. It’s a wonderful problem to have, and proof that a small garden can be every bit as abundant as a big one.

    Frequently Asked Questions

    • Can you grow zucchini in a container? Yes, easily. Choose a compact bush variety, use a container at least 5 gallons (ideally 12+ inches deep and 16 to 18 inches wide), plant one per pot, and give it full sun and consistent water.
    • Why does my zucchini have flowers but no fruit? Early in the season, the plant produces male flowers first, which naturally drop off, followed by female Flowers. If baby zucchini rot and fall, the female flowers aren’t being pollinated, so hand-pollinate in the morning or attract more bees with nearby flowers.
    • Do you need two zucchini plants to get fruit? No. Zucchini is self-pollinating, so one plant can produce a full harvest. Growing more than one simply increases the chance that male and female flowers open at the same time and get pollinated naturally.
    • How do you hand-pollinate zucchini? In the morning, snip an open male flower (thin stem), peel back the petals to expose the stamen, and brush it gently inside a female flower (the one with a tiny fruit at its base). A cotton swab works too.
    • What is the best zucchini variety for small gardens? Compact bush varieties are best. ‘Eight Ball’ has only a 3-foot spread and matures in about 40 days, while ‘Bush Baby’, ‘Patio Star’, and ‘Buckingham Patio’ are all bred for containers. For balconies without bees, choose a parthenocarpic variety.
    • How big should zucchini be when you pick it? Harvest at about 4 to 6 inches long for most varieties, or baseball size for round types. Smaller zucchini taste far better, and frequent picking keeps the plant producing, oversized fruit slows it down.
    • Why do my zucchini leaves have white powder on them? That’s powdery mildew, a common fungal issue caused by still, humid air and wet foliage. It rarely kills the plant. Improve airflow, prune a few large leaves, and water at the soil line rather than overhead.