


If you’re going to grow exactly one vegetable this year and you’ve never grown anything before, grow bush beans. The seeds are big enough to handle without squinting. They sprout in under a week. They don’t need a trellis, a cage, or any structure at all. They’re ready to eat in about eight weeks. And here’s the kicker: they actually improve your soil while they’re at it.
Learning how to grow bush beans is about as close as gardening gets to a guaranteed win. But there’s one counterintuitive rule that trips up nearly every beginner, and it’s the opposite of everything you’ve been told about feeding plants. This guide covers that rule, along with everything else: when to sow, how to get tender pods instead of tough ones, and why the timing of your harvest matters more than you’d think.
How Do You Grow Bush Beans?
Direct sow bush bean seeds 1 inch deep and 2 to 3 inches apart once soil has warmed to at least 65°F, after your last frost. Give them full sun and well-draining soil, and skip nitrogen fertilizer entirely, beans make their own. Water consistently, mulch to hold moisture, and harvest in 50 to 60 days when pods are pencil-thick, before the seeds inside start to bulge.
Two things separate a great bean harvest from a disappointing one: waiting for genuinely warm soil before you sow, and picking often, while pods are still young. Everything else is basically just watering.
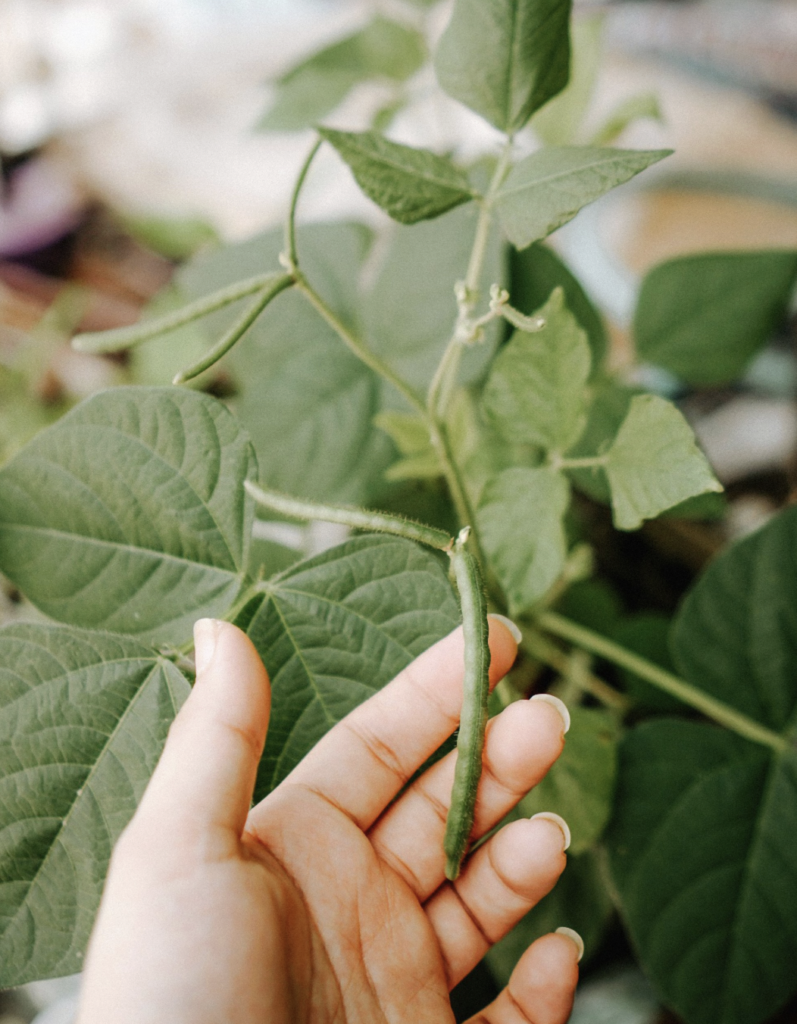
Bush vs Pole Beans: Why Beginners Should Start With Bush
Green beans (Phaseolus vulgaris) come in two growth habits, and the difference matters:
| Bush Beans | Pole Beans | |
|---|---|---|
| Height | Compact, 12–24 inches | Climbing vines, 6+ feet |
| Support | None needed | Requires a trellis |
| Harvest style | One big flush over 2–3 weeks | Slow, continuous, for a month or two |
| Total yield | Roughly a third of pole beans | Higher overall |
| Speed | Faster to first harvest | Slower to start |
| Best for | Beginners, small spaces, canning, freezing | Long harvests, vertical growers |
Bush beans are determinate. They grow to a set size, flower, produce essentially one concentrated harvest, and then wind down. That’s not a flaw, it’s a feature. It makes them ideal for beginners (no structures to build), perfect if you want a big batch for freezing or canning all at once, and easy to pull out and replace with another crop.
The trade-off: because they come all at once, you’ll want to succession sow, plant a short new row every 2 to 3 weeks for a steady supply of beans all summer. Our succession planting guide covers the rhythm. Just be sure to get your final sowing in at least 60 to 70 days before your average first fall frost, so the last crop has time to mature. And because beans go in relatively late, the bed is free early in the season, a perfect window for a fast, cold-hardy crop like radishes or baby spinach that you’ll harvest before the beans go in.
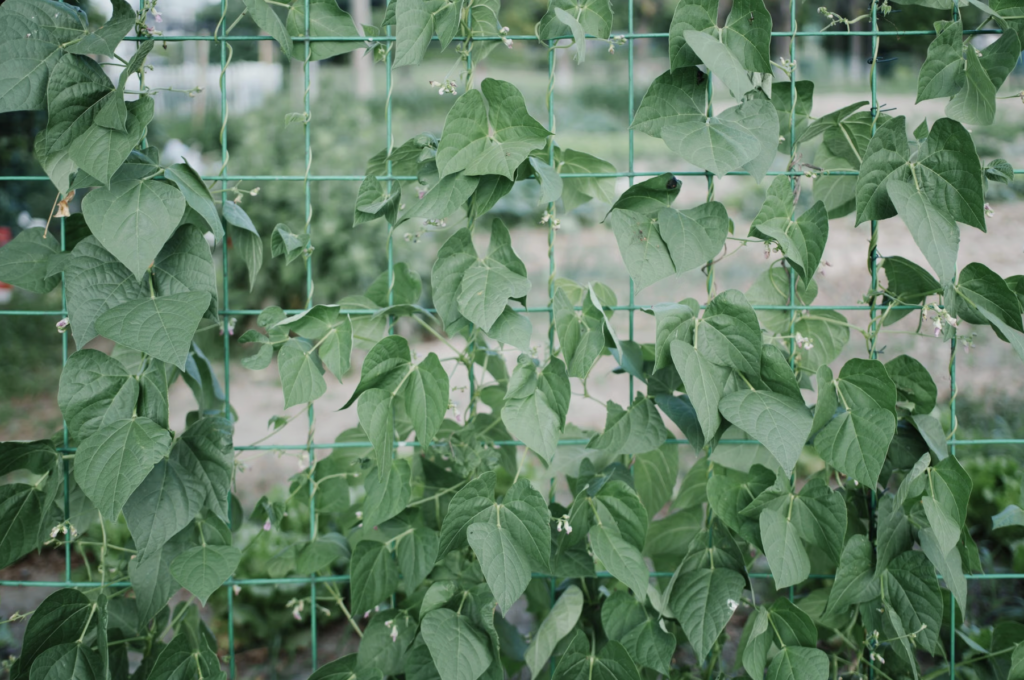
The Nitrogen Paradox: Why You Shouldn’t Fertilize Your Beans
Here’s the rule that surprises every beginner, and it’s the most important thing in this guide: do not feed your beans nitrogen.
Everything about gardening tells you plants want fertilizer. Beans are the exception, because they’re legumes and legumes perform a genuinely remarkable trick. Their roots form a symbiotic partnership with soil bacteria called rhizobia, which live in small nodules on the roots. These bacteria pull nitrogen straight out of the air and convert it into a form the plant can actually use. In effect, your beans manufacture their own fertilizer out of thin air.
So what happens if you add more? Too much nitrogen produces a beautiful, lush, leafy green plant, and hardly any beans. It also delays flowering, pushing back your whole harvest. Gardeners who fertilize their beans generously are, without realizing it, sabotaging their crop.
What to do instead:
- Feed the soil, not the plant. Work compost, worm castings, or well-rotted manure into the bed before planting. Good soil is all beans need.
- If you must fertilize, choose something low or zero in nitrogen with more phosphorus and potassium, check that the first number on the bag is low (see our NPK ratios guide).
- A mid-season side-dressing of compost is a gentle, safe boost if plants look tired.
One caveat worth knowing: the nitrogen-fixing partnership only works if the right rhizobia bacteria are actually present in your soil. In established gardens they usually are. But in brand-new beds, poor soil, or ground that’s never grown legumes, you can buy a cheap bean inoculant, a powder of rhizobia you dust onto the seeds at sowing. It’s an easy way to guarantee the magic happens. If you find soil biology fascinating, our guides to beneficial soil bacteria and building healthy soil microbiology dig into this partnership.
The garden-wide bonus: because beans leave nitrogen behind in the soil, they’re a gift to whatever you plant next. Follow your beans with a hungry crop brassicas like kale and cabbage, or squash and they’ll thrive on the nitrogen your beans banked. This is classic crop rotation at work, and it’s a cornerstone of building healthy soil without buying inputs.
Choosing a Bush Bean Variety
Bush beans come in green, yellow (wax), and purple, in snap, shelling, and dry types. For fresh eating, you want snap beans eaten pod and all. Nearly all modern varieties are stringless.
| Variety | Days | Why Grow It |
|---|---|---|
| Provider | ~50 | One of the earliest; reliable in cool soil — a great first bean |
| Blue Lake Bush | 45–50 | Heirloom, superb flavor, disease-resistant, 5–6 inch pods |
| Contender | ~50 | Tolerates heat and cool better than most; very forgiving |
| Royal Burgundy | ~55 | Deep purple pods that turn green when cooked — easy to spot when picking |
| Roma II | ~55 | Wide flat Italian (Romano) pods; produces even in hot summers |
| Mascotte | ~50 | Compact filet-type bred for containers |
A tip for beginners with kids: purple varieties like ‘Royal Burgundy’ are brilliant fun. The pods are vivid against green foliage so they’re far easier to find at harvest and they turn green in the pot, which never stops being fun.
How to Grow Bush Beans: Step-by-Step
- Step 1: Wait for Warm Soil (Seriously, Wait)
This is where impatient gardeners lose their crop. Bush beans are heat-lovers and frost-tender. Sow only after your last frost, when soil has warmed to at least 65°F (70–80°F is ideal for germination). In soil below 60°F, bean seeds simply rot in the ground before they sprout.
If spring is dragging, be patient, beans sown into cold soil don’t just grow slowly, they often never appear at all. Beans sown two weeks later into warm soil will overtake them anyway. Check your last frost date and let the soil catch up.
In our experience, this is the mistake that costs beginners their entire first bean crop, and it’s an understandable one: the seed packet says “sow after last frost,” so out they go on the first mild weekend in May. But “no more frost” and “warm soil” are two very different milestones, often weeks apart. A cheap soil thermometer costs less than a packet of seeds and removes the guesswork entirely. If you don’t have one, a decent rule of thumb is to wait until you’d be comfortable walking barefoot on the soil, beans feel roughly the same way about it that you do.
- Step 2: Direct Sow (Don’t Start Indoors)
Beans have brittle, sensitive roots that resent transplanting, and they grow so fast after germination that starting them indoors gains you nothing. Sow them right where they’ll grow.
Plant seeds 1 inch deep, 2 to 3 inches apart, in rows about 18 inches apart (10 inches works fine in raised beds). A nice detail: sow each seed with the eye facing down, that’s the small scar where it attached to the pod, and it’s where the root emerges. Germination takes just 4 to 10 days.
- Step 3: Give Them Sun and Well-Drained Soil
Beans need 6 to 8 hours of full sun and well-draining soil with a pH around 6.0 to 7.0. Raised beds are excellent here, since they both drain well and warm up faster in spring, see our raised bed guides. Work in compost before planting and, as covered above, hold the nitrogen.
- Step 4: Thin and Mulch
Once seedlings are up and growing, thin them to about 4 to 6 inches apart for good airflow, crowded plants with wet leaves are how bean diseases start. Then mulch around the base. Beans have shallow roots that suffer badly competing with weeds, and mulch smothers weeds while holding the steady moisture beans need. Our types of mulch guide can help.
- Step 5: Weed Carefully, Water Consistently
Weed by hand and gently, those shallow roots are easily damaged by aggressive hoeing. Water consistently at the soil line, aiming to keep the soil evenly moist without soaking the foliage. Wet leaves plus still air equals disease.
Bush Bean Care Through the Season
Watering. Steady, even moisture is what produces tender pods. Inconsistent watering causes tough beans and dropped blossoms. Water at the base, ideally in the morning so any splashed foliage dries quickly. A drip irrigation setup is ideal.
Heat stress. In a heat wave, bean plants often drop their blossoms, frustrating, but normal. You can protect plants with a row cover or shade cloth and keep the soil consistently moist. They usually resume setting pods once temperatures moderate. Our gardening in extreme heat guide has more strategies.
Flowers but no pods? Beyond heat, this can indicate a zinc deficiency. A spray of kelp-based fertilizer often resolves it.
Companions. Beans get along with almost everything; beets, radishes, carrots, cucumbers, corn, celery, chard, potatoes, strawberries, nasturtiums, and marigolds are all good neighbors. There’s one classic exception: keep beans away from the allium family (onions, garlic, leeks, chives, shallots), which reportedly stunt each other’s growth. Our companion planting guide has the full picture.
Pests. Aphids, Mexican bean beetles, spider mites, and slugs are the usual suspects. Check leaf undersides regularly, that’s where trouble hides and blast aphids off with a hard spray of water early in the day. Encouraging beneficial insects like ladybugs and lacewings handles most problems for you.
Growing Bush Beans in Containers
Bush beans are naturally compact, which makes them one of the better vegetables for pots, no trellis, no sprawl, no fuss. An 8-inch-deep, 8-inch-wide container holds a single plant, while a 5-gallon pot comfortably fits about three.
Use quality potting mix, give the pot 6 to 8 hours of sun, and water whenever the top inch or two dries out. The same nitrogen rule applies: if you feel the need to feed at all, use a low-nitrogen formula (something like 5-10-10) diluted to half strength, applied at planting and again at flowering. Compact filet varieties like ‘Mascotte’ were bred specifically for this. Our container gardening guide for beginners covers pot sizing and drainage, and beans are a great addition to a small-space food garden.
Harvesting Bush Beans (Timing Is Everything)
Bush beans are usually ready 50 to 60 days after sowing, and this is where a few small details make a real difference.
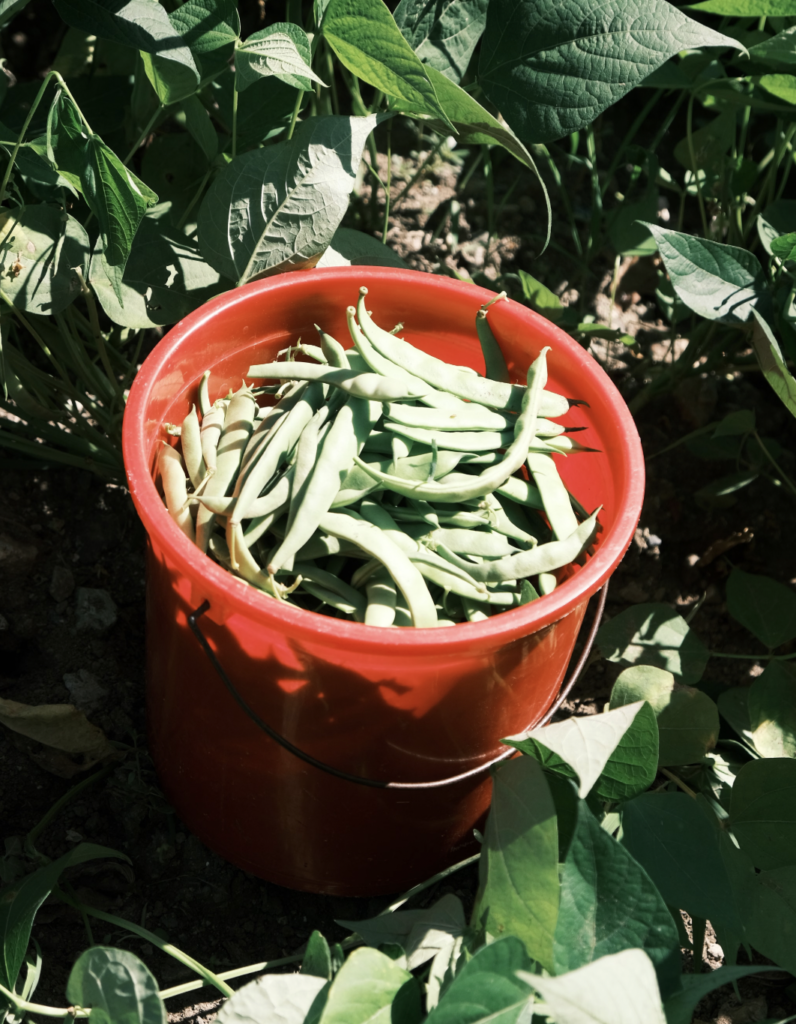
- Pick them young. The single most common mistake is waiting too long. Harvest when pods are firm, crisp, and about as thick as a pencil, roughly 4 to 6 inches for most varieties. Go by thickness and tenderness rather than length. Once you can see the outline of the seeds bulging inside the pod, they’re past their prime and will be tough and stringy. A fresh bean should snap cleanly when bent.
- Harvest in the early morning. Beans have their highest sugar content first thing in the day, which translates directly into better flavor. It’s a small habit with a real payoff.
- Never pick when the leaves are wet. Handling wet foliage spreads fungal disease through the planting. Wait for the leaves to dry.
- Pick constantly, this is the productivity secret. If pods are allowed to fatten with mature seed, the plant reads that as “mission accomplished” and stops flowering. Harvest every couple of days and you’ll keep it producing through its whole window.
Be gentle. Snap or cut pods off rather than yanking, bush bean stems are easily damaged, and a torn plant is an open door for disease.
Storing and Preserving Your Harvest
Fresh beans keep in an airtight container in the fridge for about four days, they’re best eaten quickly. Since a bush bean planting arrives all at once, though, preserving is part of the plan:
- Freezing: blanch for 2–3 minutes, plunge into ice water, drain, and freeze. Best texture of any method.
- Canning or pickling: classic dilly beans are a wonderful use for a glut.
- Drying: leave pods on the plant for weeks past normal harvest until dry and papery, then pull the whole plant and shell the beans for winter storage.
That last option is a lovely thing about beans, the same plant that gives you tender snap beans in July can, if you let it, hand you a jar of dry beans for the pantry.
Common Problems and How to Fix Them
| Problem | Likely Cause | The Fix |
|---|---|---|
| Seeds never sprouted | Soil below 60°F — seeds rotted | Wait for 65–80°F soil before sowing |
| Lush leaves, few beans | Too much nitrogen | Stop fertilizing; feed the soil with compost only |
| Blossoms dropping | Heat stress or dry soil | Shade cloth in heat; water consistently |
| Flowers but no pods set | Heat, or zinc deficiency | Spray with kelp-based fertilizer; wait out the heat |
| Tough, stringy beans | Picked too late | Harvest at pencil thickness, before seeds bulge |
| Plant stopped producing | Fat pods left on the plant | Pick every couple of days |
| Spots on leaves, disease spreading | Wet foliage, crowding, handling when wet | Thin plants; water at the base; never harvest wet |
| Seedlings chewed off | Slugs, earwigs, or rabbits | Barriers or traps; protect young plants |
If you grow beans in the same spot repeatedly, rotate the planting area each year to avoid soil-borne diseases building up.
Is Growing Bush Beans Worth It?
For a beginner, it’s hard to think of a better first crop. Bush beans sprout fast, need no structures, tolerate imperfect gardens, produce heavily in a small footprint, and are ready in under two months. They’re high in protein and fiber, they taste dramatically better than shop-bought, and almost uniquely, they leave your soil richer than they found it. There’s also something genuinely encouraging about a plant that comes up in four days: nothing builds a new gardener’s confidence faster than success you can see that quickly.
Ready to grow more? Beans make excellent neighbors for cucumbers grown vertically, tomatoes in containers, or zucchini in a small garden, and the nitrogen they leave behind is perfect for a following crop of kale. Explore the full Vegetables collection, part of the broader EcoGardenHub Plant Library.
Wait for warm soil, poke a few seeds an inch down, and stand back in less than a week you’ll have sprouts, and in less than two months, dinner. Few things in the garden reward so little effort with so much confidence.
Frequently Asked Questions
- Do bush beans need fertilizer? No, and adding nitrogen actively hurts them. Beans are legumes that fix their own nitrogen from the air via rhizobia bacteria on their roots. Too much nitrogen produces lush leaves and few pods. Just plant into decent, compost-enriched soil.
- How long do bush beans take to grow? Most varieties are ready to harvest 50 to 60 days after sowing, with germination in just 4 to 10 days. Bush beans produce most of their crop in a concentrated 2 to 3 week window.
- What’s the difference between bush and pole beans? Bush beans are compact (12–24 inches), need no support, and produce one big harvest over a few weeks. Pole beans climb to 6+ feet, require a trellis, and produce continuously for a month or two with a higher total yield. Bush beans are easier for beginners.
- When should I plant bush beans? After your last frost, once soil has warmed to at least 65°F (70–80°F is ideal). Beans sown in soil below 60°F often rot before germinating, so patience pays and later sowings in warm soil will overtake early ones anyway.
- Should I start bush beans indoors? No. Beans have fragile roots that dislike transplanting, and they grow so quickly after germination that indoor starting offers no advantage. Always direct sow where they’ll grow.
- When should I pick bush beans? Harvest when pods are firm, crisp, and about pencil-thick, usually 4 to 6 inches before you can see the seeds bulging inside. Pick in the early morning when sugar content is highest, and pick every couple of days to keep the plant producing.
- Why do my beans have lots of leaves but no pods? Almost always too much nitrogen. Beans make their own, so extra nitrogen fertilizer drives leafy growth at the expense of flowers and pods, and delays your harvest. Stop feeding and rely on compost-enriched soil instead.