Day: July 20, 2026

  • Growing Bush Beans for Beginners (Complete Guide)

    Growing Bush Beans for Beginners (Complete Guide)

    If you’re going to grow exactly one vegetable this year and you’ve never grown anything before, grow bush beans. The seeds are big enough to handle without squinting. They sprout in under a week. They don’t need a trellis, a cage, or any structure at all. They’re ready to eat in about eight weeks. And here’s the kicker: they actually improve your soil while they’re at it.

    Learning how to grow bush beans is about as close as gardening gets to a guaranteed win. But there’s one counterintuitive rule that trips up nearly every beginner, and it’s the opposite of everything you’ve been told about feeding plants. This guide covers that rule, along with everything else: when to sow, how to get tender pods instead of tough ones, and why the timing of your harvest matters more than you’d think.

    How Do You Grow Bush Beans?

    Direct sow bush bean seeds 1 inch deep and 2 to 3 inches apart once soil has warmed to at least 65°F, after your last frost. Give them full sun and well-draining soil, and skip nitrogen fertilizer entirely, beans make their own. Water consistently, mulch to hold moisture, and harvest in 50 to 60 days when pods are pencil-thick, before the seeds inside start to bulge.

    Two things separate a great bean harvest from a disappointing one: waiting for genuinely warm soil before you sow, and picking often, while pods are still young. Everything else is basically just watering.
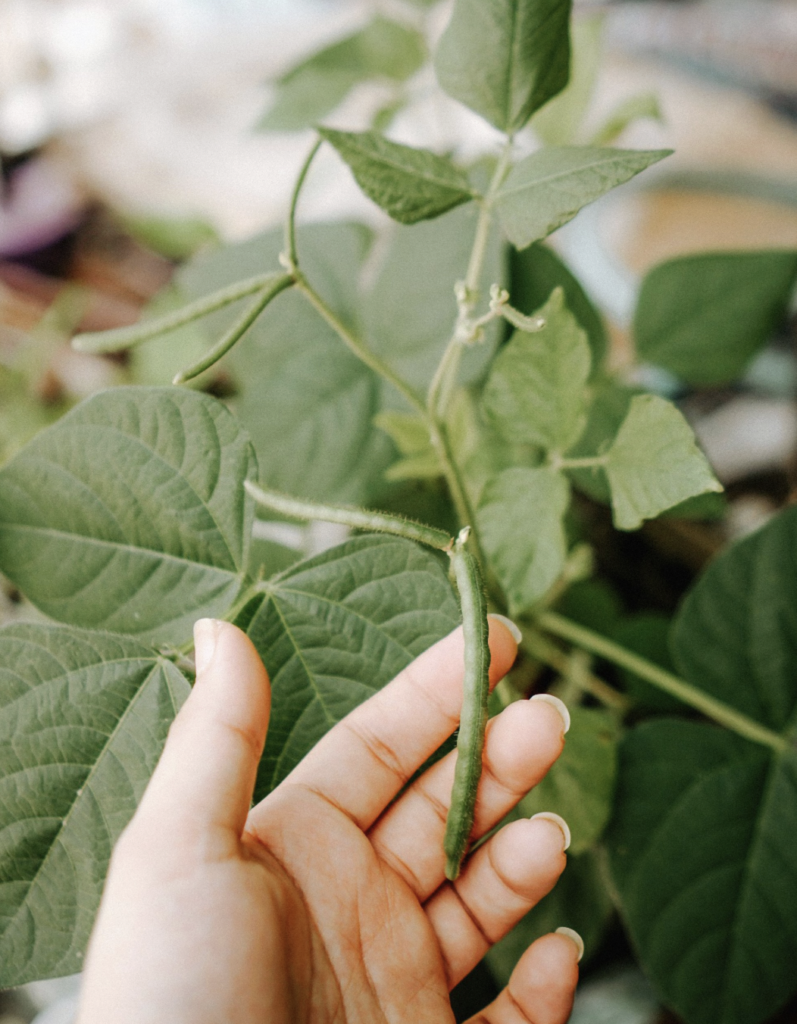
    A person's hand gently touches a green bean plant, showcasing growth and nature.
    A person’s hand gently touches a green bean plant, showcasing growth and nature.

    Bush vs Pole Beans: Why Beginners Should Start With Bush

    Green beans (Phaseolus vulgaris) come in two growth habits, and the difference matters:

    Bush Beans Pole Beans
    Height Compact, 12–24 inches Climbing vines, 6+ feet
    Support None needed Requires a trellis
    Harvest style One big flush over 2–3 weeks Slow, continuous, for a month or two
    Total yield Roughly a third of pole beans Higher overall
    Speed Faster to first harvest Slower to start
    Best for Beginners, small spaces, canning, freezing Long harvests, vertical growers

    Bush beans are determinate. They grow to a set size, flower, produce essentially one concentrated harvest, and then wind down. That’s not a flaw, it’s a feature. It makes them ideal for beginners (no structures to build), perfect if you want a big batch for freezing or canning all at once, and easy to pull out and replace with another crop.

    The trade-off: because they come all at once, you’ll want to succession sow, plant a short new row every 2 to 3 weeks for a steady supply of beans all summer. Our succession planting guide covers the rhythm. Just be sure to get your final sowing in at least 60 to 70 days before your average first fall frost, so the last crop has time to mature. And because beans go in relatively late, the bed is free early in the season, a perfect window for a fast, cold-hardy crop like radishes or baby spinach that you’ll harvest before the beans go in.
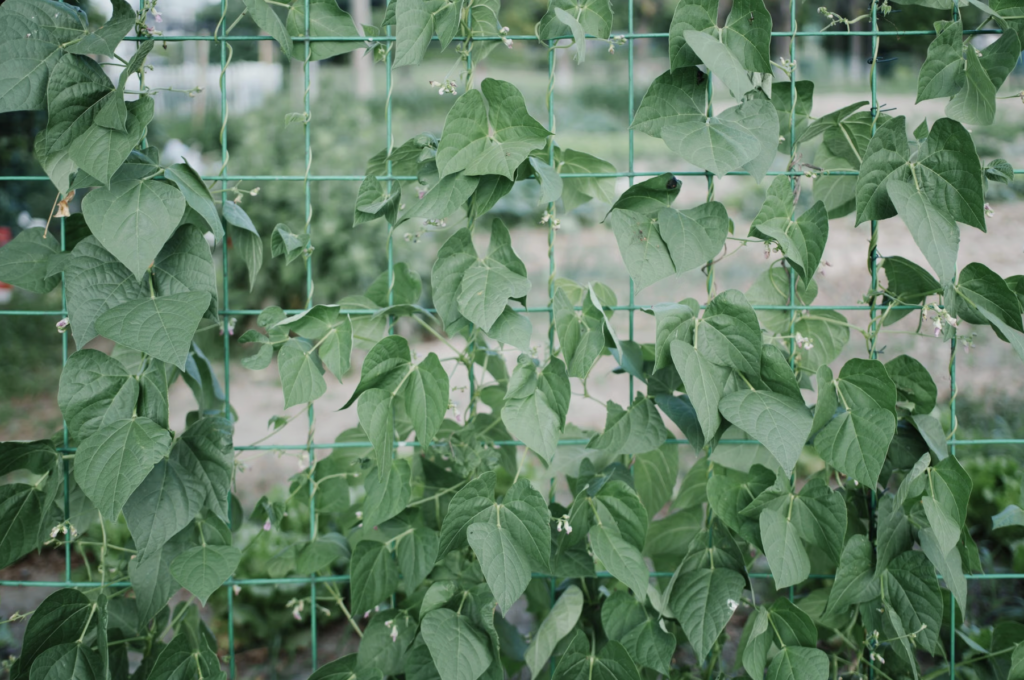
    Lush green bean plants climb a sturdy garden trellis in an outdoor setting
    Lush green bean plants climb a sturdy garden trellis in an outdoor setting

    The Nitrogen Paradox: Why You Shouldn’t Fertilize Your Beans

    Here’s the rule that surprises every beginner, and it’s the most important thing in this guide: do not feed your beans nitrogen.

    Everything about gardening tells you plants want fertilizer. Beans are the exception, because they’re legumes and legumes perform a genuinely remarkable trick. Their roots form a symbiotic partnership with soil bacteria called rhizobia, which live in small nodules on the roots. These bacteria pull nitrogen straight out of the air and convert it into a form the plant can actually use. In effect, your beans manufacture their own fertilizer out of thin air.

    So what happens if you add more? Too much nitrogen produces a beautiful, lush, leafy green plant, and hardly any beans. It also delays flowering, pushing back your whole harvest. Gardeners who fertilize their beans generously are, without realizing it, sabotaging their crop.

    What to do instead:

    • Feed the soil, not the plant. Work compost, worm castings, or well-rotted manure into the bed before planting. Good soil is all beans need.
    • If you must fertilize, choose something low or zero in nitrogen with more phosphorus and potassium, check that the first number on the bag is low (see our NPK ratios guide).
    • A mid-season side-dressing of compost is a gentle, safe boost if plants look tired.

    One caveat worth knowing: the nitrogen-fixing partnership only works if the right rhizobia bacteria are actually present in your soil. In established gardens they usually are. But in brand-new beds, poor soil, or ground that’s never grown legumes, you can buy a cheap bean inoculant, a powder of rhizobia you dust onto the seeds at sowing. It’s an easy way to guarantee the magic happens. If you find soil biology fascinating, our guides to beneficial soil bacteria and building healthy soil microbiology dig into this partnership.

    The garden-wide bonus: because beans leave nitrogen behind in the soil, they’re a gift to whatever you plant next. Follow your beans with a hungry crop brassicas like kale and cabbage, or squash and they’ll thrive on the nitrogen your beans banked. This is classic crop rotation at work, and it’s a cornerstone of building healthy soil without buying inputs.

    Choosing a Bush Bean Variety

    Bush beans come in green, yellow (wax), and purple, in snap, shelling, and dry types. For fresh eating, you want snap beans eaten pod and all. Nearly all modern varieties are stringless.

    Variety Days Why Grow It
    Provider ~50 One of the earliest; reliable in cool soil — a great first bean
    Blue Lake Bush 45–50 Heirloom, superb flavor, disease-resistant, 5–6 inch pods
    Contender ~50 Tolerates heat and cool better than most; very forgiving
    Royal Burgundy ~55 Deep purple pods that turn green when cooked — easy to spot when picking
    Roma II ~55 Wide flat Italian (Romano) pods; produces even in hot summers
    Mascotte ~50 Compact filet-type bred for containers

    A tip for beginners with kids: purple varieties like ‘Royal Burgundy’ are brilliant fun. The pods are vivid against green foliage so they’re far easier to find at harvest  and they turn green in the pot, which never stops being fun.

    How to Grow Bush Beans: Step-by-Step

    • Step 1: Wait for Warm Soil (Seriously, Wait)

    This is where impatient gardeners lose their crop. Bush beans are heat-lovers and frost-tender. Sow only after your last frost, when soil has warmed to at least 65°F (70–80°F is ideal for germination). In soil below 60°F, bean seeds simply rot in the ground before they sprout.

    If spring is dragging, be patient, beans sown into cold soil don’t just grow slowly, they often never appear at all. Beans sown two weeks later into warm soil will overtake them anyway. Check your last frost date and let the soil catch up.

    In our experience, this is the mistake that costs beginners their entire first bean crop, and it’s an understandable one: the seed packet says “sow after last frost,” so out they go on the first mild weekend in May. But “no more frost” and “warm soil” are two very different milestones, often weeks apart. A cheap soil thermometer costs less than a packet of seeds and removes the guesswork entirely. If you don’t have one, a decent rule of thumb is to wait until you’d be comfortable walking barefoot on the soil, beans feel roughly the same way about it that you do.

    • Step 2: Direct Sow (Don’t Start Indoors)

    Beans have brittle, sensitive roots that resent transplanting, and they grow so fast after germination that starting them indoors gains you nothing. Sow them right where they’ll grow.

    Plant seeds 1 inch deep, 2 to 3 inches apart, in rows about 18 inches apart (10 inches works fine in raised beds). A nice detail: sow each seed with the eye facing down, that’s the small scar where it attached to the pod, and it’s where the root emerges. Germination takes just 4 to 10 days.

    • Step 3: Give Them Sun and Well-Drained Soil

    Beans need 6 to 8 hours of full sun and well-draining soil with a pH around 6.0 to 7.0. Raised beds are excellent here, since they both drain well and warm up faster in spring, see our raised bed guides. Work in compost before planting and, as covered above, hold the nitrogen.

    • Step 4: Thin and Mulch

    Once seedlings are up and growing, thin them to about 4 to 6 inches apart for good airflow, crowded plants with wet leaves are how bean diseases start. Then mulch around the base. Beans have shallow roots that suffer badly competing with weeds, and mulch smothers weeds while holding the steady moisture beans need. Our types of mulch guide can help.

    • Step 5: Weed Carefully, Water Consistently

    Weed by hand and gently, those shallow roots are easily damaged by aggressive hoeing. Water consistently at the soil line, aiming to keep the soil evenly moist without soaking the foliage. Wet leaves plus still air equals disease.

    Bush Bean Care Through the Season

    Watering. Steady, even moisture is what produces tender pods. Inconsistent watering causes tough beans and dropped blossoms. Water at the base, ideally in the morning so any splashed foliage dries quickly. A drip irrigation setup is ideal.

    Heat stress. In a heat wave, bean plants often drop their blossoms, frustrating, but normal. You can protect plants with a row cover or shade cloth and keep the soil consistently moist. They usually resume setting pods once temperatures moderate. Our gardening in extreme heat guide has more strategies.

    Flowers but no pods? Beyond heat, this can indicate a zinc deficiency. A spray of kelp-based fertilizer often resolves it.

    Companions. Beans get along with almost everything; beets, radishes, carrots, cucumbers, corn, celery, chard, potatoes, strawberries, nasturtiums, and marigolds are all good neighbors. There’s one classic exception: keep beans away from the allium family (onions, garlic, leeks, chives, shallots), which reportedly stunt each other’s growth. Our companion planting guide has the full picture.

    Pests. Aphids, Mexican bean beetles, spider mites, and slugs are the usual suspects. Check leaf undersides regularly, that’s where trouble hides and blast aphids off with a hard spray of water early in the day. Encouraging beneficial insects like ladybugs and lacewings handles most problems for you.
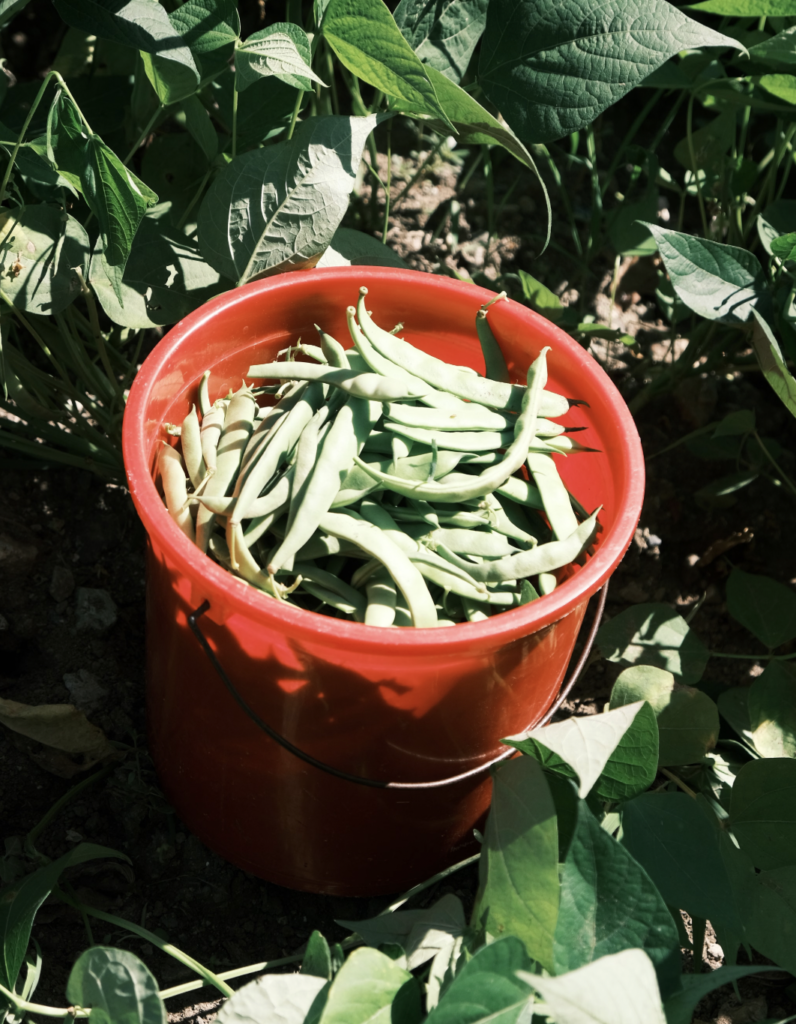
    Red bucket filled with fresh green beans in a lush vegetable garden
    Red bucket with fresh green beans

    Growing Bush Beans in Containers

    Bush beans are naturally compact, which makes them one of the better vegetables for pots, no trellis, no sprawl, no fuss. An 8-inch-deep, 8-inch-wide container holds a single plant, while a 5-gallon pot comfortably fits about three.

    Use quality potting mix, give the pot 6 to 8 hours of sun, and water whenever the top inch or two dries out. The same nitrogen rule applies: if you feel the need to feed at all, use a low-nitrogen formula (something like 5-10-10) diluted to half strength, applied at planting and again at flowering. Compact filet varieties like ‘Mascotte’ were bred specifically for this. Our container gardening guide for beginners covers pot sizing and drainage, and beans are a great addition to a small-space food garden.

    Harvesting Bush Beans (Timing Is Everything)

    Bush beans are usually ready 50 to 60 days after sowing, and this is where a few small details make a real difference.

    • Pick them young. The single most common mistake is waiting too long. Harvest when pods are firm, crisp, and about as thick as a pencil, roughly 4 to 6 inches for most varieties. Go by thickness and tenderness rather than length. Once you can see the outline of the seeds bulging inside the pod, they’re past their prime and will be tough and stringy. A fresh bean should snap cleanly when bent.
    • Harvest in the early morning. Beans have their highest sugar content first thing in the day, which translates directly into better flavor. It’s a small habit with a real payoff.
    • Never pick when the leaves are wet. Handling wet foliage spreads fungal disease through the planting. Wait for the leaves to dry.
    • Pick constantly, this is the productivity secret. If pods are allowed to fatten with mature seed, the plant reads that as “mission accomplished” and stops flowering. Harvest every couple of days and you’ll keep it producing through its whole window.

    Be gentle. Snap or cut pods off rather than yanking, bush bean stems are easily damaged, and a torn plant is an open door for disease.

    Storing and Preserving Your Harvest

    Fresh beans keep in an airtight container in the fridge for about four days, they’re best eaten quickly. Since a bush bean planting arrives all at once, though, preserving is part of the plan:

    • Freezing: blanch for 2–3 minutes, plunge into ice water, drain, and freeze. Best texture of any method.
    • Canning or pickling: classic dilly beans are a wonderful use for a glut.
    • Drying: leave pods on the plant for weeks past normal harvest until dry and papery, then pull the whole plant and shell the beans for winter storage.

    That last option is a lovely thing about beans, the same plant that gives you tender snap beans in July can, if you let it, hand you a jar of dry beans for the pantry.

    Common Problems and How to Fix Them

    Problem Likely Cause The Fix
    Seeds never sprouted Soil below 60°F — seeds rotted Wait for 65–80°F soil before sowing
    Lush leaves, few beans Too much nitrogen Stop fertilizing; feed the soil with compost only
    Blossoms dropping Heat stress or dry soil Shade cloth in heat; water consistently
    Flowers but no pods set Heat, or zinc deficiency Spray with kelp-based fertilizer; wait out the heat
    Tough, stringy beans Picked too late Harvest at pencil thickness, before seeds bulge
    Plant stopped producing Fat pods left on the plant Pick every couple of days
    Spots on leaves, disease spreading Wet foliage, crowding, handling when wet Thin plants; water at the base; never harvest wet
    Seedlings chewed off Slugs, earwigs, or rabbits Barriers or traps; protect young plants

    If you grow beans in the same spot repeatedly, rotate the planting area each year to avoid soil-borne diseases building up.

    Is Growing Bush Beans Worth It?

    For a beginner, it’s hard to think of a better first crop. Bush beans sprout fast, need no structures, tolerate imperfect gardens, produce heavily in a small footprint, and are ready in under two months. They’re high in protein and fiber, they taste dramatically better than shop-bought, and almost uniquely, they leave your soil richer than they found it. There’s also something genuinely encouraging about a plant that comes up in four days: nothing builds a new gardener’s confidence faster than success you can see that quickly.

    Ready to grow more? Beans make excellent neighbors for cucumbers grown vertically, tomatoes in containers, or zucchini in a small garden, and the nitrogen they leave behind is perfect for a following crop of kale. Explore the full Vegetables collection, part of the broader EcoGardenHub Plant Library.

    Wait for warm soil, poke a few seeds an inch down, and stand back  in less than a week you’ll have sprouts, and in less than two months, dinner. Few things in the garden reward so little effort with so much confidence.

    Frequently Asked Questions

    • Do bush beans need fertilizer? No, and adding nitrogen actively hurts them. Beans are legumes that fix their own nitrogen from the air via rhizobia bacteria on their roots. Too much nitrogen produces lush leaves and few pods. Just plant into decent, compost-enriched soil.
    • How long do bush beans take to grow? Most varieties are ready to harvest 50 to 60 days after sowing, with germination in just 4 to 10 days. Bush beans produce most of their crop in a concentrated 2 to 3 week window.
    • What’s the difference between bush and pole beans? Bush beans are compact (12–24 inches), need no support, and produce one big harvest over a few weeks. Pole beans climb to 6+ feet, require a trellis, and produce continuously for a month or two with a higher total yield. Bush beans are easier for beginners.
    • When should I plant bush beans? After your last frost, once soil has warmed to at least 65°F (70–80°F is ideal). Beans sown in soil below 60°F often rot before germinating, so patience pays and later sowings in warm soil will overtake early ones anyway.
    • Should I start bush beans indoors? No. Beans have fragile roots that dislike transplanting, and they grow so quickly after germination that indoor starting offers no advantage. Always direct sow where they’ll grow.
    • When should I pick bush beans? Harvest when pods are firm, crisp, and about pencil-thick, usually 4 to 6 inches before you can see the seeds bulging inside. Pick in the early morning when sugar content is highest, and pick every couple of days to keep the plant producing.
    • Why do my beans have lots of leaves but no pods? Almost always too much nitrogen. Beans make their own, so extra nitrogen fertilizer drives leafy growth at the expense of flowers and pods, and delays your harvest. Stop feeding and rely on compost-enriched soil instead.
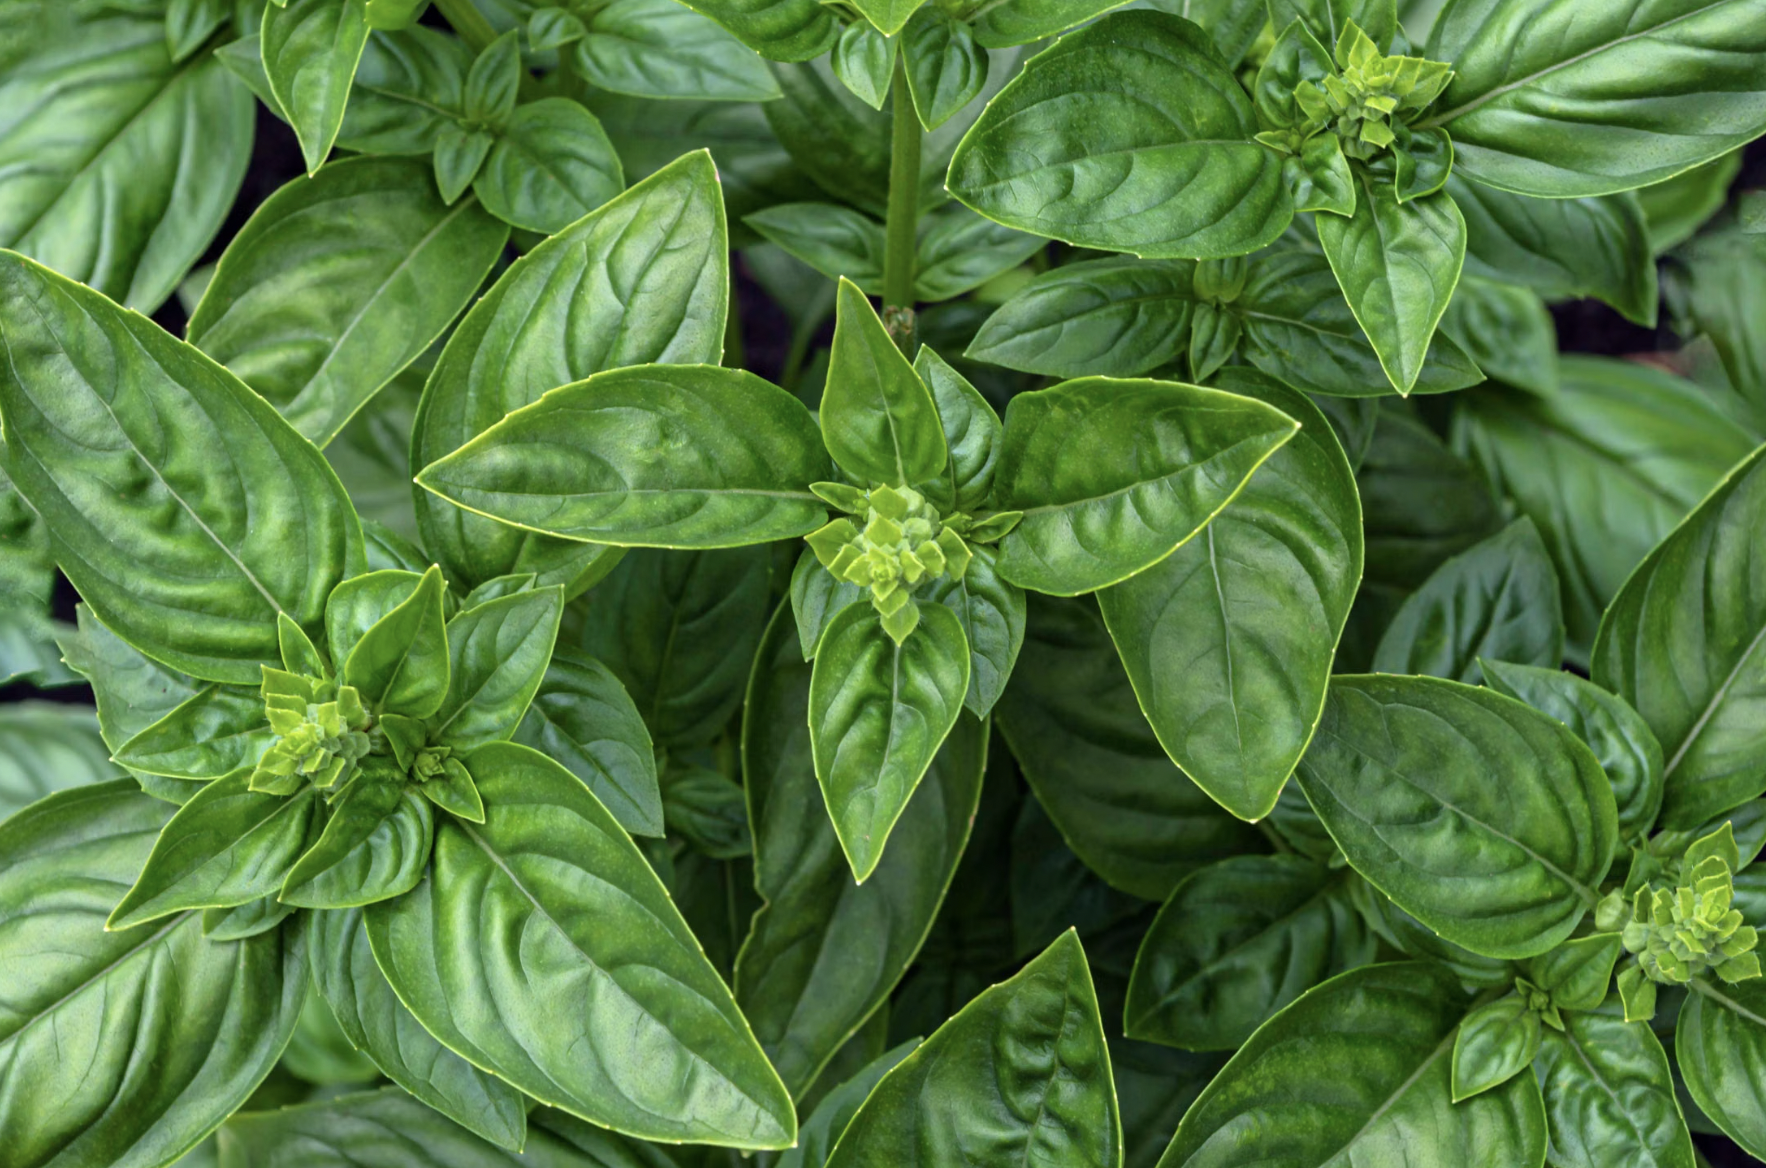
  • How to Grow Basil Indoors Year-Round (Full Guide)

    How to Grow Basil Indoors Year-Round (Full Guide)

    There’s a particular kind of joy in reaching over your stove, pinching three fragrant leaves off a plant on the windowsill, and dropping them straight into the pan. No plastic clamshell, no wilted supermarket bunch, no trip to the shop. Just basil, still alive thirty seconds ago.

    Learning how to grow basil indoors is the easiest entry point into herb growing there is, but there’s a truth most guides tiptoe around, and it’s the key to the whole thing. Basil is an annual. It will eventually flower, go woody, and die. That’s not a failure of your care; it’s the plant’s biology. So genuinely year-round basil isn’t about keeping one heroic plant alive forever. It’s about running a simple, almost effortless rotation. Once you understand that, fresh basil on your counter in February becomes routine.

    Can You Grow Basil Indoors Year-Round?

    Yes. Give basil 6 to 8 hours of direct sun or 12 to 14 hours under a grow light, a 6- to 8-inch pot with good drainage and fast-draining mix, water when the top inch dries, and keep it at 70–80°F away from cold drafts. Prune from the top above a leaf node every 2 to 3 weeks to keep it bushy, and pinch off flowers immediately. For a truly continuous supply, root cuttings in water every couple of months so a younger plant is always coming along.

    Two things decide your success: enough light (the cause of nearly every sad indoor basil) and regular pruning (the difference between a leggy stick and a lush bush).

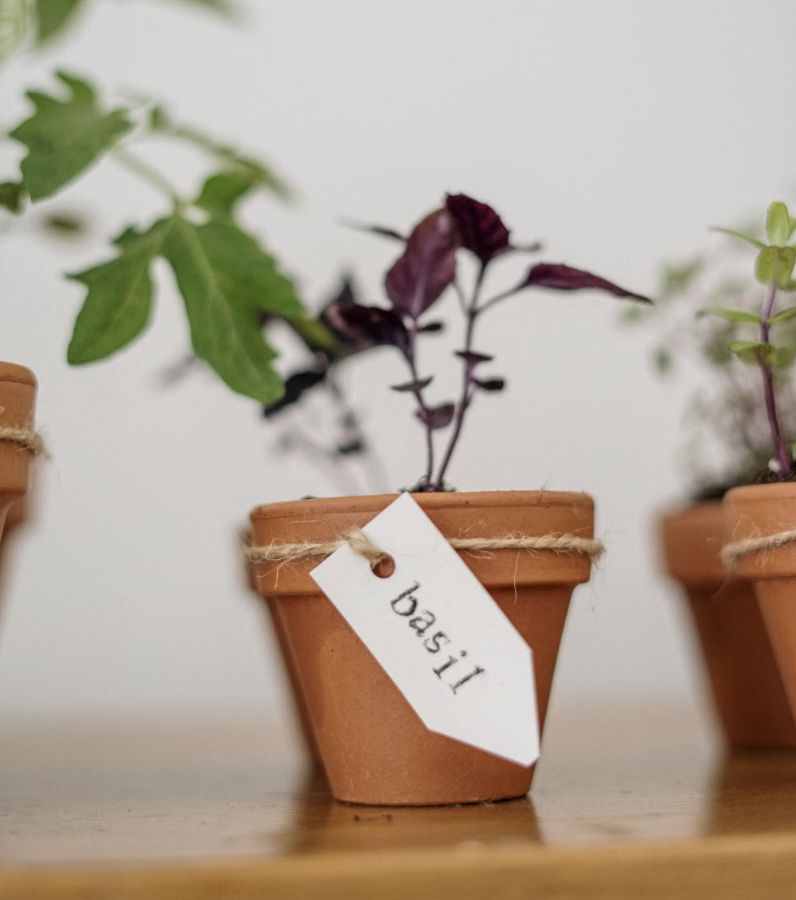
    Close-up of a basil plant in a terracotta pot with a handmade label, ideal for home gardening and botany enthusiasts
    Close-up of a basil plant in a terracotta pot with a handmade label, ideal for home gardening and botany enthusiasts

    Meet Basil (King of Herbs)

    Basil (Ocimum basilicum) is a member of the mint family, most likely originating in India before becoming inseparable from Mediterranean and Asian cooking. That heritage tells you what it wants: warmth and bright light. It’s often called the king of herbs, and it earns the title, only Few plants are as fragrant, as fast, or as immediately useful.

    It’s also worth knowing basil’s medicinal side, especially within an herb garden. Its close relative holy basil (tulsi, Ocimum tenuiflorum) has been used in Ayurvedic tradition for centuries and grows indoors under exactly the same conditions as sweet basil. Culinary basil itself is rich in aromatic oils and antioxidants and the simple act of brushing past a plant and releasing that scent is its own small daily pleasure. If you’re building a medicinal herb collection, basil is a natural cornerstone: it’s the easiest of the group to grow, it shares its care requirements with tulsi, and it earns its space in the kitchen every single day.

    Why Basil Is the Best Herb to Start With Indoors

    • It’s fast. Seeds germinate in about a week, and you’re harvesting within weeks — no long waits.
    • It’s compact. A single 6-inch pot on a windowsill is genuinely enough.
    • It’s forgiving. Basil tells you clearly what it wants (droopy = water, leggy = light), so beginners learn quickly.
    • It’s endlessly useful. Pesto, pasta, salads, sandwiches, cocktails, even tea.
    • It propagates for free. A cutting in a glass of water roots in days — one plant becomes infinite plants.
    • It smells wonderful. Just watering it perfumes the room.

    Light: The Thing That Makes or Breaks Indoor Basil

    If your indoor basil has ever gone tall, thin, and sad, this was why. Basil is a sun worshipper, and indoor light is far weaker than it looks to our eyes.

    Your two options:

    • A bright window. A south-facing window is ideal, giving at least 6 hours of direct sun. Strong afternoon light from a west-facing window also works well.
    • A grow light. Run it 12 to 14 hours a day, positioned 6 to 12 inches above the plant. Keep leaves from touching the bulb. Our DIY grow light setup guide covers cheap, effective arrangements and honestly, for winter basil in most of the country, a grow light isn’t a luxury. It’s the difference between a harvest and a houseplant.

    Read the signs:

    Sign Meaning
    Leggy, stretched stems; wide gaps between leaves Not enough light
    Pale or yellowing leaves, slow growth, weak flavor Not enough light
    Scorched or browning leaf edges Too much intense light
    Wilting despite moist soil, curling leaves Light stress or heat

    One easy habit: rotate the pot a quarter turn every few days so the plant grows evenly and upright, instead of leaning permanently toward the glass.

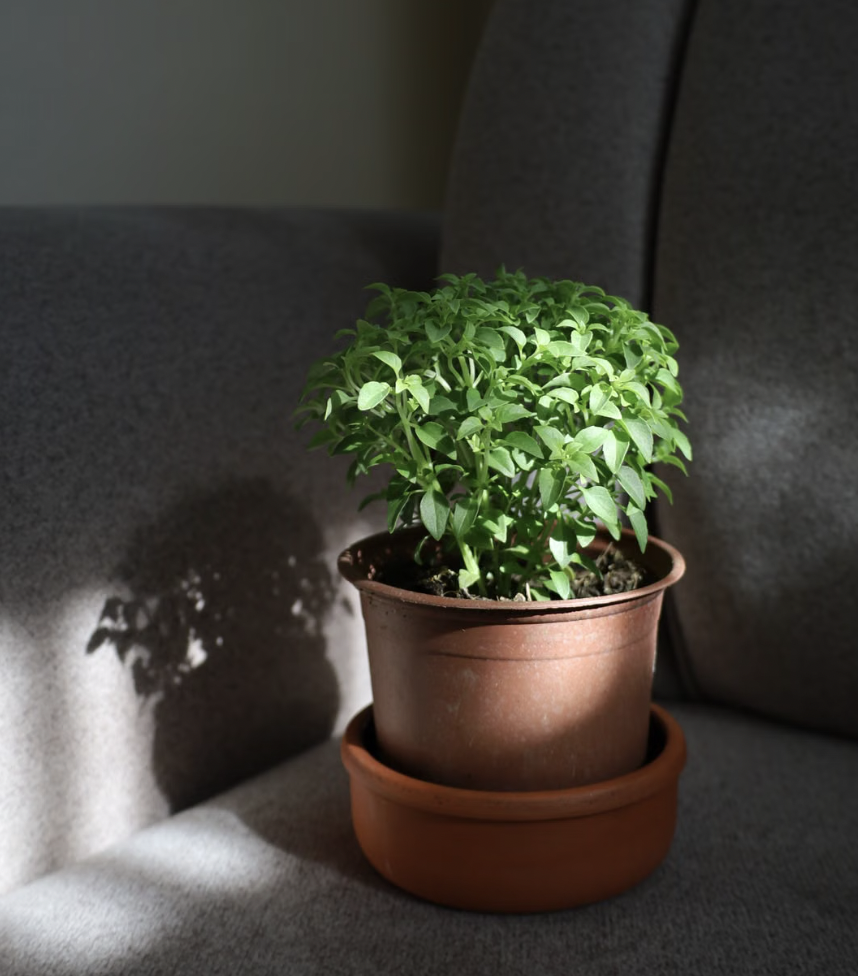
    Lush green basil plant in a terracotta pot on a cozy gray sofa in indoor lighting
    Lush green basil plant in a terracotta pot on a cozy gray sofa in indoor lighting

    The Right Pot and Soil

    Pot: at least 6 to 8 inches deep and wide, with a real drainage hole, non-negotiable. Terra cotta is a favorite because it’s porous and breathes, though any well-draining pot works. Basil grows fast and gets root-bound quickly, especially in the small nursery pots it’s sold in. When roots circle the surface or poke from the drainage holes, move up a size with fresh mix.

    Soil: a loose, breathable potting mix rich in organic matter, amended with perlite or coco coir for drainage. Aim for a pH around 6.0–7.0. Basil wants steady moisture but absolutely hates wet feet, sharp drainage is what prevents root rot.

    The Grocery-Store Basil Hack

    Here’s a trick worth knowing. That $4 pot of basil at the supermarket isn’t one plant; it’s a crowded clump of a dozen or more seedlings jammed together, competing for the same soil. That’s exactly why it looks great for a week and then collapses.

    Instead of watching it die: tip it out, gently tease the root ball apart into 4 to 6 clumps, and repot each into its own container with fresh mix. Water them in and give them bright light. You’ve just turned one struggling supermarket pot into a windowsill full of thriving plants, for the price of a coffee.

    Starting Basil From Seed

    Growing from seed is cheap, easy, and gives you access to varieties you’ll never find in a shop.

    1. Fill a small pot or tray with pre-moistened potting mix.
    2. Sprinkle seeds on the surface and cover with about ¼ inch of mix.
    3. Keep it warm and lightly moist, a sunny window or a spot near a heat source.
    4. Seeds germinate in roughly 7 to 14 days.
    5. Once seedlings have two or three sets of true leaves, thin them, cutting the extras at the soil line rather than pulling (which disturbs neighboring roots). Eat the thinnings.
    6. Move the strongest plants into their own 6-inch pots.

    Our seed starting guide covers the fundamentals in more depth.

    Choosing a Variety

    Variety Why Grow It
    Genovese The classic Italian pesto basil — rich, sweet, reliable indoors
    Sweet Basil The all-purpose standard, widely available
    Spicy Globe / Greek Naturally dwarf and compact — the best pick for tight windowsills
    Thai Basil Anise-licorice notes; essential for Southeast Asian cooking
    Purple (Dark Opal) Beautiful deep-purple leaves; ornamental and edible
    Lemon Basil Bright citrus twist for salads, fish, and drinks
    Holy Basil (Tulsi) The medicinal one — grown for tea and traditional herbal use

    For a small windowsill, dwarf types like ‘Spicy Globe’ or Greek basil give you the most flavor per square inch.

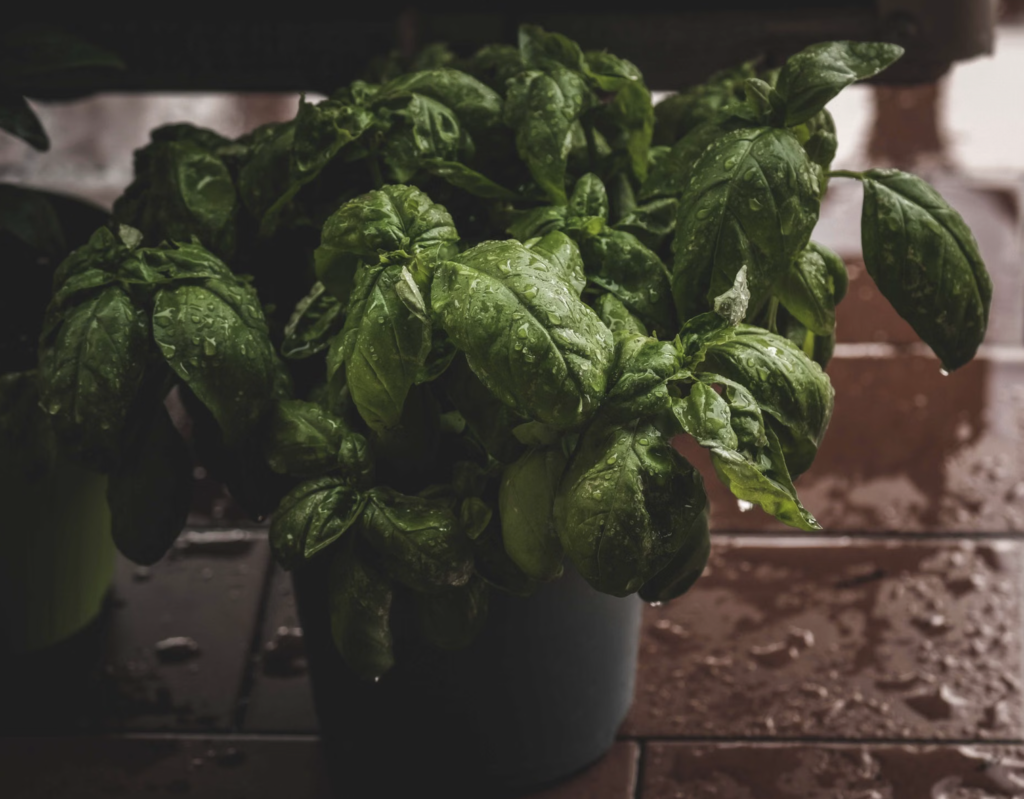
    Close-up of a vibrant basil plant with fresh water droplets on leaves, creating a refreshing feel
    Close-up of a vibrant basil plant with fresh water droplets on leaves, creating a refreshing feel

    Watering, Warmth and Humidity

    • Watering. Water when the top inch of soil feels dry, then water thoroughly until it drains. Always water at the base, not over the leaves, wet foliage invites fungal disease. Overwatering is the most common winter mistake: growth slows in low light, so the plant needs noticeably less than it did in summer.

    • Warmth. Basil wants 70–80°F during the day and never below 50°F at night. Keep it away from heating vents, air-conditioning, and importantly cold windowpanes. Leaves touching winter glass get chilled and damaged. Pull the pot a few inches back from the glass; it costs you nothing and saves the plant.

    • Humidity. Indoor heating creates desert-dry air, which basil dislikes. Set the pot on a tray of pebbles and water, group plants together, run a humidifier, or mist occasionally.

    • Feeding. Go easy. Over-fertilizing produces spindly growth and noticeably less flavorful leaves a real trade-off for a herb you’re growing to eat. Use a diluted organic fertilizer at half strength, applied lightly but regularly rather than in big infrequent doses. Our guides to homemade organic fertilizer and NPK ratios can help.

    Pruning: The Single Biggest Lever

    Pruning is the one thing that separates a sad, leggy basil from a lush, bushy, productive one and most beginners do it backwards, picking random lower leaves.

    Basil grows from the top. When you cut the main stem just above a leaf node (the point where two small leaves emerge), the plant responds by sending out two new side shoots from that node. Do it repeatedly and one stem becomes two, then four, then eight. You’re not taking from the plant, you’re multiplying it.

    How to do it:

    1. Wait until the plant is 6 to 8 inches tall with several sets of leaves.
    2. Find a leaf pair partway down the stem and cut about ¼ to ½ inch above it, ideally at a 45° angle with clean scissors (fingers work, but can tear).
    3. Never remove more than a third of the plant at once, leave at least two-thirds intact.
    4. Repeat every 2 to 3 weeks on any stem over 6 inches.
    5. Prune in the morning, when the plant is well hydrated.

    Pinch off flower buds the moment you see them. Once basil flowers, it redirects its energy into seed and the leaves turn tough and bitter. Deadheading buds keeps flavor sweet and delays the inevitable.

    The Rotation System (The Real Secret to Year-Round Basil)

    Here’s the honest part. Even with perfect care, basil stems eventually go woody and production slows. This is normal. It is not your fault. Most basil plants simply don’t last much beyond a year.

    So stop trying to keep one plant alive forever, and run a rotation instead:

    1. Every couple of months, snip a healthy 4-inch cutting from a thriving plant, just below a node.
    2. Strip the lower leaves and stand the cutting in a glass of water on the windowsill.
    3. Roots appear in about 1 to 2 weeks.
    4. Pot it up once roots are an inch or two long.
    5. When the old plant tires, compost it, the new one is already producing.

    Keep two or three plants at different ages and you’ll never be without basil. Many indoor growers also succession sow a few fresh seeds every few weeks for the same reason. This one habit, more than any other, is what “year-round basil” actually means. It also costs nothing, every future plant comes free from the one you already own.

    In our experience, this is the mental shift that turns indoor herb growing from frustrating to effortless. People buy a basil plant in October, nurse it devotedly through a slow decline, and conclude they have a black thumb when it finally gives up in February. But that plant was always going to end, annuals do. The gardeners with basil on the counter every month of the year aren’t better at keeping plants alive; they simply always have a cutting rooting in a jam jar by the sink. It takes about ninety seconds every couple of months, and it quietly solves the entire problem.

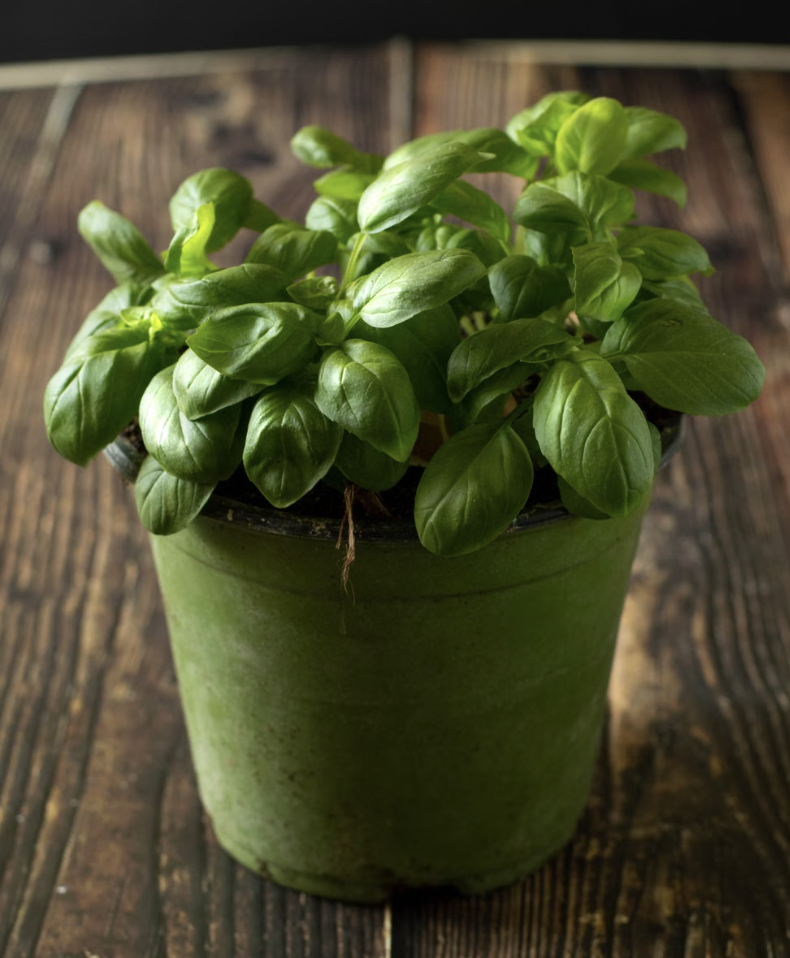
    A vibrant basil plant in a clay pot on a rustic wooden table, ideal for herb-related content.
    A vibrant basil plant in a clay pot on a rustic wooden table, ideal for herb-related content.

    Harvesting

    Start harvesting once a stem has six to eight leaves. Begin with small, light picks rather than one big haul.

    Always harvest the way you prune: cut above a leaf node, take from the top, and leave at least two-thirds of the plant standing. Frequent harvesting genuinely helps basil every cut triggers new branching. The more you use it, the more you get.

    For the kitchen, use basil fresh whenever possible; its aromatic oils fade fast with heat and time, so add it at the end of cooking. Surplus can be blitzed into pesto and frozen in ice-cube trays, or the leaves frozen whole in olive oil, a far better result than drying, which loses most of basil’s character.

    Adjusting Through the Seasons

    Indoor basil cares about the calendar more than most people expect, and a few small seasonal tweaks keep it thriving:

    • Winter. Light drops dramatically and growth slows, this is where a grow light earns its keep. Water noticeably less, since the plant is using far less. Pull pots back from freezing glass, and keep them away from radiators, which create hot, bone-dry pockets of air. Don’t be alarmed if growth nearly stops in December and January; it will surge again as daylight returns.

    • Spring and summer. Growth accelerates, so basil dries out faster, check the soil more often and water before the plant wilts rather than after. Resume light regular feeding. This is also the ideal time to take cuttings, since they root fastest in warmth and strong light. If you’d like, you can move pots outdoors once nights stay reliably above 50°F, hardening them off gradually, just watch for hitchhiking pests before bringing them back in.

    Common Problems and How to Fix Them

    Problem Likely Cause The Fix
    Tall, leggy, sparse growth Not enough light Move to a south window or add a grow light 6–12” above
    Leaves turning bitter/tough Plant is flowering Pinch off flower buds immediately
    Drooping plant Under- or over-watering Check soil; water when top inch is dry
    Yellow lower leaves, mushy stems Overwatering / root rot Improve drainage; water less in winter
    Growth stalled, roots at drain holes Root-bound Repot into the next size with fresh mix
    Crispy leaf edges Dry indoor air, or touching cold glass Raise humidity; pull pot back from the window
    Bland-tasting leaves Too much fertilizer, or too little light Feed at half strength; increase light
    Store-bought pot collapsing Overcrowded seedlings Split the clump and repot separately
    Tiny insects on new growth Aphids, spider mites, whiteflies Rinse; treat with insecticidal soap; check new plants before bringing indoors

    Fungal issues, downy mildew, root rot, and damping off  are almost always a moisture and airflow problem. Water at the base, don’t crowd plants, and give them air movement.

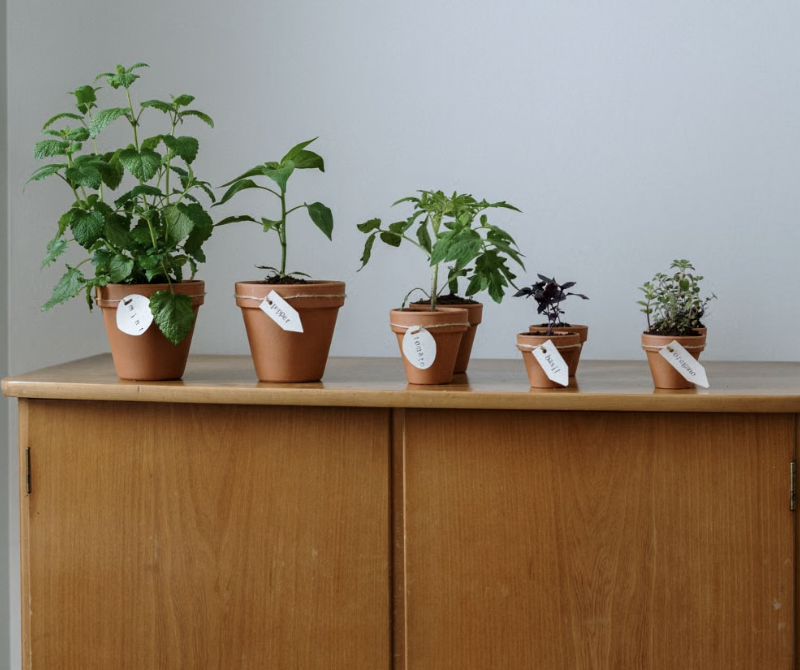
    A variety of potted Basil Seedlings labeled and arranged on a wooden cabinet indoors.
    A variety of potted herbs with Basil Seedlings among labeled and arranged on a wooden cabinet indoors.

    Is Growing Basil Indoors Worth It?

    Completely. A single pot on a windowsill pays for itself in a fortnight, gives you fresher and more aromatic leaves than anything sold in a shop, propagates itself for free forever, and perfumes your kitchen while it does it. Once you’ve got the rotation running, you’ll have basil in January without thinking about it and you’ll never buy another sad plastic packet again. It’s also the gateway herb: master basil’s rhythm of light, pruning, and cuttings, and almost every other indoor herb follows the same logic.

    Ready to build out your indoor herb garden? Basil pairs beautifully with other easy herbs, try growing rosemary in pots, peppermint (and how to contain it), or chamomile for tea. It’s also the perfect anchor for a windowsill herb garden, and a classic companion for container tomatoes. Explore the full Medicinal Herbs collection, part of the broader EcoGardenHub Plant Library.

    Grab a pot, some seeds or a supermarket clump, and your brightest window and start pinching. The more you cut, the more you’ll have. It really is that simple, and it really does work in the middle of winter.

    Frequently Asked Questions

    • How much light does basil need indoors? At least 6 to 8 hours of direct sunlight, ideally from a south-facing window or 12 to 14 hours under a grow light positioned 6 to 12 inches above the plant. Insufficient light is the number one cause of leggy, weak indoor basil.
    • Why is my indoor basil leggy? Almost always low light. Basil stretches toward whatever light it can find, producing long stems with sparse leaves. Move it to a brighter window or add a grow light, and prune the tops to encourage bushier branching.
    • How do you prune basil so it grows bushier? Cut the main stem about ¼ inch above a leaf node once the plant is 6 to 8 inches tall. Each cut prompts two new side shoots from that node. Repeat every 2 to 3 weeks, never removing more than a third of the plant.
    • Can basil live indoors forever? No, basil is an annual and most plants don’t last much past a year before going woody and flowering. The trick is to root a fresh cutting in water every couple of months so a younger plant is always coming along behind.
    • Should I let my basil flower? No. Pinch flower buds off as soon as they appear. Once basil flowers, it puts its energy into seed and the leaves turn tough and bitter. Deadheading keeps the flavor sweet and the plant productive.
    • How often should I water indoor basil? Water when the top inch of soil feels dry, then water thoroughly until it drains. Always water at the base rather than over the leaves, and cut back in winter when slower growth means the plant needs less.
    • Can I grow basil from a grocery store plant? Yes, and it’s a great value. Those pots contain many crowded seedlings, which is why they fail so fast. Tip it out, split the root ball into 4 to 6 clumps, and repot each separately, one pot becomes a whole windowsill.
  • How to Grow Kale in Cool Weather (Complete Guide)

    How to Grow Kale in Cool Weather (Complete Guide)

    Most vegetables spend autumn quietly giving up. Kale does the opposite, it waits for the first frost and then gets better. While the tomatoes are blackening and the squash has thrown in the towel, kale stands there in the snow, sweeter than it was in August, practically daring you to come pick it.

    That’s the secret at the heart of this crop. Learning how to grow kale isn’t really about coaxing a fussy plant through hard conditions,  it’s about understanding that cold isn’t kale’s enemy, it’s kale’s seasoning. Get your timing right and one planting can feed you from fall straight through winter and into early spring, when almost nothing else in the garden is awake. This guide covers the science, the hardiest varieties, the planting calendar, and how to keep harvesting when the ground is frozen.

    How Do You Grow Kale in Cool Weather?

    Sow kale seeds 3 to 6 weeks before your last spring frost, or direct sow 60 to 90 days before your first fall frost for the sweetest crop. Give it full sun and fertile, compost-rich soil, keep it consistently moist, and space plants 18 to 24 inches apart. Harvest outer leaves once they’re the size of your hand, leaving the center intact. In zones 7+ kale often needs no winter protection at all; in colder zones, a row cover or low tunnel keeps it producing.

    Two things matter most: timing your planting so the crop matures in cool weather, and choosing a genuinely cold-hardy variety. Get those right and kale becomes arguably the easiest, most generous vegetable in the entire garden.


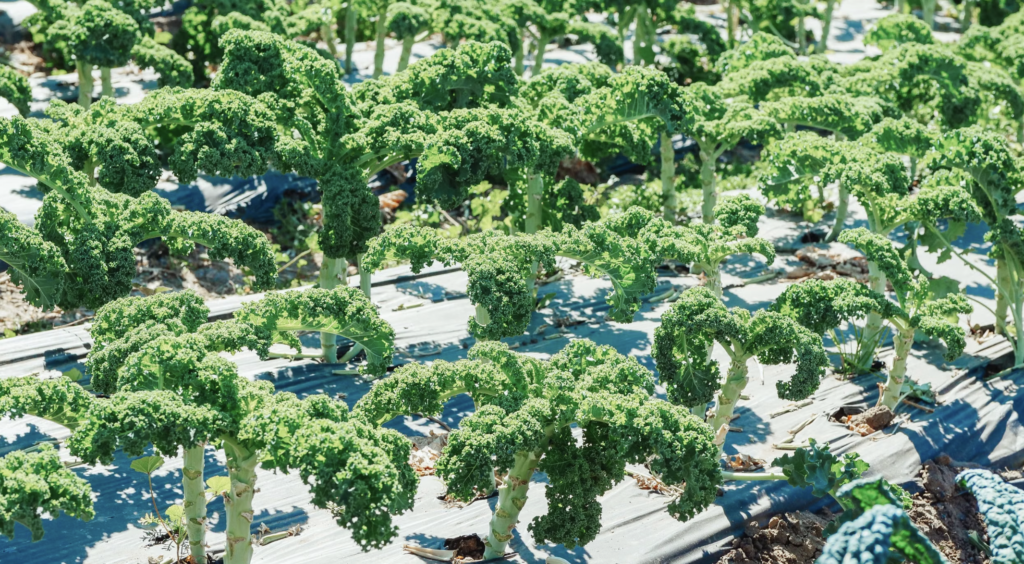
    A vibrant field of kale plants thriving in an outdoor plantation, showcasing organic farming
    A vibrant field of kale plants thriving in an outdoor plantation, showcasing organic farming

    Why Frost Makes Kale Sweeter (The Science)

    This isn’t gardening folklore; it’s plant chemistry, and it’s the single best reason to grow kale in cool weather.

    When temperatures drop, kale faces a problem: the water inside its cells could freeze and rupture them. So the plant defends itself by converting stored starch molecules into sugars, which act like a natural antifreeze, lowering the freezing point inside its tissues. The plant is protecting itself and the delicious side effect is that its leaves genuinely become sweeter and nuttier.

    It gets better. Harvesting after a light frost or two doesn’t just improve flavor; research indicates it can boost antioxidant content such as the anthocyanins in purple varieties by as much as 40%. So frost-kissed kale isn’t just tastier, it’s measurably more nutritious.

    The flip side explains kale’s other reputation. In summer heat, growth speeds up but flavor turns tough and bitter, and plants are prone to bolting. Same plant, completely different vegetable. Cool weather is not a compromise for kale, it’s the whole point.

    It’s worth knowing what you’re growing, too. Kale (Brassica oleracea) is a non-heading member of the cabbage family, a cousin to broccoli, cauliflower, and Brussels sprouts. Unlike most of those relatives, it doesn’t need to form a head before you can eat it, every leaf is usable from the moment it’s big enough to pick, which is a large part of why it’s so productive and so forgiving for beginners.

    The Preconditioning Rule Nobody Mentions

    Here’s an insight that quietly explains a lot of winter kale failures, and most guides skip it entirely: a plant’s cold tolerance depends on what came before it.

    Kale that has spent weeks basking in mild autumn weather and is then slammed by a sudden drop to 22°F can be seriously damaged, even though “kale is hardy to well below that.” But a plant that has been gradually toughened by a series of progressively colder nights will shrug off the same temperature without blinking.

    The practical takeaway: kale acclimates. Gradual cooling builds hardiness; sudden shocks break it. This is exactly why fall-planted kale that experiences a natural, slow slide into winter outperforms kale that gets rushed outside or coddled under cover and then suddenly exposed. It’s also why an unseasonable early cold snap does more damage than a much harder freeze in January. Let your kale meet the cold slowly and it will handle far more than you’d expect.

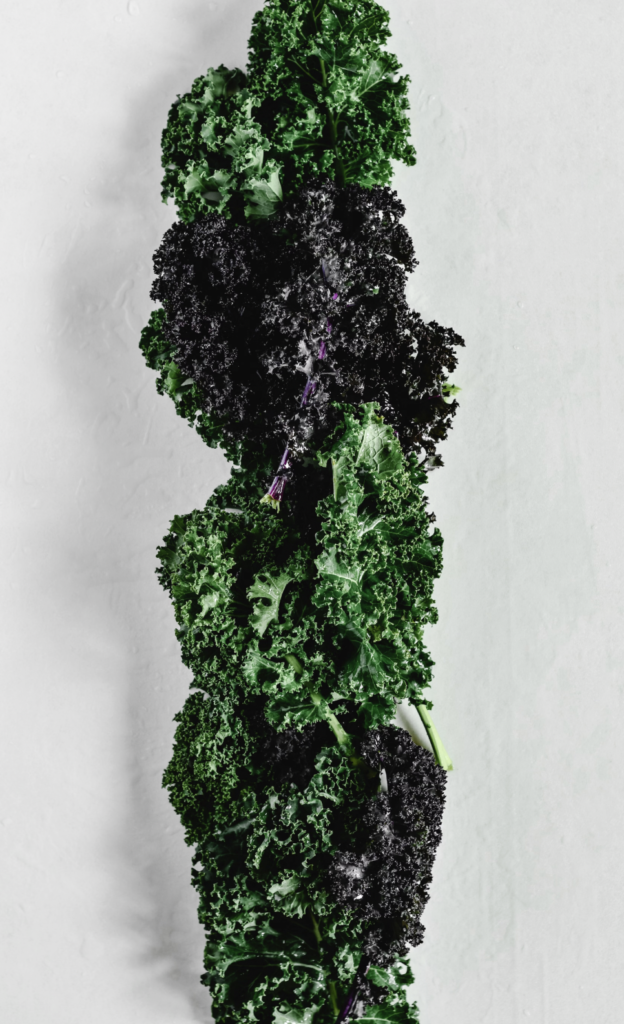
    Vertical shot of fresh organic kale on a white surface, showcasing healthy greens.
    Vertical shot of fresh organic kale on a white surface, showcasing healthy greens.

    Choosing Cold-Hardy Kale Varieties

    Not all kale handles cold equally, and here’s a genuine surprise: the fashionable Lacinato (dinosaur) kale is actually one of the less cold-hardy types, along with tender Portuguese kale. The unglamorous curly and Russian types are the true winter warriors.

    Variety Hardiness Why Grow It
    Winterbor Exceptional — survives to around −10°F The cold-season superstar; vigorous, 2 ft tall, deeply ruffled blue-green leaves, mild flavor
    Red Russian Very hardy Sweetens beautifully after frost and regrows fast in spring; oak-leaf shape, purple veins
    True Siberian Extremely hardy Large frilly blue-green leaves; pick all winter in many areas
    Vates Blue Curled Hardy Slow to bolt and doesn’t yellow in cold weather
    Redbor Very hardy Intense purple-burgundy curled leaves — stunning in winter salads
    Lacinato (Dinosaur) Moderate Delicious and heat-tolerant, but more frost-sensitive; protect in hard freezes
    Portuguese (Tronchuda) Least hardy The most tender kale — best as a warm-season snacking green

    The smart play: grow a mix. Pair a bulletproof variety like ‘Winterbor’ or ‘Red Russian’ for genuine winter harvests with something like Lacinato for flavor and tenderness in the milder months. That way you’re covered in every season, and you get a range of colors, textures, and flavors on the plate rather than one note.

    When to Plant Kale

    Timing is everything, because the goal is always the same: have your kale maturing in cool weather.

    For a spring crop: direct sow or transplant 3 to 6 weeks before your average last spring frost. Kale seeds germinate in soil as cool as 40–45°F, so you can start remarkably early. The aim is a good harvest before real summer heat arrives. Our seed starting guide covers indoor starts, and what to plant in early spring helps with timing.

    For a fall and winter crop (the best one): direct sow 60 to 90 days before your first fall frost, generally late July through August once the fiercest heat has passed. This is the crop that matures into cooling weather and delivers that famous sweetness. See what to plant in late summer for the full fall lineup.

    In hot climates (zones 9–10): skip summer entirely and sow from October through February, growing kale right through your mild winter.

    Check your local first and last frost dates to pin down your windows, and if you garden somewhere cold, our USDA Zone 5 and Zone 7 guides offer regional context.

    How to Grow Kale: Step-by-Step

    • Step 1: Pick a Sunny Spot With Rich Soil

    Kale wants at least 6 hours of sun and fertile, well-draining soil rich in organic matter, with a pH around 6.5 to 6.8. Work in several inches of aged compost before planting,  kale is a leafy crop and appreciates the fertility. In-ground beds, raised beds, and containers all work beautifully.

    • Step 2: Sow or Transplant at the Right Depth and Spacing

    Sow seeds about ¼ to ½ inch deep, or set out transplants at the depth they grew. Space plants 18 to 24 inches apart, it looks absurdly generous when they’re tiny, but mature kale gets big, and crowded plants produce smaller, more bitter leaves with worse airflow.

    • Step 3: Water Consistently (This Is the Flavor Lever)

    Kale needs about 1 to 1.5 inches of water per week, kept evenly moist. This matters more than people realize: drought-stressed kale turns bitter and tough. Consistent moisture is what produces tender, mild, sweet leaves. Water at the soil line and check often in warm weather.

    • Step 4: Mulch to Keep Roots Cool

    A layer of straw or shredded leaves around the base holds moisture and keeps the root zone cool, which directly improves flavor in warmer weather and insulates roots when winter arrives. Our types of mulch guide can help you choose.

    • Step 5: Feed Monthly While Actively Growing

    Feed monthly through summer and early autumn with a liquid organic fertilizer like fish emulsion, or side-dress with compost, to keep a steady supply of leaves coming. Once cold weather settles in and growth slows, you can stop. Our homemade organic fertilizer guide has low-waste options, and NPK ratios explains the numbers.


    Harvesting Kale (Cut-and-Come-Again)

    Kale is a cut-and-come-again champion, and harvesting it correctly is what turns one plant into months of food.

    The method: never pull up the whole plant. Instead, pick the outer, lower leaves , the oldest ones. while leaving the central growing point untouched. Kale grows from the center outward, so as long as that crown keeps producing, you can harvest the same plant again and again. This is the identical technique that makes leaf lettuce a continuous crop.

    Timing: baby leaves are ready in about 3 to 4 weeks, full-size leaves in 6 to 8 weeks. Harvest a fistful at a time roughly a handful of outer leaves per plant and never strip more than about a third of the plant at once.

    In deep cold: take only the outer leaves so you don’t stress a plant that isn’t actively regrowing, and harvest around midday, when leaves are less brittle. Frozen kale leaves shatter like glass if you handle them at dawn; give them a few hours to soften first.

    The rhythm: a single well-tended kale plant can produce for six months or more. And here’s a lovely bonus, kale is a biennial, so overwintered plants throw out fresh leaves weeks before anything else is ready in spring, and many send up sweet, tender, edible flower shoots before they finally bolt in their second year.

    Growing Kale Through Winter

    This is where kale becomes genuinely magical. In zones 7 and warmer, kale often needs no protection at all, many gardeners harvest straight from the snow all winter. In zones 5 and 6, a little help keeps it going through remarkable cold:

    • Mulch heavily. A thick layer of straw or shredded leaves around the base insulates the roots. Apply it after the first hard frost.
    • Use a low tunnel. Hoops with frost cloth or plastic sheeting can keep kale alive down to around −10°F. In the coldest stretch, doubling the frost cloth adds warmth without losing airflow. See our guides to building a cold frame, a hoop house or low tunnel, and using row covers.
    • Let the snow stay. Snow is a genuinely excellent insulator, don’t rush to brush it off your plants.
    • Watch for overheating. On sunny winter days, a sealed tunnel can cook plants. Choose a design you can roll back to ventilate.

    The best part of a winter kale patch is how little it asks. Once cold sets in, there’s no weeding, no watering, and essentially no pests, you simply walk out and pick. Our winter garden prep guide and growing vegetables in winter cover the wider cold-season garden.

    In our experience, the gardeners who eat homegrown greens in January aren’t doing anything clever in December, they’re doing something simple in August. Winter kale is almost entirely a timing crop. Sow it in late summer so the plants are big and well-rooted before the cold arrives, and they’ll coast through months of freezing weather on the strength of that head start. Try to plant kale in October and you’ll get a row of struggling seedlings that never size up. The work is front-loaded; the winter itself is the easy part.

    Growing Kale in Containers

    Kale takes to pots readily, which makes it a great choice for patios and balconies. Use a container at least 12 inches deep and wide per plant, filled with quality potting mix and compost. Compact varieties like ‘Dwarf Green Curled’ are ideal.

    Two container notes: pots dry out faster, and dry kale is bitter kale, so check moisture often. And potted roots are more exposed to cold than in-ground ones, so in a hard freeze, move the container against a sheltered wall or wrap it. Our container gardening guide for beginners covers the basics.

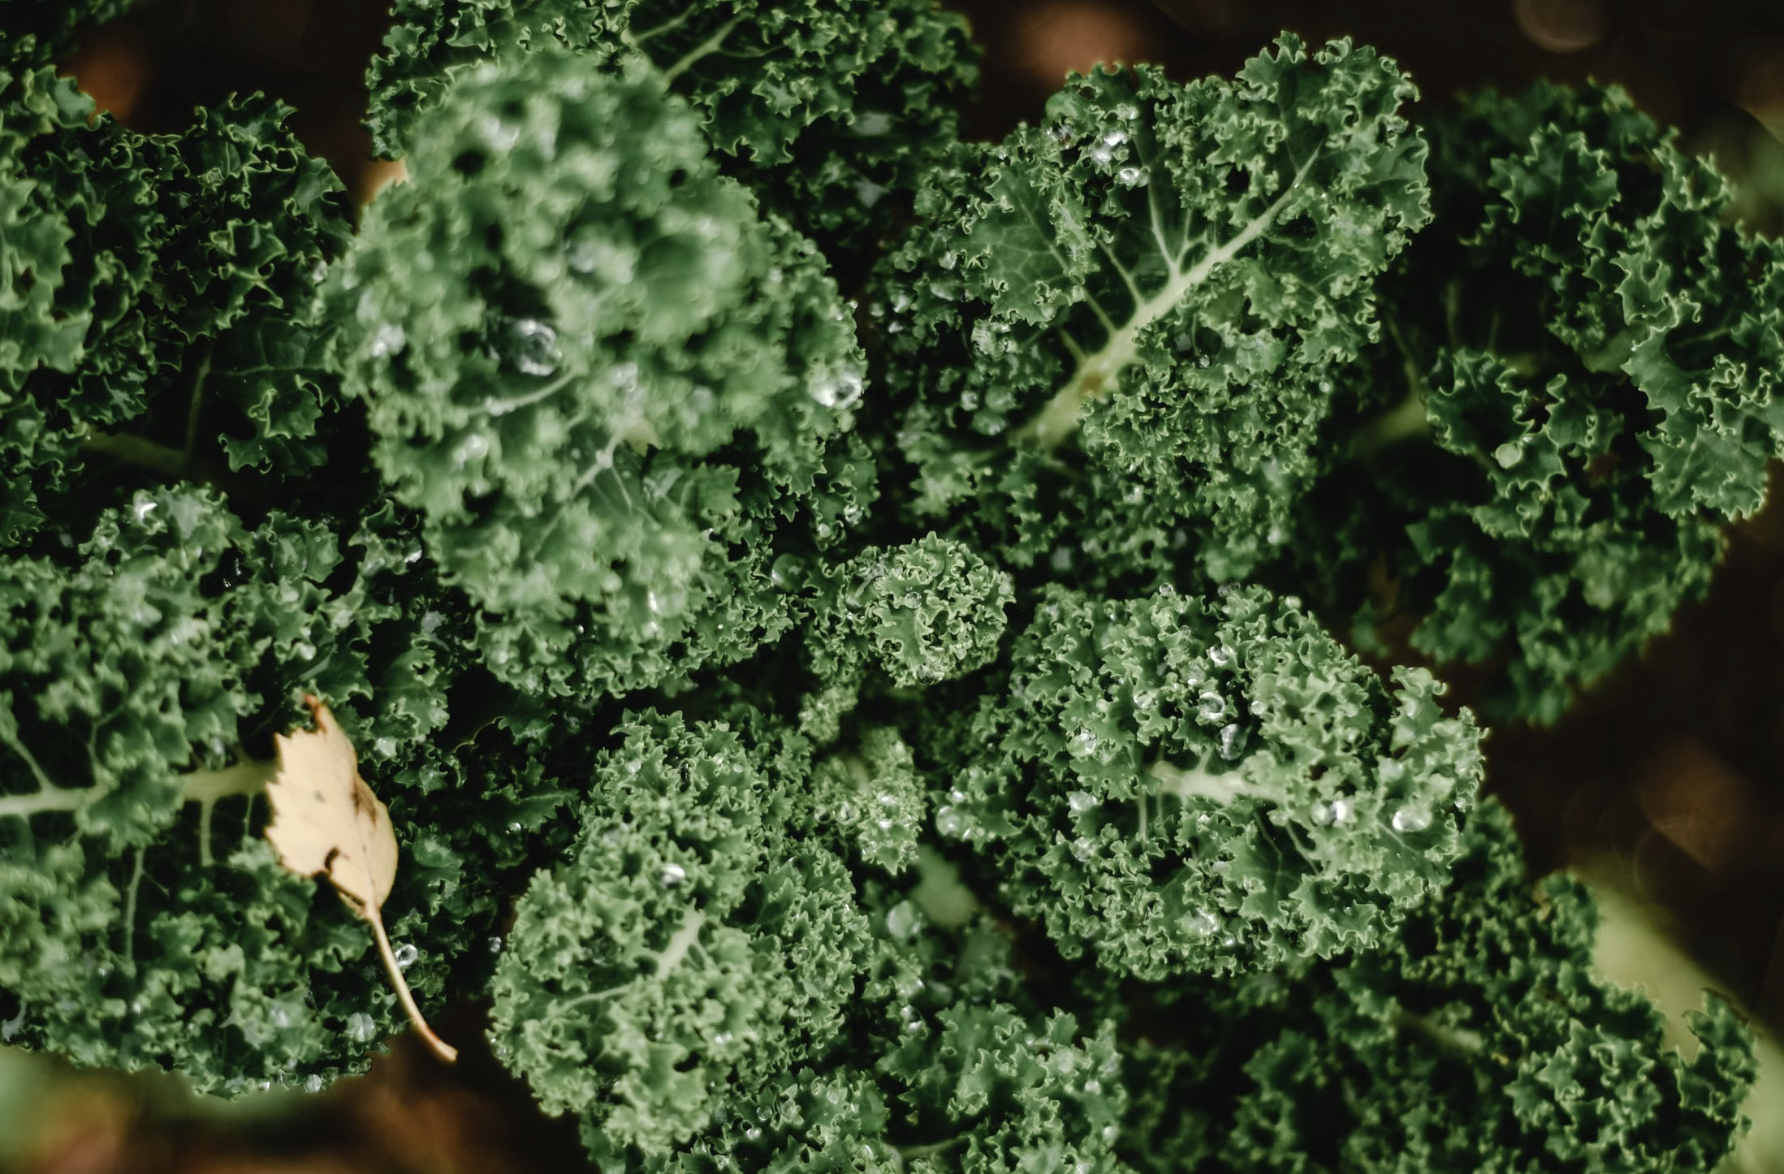
    A close-up view of fresh green kale leaves in a natural setting
    A close-up view of fresh green kale leaves in a natural setting

    Storing and Using Your Kale

    Fresh kale keeps for about a week stored loosely in a plastic bag in the fridge, though with a winter patch outside, the best “storage” is simply leaving it on the plant and picking as needed.

    For a glut, kale freezes beautifully. Wash the leaves, strip out the tough central stems, blanch them in boiling water for two to three minutes, then plunge them into ice water to stop the cooking and lock in the color. Squeeze out the excess water, pack, and freeze. For maximum quality, harvest the leaves you plan to freeze after a light frost or two, you’ll be preserving them at their absolute sweetest and most antioxidant-rich.

    In the kitchen, kale is endlessly useful: massaged raw into salads (young leaves are best), sautéed with garlic, crisped into chips, stirred into soups and stews where it holds its texture far better than spinach, or blitzed into smoothies. It’s one of the most nutrient-dense foods you can grow, loaded with vitamins A, C, and K, calcium, and antioxidants.

    Common Problems and How to Fix Them

    Problem Likely Cause The Fix
    Bitter, tough leaves Summer heat or drought stress Plant for a fall harvest; water consistently; mulch roots
    Plant bolted (flower stalk) Heat, or it’s a second-year biennial Grow in cool seasons; replant; eat the sweet flower shoots
    Small leaves, weak plants Overcrowding Space 18–24 inches apart
    Damage after a sudden cold snap No preconditioning — mild weather then a sharp freeze Let plants acclimate gradually; cover before unseasonable drops
    Leaves shattering when picked Harvesting frozen leaves at dawn Harvest midday when leaves have softened
    Ragged holes in leaves Cabbage worms, loopers, aphids Use row covers; encourage beneficial insects; hand-pick
    Plant cooked under cover Sealed tunnel on a sunny winter day Ventilate; use a design you can roll back
    Yellowing lower leaves Natural aging, or needs feeding Remove old leaves; feed while actively growing

    For pests, kale’s biggest summer nuisances are cabbage worms and aphids one more reason a fall crop is easier, since cold weather largely ends the pest problem for you. Our guide to beneficial insects can help during the warm months.

    Is Growing Kale Worth It?

    Enormously. If you can grow weeds, you can grow kale. It’s the toughest, most forgiving, most productive green in the garden: a single plant feeds you for months, it laughs at frost, it needs almost no work in winter, and it tastes best exactly when everything else is dead. Add in the nutrition, it’s one of the most vitamin- and mineral-dense vegetables you can eat, and even more so after a frost and it’s hard to think of a better use of a square foot of soil.

    Ready to build a cool-season garden around it? Kale pairs perfectly with other cold-hardy crops. Try leaf lettuce for continuous harvest, spinach year-round, or carrots in raised beds which frost sweetens by the very same mechanism. Explore the full Vegetables collection, part of the broader EcoGardenHub Plant Library.

    Sow a few seeds in late summer, let winter do the seasoning, and go pick your dinner out of the snow. It’s the closest thing gardening offers to a free lunch and it arrives exactly when you need it most.

    Frequently Asked Questions

    • Does frost really make kale sweeter? Yes, and it’s real chemistry. Cold prompts kale to convert stored starches into sugars as natural antifreeze to protect its cells. The result is sweeter, nuttier leaves and research suggests frost can also boost antioxidant content by up to 40%.
    • How cold can kale tolerate? Very cold. Mature plants of hardy varieties like ‘Winterbor’ can survive to around −10°F, and kale keeps growing until roughly 20°F. Crucially, tolerance depends on preconditioning, a plant gradually hardened by cool weather handles far more than one hit by a sudden freeze.
    • When should I plant kale? Sow 3 to 6 weeks before your last spring frost for a spring crop, or 60 to 90 days before your first fall frost for a sweeter fall and winter crop. In hot climates, plant from October through February and skip summer entirely.
    • What is the most cold-hardy kale variety? ‘Winterbor’ is the standout, surviving to around −10°F, with ‘Red Russian’, ‘True Siberian’, and ‘Redbor’ close behind. Note that popular Lacinato (dinosaur) kale is actually less cold-hardy than curly types.
    • How do I harvest kale so it keeps growing? Pick the outer, lower leaves and leave the central growing point intact kale grows from the center outward. Take no more than about a third of the plant at a time, and one plant can produce for six months or more.
    • Why is my kale bitter? Bitterness comes from heat and drought stress. Kale grown in summer or allowed to dry out turns tough and bitter, while cool weather and consistent moisture produce sweet, tender leaves. Mulch to keep roots cool.
    • Can kale survive winter without protection? In zones 7 and warmer, usually yes many gardeners harvest kale from the snow with no cover at all. In zones 5 and 6, mulch heavily and use a low tunnel or row cover to keep plants producing through hard cold.

  • How to Grow Cucumbers Vertically (Trellis Guide)

    How to Grow Cucumbers Vertically (Trellis Guide)

    A cucumber vine doesn’t need much convincing to climb. Within minutes of a tendril brushing against string or wire, it starts to coil, gripping tightly enough to hold the whole plant through a stiff wind. The plant already wants to go up. Your only job is to give it something worth climbing.

    That single shift changes almost everything about growing cucumbers. Learning how to grow cucumbers vertically means straighter, cleaner fruit, dramatically less disease, and a plant that occupies a foot of ground instead of sprawling across a whole bed. You’ll also stop crawling around on your hands and knees hunting for cucumbers that quietly turned into baseball bats under the foliage. This guide covers everything: choosing the right variety, picking a trellis, training vines without hurting them, and harvesting more fruit for longer.

    How Do You Grow Cucumbers Vertically?

    Choose a vining (not bush) cucumber variety, install a sturdy 5- to 6-foot trellis before planting, and plant seedlings at its base. When vines reach 8 to 12 inches, gently guide them onto the support and let their tendrils grip. Check every 3 to 4 days to redirect wayward vines, water deeply at the soil line, and harvest every 1 to 2 days once fruit starts coming.

    Two things decide your success: picking a vining variety (a bush type will simply ignore your trellis) and building the support before you plant so you never disturb established roots. Everything after that is mostly the plant doing the work.

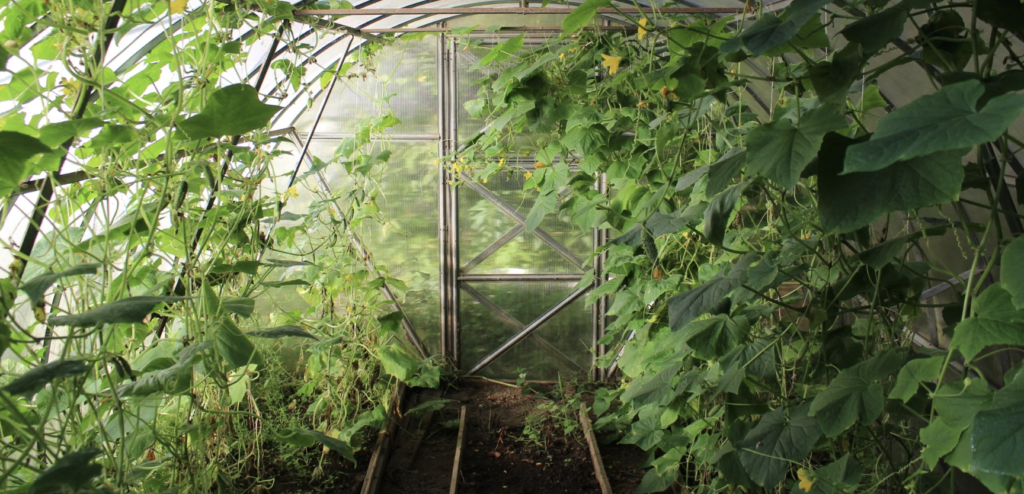
    Explore a thriving greenhouse filled with cucumber vines and greenery, showcasing modern farming's growth potential.
    Explore a thriving greenhouse filled with cucumber vines and greenery, showcasing modern farming’s growth potential.

    Why Grow Cucumbers Vertically? (The Science)

    Vertical growing isn’t just a space trick, there’s real plant science behind why it produces healthier plants:

    • It directly cuts disease. Downy mildew, the most destructive cucumber disease, needs moisture sitting on the leaf surface in order to germinate and infect. When you lift a vine off the ground, the canopy opens, wind moves through, and wet leaves dry in a fraction of the time. You’re not just “improving airflow”, you’re shrinking the window in which disease can establish at all.
    • Cleaner, straighter fruit. Cucumbers resting on soil develop pale patches and soft spots where they touch the ground, often rotting before you spot them. A hanging cucumber grows straight, colors evenly, and stays clean.
    • Enormous space savings. A sprawling cucumber can claim 10 to 20 square feet of ground. The same plant trained upward uses about a foot of ground while fruiting along 5 to 6 feet of vertical vine.
    • You actually find the fruit. Every cucumber hangs in plain sight at picking height, no more discovering a bitter, oversized monster you missed for two weeks.
    • Room underneath. You can tuck fast, shade-tolerant crops like leaf lettuce or arugula at the base while the vines are young.
    • No scratched arms. Cucumber stems are prickly; harvesting at eye level is far more pleasant.

    Choose a Vining Variety (Not a Bush Type)

    This is the mistake that quietly ruins the whole plan. Cucumbers come in two habits:

    • Vining (indeterminate) types produce long stems with grasping tendrils, climb naturally, grow 4 to 6 feet or more, and fruit over a long season. These are the ones you want.
    • Bush types stay compact and don’t climb at all. They’re fine plants, but they’ll waste a trellis entirely.

    Check the seed packet or plant tag, it will say. Here are proven climbers:

    Variety Type Why Grow It
    Marketmore 76 Slicing The beginner’s best bet: vigorous climber, resists three common diseases, heavy reliable crops
    Suyo Long Slicing Best for hot climates; the long ribbed fruit grows perfectly straight when hanging
    Homemade Pickles Pickling Classic productive pickler for a trellis
    Sumter Pickling Disease-resistant and dependable
    Lemon Novelty Round yellow fruit; a charming, vigorous climber
    Mini Munch Snacking Snack-sized fruit, reaches about 5 feet, great for small spaces

    Choosing Your Trellis

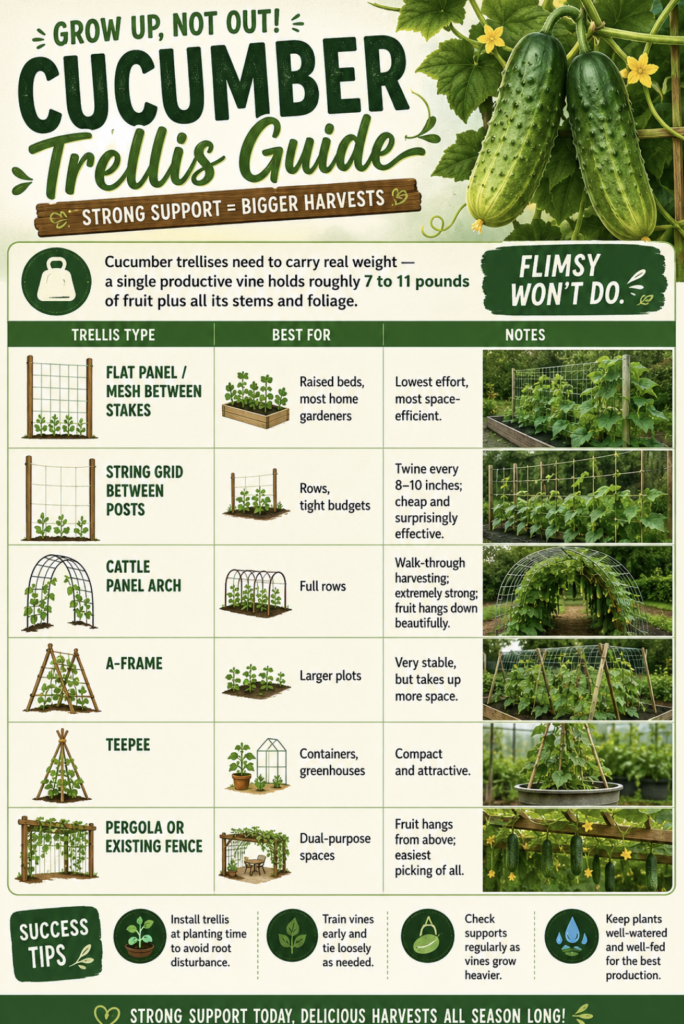
    Cucumber trellises need to carry real weight, a single productive vine holds roughly 7 to 11 pounds of fruit plus all its stems and foliage. Flimsy won’t do.

    Choosing cucumber Your Trellis
    Choosing cucumber Your Trellis


    Sizing it right: aim for about 5 to 6 feet of height  tall enough for a vigorous vine, but still within reach at harvest, since a trellis you need a ladder for defeats the purpose. Drive stakes or posts at least 12 inches into the ground. For string and netting systems, space your horizontal supports 6 to 8 inches apart vertically, so a climbing tendril always has a contact point within reach; wider gaps let vines grow past a level without attaching, risking a heavy section breaking loose.

    Our guides to installing a garden trellis and building a garden arbor walk through building something sturdy, and for more ideas see our vertical vegetable gardening guide.

    How to Grow Cucumbers Vertically: Step-by-Step

    • Step 1: Install the Trellis First

    Before anything else, get your structure firmly in place. Driving stakes into a bed after seedlings are growing risks tearing roots and bending stems you can’t undo. Building first also tells you exactly how many plants you have room for.

    • Step 2: Prepare Rich Soil and Plant After Frost

    Cucumbers are hungry, thirsty, warm-season plants. Work plenty of compost or well-rotted manure into the soil before planting  they need genuinely fertile ground. Wait until all danger of frost has passed and the soil is warm; check your last frost date. You can direct sow at the trellis base, or start seeds indoors a few weeks early for a head start (see our seed starting guide). Give them full sun 6 to 8 hours minimum.

    • Step 3 Space Closer Than the Packet Says

    Here’s a bonus of going vertical: because plants aren’t competing for horizontal light, you can plant tighter than the seed packet recommends for sprawling. Space slicing cucumbers 12 to 24 inches apart along the trellis and pickling types 12 to 18 inches. In raised beds, plant along the edge so the trellis doesn’t shade your other crops, leaving about 6 inches between the planting hole and the bed wall for root room.

    • Step 4: Start Training at 8 to 12 Inches

    Timing matters here. Begin guiding vines toward the trellis when they’re 8 to 12 inches long before the stems lignify and turn brittle. Gently straighten each vine and lean it against the support, or loosely tie it with soft ties or garden twine every 6 to 8 inches of growth. Once a tendril finds the structure, it takes over.

    • Step 5L: Check Every 3 to 4 Days

    Cucumbers are enthusiastic but not always well-behaved. Gravity pulls them down, and they’ll happily climb your tomatoes instead. Do a quick vine check every three or four days through peak growth, redirecting anything that’s gone rogue back onto the trellis. That’s genuinely the whole maintenance routine.

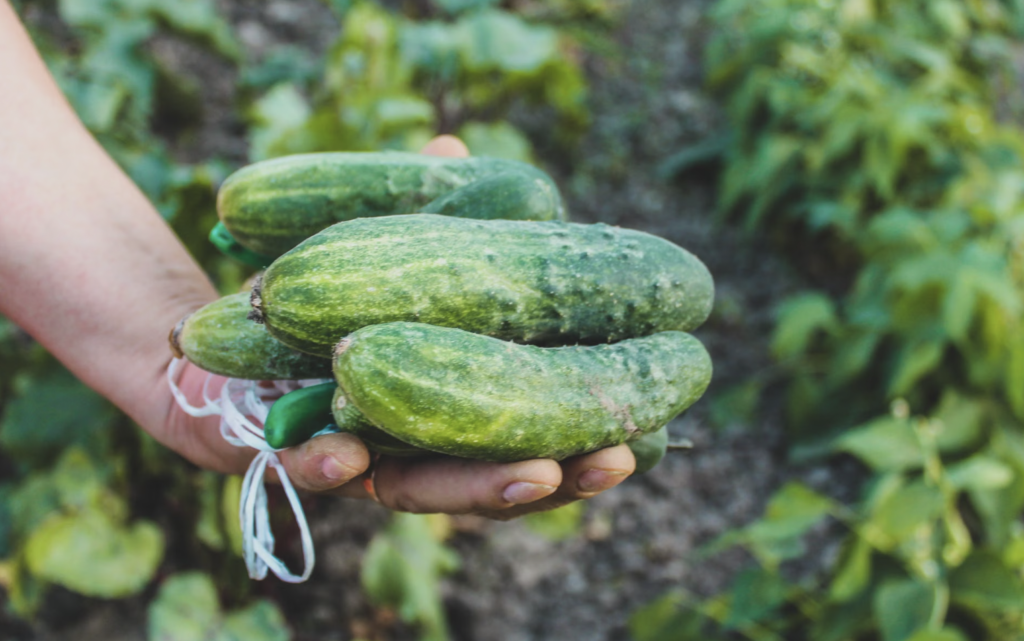
    A close-up of hand holding freshly harvested cucumbers in a vibrant garden setting.
    A close-up of hand holding freshly harvested cucumbers in a vibrant garden setting.

    The Two Training Rules That Save Your Plants

    Most vertical cucumber disasters come down to a single moment of impatience. Two rules matter more than everything else:

    1. Never force a vine sideways. If a vine is heading the wrong way, coax it gradually over several days. Bending a rigid, established stem sharply cracks the vascular tissue inside and everything above that break dies. Gentle and gradual, always.
    2. Never remove the tendrils. Those curly little grabbers are the plant’s entire anchor system. Cut them off and you’ll be manually tying every section forever, with a plant that loses its grip in wind. Let them do their job.
    • One myth worth busting: you don’t need slings, hammocks, or nets to hold up the fruit. Cucumber vines are perfectly strong enough to carry their own mature cucumbers, the fruit won’t tear itself off. Skip the fuss.

    In our experience, the gardeners who struggle with vertical cucumbers are almost always the ones who try to install the vine rather than invite it. They’ll wrestle a stubborn three-foot vine across the bed in one go, snap something without realizing it, and watch the top half wilt a few days later. The ones who succeed do something much lazier: they wander past every few days, nudge whatever’s heading the wrong way an inch or two closer to the trellis, and let the plant’s own tendrils finish the job. Cucumbers are enthusiastic climbers, they just need a suggestion, not an argument.

    Cucumber Care: Water, Feeding, Pruning

    Watering (more than you think). Cucumbers are about 95% water, and here’s the counterintuitive part: vertical growing increases water demand, because elevated containers and raised beds drain faster than ground-level soil, and the open canopy loses moisture more freely. In peak summer, a single plant can want half a gallon to a gallon a day. Water deeply and consistently erratic moisture is the main cause of bitter cucumbers.

    Critically,

    • water at the soil line, never over the foliage. Wet leaves are exactly what powdery and downy mildew need. Drip irrigation or a soaker hose along the trellis base is ideal, ideally on a timer running early morning and late afternoon. See our DIY drip irrigation guide. A layer of mulch at the base helps hold moisture steady.
    • Feeding. Cucumbers are heavy feeders. Mix compost or manure into the soil before planting, then side-dress with more compost, a slow-release fertilizer, or compost tea in early summer as the vines take off and again as fruiting hits its stride. Our NPK ratios guide and compost tea guide can help.
    • Pruning. Optional but useful for tidy, productive vines. Prune the secondary side vines, never the main leader, cutting close to the main stem with bypass pruners (anvil pruners crush the tissue). Many gardeners also remove the lowest fruit and shoots so the plant channels energy upward. Don’t overdo it; those leaves power the plant.

    Growing Vertical Cucumbers in Containers

    You don’t need a garden bed at all. A vining cucumber grows happily in a large pot, aim for at least 5 gallons, ideally bigger with a trellis or teepee set into the container itself, or a panel fixed to the wall behind it. It’s one of the most productive things you can grow on a balcony or patio.

    Two container-specific tips matter. First, anchor the structure: a fully loaded vine is top-heavy, and one gusty afternoon can tip the whole pot over, so bracket the trellis to a wall or railing in windy spots. Second, water even more attentively pots dry out faster than beds, and a big cucumber vine in a container in July can be thirsty twice a day. Position the pot against a sunny wall if you can; the wall radiates stored heat in the evening and can extend your growing window by a week or two at each end of the season. Our container gardening guide for beginners covers pot sizing and drainage.

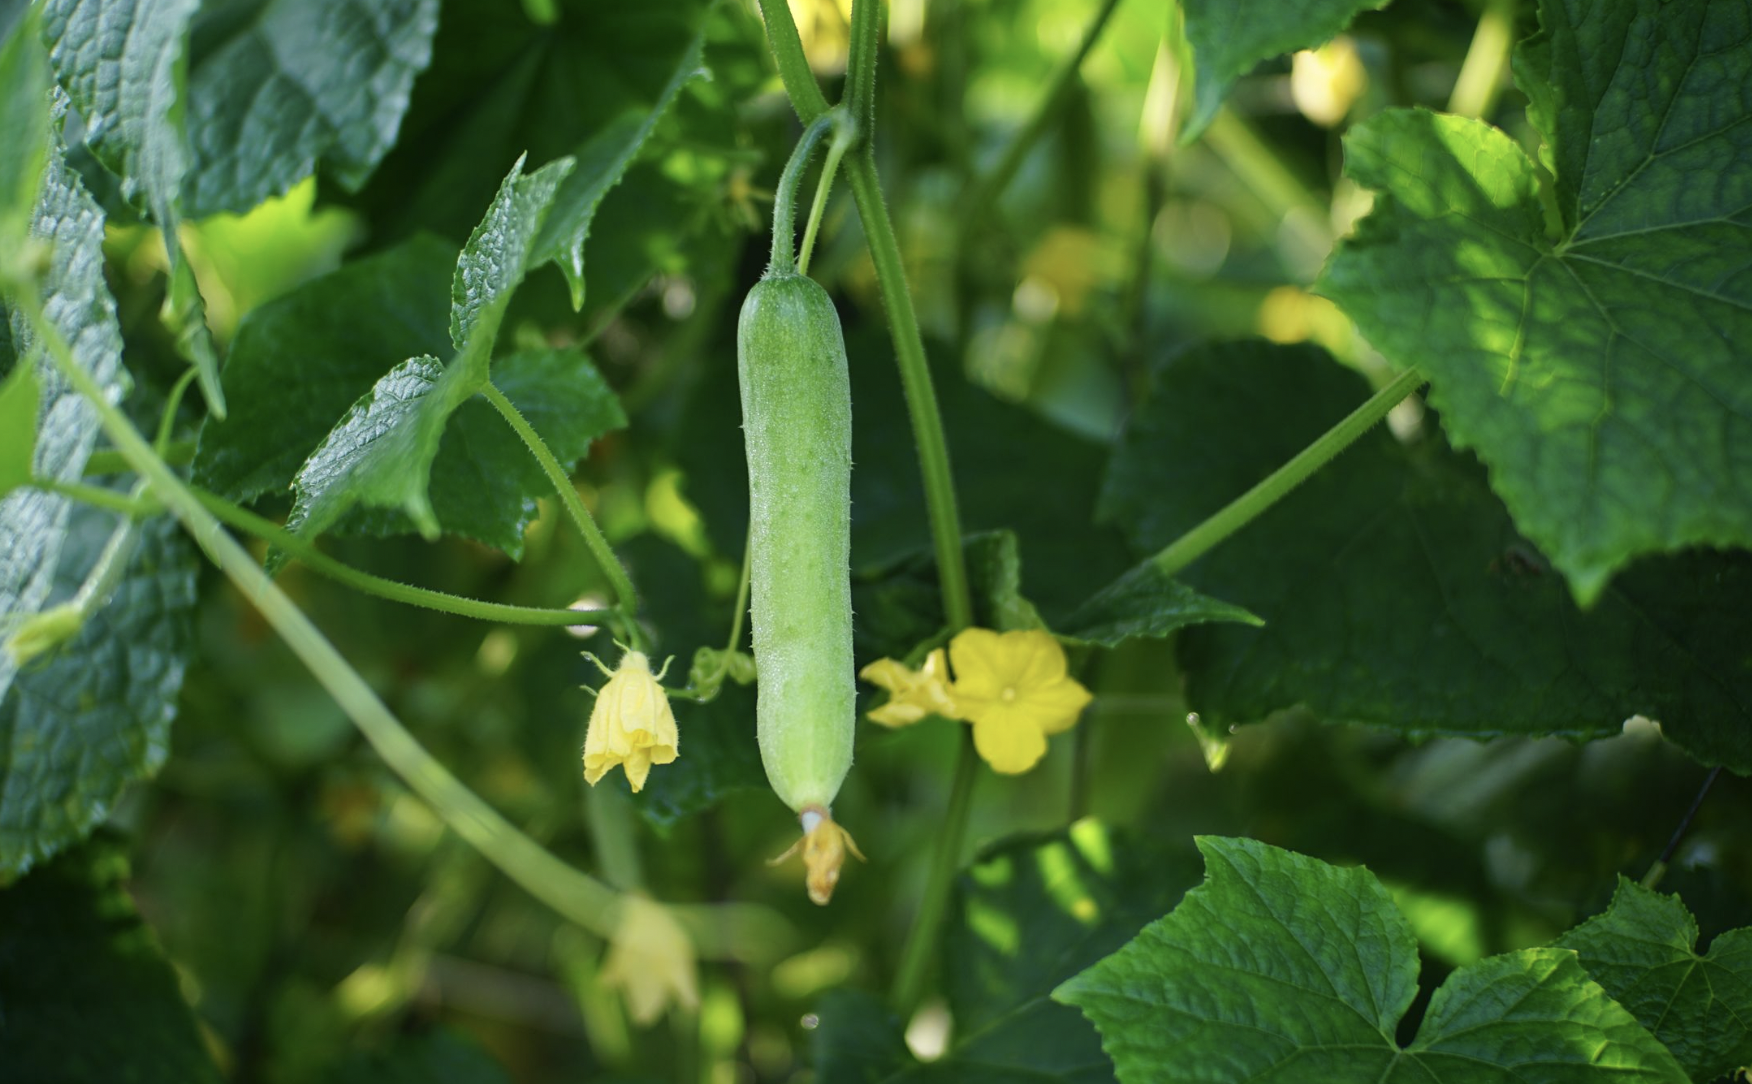
    Close-up of a ripe cucumber hanging on the vine in a lush greenhouse setting
    Close-up of a ripe cucumber hanging on the vine in a lush greenhouse setting

    Harvesting Vertical Cucumbers

    This is where vertical growing really pays off, every cucumber is visible at a comfortable height.

    • Pick at the right size. Roughly 6 to 9 inches for slicers, 4 to 6 inches for pickling types, or whatever your variety’s packet specifies. Don’t wait.
    • Harvest every 1 to 2 days during peak production. This is the productivity secret: leaving oversized fruit on the vine signals the plant to slow down or stop making new cucumbers. Constant picking keeps it going.
    • Cut, don’t pull. Snip the stem about half an inch above the fruit with pruners or a sharp knife. Yanking or twisting damages the vine and can tear off the tendril attachments holding your plant to the trellis, undoing weeks of climbing in one careless tug.

    Expect a healthy vertical plant to give you roughly 7 to 11 pounds of fruit across a 6 to 8 week window. Store cucumbers in the fridge and use them within about a week or turn a glut into pickles, which is exactly what pickling varieties were bred for.

    And a glut is likely, which is part of the fun. Beyond the obvious salads and sandwiches, homegrown cucumbers make wonderful quick refrigerator pickles (ready in a day, no canning required), cooling summer soups, infused water, and tzatziki. They’re low in calories and high in water, vitamin K, and antioxidants and because you’re picking them at their peak rather than after a week in transit, the crunch and flavor are in a different league from supermarket fruit. Don’t peel them unless you must: much of the nutrition sits in the skin, and trellised cucumbers stay clean enough that a quick rinse is all they need.

    Common Problems and How to Fix Them

    Problem Likely Cause The Fix
    Vine won’t climb the trellis Bush variety, or training started too late Use a vining type; start guiding at 8–12 inches
    Vine died above a bend Stem forced sideways and cracked Redirect vines gradually over days, never sharply
    Section broke away under fruit Supports spaced too far apart Space horizontal supports 6–8 inches apart
    White powdery leaves Powdery/downy mildew from wet foliage Water at the soil line only; keep the canopy open
    Bitter cucumbers Inconsistent watering or heat stress Water deeply and consistently; mulch
    Fruit stopped forming Oversized cucumbers left on the vine Harvest every 1–2 days
    Trellis leaning or tipping Underbuilt for a loaded vine Drive posts 12+ inches deep; anchor to a wall or fence
    Flowers but no fruit Poor pollination Invite bees with nearby flowers; hand-pollinate if needed

    Nb: Cucumber beetles are the other pest to watch, since they can spread bacterial wilt. row covers early in the season help, but remove them at flowering so bees can reach the blossoms. Our companion planting guide suggests helpful neighbors, and beneficial insects do a lot of the pest work for you.

    Is Growing Cucumbers Vertically Worth It?

    Without question, it may be the single highest-return change you can make to how you grow them. You get straighter, cleaner, better-colored fruit; markedly less disease; a fraction of the footprint; and harvests you can actually see and reach. For small-space and urban gardeners it’s transformative, and even in a big garden it frees up room for everything else you want to grow.

    Ready to keep going vertical? Cucumbers pair beautifully with other climbers and warm-season crops. Try growing zucchini in a small garden,  a fellow cucurbit with the same needs plus tomatoes in containers, bell peppers from seed, or kiwi vines for a permanent climbing crop. Explore the full Vegetables collection, part of the broader EcoGardenHub Plant Library.

    Put up a trellis this spring, plant a vining variety at its feet, and give it a nudge in the right direction, then stand back and let the tendrils do the rest. It’s the rare gardening upgrade where the plant does most of the work and you get all the credit.

    Frequently Asked Questions

    • Do cucumbers need a trellis? Not strictly, but vining types grow far better with one. Trellised cucumbers produce straighter, cleaner fruit with much less disease, take up a fraction of the space, and are far easier to harvest. Bush varieties don’t climb and don’t need support.
    • Which cucumber varieties climb? Vining (indeterminate) varieties climb using tendrils; bush types do not. Good climbers include ‘Marketmore 76’ (great for beginners and disease-resistant), ‘Suyo Long’ for hot climates, ‘Homemade Pickles’, ‘Sumter’, and ‘Mini Munch’ for small spaces.
    • How tall should a cucumber trellis be? About 5 to 6 feet is ideal, tall enough for vigorous vines but still within easy reach at harvest. Drive posts at least 12 inches into the ground, and space horizontal supports 6 to 8 inches apart so tendrils always have something to grab.
    • When should I start training cucumbers up a trellis? Start when vines are 8 to 12 inches long, before the stems become woody and brittle. Gently guide them to the support and let the tendrils grip; check every 3 to 4 days to redirect wandering vines.
    • How far apart should I plant trellised cucumbers? Closer than the packet suggests for ground growing, since vertical plants don’t compete for horizontal light. Space slicing cucumbers 12 to 24 inches apart and pickling types 12 to 18 inches along the trellis.
    • Do I need to support cucumber fruit on a trellis? No. Cucumber vines are strong enough to hold their own mature fruit without slings or nets. Just don’t cut the tendrils, they’re the plant’s anchor system and keep it attached to the trellis.
    • Why are my vertically grown cucumbers bitter? Bitterness comes from stress, usually inconsistent watering or heat. Vertical plants actually need more water than ground-grown ones because the soil drains and dries faster, so water deeply and consistently at the soil line, and mulch the base.