Day: July 18, 2026

  • How to Grow Kiwi Vines in Your Backyard (Full Guide)

    How to Grow Kiwi Vines in Your Backyard (Full Guide)

    Picture popping a sweet, grape-sized kiwi straight into your mouth, no peeling, no fuzz, just an intense burst of tropical flavor grown right in your own backyard, even if that backyard freezes solid every winter. That’s the magic of the hardy kiwi, and learning how to grow kiwi vines is one of the most rewarding and surprisingly cold tolerant, definitely a fruit projects you can take on.

    Most people picture the fuzzy brown grocery-store kiwi and assume it needs a warm, subtropical climate. But its smooth-skinned cousin, the hardy kiwi (or “kiwiberry”), is a vigorous, pest-free vine that thrives as far north as zone 3 and rewards you with hundreds of sweet little fruits for decades. This complete guide walks you through everything, from the all-important male-and-female question to building a trellis, pruning like a pro, and harvesting your first backyard kiwis.

    Can You Grow Kiwi Vines at Home?

    Yes, you can grow kiwi vines at home, and hardy kiwi in particular is easy in most US backyards. Plant female and male vines (most kiwis need both to fruit) in full sun with rich, well-draining soil, give them a strong trellis to climb, water and prune regularly, and you’ll harvest sweet, grape-sized kiwiberries within three to five years. In cold regions, choose hardy or arctic kiwi varieties.

    The two non-negotiables are pollination and support. Because most kiwi vines come in separate male and female plants, you usually need both to get fruit and because these vines are astonishingly vigorous, they need a sturdy structure built to last. Get those two things right, and kiwi is a remarkably low-fuss, long-lived crop.
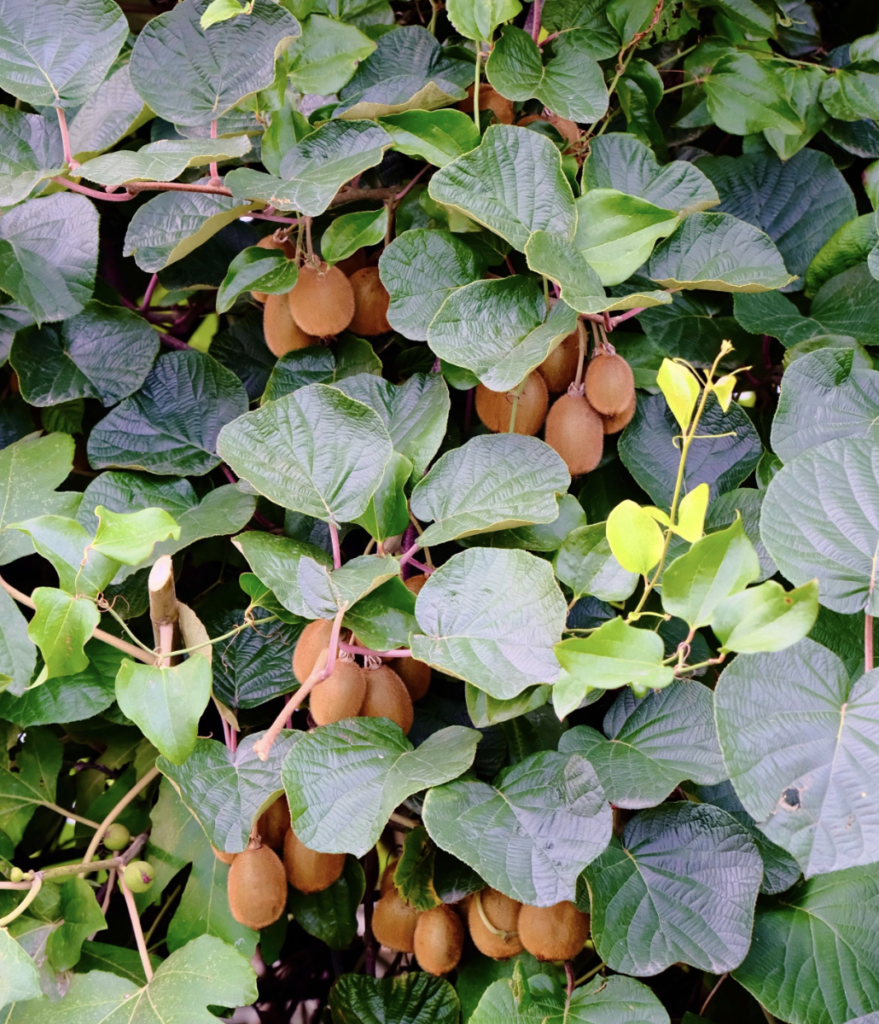
    Vibrant kiwi fruits hanging on verdant vines in a natural setting, ready for harvest
    Vibrant kiwi fruits hanging on verdant vines in a natural setting, ready for harvest

    Meet the Three Backyard Kiwis

    Not all kiwis are the same, and choosing the right type for your climate is the first step. Here are the three you’ll encounter:

    Type Fruit Zones Notes
    Hardy kiwi (Actinidia arguta) Smooth, grape-sized, very sweet, eat whole 4–9 The backyard standard; vigorous and productive
    Arctic kiwi (A. kolomikta) Smaller, smooth, early-ripening 3–7 Most cold-hardy; ornamental pink-and-white variegated leaves
    Fuzzy kiwi (A. deliciosa) Classic large brown fuzzy fruit 7–9 The grocery-store type; needs a long warm season

    For most home gardeners, especially in cooler regions, the hardy kiwi is the star. Its grape-sized fruits have tender, edible skin (no peeling needed), are packed with vitamin C, and taste even sweeter and more intense than the familiar fuzzy kiwi. One important rule: match your species when pairing plants, because hardy kiwi males won’t pollinate arctic kiwi females, and vice versa.

    The arctic kiwi deserves a special mention for cold-climate and ornamental gardeners: its male plants develop striking leaves splashed with pink, white, and green, making the vine a beautiful landscape feature in its own right, quite apart from the fruit. The fuzzy kiwi, meanwhile, is the one to choose if you live in a milder zone (7–9) and want the classic large fruit you know from the store, just be aware it needs a longer, warmer growing season and a good stretch of winter chill hours to fruit well. Whichever type calls to you, the growing principles that follow are broadly the same.

    The One Rule You Can’t Skip: Male and Female Vines

    Here’s the single most important thing to understand about growing kiwifruit: most kiwi vines are dioecious, meaning each plant is either male or female, and only females bear fruit. A row of nothing but female vines will produce exactly zero kiwis.

    To get fruit, you need both generally one male vine for every six female vines (anywhere from five to eight works), with the male planted within about 50 feet so pollen can travel by wind and bees. Reputable nurseries sell vines already “sexed” and clearly labeled, so pairing them is easy. Popular females include ‘Anna’ (Ananasnaya), ‘Geneva’, ‘Ken’s Red’, and ‘Prolific’; reliable male pollinators include ‘Meader’ and ‘Opitz’. For the best pollination, position the male upwind of, or centrally among, your females so the breeze carries pollen where it’s needed and welcoming bees to your garden helps enormously, since they do much of the work of moving pollen from the male blossoms to the female flowers.

    Short on space? There’s a happy exception: the self-fertile variety ‘Issai’ produces fruit on its own without a male (though a pollinator boosts the yield), making it perfect for a single-vine, small-space planting. ‘Prolific’ also fruits well without a mate. If you only have room for one vine, these are your friends.

    It also pays to choose varieties suited to both your climate and your harvest goals. In the coldest regions (zones 3–4), lean on arctic kiwi selections like ‘Arctic Beauty’ paired with a hardy ‘Red Beauty’ female. In milder zones, the classic ‘Anna’ (prized for its pineapple-like flavor), red-fleshed ‘Ken’s Red’, and heavy-cropping ‘Geneva’ are all excellent. If you have room for several female vines, planting a mix of early, mid, and late-ripening cultivars staggers your harvest over many weeks instead of all at once, a favorite trick of permaculture growers who like a long, steady supply of fruit.

    Build a Strong Trellis First

    Do not underestimate a kiwi vine. These are among the most vigorous plants you can grow, capable of putting on 10 to 20 feet in a single season, living for 30 to 50 years or more, and eventually carrying hundreds of pounds of vine, leaves, and fruit. A flimsy trellis will collapse under a mature vine.

    Build your support before you plant, so you never have to disturb established roots later. A sturdy pergola, arbor, or a heavy-duty T-bar wire trellis all work beautifully, kiwis grow best trained along a horizontal, flat overhead surface. Because these vines can outlive the gardener who plants them, it’s worth using rot-resistant posts and thick, durable wire rather than lightweight materials you’ll be replacing in a few years. Our guides to installing a garden trellis and building a garden arbor walk through building something strong enough to last as long as the vine does. As a bonus, a kiwi-covered pergola makes a gorgeous living shade structure over a patio, one reason hardy kiwi is a permaculture and food-forest favorite.

    What You’ll Need

    • Kiwi vines — at least one female and one male of the same species (or a self-fertile ‘Issai’)
    • A heavy-duty support — a pergola, arbor, or T-bar wire trellis built to last decades
    • A sunny, sheltered planting site with rich, well-draining soil
    • Compost or aged manure to enrich the planting area
    • Organic mulch — compost or shredded leaves work well
    • Stakes and soft ties to train the young leader
    • Sharp, clean pruners for annual pruning

    How to Plant Kiwi Vines: Step-by-Step

    With your plants and trellis chosen, here’s how to get them in the ground.

    • Step 1: Choose Your Vines

    Buy sexed, labeled nursery vines: at least one female (for fruit) and one male (for pollination) of the same species, or a self-fertile ‘Issai’ if you want a single vine. For a family, just two or three female vines plus a male are usually plenty — hardy kiwis are that productive.

    • Step 2: Pick a Sunny, Sheltered, Well-Drained Site

    Choose a spot with full sun (at least eight hours) for the best fruiting, sheltered from strong wind, with loose, rich, well-draining soil. Kiwis hate waterlogged roots, so good drainage is essential. If possible, an east-facing slope helps, since it keeps vines from breaking bud too early and getting caught by late spring frosts.

    • Step 3: Erect the Trellis

    Put your sturdy trellis, pergola, or T-bar support firmly in place before planting. Building it first protects the vine’s roots from disturbance and means your fast-growing kiwi has something to climb from day one.

    • Step 4: Plant and Space Correctly

    Plant in spring after the last frost. Give each vine plenty of room — space plants about 10 to 15 feet apart (they’ll want even more than you’d expect). Set each plant at the same depth it grew in its pot, backfill, firm gently, and water in well. Mulch around the base with a few inches of compost or shredded leaves, keeping it a few inches away from the stem.

    • Step 5: Train a Single Leader Up the Support

    In the first year, select one or two strong shoots to become the main trunk and tie them loosely to a stake, guiding them straight up to the trellis. Removing competing side shoots early creates a strong framework. First-year vines need frequent, attentive training to grow upward rather than into a tangled mess.
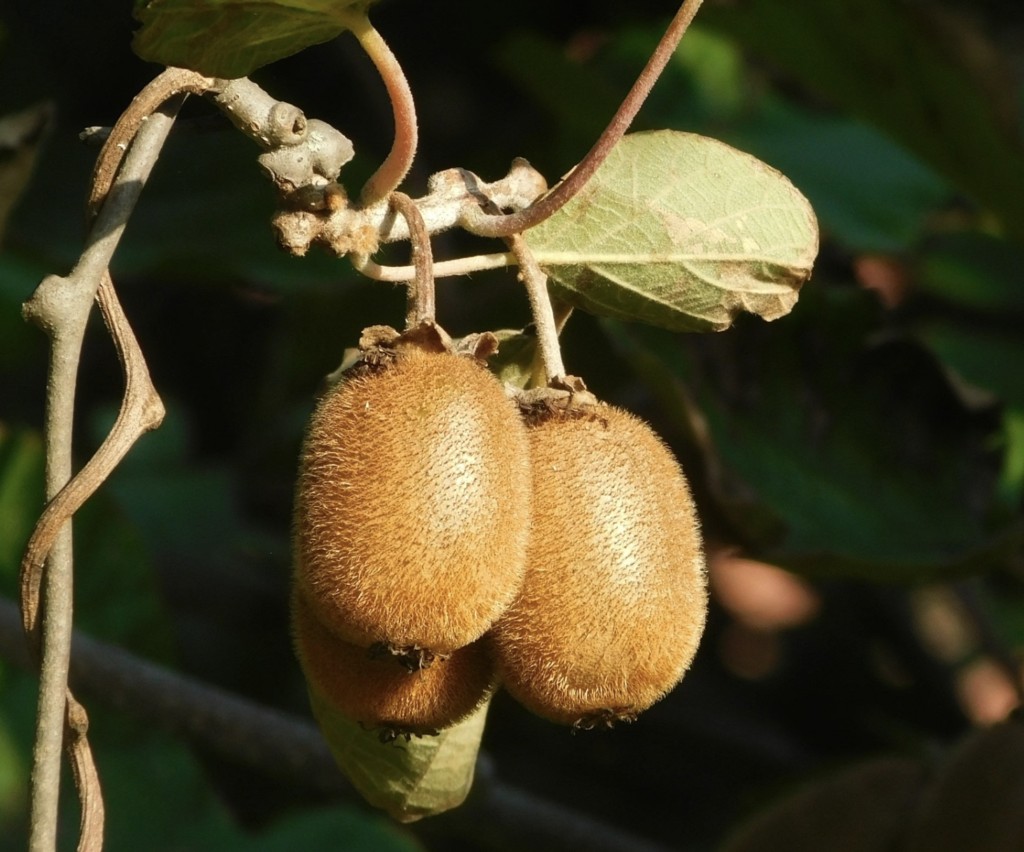
    Close-up of fuzzy kiwi fruits ripening on vine with green leaves in natural outdoor setting
    Close-up of fuzzy kiwi fruits ripening on vine with green leaves in natural outdoor setting

    Kiwi Vine Care: Water, Feeding and Pruning

    Once established, kiwi vine care is mostly about water, feeding, and bove all pruning.

    • Watering. Water regularly through summer and dry spells, especially while plants are young and establishing. Just be careful not to overdo it: kiwis are very prone to root rot in soggy soil, so let the ground dry somewhat between waterings and never leave the roots waterlogged. A good mulch layer helps hold steady moisture, see our guide to types of mulch.
    • Feeding. Skip fertilizer in the first year while the plant settles in. After that, feed each spring (and again as fruit begins to develop) with a balanced or all-purpose fertilizer; kiwis especially love compost and composted manure. Feed early in the season, since too much fertilizer late in the year can delay ripening. Our guide to homemade organic fertilizer offers gentle, low-waste options.
    • Pruning. This is where kiwi care really matters, think of it like growing grapes. Prune female vines while dormant in winter, removing dead, diseased, and crossing wood and cutting back the previous year’s fruited branches, leaving young one-year-old canes shortened to about eight to twelve buds (that’s where this year’s fruit forms). Prune male vines in early summer, after they’ve finished flowering, to keep them tidy and encourage fresh growth. Then prune lightly through summer to thin congested shoots. Don’t be timid, kiwis are vigorous and bounce back readily, so it’s better to prune too hard than too little.

    In our experience, pruning is the make-or-break skill with kiwi, and the biggest mistake new growers make is being too gentle. Left unpruned, a kiwi vine turns into a dense, tangled thicket that produces plenty of leaves but disappointingly little fruit, because sunlight and air can’t reach the fruiting wood. Gardeners who commit to a firm winter prune on their females  and a quick summer tidy-up all around, consistently get bigger, sweeter harvests on healthier vines. Think of the annual prune not as a chore but as the single most valuable hour you’ll spend on your kiwi all year.

    • Propagation. Once you have a vine you love, hardy kiwi is easy and fun to multiply for free. Take a healthy greenwood cutting, trim it into six-inch segments, and stand them in a glass with about an inch of water; in roughly three weeks small roots appear, ready to pot up. It’s a lovely, low-waste way to expand your planting or share vines with friends, just remember to keep track of which are male and female.

    How Long Until Kiwi Vines Fruit & Harvesting

    Patience is part of the deal with kiwi. Vines typically begin bearing in their third to fifth year, though some take a little longer to establish  and once they start, they can produce abundantly for 20 to 30 years or more.

    Here’s the seasonal rhythm to expect:

    • Late spring/early summer: fragrant little white flowers open (they smell like lily of the valley) and are pollinated by wind and bees.
    • Summer: clusters of small fruits form and swell all season.
    • Fall: fruit ripens, typically September into October depending on variety and region.

    For the best flavor, let hardy kiwis ripen fully, but be sure to harvest everything before a hard fall frost. If fruit is still firm when frost threatens, pick it and let it finish ripening on the kitchen counter. The reward: sweet, aromatic, grape-sized kiwis you can eat by the handful, skin and all. Their famously short shelf life is exactly why you rarely see them in stores  and exactly why growing your own is such a treat.

    To judge ripeness, gently squeeze a fruit or two, ripe kiwiberries yield slightly and taste sweet rather than starchy. A handy trick used by orchardists is to pick a sample fruit and leave it on the counter; if it softens to delicious within a few days, the rest of the crop is ready to harvest and ripen the same way. Once picked, ripe kiwiberries keep only a few days at room temperature but will hold for a couple of weeks in the fridge, and they freeze well for smoothies and baking. Beyond eating them fresh off the vine (the way most growers can’t resist), they’re wonderful in fruit salads, jams, and desserts, adding a bright, tropical note to the tail end of the growing season when little else is fruiting.
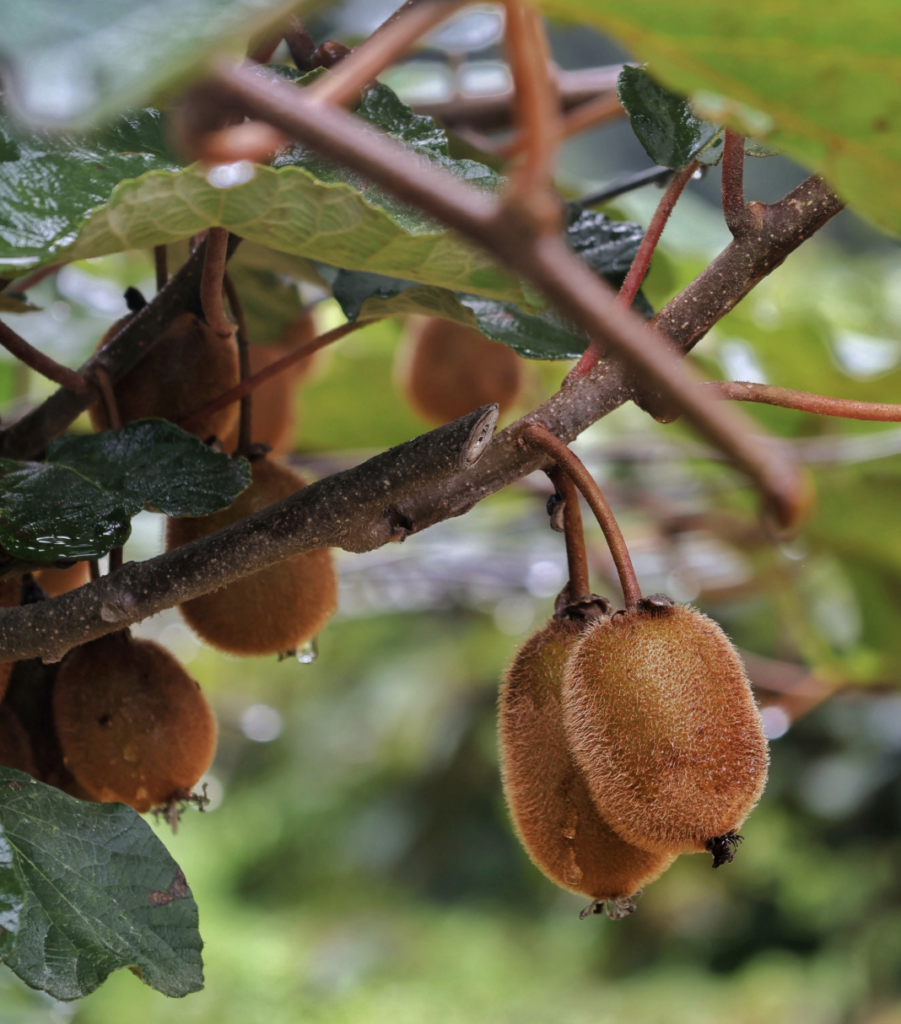
    Detailed view of ripe kiwifruit hanging on a vine, showcasing the vibrant textures and natural environment
    Detailed view of ripe kiwifruit hanging on a vine, showcasing the vibrant textures and natural environment

    Common Problems and How to Fix Them

    Hardy kiwis are among the most trouble-free fruits you can grow, but a few things are worth watching.

    Problem Likely Cause The Fix
    Lots of vine, no fruit No male pollinator, or all-female (or all-young) planting Add a male of the same species; be patient as vines mature
    Wilting, dying vines Root rot from waterlogged soil Improve drainage; water less; never leave roots soggy
    Frost-damaged spring shoots Late frost on tender new growth Site on an east slope; protect shoots; expect regrowth
    Vine collapsing the support Underbuilt trellis for a heavy mature vine Build a strong, durable structure from the start
    Chewed or shredded young vines Cats — kiwi foliage attracts them like catnip Protect young plants with a cage or barrier
    Delayed ripening Too much late-season nitrogen Feed early in spring, not late in the season

    Happily, hardy kiwis are so pest- and disease-resistant that they rarely need spraying at all, making them a favorite of organic and permaculture gardeners.

    Is Growing Kiwi Worth It?

    Absolutely, especially if you love the idea of a “tropical” fruit that laughs at cold winters. A hardy kiwi vine gives you a beautiful, shade-giving living structure, fragrant spring flowers, and years of sweet, no-peel fruit you simply can’t buy fresh in stores. Once established, it’s low-maintenance, pest-free, and astonishingly productive, a permaculture dream that keeps giving for decades. And because a single well-managed vine can yield hundreds of pounds of fruit, just two or three plants can supply a whole family, with plenty left over to freeze, share, and turn into jam.

    If growing your own unusual fruit appeals, keep exploring: try fig trees for beginners, pomegranate from seed, a pineapple from a top, or a compact kumquat tree in a pot. For the full collection of exotic edibles, browse our hub on growing tropical and exotic fruits, part of the broader EcoGardenHub Plant Library.

    Set up a strong trellis, plant a female and a male this spring, and in a few years your backyard could be dripping with sweet little kiwis, proof that a taste of the tropics can grow just about anywhere. It’s a patient project, but few plants reward that patience as generously, or for as many years, as a well-loved kiwi vine.

    Frequently Asked Questions

    Do you need two kiwi plants to get fruit? Usually, yes. Most kiwi vines are dioecious, meaning you need both a male and a female plant to get fruit, with one male for every five to eight females. The exceptions are self-fertile varieties like ‘Issai’ and ‘Prolific’, which can fruit on their own.

    How long does it take for kiwi vines to produce fruit? Kiwi vines typically begin fruiting in their third to fifth year, though some take a bit longer to establish. Once they start, a healthy vine can produce abundantly for 20 to 30 years or more.

    What is hardy kiwi? Hardy kiwi (Actinidia arguta), also called kiwiberry, is a cold-tolerant kiwi vine that produces smooth, grape-sized fruit you eat whole, skin and all. It’s sweeter than the fuzzy grocery-store kiwi and grows in USDA zones 4 to 9 (arctic kiwi is hardy to zone 3).

    How much space do kiwi vines need? Quite a lot, kiwis are vigorous and usually need more room than expected. Space vines about 10 to 15 feet apart on a strong trellis, pergola, or T-bar support built to carry hundreds of pounds of mature growth.

    Do kiwi vines need a trellis? Yes. Kiwis are heavy, fast-growing vines that must have a sturdy structure to climb. Build a strong, durable trellis, pergola, or arbor before planting, since a mature vine can weigh hundreds of pounds and last for decades.

    When and how do you prune kiwi vines? Prune female vines while dormant in winter, cutting back fruited wood and shortening one-year-old canes to eight to twelve buds. Prune male vines in early summer after flowering, and thin lightly through summer. Kiwis are vigorous, so don’t be afraid to prune hard.

    Can you grow kiwi in cold climates? Yes. Hardy kiwi grows in zones as cold as 4, and arctic kiwi down to zone 3, so you can grow sweet kiwiberries even where winters are harsh. Their spring shoots are frost-sensitive, so a sheltered site helps.
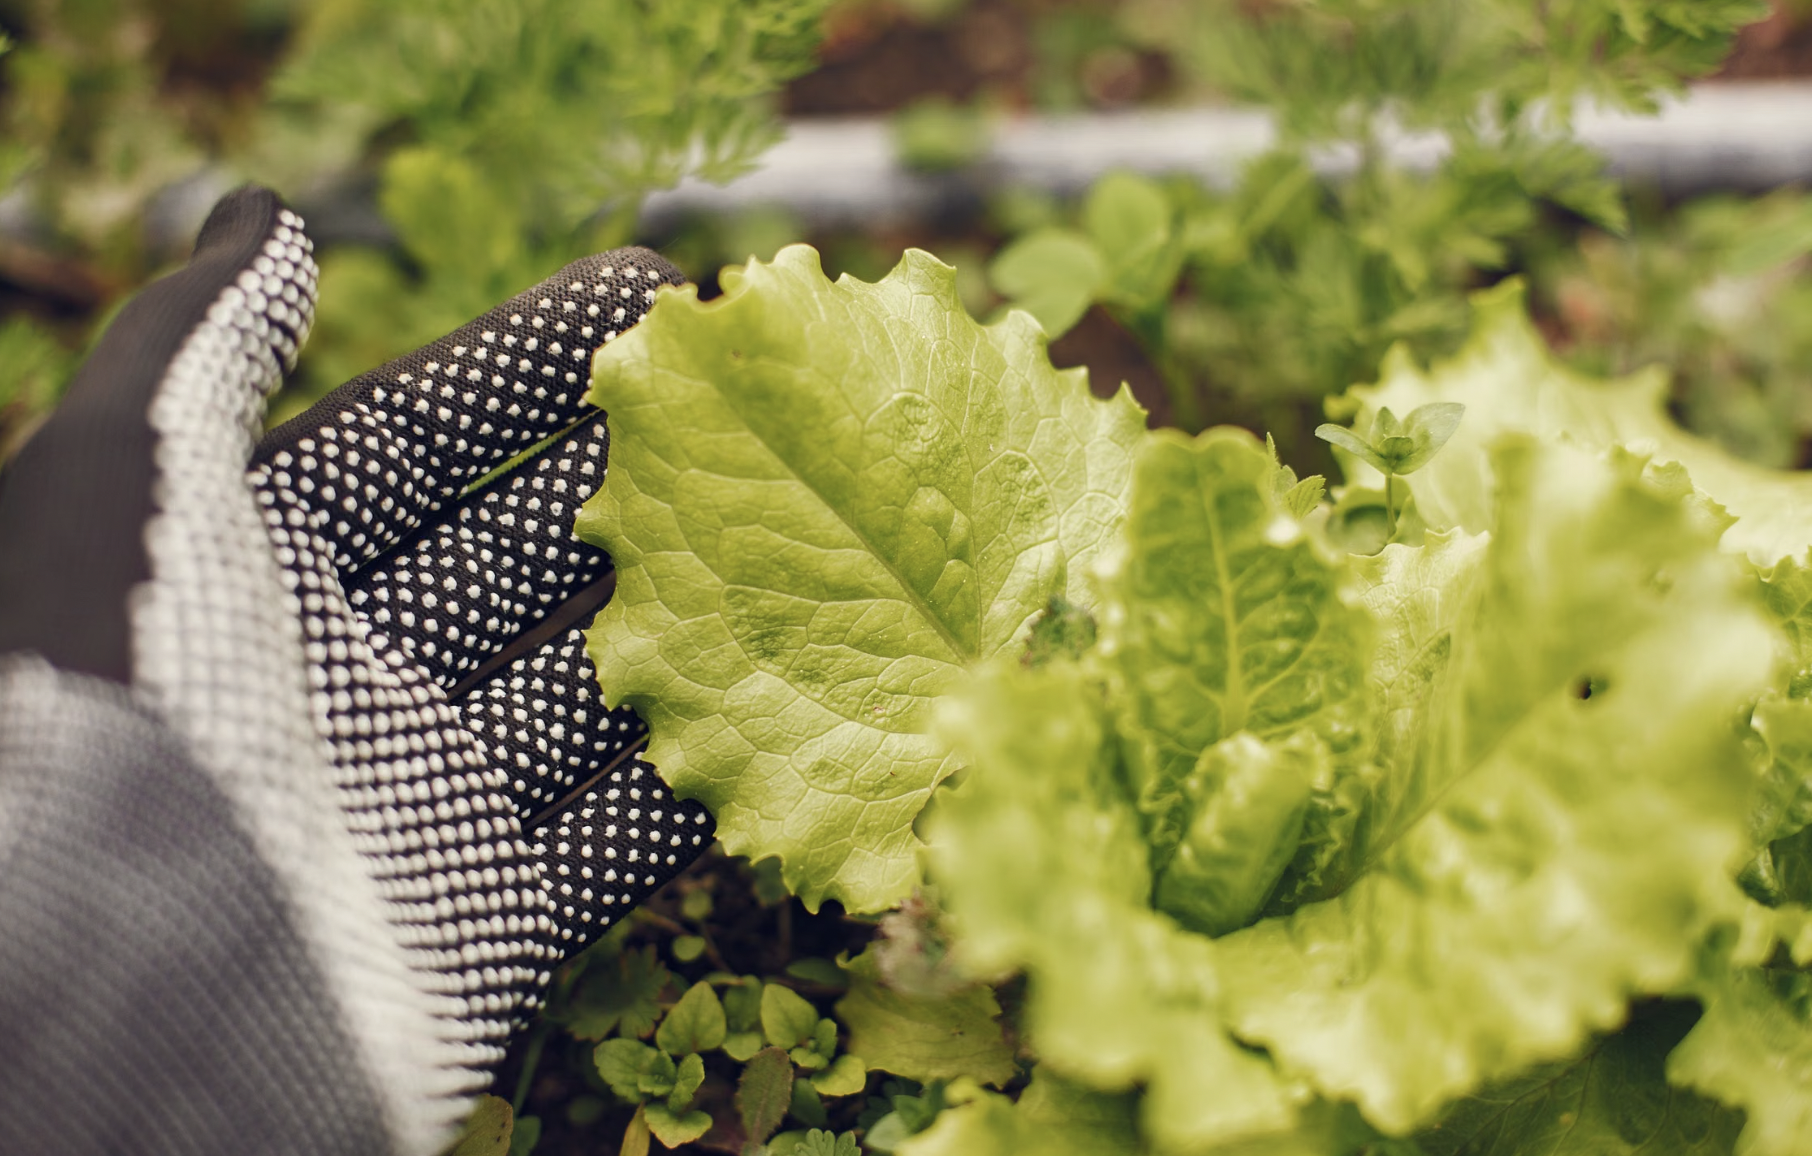
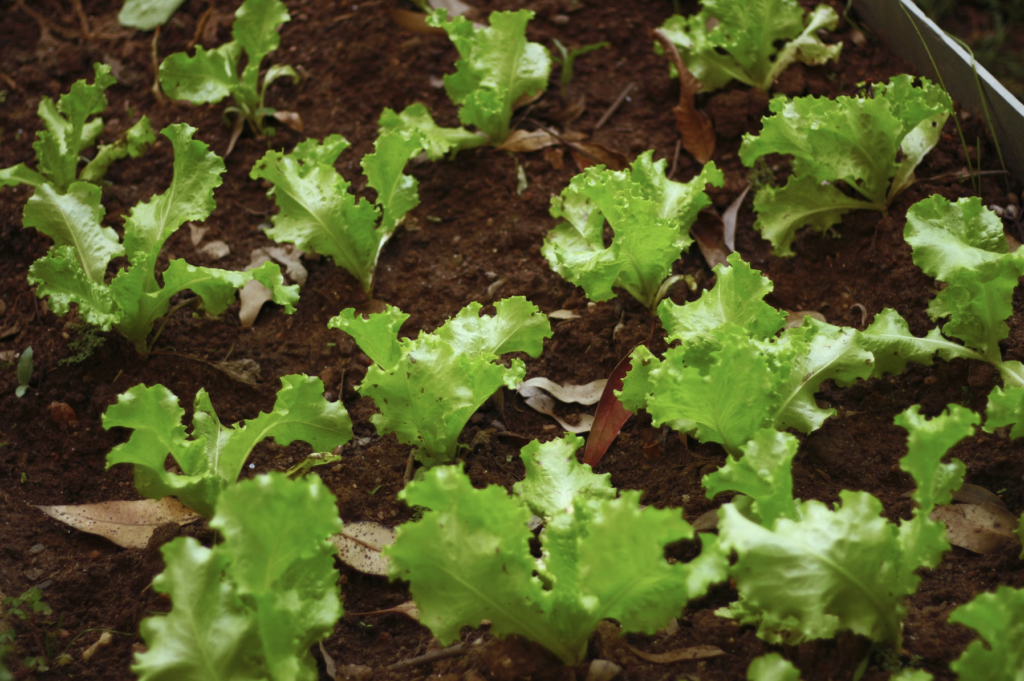
  • How to Grow Leaf Lettuce for Continuous Harvest

    How to Grow Leaf Lettuce for Continuous Harvest

    Here’s a scenario every new gardener knows: you grow a beautiful lettuce plant, pull the whole thing up for one salad, and just like that, your harvest is over. Now here’s the professional secret that changes everything. Learning how to grow lettuce properly means one small planting can feed you salads for months, not one dinner.

    The trick is a technique called cut-and-come-again, and it’s built on a simple bit of plant biology: lettuce grows from its center outward. Harvest the outer leaves and leave that growing point untouched, and the plant just keeps producing. Pair that with a little succession sowing and you’ll have crisp, fresh greens from early spring right through fall from a patch of ground the size of a doormat. This guide shows you exactly how.

    How Do You Grow Lettuce for a Continuous Harvest?

    Sow loose-leaf lettuce seeds shallowly in cool weather, spacing plants 4 to 6 inches apart in rich, moist soil with sun or part shade. Once leaves reach 3 to 4 inches, harvest using the cut-and-come-again method, snipping outer leaves or cutting 1 to 2 inches above the soil while leaving the central crown intact. The plant regrows in 7 to 14 days, giving three or four harvests. Sow a fresh batch every 2 to 3 weeks for greens all season.

    The two habits that make lettuce a season-long crop are protecting the crown when you harvest and succession sowing so a new batch is always coming along behind. Master those and you’ll never buy a bag of salad again.

    Close-up of fresh green lettuce plants growing in garden soil outdoors
    Close-up of fresh green lettuce plants growing in garden soil outdoors

    Meet Leaf Lettuce (and Why It’s the Easiest Crop You’ll Grow)

    Lettuce (Lactuca sativa) is a fast, cool-season crop, and loose-leaf types are the friendliest of the family. Unlike iceberg or other heading lettuces that form a tight ball, loose-leaf varieties grow as an open rosette of leaves, which is exactly what makes them so generous.

    That open habit brings real advantages:

    • You can plant them close together.  4 to 6 inches apart, with no thinning required, so a tiny space produces a lot.
    • Every leaf is edible from the start. There’s no waiting for a head to form; lettuce is delicious at any size, even as microgreens.
    • It’s fast. Seeds sprout in about three days and you can be picking baby leaves within a couple of weeks, with a first full harvest around four weeks.
    • It tolerates partial shade. Lettuce is one of the very few vegetables that grows well without full sun, making it perfect for shadier balconies and yards.

    Here’s a bonus most gardeners don’t realize: you can harvest leaf-style from any type of lettuce. Even a romaine or butterhead will happily give you outer leaves while its heart keeps developing. Cut-and-come-again isn’t limited to one kind of plant, it’s a technique, not a variety.

    Choosing Varieties for Continuous Harvest

    While the technique works broadly, some varieties are true champions of regrowth. Loose-leaf types are the gold standard because they have no tight central core to disturb.

    Variety Type Why Grow It
    Black Seeded Simpson Loose-leaf Classic, fast, bounces back quickly after a trim
    Red Sails Loose-leaf Beautiful bronze-red leaves; slow to turn bitter
    Oakleaf Loose-leaf Tender lobed leaves; hardy and reliable
    Parris Island Cos Romaine Pick outer leaves while the heart keeps developing
    Jericho Romaine Bred in Israel for heat — excellent slow-bolt choice
    Nevada Summer crisp Heat-tolerant and resists bolting
    Mesclun mixes Blend Multiple colors, flavors, textures from one sowing

    A smart strategy: grow a mix. Different varieties mature at slightly different rates, so even after you harvest one section heavily, another is ready creating a seamless supply of greens. In warm weather, lean on slow-bolt varieties like ‘Jericho’ and ‘Nevada’.

    Many experienced gardeners actually grow lettuce two ways at once: a few full-size romaine or butterhead plants left to mature into proper heads, alongside a couple of densely sown rows of cut-and-come-again baby greens on constant rotation. It’s the best of both worlds, crisp whole heads for wedges and wraps, plus a permanent supply of tender leaves for everyday salads. The same technique also works beautifully on arugula, mizuna, mustard greens, and even young kale, so a single “salad bed” can deliver endless variety.

    How to Grow Lettuce: Step-by-Step

    • Step 1: Sow in Cool Weather

    Lettuce is a cool-season crop that thrives at roughly 55–65°F, so sow in early spring and again in late summer for a fall crop. Heat is lettuce’s enemy, it triggers bolting. So plan around the cool ends of the year. Our guide to what to plant in early spring helps with timing, and what to plant in late summer covers the fall round.

    • Step 2: Barely Cover the Seeds

    Lettuce seeds need light to germinate, so don’t bury them. Sprinkle them on the soil surface and press gently, or cover with the barest dusting of fine soil. Water gently and they’ll sprout in about three days. For full-size plants, space them 4 to 6 inches apart; for a baby-greens “salad bar,” scatter seeds thickly (think 40 seeds per foot in a two-inch-wide band) and skip thinning entirely.

    • Step 3: Enrich With Compost, Not Synthetic Nitrogen

    Lettuce loves rich, moisture-retentive soil. Work in a generous helping of compost before sowing. Here’s a subtle but important point: compost releases nitrogen slowly and steadily, whereas synthetic high-nitrogen fertilizers cause growth surges that can actually trigger early bolting. Gentle, steady feeding is what keeps lettuce sweet, our guide to making your own organic fertilizer has low-waste options.

    • Step 4: Water Consistently

    Dry soil is one of the fastest ways to send lettuce bolting and turn it bitter. Keep the soil evenly moist — never bone dry, never waterlogged. Shallow-rooted lettuce dries out quickly, especially in containers, so check often. Planting densely helps too: the leaves shade the soil and keep the roots cool.

    • Step 5: Succession Sow Every 2 to 3 Weeks

    This is the habit that turns lettuce into a season-long crop. Rather than sowing everything at once, plant a small batch every two to three weeks from early spring onward. As one planting starts to tire or bolt, the next is hitting its first harvest window. Our guide to succession planting covers the whole approach.

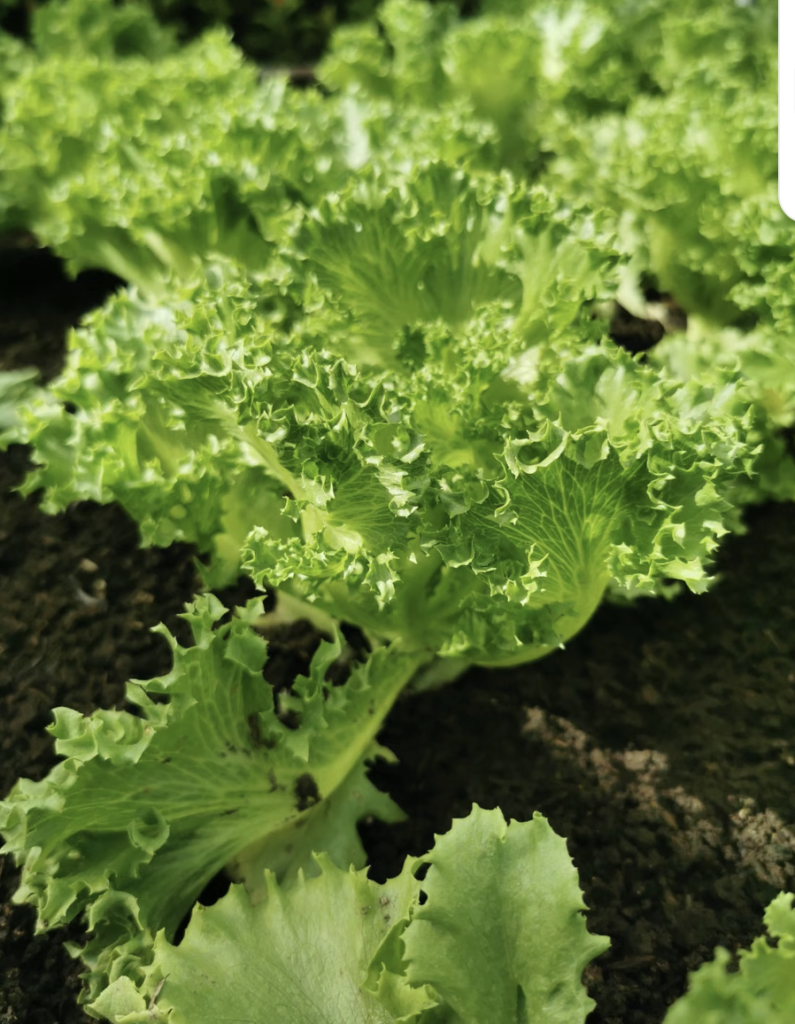
    Close-up of fresh green lettuce with curly leaves growing outdoors in sunlight.
    Close-up of fresh green lettuce with curly leaves growing outdoors in sunlight.

    The Cut-and-Come-Again Method (The Heart of It All)

    This is the technique that transforms one planting into a season-long feast, and it hinges on protecting a single part of the plant: the crown.

    The crown is the central growing point at the plant’s base, where all new leaves emerge. Lettuce grows from the center outward, so as long as the crown is intact and has sun and water, it keeps producing. Cut it off and the plant is finished. Think of the crown as the plant’s beating heart, many beginners accidentally “scalp” their lettuce and end the growing cycle prematurely.

    Here are the three harvesting methods, each with its place:

    1. Leaf-by-leaf (gentlest, most productive). Circle the plant and snip the three or four largest, lowest outer leaves with micro-tip snips or sharp scissors. The plant continues its normal growth pattern from the center, barely noticing. Perfect for grabbing enough for a single salad, and it typically yields three to four harvests per plant over a season. It’s also good housekeeping, remove any yellowing leaves or ones touching the soil while you’re there, since those invite slugs and fungal problems.
    2. The “ponytail chop” (faster, bigger harvests). Gather a handful of leaves as if making a ponytail, and cut below your hand with clean scissors about two to three inches above the crown. You get more leaves per trip and still leave the growing point intact. Expect two to three harvests this way.
    3. The “mow” (for densely sown baby greens). If you carpet-sowed for a spring-mix bed, simply cut a horizontal swath across the tops with shears when greens are about four inches tall, staying an inch or two above soil level. New leaves push up for another harvest in around two weeks, usually giving two to three cuts.

    Always use sharp, clean tools. A crisp cut heals far faster than a jagged tear, which leaves more open surface for pathogens and pests to enter. Micro-tip pruning shears or floral snips are ideal.

    In our experience, the single moment that decides whether lettuce becomes a season-long crop or a one-salad novelty is that first harvest. Beginners almost always cut too low, the instinct is to take the whole plant, because that’s what a head of lettuce looks like at the store. Gardeners who train themselves to leave a stubby two inches of stem behind, even though it looks unfinished, are the ones still picking from those same plants six weeks later. Keep your cuts high, err on the side of taking too little, and lettuce will keep rewarding you.

    How Fast Does Lettuce Regrow?

    Regrowth speed depends almost entirely on temperature:

    • Cool spring conditions (55–65°F): rapid regrowth, return to the same plant in 7 to 10 days.
    • Warm early-summer weather: slower, but still a harvest roughly every 10 to 14 days.
    • First full harvest: about four weeks from sowing, then every two to three weeks thereafter.

    Keep harvesting from each plant until it becomes tired or the leaves turn bitter, then pull it and let your next succession batch take over. If you have multiple rows at different stages, rotate which row you pick from, giving each one time to bounce back. This rotation is the quiet engine behind a truly continuous supply: while one row is regrowing, another is at its peak, and a third is just germinating.

    There’s also a simple test for whether a tiring plant is still worth eating. Cut a leaf and look at the stem, if it oozes a milky white sap and tastes bitter, the plant has turned and it’s time to pull it. If the sap is minimal and the leaf still tastes sweet, keep harvesting.

    Beating the Bolt: Keeping Lettuce Sweet

    Bolting is lettuce’s one real drama. When the plant gets stressed, usually by heat, but also by drought or general neglect, it stops making leaves and shoots up a thick central flower stalk to set seed. Once that happens, the leaves turn bitter and the party’s over.

    Spot it early. The tell is a plant growing taller instead of fuller, with leaves spacing out as a central stem rises. Leaves may also turn dull instead of glossy. Catch that and harvest immediately you can usually get one last good picking before the flavor turns.

    Prevent it. Bolting resistance comes down to a few simple habits:

    • Plant in the cool seasons. Spring and fall are lettuce’s happy places.
    • Never let the soil dry out. Drought stress is a bolting trigger.
    • Space densely. Closely planted leaves shade the soil and keep roots cool.
    • Feed with compost, not nitrogen surges.
    • Use shade. Row covers or shade cloth slow bolting in warm weather noticeably.
    • Choose slow-bolt varieties like ‘Jericho’ or ‘Nevada’ for late plantings.

    If your lettuce bolts anyway, it’s simply too warm, that’s not a failure, it’s a signal. Wait for cooler weather and sow a fall crop. And there’s a silver lining: a bolted plant will produce seed you can dry and save for next year’s sowings.

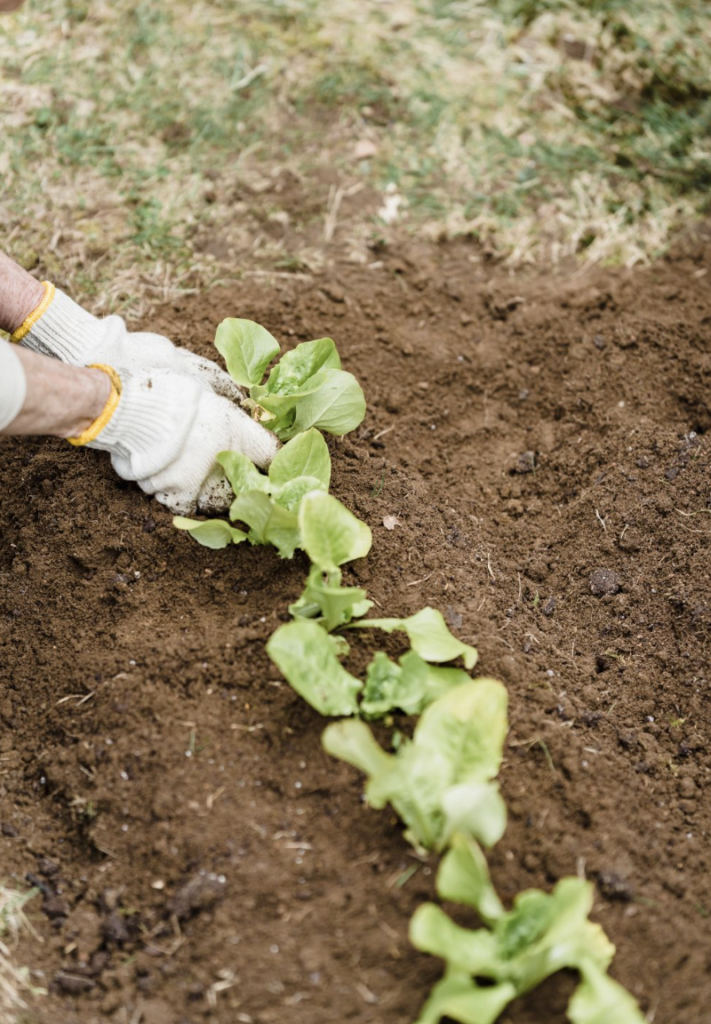
    Hands in gloves planting lettuce seedlings in a neat row on fertile garden soil
    Hands in gloves planting lettuce seedlings in a neat row on fertile garden soil

    Extending the Season Even Further

    Lettuce doesn’t have to stop when the weather turns. Because it’s so cold-tolerant, a little protection stretches your harvest dramatically. A cold frame or low tunnel will carry fresh greens well into winter, and row covers do double duty, shading lettuce in summer heat and buffering frost in fall.

    Lettuce is also one of the very best crops for indoor growing. A sunny windowsill or a simple grow light setup will keep a shallow tray of leaf lettuce producing through the dead of winter. Choose a small, fast variety, sow thickly, and mow for baby greens.

    Growing Lettuce in Containers

    Lettuce is practically made for pots. Its roots are shallow, so a container just 6 to 8 inches deep is plenty, a window box, a shallow bowl, even a repurposed storage tub with drainage holes. Fill with quality potting mix, scatter seeds thickly, and set it somewhere with morning sun and afternoon shade.

    The catch with containers is moisture: shallow soil dries fast, and dry lettuce bolts. Check daily in warm weather. The upside is portability. as summer heats up, simply move the pot into the shade to extend your harvest by weeks. Our container gardening guide for beginners covers the basics, and lettuce makes an excellent companion for a windowsill herb garden.

    Harvesting and Storing for Best Flavor

    One small detail makes a big difference: harvest early in the morning. Overnight, lettuce absorbs water and its leaves become fully turgid and sweet, before sun and heat begin to wilt them. Morning-picked lettuce is noticeably crisper and better-tasting than the same leaves cut at noon.

    To store it, wash the leaves, dry them thoroughly (a salad spinner is ideal), wrap them loosely in a dry paper towel, and seal them in a container in the fridge. The towel absorbs excess moisture and keeps leaves crisp for up to a week. That said, lettuce loses freshness and nutrition the longer it sits. one of the quiet joys of growing your own is harvesting exactly what you need, minutes before it hits the bowl. It’s zero-waste eating at its simplest.

    Common Problems and How to Fix Them

    Problem Likely Cause The Fix
    Bitter leaves, tall center stalk Bolting from heat, drought, or age Harvest immediately; sow slow-bolt types; use shade
    Plant died after harvesting Crown was cut off (“scalped”) Always cut 1–2 inches above the crown
    Seeds never germinated Buried too deep — lettuce needs light Surface-sow and barely cover
    Wilting, slow growth Dry soil; shallow roots drying out Water consistently; mulch or plant densely
    Ragged holes in leaves Slugs and snails Remove low/yellowing leaves; use barriers or traps
    Leaves rotting at the base Overcrowding, poor airflow, wet foliage Thin slightly; water at the soil line
    Sticky leaves, curling tips Aphids Rinse off; encourage ladybugs and lacewings

    For slugs and aphids especially, inviting beneficial insects does much of the work for you, see our guide to beneficial insects every gardener should know.

    Is Growing Lettuce Worth It?

    Enormously. Lettuce may be the highest-return crop in the entire vegetable garden: it’s cheap, it sprouts in days, it grows in shade and containers, and with cut-and-come-again, a single sowing keeps giving for months. Add succession sowing and a bit of shade, and you can eat homegrown salad most of the year while never buying another plastic clamshell of greens. A single seed packet costing a couple of dollars can genuinely replace a season’s worth of supermarket salad, with far better flavor and none of the packaging.

    Ready to round out your salad garden? Lettuce pairs beautifully with other cool-season crops, try growing kale in cool weather or spinach year-round, both of which respond to the very same cut-and-come-again technique. For warm-season company, see tomatoes in containers. Explore the full Vegetables collection, part of the broader EcoGardenHub Plant Library.

    Scatter a few seeds this week, protect that crown when you harvest, and sow again in a fortnight, before long you’ll be walking out with a bowl and coming back with dinner. There’s no fresher salad on earth than one that was still growing five minutes ago.

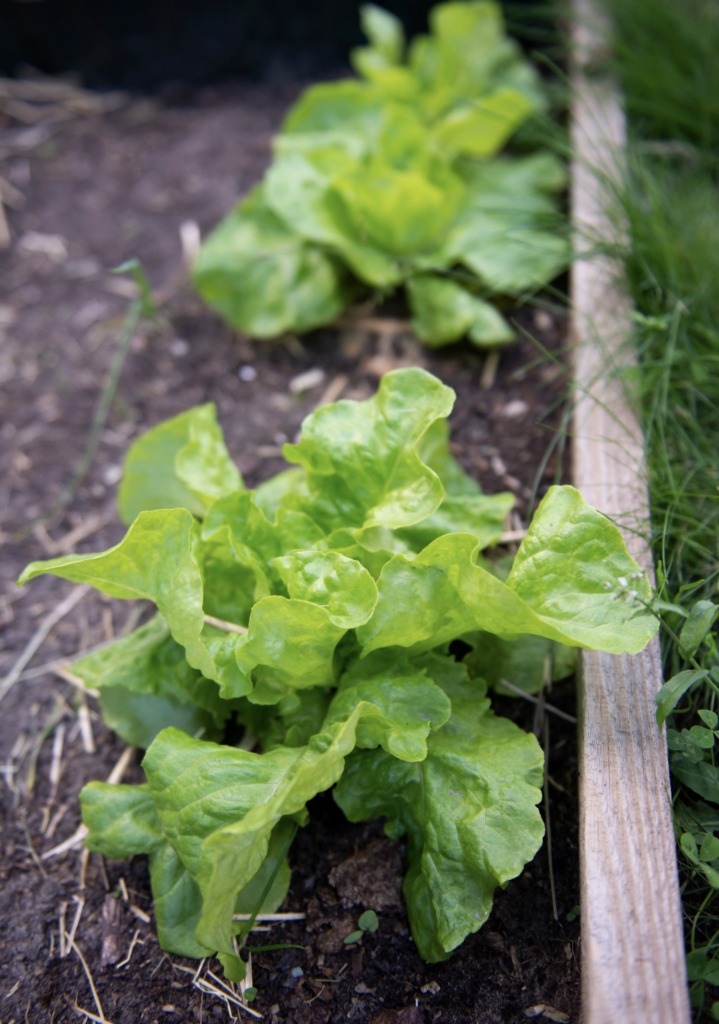
    Close-up of fresh green lettuce growing in a vegetable garden bed.
    Close-up of fresh green lettuce growing in a vegetable garden bed.

    Frequently Asked Questions

    • What is the cut-and-come-again method? It’s a harvesting technique where you take only the outer leaves or cut the plant 1 to 2 inches above soil, while leaving the central crown intact. Because lettuce grows from the center outward, the plant regrows and can be harvested three or four times.
    • How do I harvest lettuce so it keeps growing? Never cut the crown. Snip outer leaves individually with clean scissors, or gather a handful and cut two to three inches above the base. Leave that central growing point untouched and new leaves will keep emerging.
    • How often can you harvest cut-and-come-again lettuce? In cool weather (55–65°F), plants regrow in 7 to 10 days; in warmer weather, expect a harvest every 10 to 14 days. Most plants give three or four good harvests before turning bitter.
    • Why is my lettuce bitter? Bitterness means the plant is bolting, sending up a flower stalk in response to heat, drought, or age. Harvest immediately for one last picking, water consistently, use shade cloth, and choose slow-bolt varieties like ‘Jericho’ or ‘Nevada’.
    • How do you stop lettuce from bolting? Grow it in cool seasons, keep soil consistently moist, plant densely to shade the soil, feed with compost rather than high-nitrogen fertilizer, and use shade cloth or row covers in warm weather.
    • Can you grow lettuce in the shade? Yes. Lettuce is one of the few vegetables that grows well in partial shade, which actually helps in warm weather by slowing bolting. Morning sun with afternoon shade is close to ideal.
    • When is the best time of day to harvest lettuce? Early morning. Lettuce absorbs water overnight, so leaves are at their crispest and sweetest before the sun and heat begin to wilt them.

  • How to Grow Fig Trees: A Beginner’s Guide

    How to Grow Fig Trees: A Beginner’s Guide

    Here’s a fruit-growing secret the farmers market won’t tell you: that little pint of figs costing six dollars comes from one of the easiest, most forgiving fruit trees you can grow at home. Figs (Ficus carica) have been cultivated for over 5,000 years. some believe they were the very first fruit humans ever domesticated and learning how to grow fig trees is refreshingly beginner-friendly. Plant one, give it sun and decent drainage, and within a year or two it can be handing you soft, honey-sweet fruit warm from the branch.

    The best part? You don’t need a Mediterranean climate. With the right variety and a few simple cold-weather tricks, gardeners grow figs successfully from Southern California to Chicago. This friendly guide covers everything a first-timer needs, from choosing the perfect variety for your zone to protecting your tree through winter and harvesting your first perfect fig.

    Can Beginners Grow Fig Trees?

    Yes,  figs are one of the best fruit trees for beginners. Plant a variety suited to your climate in a hot, sunny spot with well-draining soil, water it consistently while it establishes, and protect it over winter in cold regions. Common figs are self-fruitful, so you only need one tree, and it can produce fruit within one to two years. In cold zones, grow figs in pots you can move indoors.

    The single most important decision is variety. Fig cultivars vary dramatically in flavor and cold-hardiness, and matching one to your zone is genuinely half the battle. Get that right, and figs reward you with more fruit for less effort than almost anything else in the garden.

    Meet the Fig Tree (Ficus carica)

    The common fig is a fast-growing deciduous tree or large shrub, prized for its lush, hand-shaped leaves and richly sweet fruit. Native to the Mediterranean and Middle East, it’s a plant of hot, sunny places, but it’s far hardier and more adaptable than its tropical reputation suggests.

    One detail makes figs especially beginner-friendly: the common fig is self-fruitful and needs no pollination to set fruit, so you only need a single tree and never have to worry about pollination partners or the famous fig wasp that some other fig types require. Most home varieties stay a manageable 10 to 20 feet (and can be kept smaller with pruning or in a pot), they’re deciduous, dropping their leaves each winter and flushing out fresh in spring and the fruit is a genuine superfood, rich in fiber, potassium, and calcium.

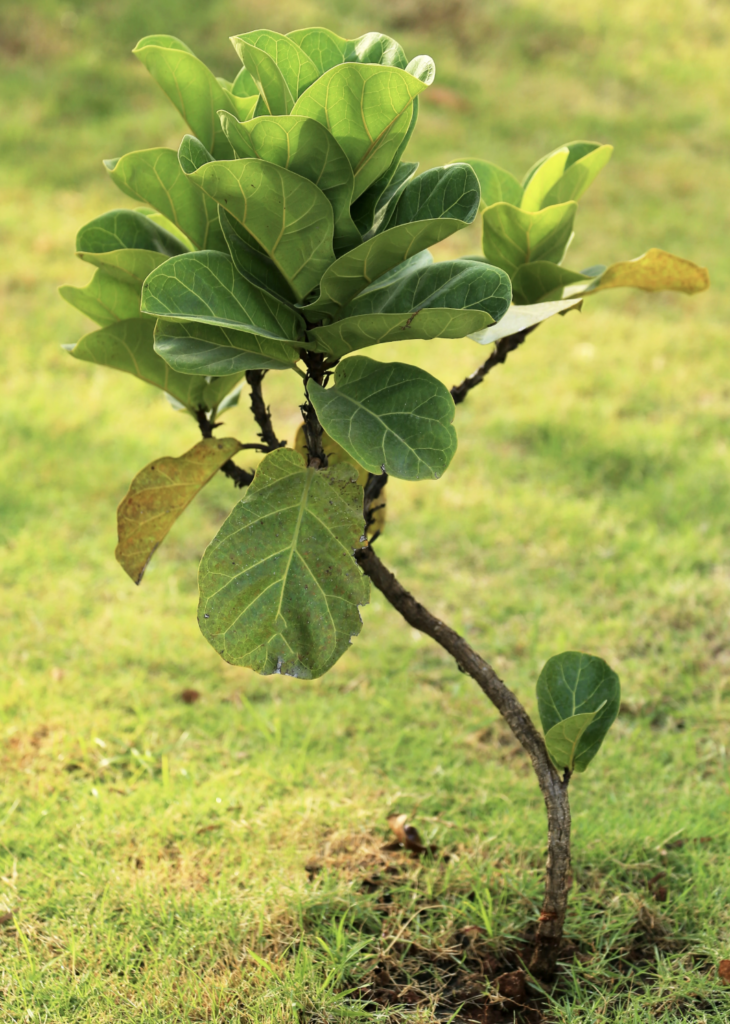
    Meet the Fig Tree (Ficus carica)
    Meet the Fig Tree (Ficus carica)

    There’s also something quietly special about growing figs: you’re tending a plant with thousands of years of history behind it. The same tree that fed ancient civilizations around the Mediterranean can grow on a modern patio, asking for little more than sunshine and the occasional drink. That combination of heritage, ease, and generosity is a big part of why, once gardeners grow their first fig, they rarely stop.

    Choosing the Right Fig Variety for Your Zone

    Because figs are so sensitive to their environment while ripening, choosing a variety suited to your climate is the key to success. Here are dependable, beginner-friendly cultivars:

    Variety Fruit Best For
    Chicago Hardy Purple skin, red flesh, sweet The most cold-hardy — great for zones 5–6 with protection
    Celeste Small, brown-purple, very sweet (“sugar fig”) Compact (7–10 ft), heat-tolerant, often fruits in year one
    Brown Turkey Medium, mild and sweet The popular all-rounder; among the most cold-hardy
    Black Mission Large, purple-black, jammy Hot, dry climates (zones 6–11)
    Kadota Small-medium, rich and sweet Warm areas; the classic canning fig

    Most figs are hardy in USDA zones 7 to 11 in the ground. In zones 5 and 6, choose the hardiest varieties (like Chicago Hardy) and provide winter protection, or grow figs in containers you can move indoors. Our regional guides for USDA Zone 5 and USDA Zone 7 gardening can help you match plants to your climate.

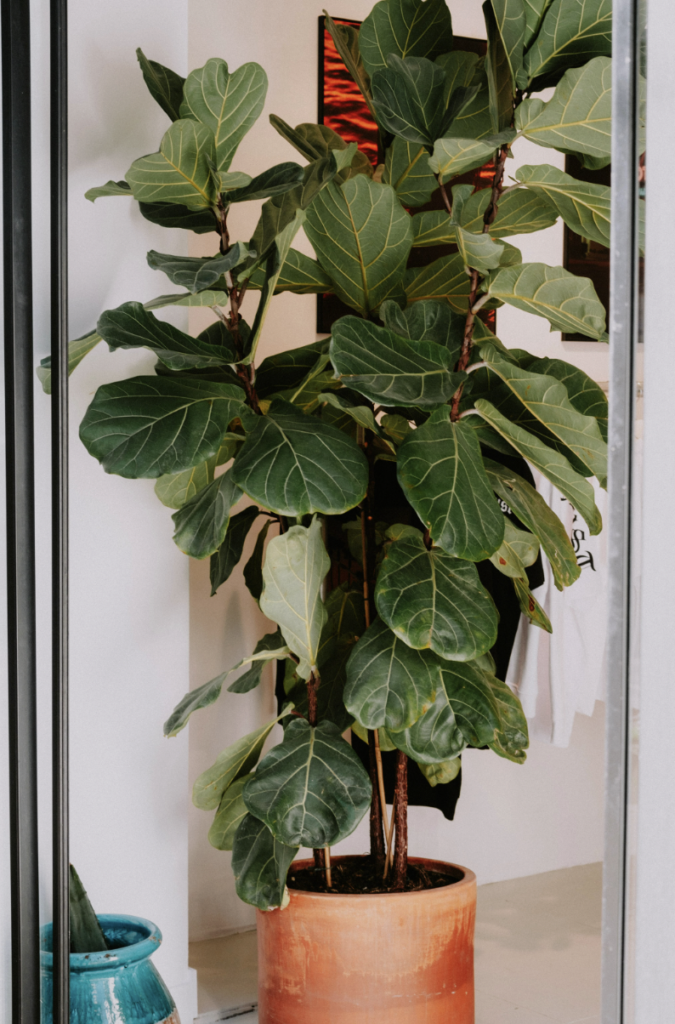
    How to Plant a Fig Tree in Pots indoor
    How to Plant a Fig Tree in Pots indoor

    How to Plant a Fig Tree: Step-by-Step

    Figs are forgiving, but getting the planting right sets you up for years of easy harvests.

    • Step 1: Choose the Right Variety and a Sunny Site

    Pick a variety suited to your zone, then find your hottest, sunniest spot. figs want at least six to eight hours of direct sun (more is better), and they love the reflected heat of a south-facing wall or fence, which speeds ripening and shelters the trunk in winter. Avoid low-lying frost pockets, since figs are more vulnerable to late spring frosts on tender new growth than to ordinary winter cold.

    • Step 2: Plant at the Right Time (and a Little Deep)

    Plant in early spring after the last frost, or in early fall in mild climates, giving roots time to establish. Dig a hole about twice as wide as the root ball. Here’s a fig-specific trick most guides skip: unlike other fruit trees, you can plant a fig slightly deeper than it grew in its pot, burying a couple of the lowest trunk nodes below the soil line. Those buried buds act as insurance, if a harsh winter kills the top, the tree can regrow from below.

    • Step 3: Enrich, Backfill, and Firm

    Mix a few handfuls of compost or well-rotted manure into the planting hole to boost fertility and structure. Set the tree, backfill around the roots, and firm gently to remove air pockets. Figs tolerate most soil types as long as it drains well and holds some organic matter.

    • Step 4: Water Well and Mulch

    Water thoroughly after planting to settle the soil, then spread a layer of organic mulch around the base, kept a few inches from the trunk, to conserve moisture and moderate soil temperature. Our guide to types of mulch helps you choose.

    • Step 5: (Optional) Grow a Free Fig From a Cutting

    One of the joys of figs is how easily they root from cuttings, giving you free trees. Take an 8- to 10-inch piece of dormant young wood, dip the cut end in rooting hormone, and plant it in moist, well-draining soil. Keep it warm and lightly moist, and it will often root and grow into a whole new tree.

    Fig Tree Care: Sun, Water, Feeding and Pruning

    Once established, fig tree care is wonderfully low-effort, figs are among the most drought-tolerant, resilient fruit trees you can grow.

    • Sun. More sun, more figs. Give your tree full sun (eight or more hours where possible); in too much shade, fruit production drops sharply.
    • Watering. Keep the soil consistently moist during the first year and through the growing season, especially as fruit develops erratic watering can cause fruit to drop or split. Once established, in-ground figs become quite drought-tolerant. Container figs, however, dry out fast and need more regular watering.
    • Feeding. In-ground figs in decent soil need very little feeding; in fact, over-fertilizing (especially with nitrogen) produces lush leaves at the expense of fruit. Container figs are the exception, they benefit from a high-nitrogen feed every four weeks or so through spring and early summer. Our guide to understanding NPK ratios keeps it simple, and homemade organic fertilizers offer gentle, low-waste options.
    • Pruning. Less is more with figs. Over-pruning disrupts the tree’s hormones and can reduce next year’s crop, so prune lightly while the tree is dormant in late winter or early spring, removing dead, diseased, or crossing branches and any suckers from the base. Always wear gloves, as fig sap can irritate skin.

    Understanding Fig Crops: Breba vs Main

    Here’s something that puzzles many new fig growers, so it’s worth understanding. Many fig trees produce two crops a year:

    • The breba crop forms in spring on the previous year’s wood. It’s earlier but smaller, and because the young fruitlets overwinter on the branch tips, they’re vulnerable to frost damage.
    • The main crop forms later in summer and fall on the current season’s new growth. It’s larger and the one most gardeners rely on.

    In cooler climates, the breba crop may be lost to frost and only the main crop ripens, which is exactly why winter protection matters so much for figs. It’s also why a tree can look healthy yet drop unripe fruitlets: often those were breba figs caught by cold.

    Growing Figs in Containers

    Growing a potted fig is a brilliant solution for small spaces and cold climates alike and figs genuinely thrive in pots, since they don’t mind having their roots a little restricted. A container also gives you a superpower: you can move the whole tree to shelter for winter.

    Start a young tree in a pot around a foot wide and deep, or one size up from its nursery pot, filled with a soil-based potting mix improved with bark chips, perlite, or pebbles for drainage. Keep it in full sun through summer, water regularly (pots dry out quickly), and feed every few weeks in spring and early summer. Because the roots are confined, repot every few years into fresh mix to keep the tree healthy and productive. Our container gardening guide for beginners covers pots, drainage, and repotting in detail.

    Fig Winter Protection: How to Overwinter Your Fig

    For gardeners north of zone 7, fig winter protection isn’t optional, it’s the difference between a thriving tree and a dead stump. The good news is that it’s straightforward, and there are several proven methods to suit your setup.

    • For potted figs (the easy route). Let the tree experience a light frost so it drops its leaves and goes dormant, then move the container into a cool, dark, frost-free spot like an unheated garage, shed, or basement (ideally around 20–50°F). Water only sparingly through winter to keep the roots from fully drying out, and bring it back into the sun in spring. Dormancy is far easier than trying to keep a fig actively growing indoors.
    • For in-ground figs — wrap it up. Once the tree drops its leaves in fall, tie the branches together loosely, then wrap the whole tree in burlap or landscape fabric, stuffing the interior with straw or dry leaves for insulation. A final layer of tarp or plastic sheds moisture. Unwrap gradually in early spring once nights stay reliably above about 25°F.
    • The mulch-and-cage method. Encircle the tree with a ring of chicken wire and fill it with insulating leaves, straw, or wood chips to protect the lower trunk and buds.
    • The bend-and-bury method. A traditional technique from Italian-American gardeners in the cold Northeast: prune to a few flexible branches, bend the whole tree to the ground, and bury it under six to eight inches of soil and mulch for winter.

    Whichever you choose, remember that young trees are the most vulnerable, so give newly planted figs extra care. And even if a hard winter kills the top growth, a hardy variety will usually resprout from the roots in spring, just remove the dead wood while the tree is still dormant. For more on shepherding tender plants through the cold, see our guides to overwintering plants and winter garden prep, and use your first and last frost dates to time everything.

    In our experience, the growers who succeed with figs in cold regions all share one habit: they don’t panic. A fig that looks like a lifeless stick in April often surprises everyone by pushing vigorous new shoots from the base once the soil warms. The trick is patience, wait until late spring before writing off any branch, scratch the bark to check for green underneath, and only then prune away what’s truly dead. Combined with a hardy variety and a little autumn wrapping, that calm, wait-and-see approach is what turns “figs won’t grow here” into a yearly harvest.

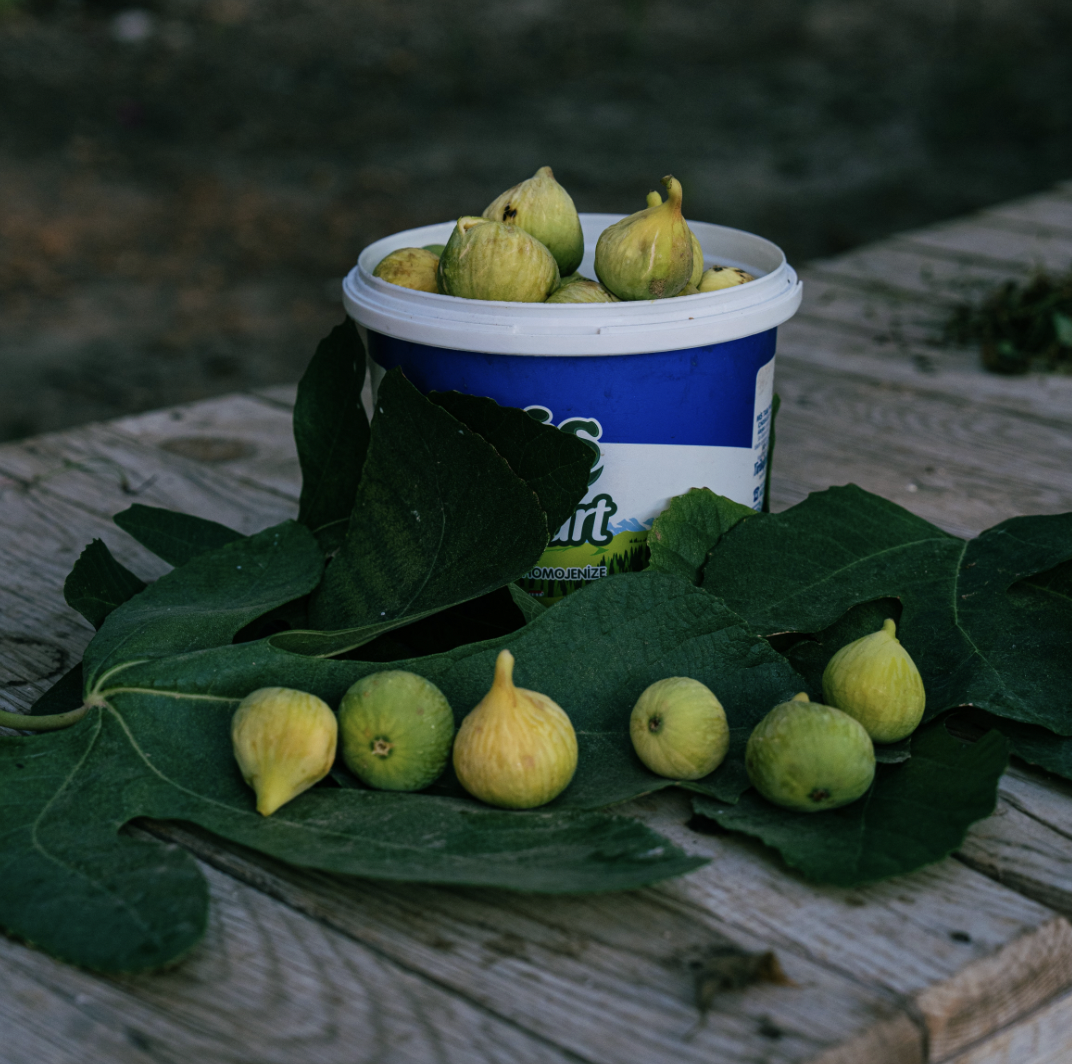
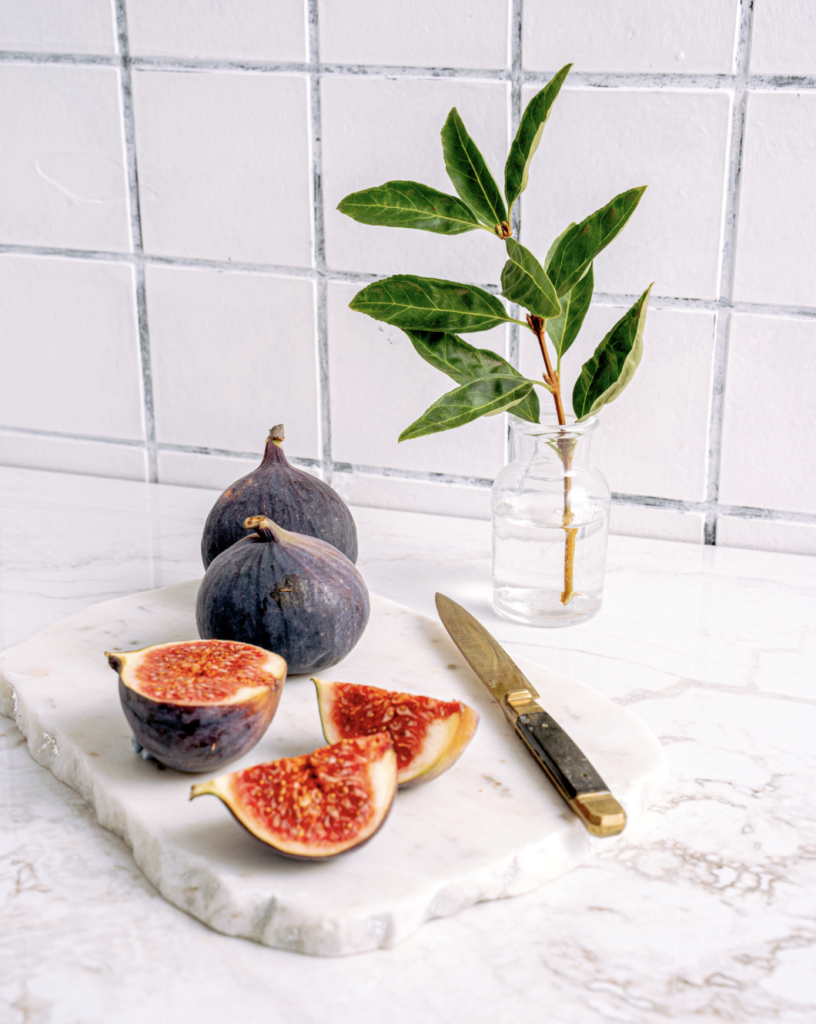
    Fresh Fig Tree (Ficus carica)
    Fresh Fig Tree (Ficus carica)

    How Long Until a Fig Tree Fruits & Harvesting

    Figs are fast rewarders. A nursery tree or rooted cutting often bears its first fruit within one to two years, with some compact varieties like Celeste fruiting in their very first season. Harvest usually comes in late summer to early fall.

    The golden rule of harvesting: figs do not ripen off the tree, so patience is essential. Pick only when a fig is fully colored, soft to a gentle squeeze, and starting to droop on its stem. A fully ripe fig detaches easily with the barest tug, and may show a drop of nectar at its base. Because birds and squirrels adore ripe figs, drape the tree with netting and harvest daily once fruit starts coloring up. Wear gloves or long sleeves while picking, since the sap can irritate skin.

    Figs are wonderfully perishable, which is part of their homegrown magic, enjoy them fresh within a couple of days, or preserve your surplus by freezing whole, drying, or making jam. Few things capture the taste of summer like a still-warm fig eaten straight off your own tree.

    Because a healthy fig tree can be remarkably generous, it pays to plan for a glut. Fresh figs keep only two to three days in the fridge, but they freeze beautifully whole for smoothies and baking, dry into chewy, candy-sweet snacks that store for months, and cook down into some of the finest jam and preserves you’ll ever taste. Figs also pair gorgeously with cheese, honey, and cured meats, or roasted alongside savory dishes, a luxurious ingredient that would cost a small fortune at the store but flows freely from a single backyard tree. It’s the kind of abundant, low-waste harvest that makes growing your own feel genuinely rewarding.

    Common Problems and How to Fix Them

    Figs are famously trouble-free, but a few issues can arise.

    Problem Likely Cause The Fix
    Fruit won’t ripen before season ends Cool climate or too much shade Choose an earlier variety; give maximum sun; a warm wall helps
    Tree dies back over winter Cold below the variety’s hardiness Wrap or bury; grow a hardier variety; expect regrowth from roots
    Dropping small unripe fruitlets Frost-damaged breba crop, or stress Protect in winter; keep watering steady
    Few figs despite lush leaves Over-fertilizing or over-pruning Ease off nitrogen; prune lightly only
    Birds and squirrels stealing fruit Ripe figs are irresistible Net the tree and harvest daily
    Sticky or webbed leaves Scale or spider mites (often indoors) Treat with insecticidal soap or neem oil

    Fruit flies can also target overripe or fallen figs, so pick promptly and clear away any dropped fruit.

    Is Growing Figs Worth It?

    Without question. Figs offer one of the best effort-to-reward ratios in all of gardening: a single sun-loving tree, a little patience, and a few winter precautions in cold regions, and you’re rewarded with basketfuls of luxurious, expensive-at-the-store fruit. They’re beautiful, ancient, low-maintenance, and easy to propagate for free, everything a sustainable home garden loves.

    If figs have you dreaming of more homegrown fruit, keep exploring: try growing pomegranate from seed, a compact kumquat tree in a pot, a pineapple from a top, or papaya from seed. For the full collection of exotic edibles, browse our hub on growing tropical and exotic fruits, part of the broader EcoGardenHub Plant Library.

    Plant a fig this spring, give it your sunniest corner, and get ready, that first warm, honey-sweet fig off your own tree is a moment you won’t forget. And with a tree that fruits fast, propagates for free, and can outlive you with basic care, it may just be the most generous plant you ever add to your garden.

    Frequently Asked Questions

    How long does it take for a fig tree to produce fruit? A nursery tree or rooted cutting often fruits within one to two years, and some compact varieties like Celeste can fruit in their first season. Figs are among the faster fruit trees to reward you.

    Do you need two fig trees to get fruit? No. The common fig is self-fruitful and needs no pollination, so a single tree will produce fruit on its own, one of the reasons figs are so beginner-friendly.

    Can you grow figs in cold climates? Yes. Choose a cold-hardy variety like Chicago Hardy, provide winter protection such as wrapping or mulching, or grow the fig in a container you can move indoors for winter. Gardeners grow figs well into cold northern zones this way.

    How do I protect a fig tree in winter? For potted figs, let them go dormant and store them in a cool, frost-free garage or basement. For in-ground trees, wrap them in burlap stuffed with straw, build a mulch-filled chicken-wire cage, or bend and bury the tree then uncover in spring.

    How do I know when a fig is ripe? A ripe fig is fully colored, soft to a gentle squeeze, and droops on its stem, detaching with the slightest tug. Figs do not ripen after picking, so always wait until they’re fully ripe on the tree.

    Can I grow a fig tree in a pot? Absolutely. Figs thrive in containers and even fruit well with restricted roots. Use a soil-based mix with added drainage, keep it in full sun, water and feed regularly, and repot every few years.

    Why won’t my fig tree fruit? The usual culprits are too little sun, a variety poorly matched to your climate, over-fertilizing, or over-pruning. Give it maximum sun, choose a zone-appropriate variety, and prune and feed sparingly.