Day: July 16, 2026

  • How to Grow Star Fruit (Carambola) at Home

    How to Grow Star Fruit (Carambola) at Home

    Slice a ripe star fruit crosswise and you’re rewarded with a row of perfect little edible stars, golden, glossy, and almost too pretty to eat. Behind that whimsical shape is a genuinely delicious fruit, crisp and juicy with a bright flavor that lands somewhere between apple, grape, pear, and citrus. If you’ve fallen for it at the market, here’s the good news: learning how to grow star fruit at home is easier and faster than most tropical fruits, and the tree itself is a stunning, productive addition to a warm-climate garden.

    Star fruit, or carambola, has a reputation among experienced growers for being wonderfully rewarding when you get a few key things right chiefly warmth, wind protection, and the right variety. This friendly, complete guide walks you through all of it, from choosing a sweet cultivar to slicing into your first homegrown stars.

    Can You Grow Star Fruit at Home?

    Yes, you can grow star fruit at home if you live in a warm climate (USDA zones 9–11) or can grow it in a movable container. Plant a grafted, sweet-variety carambola in full sun with wind protection and rich, well-draining soil. Water regularly without waterlogging, feed through the growing season, and you can expect fruit in as little as one to three years.

    The two things that most determine your success are climate and variety. Carambola is a subtropical tree that can’t take hard frost and dislikes wind, and its fruit ranges from lusciously sweet to mouth-puckeringly tart depending on the cultivar. Nail those two choices and the rest of carambola tree care is refreshingly manageable.

    Meet the Star Fruit Tree (Carambola)

    The star fruit tree (Averrhoa carambola) is a tropical-to-subtropical evergreen native to Southeast Asia, where it has been cultivated for centuries. It’s a member of the wood sorrel family, and it makes a genuinely beautiful landscape tree: a bushy, multi-branched, rounded canopy of glossy green compound leaves, dotted through the year with delicate pink-to-lavender flowers that pollinators adore.

    Left unpruned, a carambola can reach 20 to 30 feet tall and nearly as wide, but it responds beautifully to pruning and is easily kept to a tidy 6 to 12 feet perfect for an average backyard. The fruit itself is 2 to 6 inches long with five prominent ribs, turning from green to a waxy golden-yellow when ripe. The thin skin and small seeds are edible, so the whole fruit can be enjoyed. And carambola is famously generous: a mature, well-cared-for tree can produce hundreds of pounds of fruit in a year. Even setting the harvest aside, many gardeners grow carambola purely for its looks the year-round glossy foliage, the clouds of pretty lilac-pink blooms, and the ornamental fruit make it a standout feature tree, patio specimen, or informal privacy screen.

    Star Fruit Climate: Where Carambola Grows Best

    Getting the star fruit climate right is the single biggest factor in your success. Carambola thrives in warm, humid, subtropical-to-tropical conditions and grows best in USDA Hardiness Zones 10 and 11, with zone 9 possible if you can protect the tree from frost. In the US, that makes South Florida, Hawaii, and warm pockets of California and southern Texas the natural home for in-ground carambola.

    A few climate details make all the difference:

    • Temperature. The ideal fruiting range is roughly 68–85°F. Growth slows to a stop around 55–60°F, and while mature trees tolerate brief dips, prolonged temperatures below freezing can seriously damage or kill a tree. Young trees are especially tender.
    • Wind is the hidden enemy. More than almost any other fruit tree, carambola resents strong wind, which can shred foliage, drop fruit, and stunt growth. A sheltered, wind-protected spot is essential this is the detail most beginners overlook.
    • Salt intolerance. Carambola doesn’t tolerate salty conditions, so it isn’t a great choice for exposed coastal properties.
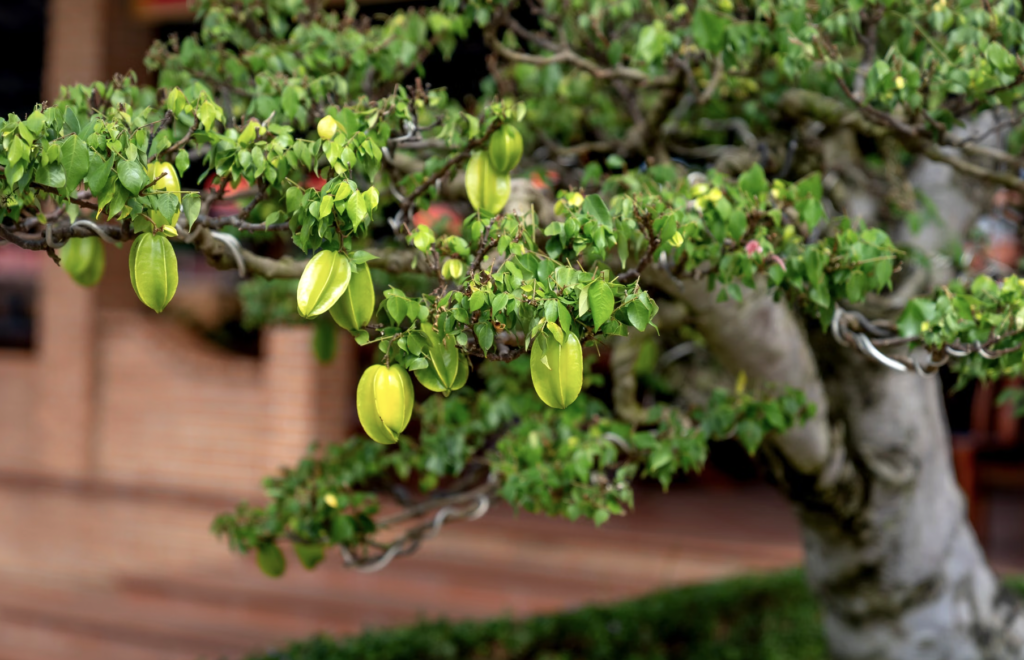
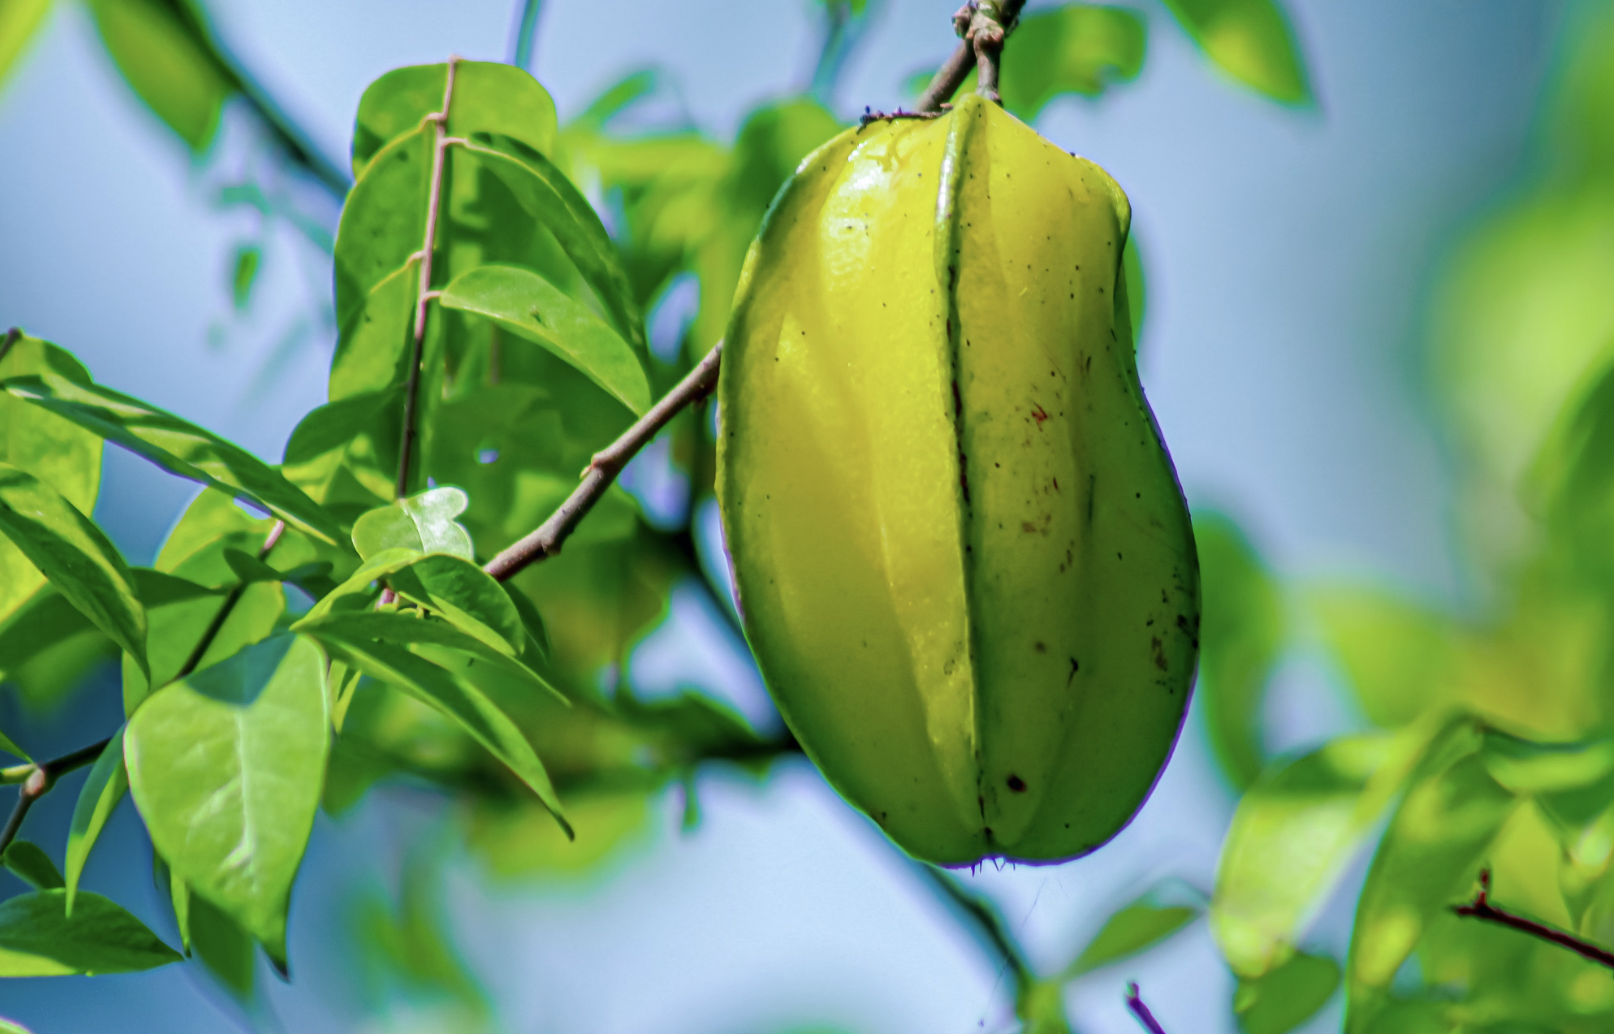
    Close-up of a starfruit tree with vibrant green fruits and leaves, showcasing nature's beauty.
    Close-up of a starfruit tree with vibrant green fruits and leaves, showcasing nature’s beauty.

    If you live in a cooler zone, don’t count yourself out dwarf carambola grows well in a large container you can move indoors for winter. Keep an eye on your first and last frost dates to time protection, and if you’re in a borderline region, our USDA Zone 9 gardening guide shares helpful microclimate tricks.

    In our experience, wind protection is the factor that separates a struggling carambola from a thriving one, and it’s the one new growers most often underestimate. Trees tucked into a sheltered corner beside a warm wall, behind a hedge, or in the lee of the house consistently recover faster from stress, hold their fruit better, and grow more densely than trees left exposed in an open yard. If you can offer only one thing beyond sunshine, make it a windbreak.

    Sweet vs. Tart: Choosing the Right Carambola Variety

    Here’s a make-or-break tip that too many guides skip: carambola varieties fall into two camps, sweet and tart, and choosing well determines whether you’re eating fruit fresh or reaching for the sugar. Older, unnamed seedlings often produce tart fruit, while modern named cultivars from Thailand, Taiwan, and Malaysia have been selected for sweetness.

    • Sweet varieties:  ‘Arkin’ (the reliable US favorite), ‘Fwang Tung’, ‘Sri Kembangan’, and ‘Kary’ are crisp and mild, perfect for eating fresh, juicing, or slicing into salads.
    • Tart varieties: such as ‘Golden Star’, ‘Newcombe’, and ‘Star King’  are brighter and more acidic, shining in curries, chutneys, jams, and juices.

    For the best chance of sweet, dependable fruit, buy a grafted, named cultivar from a reputable nursery rather than gambling on a random seedling.

    Seed or Grafted Tree?

    You can grow carambola from seed, but it comes with two big caveats. First, the seeds lose viability within just a few days of leaving the fruit, so they must be sown fresh. Second and more importantly seedlings are unpredictable and often produce tart fruit, and they can take years to mature. 

    A grafted or air-layered nursery tree, by contrast, gives you a known sweet variety and fruits far sooner, sometimes within a year or two. If you want reliable, sweet star fruit without a long wait, a grafted tree is the way to go. If you’d like to try seeds for fun, sow them fresh in a warm (around 70°F), well-draining, peat-based mix in bright indirect light, and be prepared to grow the seedling in a container for two to three years before planting out.

    How to Plant a Star Fruit Tree: Step-by-Step

    Spring, after all danger of frost has passed, is the best time to plant. Follow these steps for a strong start.

    • Step 1: Choose a Sunny, Wind-Sheltered Spot

    Pick the sunniest place in your yard carambola wants at least six to eight hours of direct sun for good fruiting that’s also protected from strong winds by a wall, fence, or other trees. Give it room: plant 20 to 30 feet from buildings and other trees so it isn’t shaded or crowded.

    • Step 2: Prepare Well-Draining, Slightly Acidic Soil

    Carambola isn’t fussy about soil type, but it does need good drainage and grows best in soil rich in organic matter with a moderately acidic to neutral pH (around 4.5–7). If your soil is alkaline (above pH 7), the tree is prone to iron and zinc deficiencies, so it’s worth testing first our guide on how to test your garden soil shows you how, and how to lower soil pH for acid-loving plants helps you adjust it.

    • Step 3: Plant Your Carambola

    Dig a hole as deep as the root ball and about twice as wide. Choose a healthy nursery tree that isn’t root-bound, gently loosen any circling roots, and set it so the top of the root ball sits level with the surrounding soil. Backfill and firm gently to remove air pockets.

    • Step 4: Water In and Mulch

    Water the newly planted tree deeply to settle the roots, then spread a layer of organic mulch around the base kept a few inches from the trunk to conserve moisture and suppress weeds. A good layer of organic mulch helps young trees establish quickly.

    • Step 5: Tip-Prune Young Shoots to Shape

    In the first year or two, tip back any shoots that grow beyond about 2 to 3 feet. This simple pruning encourages bushy branching and sets up a strong, well-shaped, easy-to-harvest tree and a lower, denser tree also stands up far better to wind.

    Carambola Tree Care: Water, Feeding & Pruning

    Day-to-day carambola tree care is straightforward once your tree is in the right spot.

    Watering. Star fruit likes regular, consistent watering to keep the soil evenly moist but it’s also sensitive to overwatering, so never let the roots sit in soggy soil. Aim for steady moisture, easing off during rainy spells, and pay special attention while fruit is developing, since inconsistent watering can cause fruit drop.

    Feeding. Feed young trees regularly through the growing season a balanced fertilizer such as 10-10-10 monthly (skip winter) works well then shift mature trees to a few feedings a year. Carambola benefits from a fertilizer that also includes magnesium, and it can develop yellowing leaves (chlorosis) in high-pH soils; a foliar spray of chelated iron and micronutrients corrects this. Compost, worm castings, or aged manure are excellent organic options. If those fertilizer numbers feel cryptic, our guide to understanding NPK ratios makes them simple.

    Pruning. Happily, carambola responds very well to pruning and generally needs only light annual attention. Selectively remove a few upper limbs each year to keep the tree at a manageable 6 to 12 feet and to stop the upper canopy from shading out the lower branches but never strip the lower limbs, which carry easy-to-reach fruit and shade the ground. A smaller tree is easier to harvest, easier to protect, and far more wind-resistant.

    Growing Star Fruit in Containers

    If your winters are too cold for in-ground carambola, a container is the perfect solution and star fruit takes to pots surprisingly well, especially dwarf varieties. Container growing lets you give the tree a warm, sunny summer outdoors and then move it to a frost-free spot when the cold arrives.
    how to grow star fruit in containers at home
    This is how to grow star fruit in containers at home


    Start young trees in a 5–7 gallon pot, then size up to a 15–25 gallon container as they grow. Use a deep, sturdy pot with excellent drainage, filled with a well-draining, slightly acidic mix enriched with compost. Give it full sun, rotate the pot occasionally for even growth, and supplement with a grow light if you’re keeping it indoors through a dim winter. Our container gardening guide for beginners covers pot sizing and repotting, and our overwintering guide walks through cold-season care.

    How Long Until Star Fruit Fruits?

    Here’s some genuinely cheering news: compared to slow tropical fruits like lychee, carambola is a sprinter. A grafted or air-layered tree can begin fruiting within one to two years, while a seedling typically takes about three years, with abundant harvests by year three or four.

    Here’s a realistic picture once your tree is fruiting:

    • Flowering: clusters of pink-lavender blooms appear, often with two main flushes (roughly spring and fall) and sometimes more.
    • Fruit set to ripe: individual fruits mature in about 60 to 75 days after the flowers set.
    • Multiple crops: in warm climates, established trees often fruit two or even three times a year.
    • Yield: a healthy mature tree is remarkably prolific, capable of hundreds of pounds of fruit annually.

    A lovely quirk of carambola: once a shoot is a few months old and has “learned” to flower, it can flower again and again on the same wood, one reason these trees become so productive with age.

    Harvesting Star Fruit

    Timing your harvest is easy and satisfying. Wait until the fruit is fully colored  a rich, even yellow to golden  and the ribs’ edges just begin to turn light brown. At that point the fruit is crisp, juicy, and at its best. You can pick fruit by hand with a gentle twist, and very ripe fruit will even drop on its own.

    If you harvest a touch early while it’s still yellow, star fruit will continue to sweeten on the counter until golden. Enjoy it fresh (skin and all), sliced into salads, juiced, or as a striking garnish. Because a productive tree gives so generously, star fruit is a wonderful, low-waste way to fill your kitchen and share stars with the whole neighborhood.

    One optional pro trick worth knowing: about three to four weeks after flowering, you can thin the developing fruit, removing the smallest ones from each cluster so the tree channels its energy into fewer, larger, better-formed fruits. It feels ruthless, but it noticeably improves the size and quality of your harvest. Nutritionally, the payoff is worth every bit of care star fruit is low in calories yet rich in vitamin C, fiber, potassium, and antioxidants, making each golden slice as wholesome as it is beautiful.

    A Note on Star Fruit and Kidney Health

    One important, responsible heads-up: star fruit naturally contains oxalic acid and a compound that can be harmful to people with kidney problems. For most people, star fruit is a healthy, low-calorie treat rich in vitamin C, fiber, and antioxidants. But anyone with kidney disease or impaired kidney function should avoid star fruit unless a doctor confirms it’s safe, as it can cause serious reactions in those individuals. When in doubt, check with a healthcare professional.

    Common Problems and How to Fix Them

    Most carambola troubles come down to wind, water, cold, or a few familiar pests.

    Problem Likely Cause The Fix
    Torn leaves, dropped fruit, stunting Wind exposure Plant in a sheltered spot; keep the tree pruned low and dense
    Yellowing leaves (chlorosis) High-pH soil, iron/zinc deficiency Test and acidify soil; apply chelated iron as a foliar spray
    Wilting, mushy roots Overwatering / root rot Improve drainage; water evenly, never leaving soil soggy
    Tart, disappointing fruit Grown from a seedling of unknown parentage Choose a grafted, named sweet cultivar like ‘Arkin’
    Damaged leaves and stems Frost on a tender tree Cover during cold snaps; move containers indoors
    Blemished fruit, maggots Fruit flies, stink bugs, scale Treat with neem oil; bag fruit; clean up fallen fruit

    Birds also love ripe star fruit, so netting can help protect your harvest as fruit colors up.

    One last responsible-gardening note: in some warm regions, star fruit can self-seed and naturalize where it isn’t wanted. It’s easy to be a good steward,harvest fruit promptly, don’t toss seeds into wild areas, and pull up any volunteer seedlings you spot. A little care keeps carambola a welcome guest rather than a nuisance.

    Is Growing Star Fruit from Tree Worth It?

    Absolutely. Few fruit trees offer this much: fast fruiting, generous yields, year-round ornamental beauty, and fruit that’s as fun to look at as it is to eat. For gardeners in warm climates or anyone willing to grow a dwarf tree in a pot. carambola is a joyful, rewarding, and genuinely sustainable way to enjoy fresh tropical fruit at home.

    If star fruit has whetted your appetite for more, keep exploring: try growing a lychee tree, guava trees in containers, papaya from seed, or a pineapple from a top. For the whole collection of exotic edibles, browse our hub on growing tropical and exotic fruits, part of the broader EcoGardenHub Plant Library.

    Plant a sweet carambola this spring, give it sun and shelter from the wind, and before long you’ll be slicing your own golden stars, a little piece of the tropics, grown right at home.

    Frequently Asked Questions

    How long does it take for a star fruit tree to fruit? A grafted or air-layered carambola can begin fruiting within one to two years, while a seed-grown tree usually takes about three years, with abundant harvests by year three or four. Star fruit is one of the faster-fruiting tropical trees.

    What climate do star fruit trees need? Carambola grows best in warm, humid USDA zones 10–11, with zone 9 possible if protected from frost. It needs temperatures ideally between 68 and 85°F, shelter from wind, and protection from freezing, which can kill young trees.

    Are all star fruit sweet? No. Carambola comes in sweet and tart types. Seedlings are often tart, so for reliably sweet fruit, choose a grafted, named sweet cultivar such as ‘Arkin’, ‘Fwang Tung’, or ‘Sri Kembangan’.

    Can you grow star fruit in a pot? Yes. Dwarf carambola grows well in a large container, starting in a 5–7 gallon pot and sizing up to 15–25 gallons. Containers are ideal in cooler climates, since you can move the tree indoors for winter.

    How do you know when star fruit is ripe? Harvest when the fruit is fully yellow to golden and the edges of the ribs just start to brown. It will be crisp and juicy; fruit picked slightly early will continue to sweeten on the counter until golden.

    Is star fruit safe to eat? For most people, yes it’s a healthy, low-calorie fruit. However, people with kidney disease or impaired kidney function should avoid star fruit unless cleared by a doctor, as it contains compounds that can be harmful to them.

    How big does a star fruit tree get? Unpruned, carambola reaches about 20 to 30 feet tall and wide, but it responds well to pruning and is easily kept to 6 to 12 feet for easier harvesting and better wind resistance. Dwarf varieties stay smaller still.
  • How to Grow Bell Peppers From Seed to Harvest

    How to Grow Bell Peppers From Seed to Harvest

    Few garden vegetables are as cheerful as a bell pepper, glossy, crunchy, and ripening into brilliant shades of red, orange, yellow, and even purple. They’re a staple in kitchens everywhere, and at the store the colorful ones cost a small fortune. Learning how to grow bell peppers means you can pick them at their sweetest, straight from the plant, for pennies.

    Here’s the honest truth up front: bell peppers reward patience more than almost any other vegetable. They’re slow starters, they love warmth, and the sweetest peppers ask you to wait a few extra weeks. But they’re genuinely easy once you understand their handful of needs, and a single healthy plant can keep producing right up until frost. This complete guide walks you through the whole journey, from starting seeds indoors to harvesting your first perfectly ripe pepper.

    Can You Grow Bell Peppers From Seed?

    Yes, and starting from seed is the best approach in most climates. Sow bell pepper seeds indoors 8 to 10 weeks before your last spring frost, keeping the soil at 80–85°F for good germination. Transplant seedlings outdoors 2 to 3 weeks after the last frost, once soil reaches 65°F. Give them full sun, consistent water, and low-nitrogen feed. Expect green peppers 60 to 90 days after transplanting, with colored peppers taking 2 to 3 weeks longer.

    Because peppers need such a long, warm season, starting seeds indoors isn’t just convenient, it’s often essential. That head start is what lets gardeners in cooler regions harvest ripe, colorful peppers before frost arrives.

    Prefer to skip the seed stage? There’s no shame in buying nursery transplants, many experienced gardeners do, and it’s a perfectly good route if you’re short on time, space, or indoor light. Plant them out 2 to 3 weeks after your last frost, once the soil has properly warmed. That said, starting from seed opens up hundreds of varieties you’ll never see on a garden-center bench, costs a fraction as much, and lets you grow exactly the colors and sizes you love. If you have a sunny window or a simple grow light, it’s well worth trying.

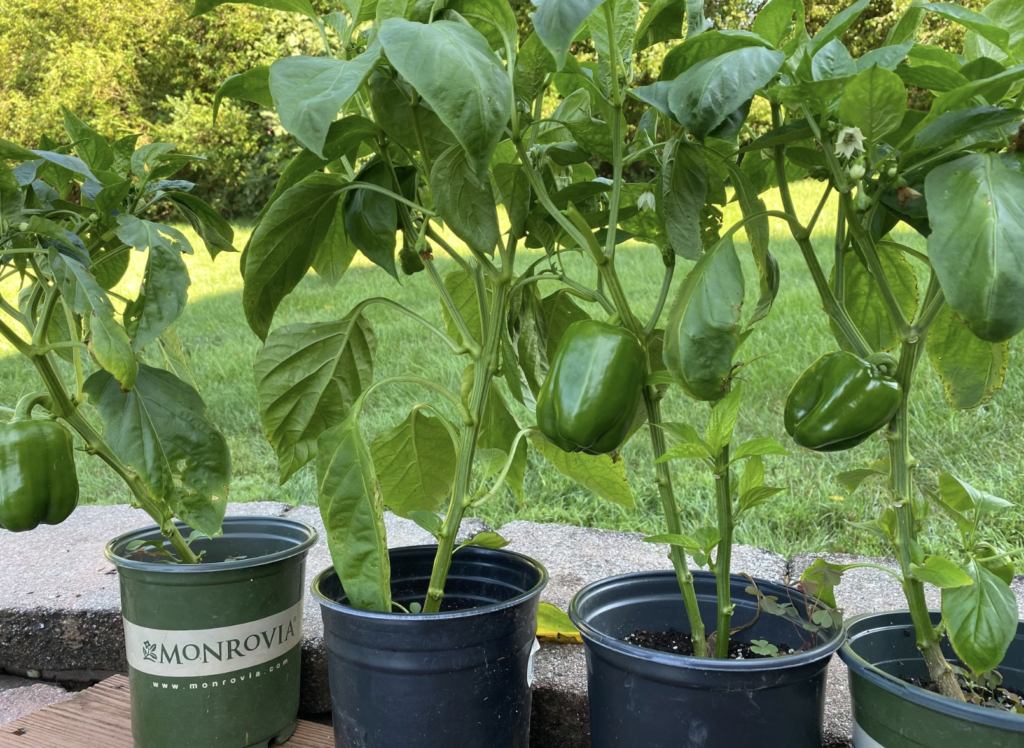
    Fresh green bell peppers growing in pots in a garden setting.
    Fresh green bell peppers growing in pots in a garden setting.

    The Secret Most Beginners Miss: Green Peppers Aren’t a Variety

    Here’s the single most useful thing to understand about growing peppers, and it surprises almost everyone: green bell peppers are simply unripe peppers. They aren’t a separate variety. Left on the plant, a green pepper will gradually turn yellow, then orange, and finally red, growing sweeter and more nutritious at every stage.

    That’s why green peppers taste slightly bitter and cost less at the store, they’re picked early. It’s also why the timeline matters so much:

    • Green (mature size): roughly 60–70 days after transplanting. Crisp, mildly bitter, perfectly edible.
    • Full color (red, yellow, orange): another 2–3 weeks on the plant. Sweeter, richer, and higher in vitamins.

    There’s a trade-off worth knowing. Picking peppers green encourages the plant to produce more fruit overall, while letting them ripen to full color gives you better flavor but fewer total peppers. Many experienced gardeners split the difference letting peppers start to blush on the plant, then finishing the ripening indoors on the counter. Both approaches are right; it depends on whether you want quantity or sweetness.

    Meet the Bell Pepper

    The bell pepper (Capsicum annuum) is a warm-season vegetable in the same genus as chili peppers but bells are the gentle members of the family, larger, rounder, crunchier, and completely without heat. They’re grown as annuals in most of the US, forming bushy plants about 2 to 3 feet tall that produce hollow, thick-walled fruits packed with vitamin C.

    A myth worth busting: you may have read that peppers with three bumps on the bottom are “male” and four-bump peppers are “female” and sweeter. It’s completely false. Pepper flowers contain both male and female parts, and the number of lobes is simply a result of variety and growing conditions. Feel free to pick whichever pepper looks best.

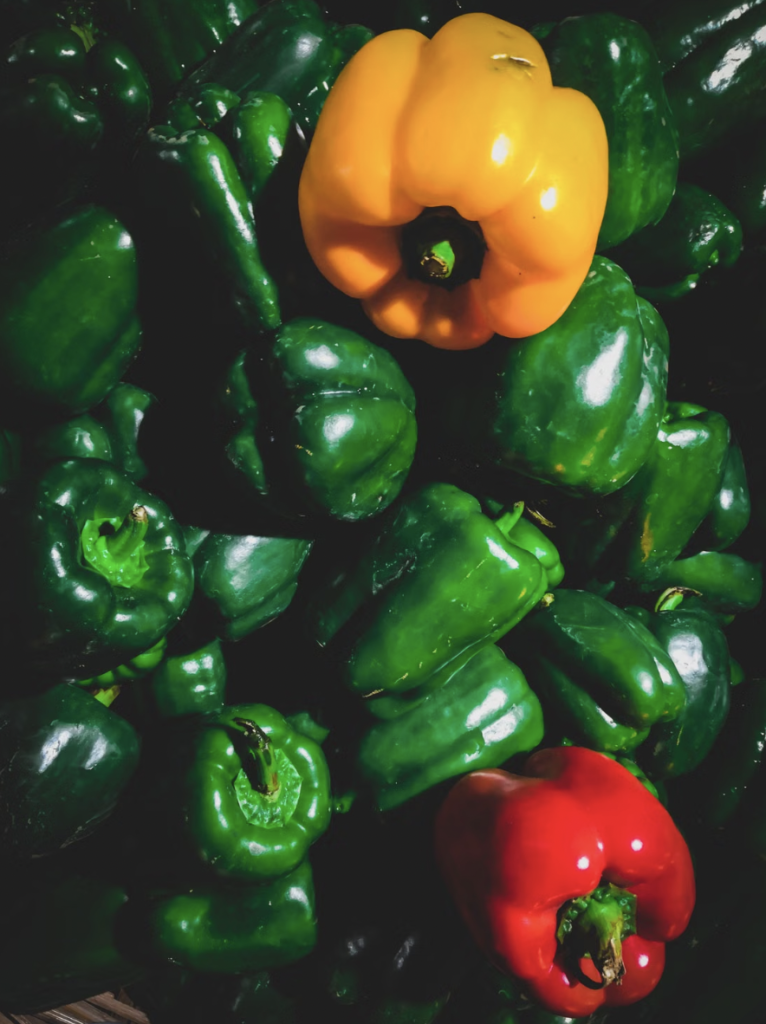
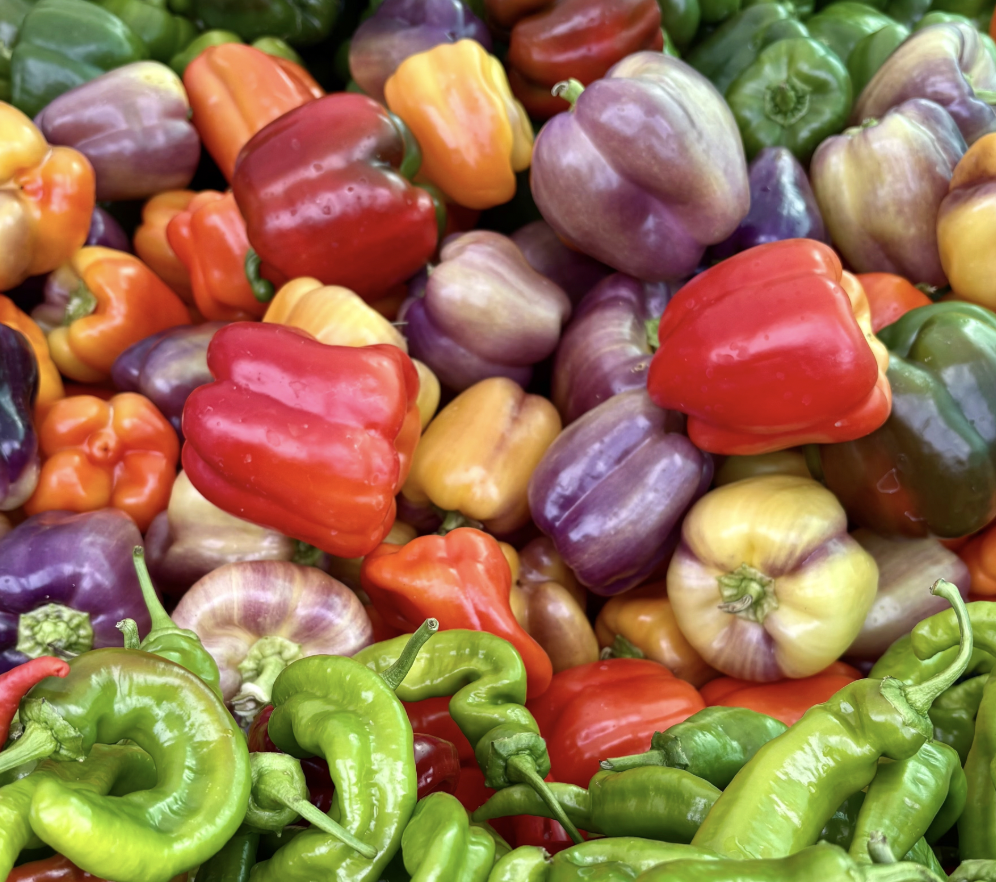
    Colorful mix of bell peppers in varying shades. Perfect for healthy and organic food concepts.
    Colorful mix of bell peppers in varying shades. Perfect for healthy and organic food concepts.

    Choosing the Right Bell Pepper Variety

    Variety choice matters more than beginners expect, especially if your summers are short. Days-to-maturity ranges widely,  early types like ‘Ace’ can produce in about 60 days, while large specialty peppers may need 90 or more. If you garden in a cool or short-season region, choosing an early variety is the difference between ripe red peppers and a plant full of green ones when frost arrives.

    Reliable home-garden picks include ‘California Wonder’ (the classic thick-walled green-to-red bell), ‘Ace’ (fast, productive, and forgiving in cool summers), ‘King of the North’ (bred for northern gardens), ‘Golden California Wonder’ (a sunny yellow), and ‘Purple Beauty’ (a striking purple that ripens to red). Snack-sized “lunchbox” peppers are wonderfully prolific and perfect for containers and kids.

    One tip if you’d like to save seeds: choose open-pollinated or heirloom varieties. Let the peppers ripen fully on the plant, scoop out the seeds, dry them thoroughly for a couple of weeks, and store them somewhere cool and dry. Hybrid varieties won’t grow true from saved seed, so they’re best repurchased each year.

    What You’ll Need

    • Bell pepper seeds (or a nursery transplant if you’re short on time)
    • Seed trays or small pots with drainage
    • Seed-starting mix and a heat mat (or a warm spot)
    • A grow light or very bright window
    • Rich, well-draining soil with a pH around 6.0–6.8
    • A sunny site or a 5-gallon-plus container
    • Low-nitrogen fertilizer and compost
    • Small cages or stakes — pepper stems are brittle

    How to Grow Bell Peppers From Seed: Step-by-Step

    Follow these five steps from seed to established plant.

    • Step 1: Start Seeds Indoors, Early and Warm

    Sow bell pepper seeds indoors about 8 to 10 weeks before your last spring frost, check your local last frost date to time it. Fill trays with seed-starting mix, plant seeds a quarter-inch deep, water gently, and here’s the crucial part: keep the soil at 80–85°F. Peppers are famously slow, stubborn germinators in cool soil, and a seedling heat mat makes a dramatic difference. Keep the mix moist but never soggy, since overwatering causes damping-off. Our seed starting guide for beginners covers the whole indoor setup.

    • Step 2:  Give Seedlings Strong Light

    Once seeds sprout, remove the heat mat and get them under bright light immediately, a grow light a few inches above the seedlings, or your sunniest window. Weak light produces leggy, floppy seedlings that struggle later. Our DIY grow light setup guide shows an easy, affordable arrangement. Feed lightly with a quarter-strength liquid fertilizer every couple of weeks once true leaves appear.

    • Step 3: Harden Off Before Transplanting

    About a week before planting out, start hardening off your seedlings, setting them outdoors for gradually longer stretches each day so they acclimate to sun, wind, and cooler nights. Skipping this step shocks tender plants badly. Our guide on how to harden off seedlings walks through the schedule.

    • Step 4: Transplant Into Warm Soil

    Patience pays here. Wait until 2 to 3 weeks after your last frost, when soil has warmed to at least 65°F and nights stay above 60°F. Peppers planted into cold soil sulk for weeks and never fully recover. Choose a spot with at least 6 to 8 hours of full sun and rich, well-draining, slightly acidic soil (pH 6.0–6.8) amended with compost. Space plants 18 to 24 inches apart, setting them at the same depth they grew, and water in well.

    • Step 5: Mulch and Add Support

    Mulch around plants to hold moisture, suppress weeds, and keep soil warm, black plastic works well in cool regions, while grass clippings or straw are great organic options (see our types of mulch guide). Then add a small tomato cage or stake at planting time. Pepper stems are surprisingly brittle and snap under a load of fruit, so support is cheap insurance.

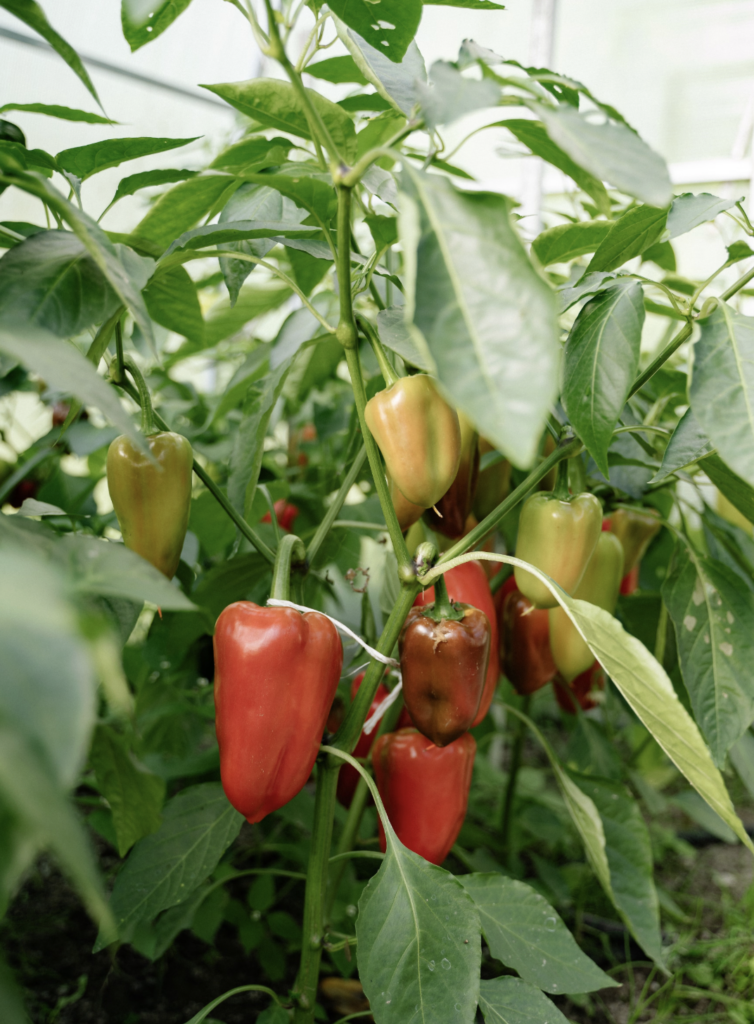
    Close-up of colorful bell peppers on plant in a greenhouse, showcasing organic farming.
    Close-up of colorful bell peppers on plant in a greenhouse, showcasing organic farming.

    Pepper Plant Care: Sun, Water, Feeding and Pinching

    Good pepper plant care is mostly about consistency and restraint.

    • Sun. Peppers want full sun, six to eight hours minimum. In regions where summer regularly tops 90°F, however, a little afternoon shade or shade cloth actually helps, preventing sunscald and heat-induced flower drop. Morning sun is the most valuable. Keep in mind that peppers also appreciate warm soil, which is why black plastic mulch is popular in northern gardens and why containers, which heat up faster than the ground, often produce earlier peppers in cool climates.
    • Watering. Aim for about one to two inches of water per week, delivered deeply rather than in frequent sips, which trains roots to grow deep and drought-resistant. Water at the base and keep the leaves dry. Consistency matters enormously: dry conditions make peppers bitter, while erratic watering causes blossom end rot. In extreme heat, container plants may need water twice daily.
    • Feeding. This is where many gardeners go wrong, peppers need surprisingly little nitrogen. Too much produces a beautiful, leafy green bush with almost no fruit. Feed a balanced fertilizer a couple of weeks after transplanting, then switch to a low-nitrogen, higher-phosphorus feed once flowering begins, applied every two to three weeks. Ease off late in the season as the final fruits set. Our guide to understanding NPK ratios explains the numbers, and homemade organic fertilizer offers gentle, low-waste options.

    Pinching. When plants reach 6 to 8 inches tall, pinch out the top set of leaves. It feels brutal, but it triggers lateral branching, producing shorter, bushier, sturdier plants that carry far more fruit. In long-season climates, some gardeners also remove the very first flowers so the plant puts its energy into growth before fruiting. though in short seasons, every flower counts, so skip that step.

    Growing Bell Peppers in Containers

    Peppers are excellent container plants, compact, ornamental, and perfectly happy on a sunny patio. Use a container of at least 5 gallons per plant, though 7 to 10 gallons produces noticeably bigger plants and better yields. Make sure it has good drainage, fill it with quality potting mix, and keep it in your sunniest spot.

    Container peppers dry out faster and use up nutrients quicker than garden plants, so check moisture daily in hot weather and feed regularly. Otherwise, care is identical. Peppers also make lovely companions for container tomatoes on a patio, and our container gardening guide for beginners covers pot sizing and drainage in detail.

    Why Your Peppers Aren’t Setting Fruit

    If there’s one frustration that unites pepper growers, it’s watching flowers appear and then drop off without setting fruit. Almost always, the culprit is temperature. Peppers are picky: they need nights above 55–60°F and days below 90°F for successful pollination. Outside that window, blossoms simply fall.

    Other common causes include too much nitrogen fertilizer, inconsistent watering, low humidity, and a lack of pollinators. The fixes are straightforward: feed low-nitrogen once flowering starts, water consistently, use shade cloth in extreme heat, and invite pollinators with flowers nearby our companion planting guide suggests good pepper partners, and basil and marigolds are classic choices that also help deter pests. If a heat wave stalls your plants, don’t panic; they usually resume setting fruit once temperatures moderate.

    In our experience, the most common mistake with peppers isn’t neglect, it’s impatience and over-care. Gardeners rush their seedlings into cold spring soil, then, when the plants sit there doing nothing, they respond by feeding them heavily. The result is a lush, leafy plant with hardly a pepper on it. The growers who consistently harvest baskets of sweet, colorful peppers do the opposite: they wait for genuinely warm soil, plant into compost-rich ground, then feed sparingly and water steadily. Peppers reward restraint, and a plant that’s been allowed to settle in slowly will out-produce a pampered one every time.

    Harvesting Bell Peppers

    The moment of truth. Bell peppers can be harvested at any size once they’re full-sized and firm, but flavor peaks at full color. Here’s how to do it right:

    • Always cut, never pull. Use sharp snips, scissors, or a knife to cut the stem, leaving about an inch attached. Twisting or tugging at the fruit will damage the brittle plant. a small detail that protects your harvest for the rest of the season.
    • Harvest often. This is the productivity secret: the more you pick, the more the plant produces. A pepper plant carrying mature fruit slows down flowering, so removing peppers every three to four days keeps it pushing out new blossoms right up until frost.
    • Storing your harvest. Unwashed peppers keep for one to two weeks in the fridge’s crisper drawer, wash them just before use. For longer storage, chop and freeze them (no blanching needed), or dry them in a dehydrator or low oven. Green peppers left on the counter will slowly color up, though vine-ripened ones always taste best.

    It’s worth appreciating just how nutritious a fully ripe pepper is. Bell peppers are famously rich in vitamin C. a ripe red one contains substantially more than an orange, along with vitamin A, fiber, and antioxidants, and the levels climb as the fruit ripens from green to red. In the kitchen they’re endlessly versatile: crisp and sweet raw in salads and with dips, wonderful roasted until the skins blister and slip off, essential in stir-fries and fajitas, and of course perfect for stuffing. Because a healthy plant keeps producing until frost, even two or three peppers can supply a household through late summer, with plenty left to freeze for winter cooking.

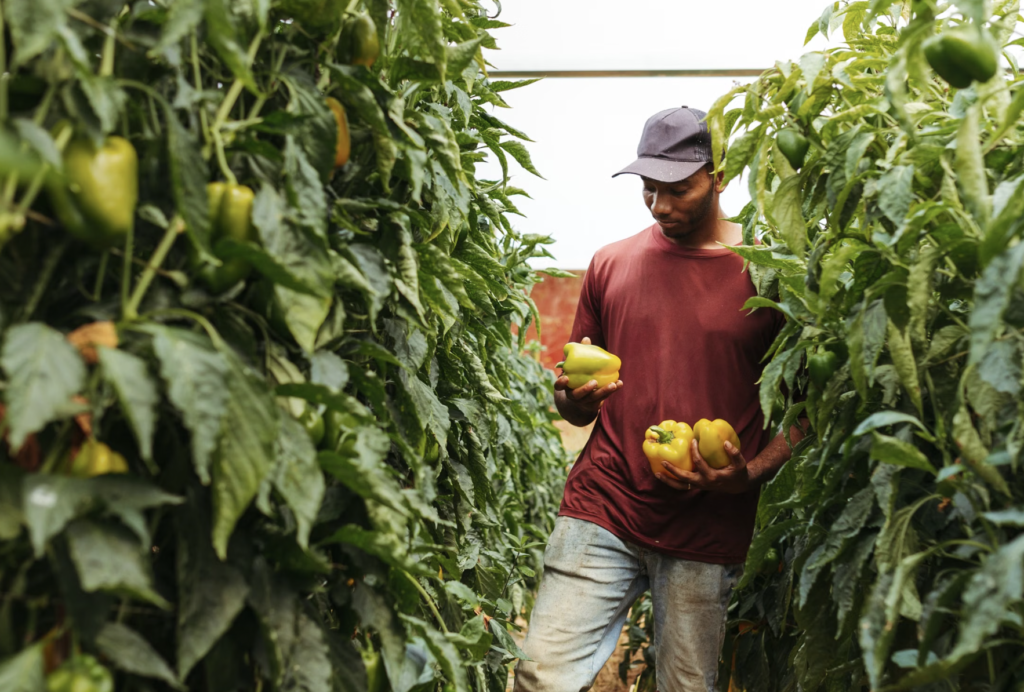
    A farmer picking ripe yellow bell peppers amidst lush green plants in a greenhouse
    A farmer picking ripe yellow bell peppers amidst lush green plants in a greenhouse

    Common Problems and How to Fix Them

    Problem Likely Cause The Fix
    Flowers dropping, no fruit Nights below 55°F or days above 90°F Wait for moderate temps; use shade cloth in heat
    Blossom end rot (sunken dark spots) Inconsistent watering, calcium uptake issues Water evenly and consistently; mulch to buffer moisture
    Big leafy plant, few peppers Too much nitrogen Switch to a low-nitrogen, higher-phosphorus feed
    Bitter-tasting peppers Picked green, or drought-stressed Let peppers ripen to color; water consistently
    Broken stems or branches Brittle stems under fruit weight Stake or cage plants; pinch early for a bushier form
    Pale patches on fruit Sunscald in intense heat Provide afternoon shade; maintain leafy cover
    Clusters of tiny insects on new growth Aphids Blast off with water; use insecticidal soap or neem oil

    Seedlings that collapse at the soil line are suffering from damping-off, caused by overwatering, keep seed-starting mix moist, never soggy, with good airflow. Whiteflies, spider mites, and pepper hornworms can also appear in summer, but a quick weekly inspection of leaf undersides catches nearly every problem while it’s still small and easy to handle.

    Is Growing Bell Peppers Worth It?

    Absolutely. Bell peppers reward a little patience with weeks of steady harvests, brilliant color, and a sweetness that store-bought peppers simply can’t match especially the red, orange, and yellow ones you’d otherwise pay a premium for. They’re compact enough for containers, beautiful enough to grow among flowers, and productive right through to frost. They’re also remarkably economical: a single seed packet costs about the same as two or three grocery-store peppers, yet can produce plants that yield dozens over a season.

    Ready to build out your vegetable garden? Peppers pair beautifully with other warm-season crops. Try growing tomatoes in containers, zucchini in a small garden, or cucumbers grown vertically. Explore the full Vegetables collection, part of the broader EcoGardenHub Plant Library.

    Start your seeds early, keep them warm, and be patient through that slow first month, by late summer you’ll be picking glossy, sweet, sun-ripened peppers from plants you grew from a pinch of seed. There are few better illustrations of what a little patience and a lot of sunshine can produce.

    Frequently Asked Questions

    • How long does it take to grow bell peppers from seed? Expect roughly 120 days total: 8 to 10 weeks of indoor seedling growth, then 60 to 90 days after transplanting to harvest green peppers. Colored peppers take another 2 to 3 weeks on the plant to fully ripen.
    • Why are my pepper flowers falling off? Temperature is the usual cause, peppers need nights above 55°F and days below 90°F to set fruit. Too much nitrogen, inconsistent watering, and a lack of pollinators can also cause flower drop. Plants typically recover once conditions moderate.
    • Are green peppers just unripe red peppers? Yes. Green bell peppers are simply unripe. Left on the plant, they ripen to yellow, orange, then red, becoming sweeter and more nutritious. Green peppers are perfectly edible but slightly more bitter.
    • Can I grow bell peppers in containers? Yes, peppers do very well in pots. Use at least a 5-gallon container per plant (7 to 10 gallons is even better for bigger yields), with good drainage, quality potting mix, and full sun.
    • What temperature do pepper seeds need to germinate? Pepper seeds germinate best in soil around 80–85°F. They’re slow and unreliable in cool soil, so a seedling heat mat dramatically improves germination speed and success.
    • Should I pinch my pepper plants? Yes. Pinching out the top set of leaves when plants are 6 to 8 inches tall encourages lateral branching, producing shorter, bushier, sturdier plants that carry more fruit and resist breaking.
    • How do I harvest bell peppers without hurting the plant? Always cut the stem with sharp snips or scissors, leaving about an inch attached, rather than twisting or pulling. Pepper stems are brittle and tearing fruit off can damage or break the plant.