Day: July 15, 2026

  • How to Grow Tomatoes in Containers (Beginner’s Guide)

    How to Grow Tomatoes in Containers (Beginner’s Guide)

    There’s nothing quite like a sun-warmed, homegrown tomato and you don’t need a sprawling garden to grow one. A single pot on a sunny patio, balcony, or doorstep can produce pounds of juicy, flavor-packed fruit. Learning how to grow tomatoes in containers is one of the most satisfying and beginner-friendly ways to start growing your own food, and it comes with some surprising perks: better pest control, fresh soil every season, and the freedom to chase the sun.

    The secret to thriving container tomatoes really comes down to a few key choices: the right variety, a big enough pot, and consistent watering. Get those right and even a first-time gardener can harvest baskets of tomatoes from a container. This complete guide walks you through every step, from picking your plant to slicing into your first ripe tomato.

    Can You Grow Tomatoes in Pots?

    Yes, tomatoes grow beautifully in containers, and it’s one of the best crops for pots. Choose a compact or determinate variety for the easiest results, plant it in a 5-gallon (or larger) container filled with quality potting mix, give it at least 6 to 8 hours of full sun, water consistently, and feed regularly. Add a stake or cage at planting time, and you’ll be harvesting patio tomatoes all season.

    The two biggest keys to success are choosing the right variety for your space and giving the plant a large enough container with steady moisture. Tomatoes have big, thirsty root systems, so the more soil volume you give them, the easier they are to keep happy.
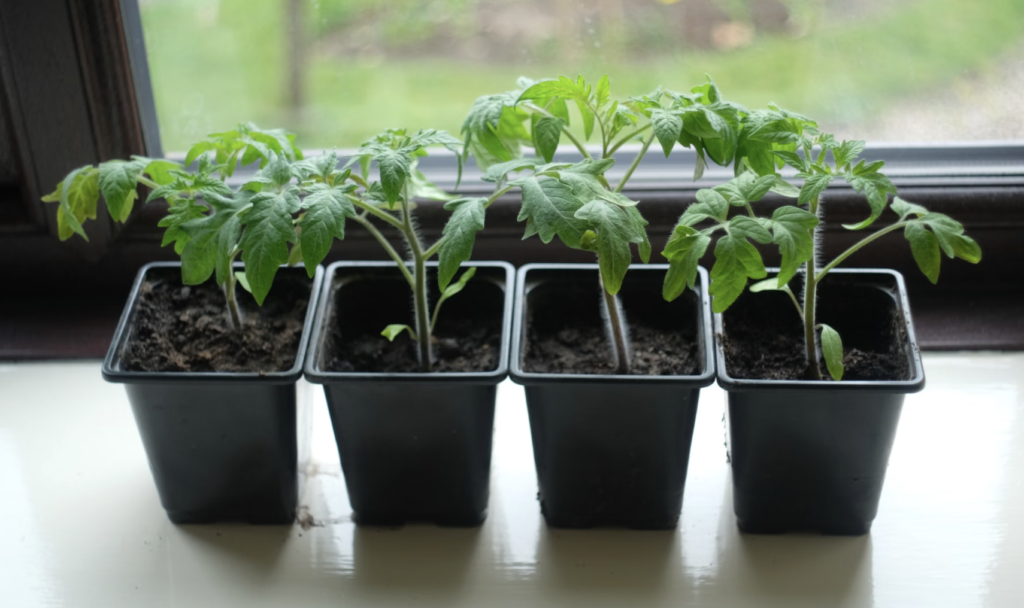
    Four potted tomato seedlings on a window sill, perfect for home gardening enthusiasts
    Four potted tomato seedlings on a window sill, perfect for home gardening enthusiasts

    Why Grow Tomatoes in Containers?

    Even gardeners with plenty of ground space often choose pots for their tomatoes, and for good reason:

    • Grow anywhere. A patio, balcony, deck, driveway, or sunny doorstep becomes a productive tomato garden  no yard required.
    • Chase the sun. Because containers are movable, you can shift plants to the sunniest spot as the season changes, or roll them out of harsh weather.
    • Fresh, controlled soil. You start each season with clean potting mix, sidestepping the soil-borne diseases that build up in garden beds.
    • Fewer pests and diseases. Raised off the ground and easy to inspect, container tomatoes are simpler to keep healthy.
    • Convenience. Keeping plants near the kitchen door makes watering, tending, and harvesting effortless.

    For beginners especially, containers make tomato growing more forgiving and far less intimidating than committing to a full garden bed.
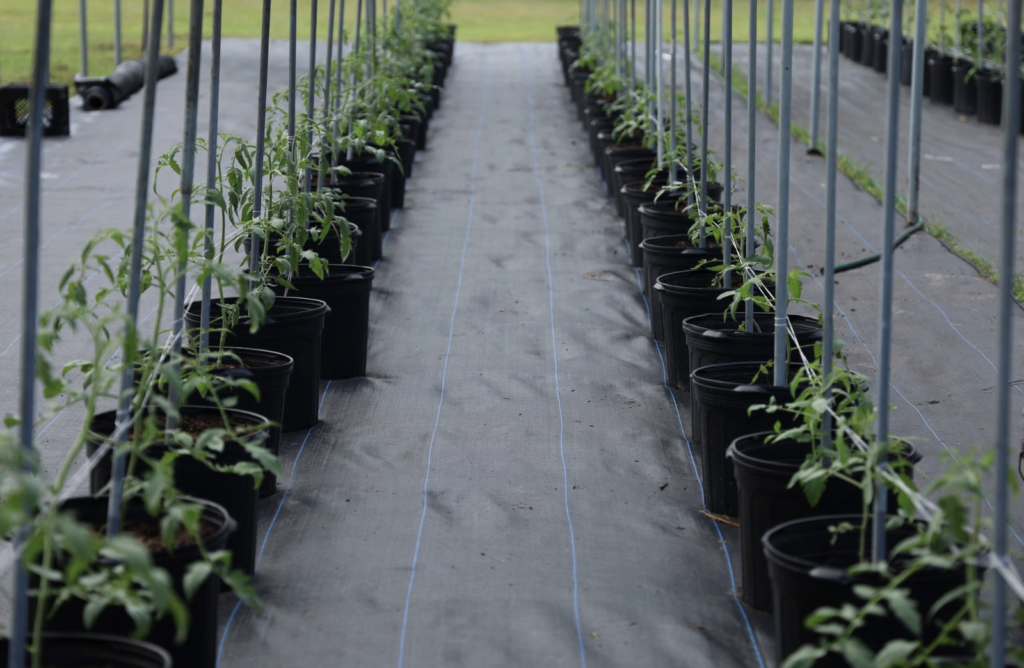
    Rows of young tomato plants grow in a modern greenhouse setting, optimizing indoor farming techniques
    Rows of young tomato plants grow in a modern greenhouse setting, optimizing indoor farming techniques

    Determinate vs Indeterminate: Choose the Right Tomato

    Before you buy a single plant, understand this one distinction, it’s the most important decision you’ll make for container success. Tomatoes come in two growth habits:

    • Determinate (bush) tomatoes grow to a compact, predetermined size, then set most of their fruit in one big flush. Often labeled “bush,” “patio,” or “dwarf,” these are the easiest choice for containers because they stay manageable and need little pruning.
    • Indeterminate (vining) tomatoes keep growing and fruiting all season long, reaching 6 to 8 feet or more. They can be grown in pots, but they need a very large container, sturdy support, and regular pruning and watering. more work, but a longer harvest.

    For your first container tomato or any small space start with a determinate or dwarf variety. Cherry and grape tomatoes (which are usually compact bush types) are especially forgiving and productive. Great container picks include ‘Patio’, ‘Bush Early Girl’, ‘Tiny Tim’, ‘Tumbling Tom’ (lovely in hanging baskets), and reliable cherries like ‘Sweet 100’. For a deeper look at your options, see our guide to the best tomato varieties for home gardens.

    Seedling or seed? The quickest, easiest route is to buy a healthy young transplant from a garden center in spring perfect for beginners and anyone short on time. If you’d like a much wider choice of compact and dwarf varieties, though, starting from seed indoors six to eight weeks before your last frost opens up hundreds of options you’ll never find as transplants. Our seed starting guide for beginners walks you through it step by step.

    Choosing the Right Container

    When it comes to container tomatoes, bigger is almost always better. A cramped pot restricts roots, dries out fast, and cuts your harvest, so err on the generous side. Here’s a quick sizing guide:

    Tomato Type Minimum Container Size
    Miniature / micro-dwarf 1–2 gallons (8–10 inch pot)
    Cherry / patio / determinate 5 gallons
    Dwarf with full-size fruit 5–7 gallons
    Indeterminate / vining 15–25 gallons (bigger is better)

    Material matters too. Plastic pots are cheap and light but hold heat and moisture (watch for root rot). Fabric grow bags breathe beautifully and “air-prune” roots for a healthier system, but they drain fast, so you’ll water and feed a bit more. Wooden containers work well, just use untreated rot-resistant wood like cedar. A self-watering container, with its built-in water reservoir, is a fantastic option for thirsty tomatoes, since it buffers the plant against the inconsistent watering that causes so many problems you can even build a self-watering planter yourself. Whatever you choose, make sure it has good drainage holes (fabric bags excepted), and raise it off the ground on pot feet so roots don’t bake on hot paving and water can drain freely. Grow just one tomato plant per container for the best airflow and yields. If you’re new to pots in general, our container gardening guide for beginners covers the fundamentals.

    The Best Soil for Container Tomatoes

    Never fill a container with garden soil or straight compost, both compact and drain poorly in pots. Instead, use a loose, well-draining potting mix. You can buy a quality potting mix or make your own by blending equal parts coco coir (or peat), compost, and perlite or vermiculite for drainage and moisture retention. Tomatoes prefer slightly acidic soil, around pH 5.5 to 6.5. Mixing a little slow-release fertilizer or extra compost into the mix at planting gives your plant a strong start. Many gardeners also add a handful of crushed eggshells or a calcium supplement to the planting hole, since a steady calcium supply together with even watering helps ward off blossom end rot. For a homemade, low-waste feeding approach, our guide to making your own organic fertilizer is a great companion.

    How to Plant Tomatoes in Containers: Step-by-Step

    With variety, pot, and soil sorted, planting is quick and easy.

    • Step 1: Pick a Big Container and a Full-Sun Spot

    Choose your appropriately sized container with good drainage, and place it where it will get at least six to eight hours of direct sun, more is better. A bonus of containers is portability: position them to catch the sun and, ideally, somewhat sheltered from strong wind. On timing, wait until all danger of frost has passed and nights are reliably warm (above about 50°F) before setting tomatoes outside, they’re warm-season plants that sulk or stall in the cold. If you started or bought plants early, harden them off by moving them outdoors for gradually longer periods over a week before planting. Knowing your local last frost date makes this timing easy.

    • Step 2: Fill With Quality Potting Mix

    Fill the container most of the way with your well-draining potting mix, leaving room for the root ball. Moisten the mix so it’s evenly damp before planting.

    • Step 3: Plant Deep

    Here’s a tomato-specific trick that makes a real difference: plant deep. Pinch off the lower leaves and bury up to two-thirds of the stem, leaving just the top cluster of leaves above the soil. Tomatoes grow new roots all along any buried stem, so deep planting creates a much stronger, more drought-resistant root system.

    • Step 4: Add Support Now

    Install your stake, cage, or trellis at planting time, not later adding it once the plant is established risks damaging the roots. A determinate plant is happy with a standard cage or stake; an indeterminate one needs a tall, sturdy support, ideally anchored to a wall or railing so a top-heavy plant can’t tip the pot over late in the season.

    • Step 5: Water In and Mulch

    Water thoroughly until it runs from the drainage holes to settle the soil around the roots. Then add a couple of inches of mulch straw, shredded leaves, or bark on the surface to conserve moisture and keep roots cool. Our guide to types of mulch can help you pick.
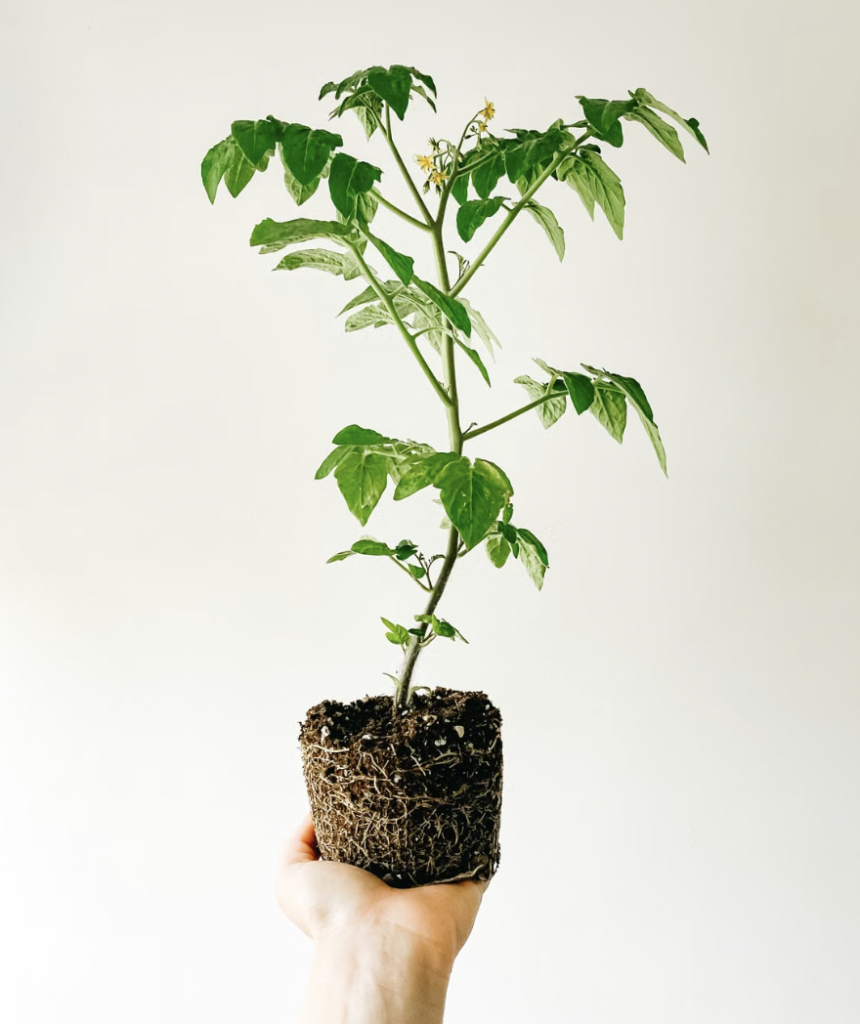
    Close-up of a tomato seedling held in a hand against a white background, showcasing gardening basics.
    Close-up of a tomato seedling held in a hand against a white background, showcasing gardening basics.

    Tomato Care: Watering, Feeding and Support

    Consistent, attentive care is what separates a struggling pot tomato from a thriving one. Good tomato care in containers comes down to three things.

    • Watering. This is the single most important task. Containers dry out far faster than garden beds, so check daily and water whenever the top inch of soil feels dry in hot summer weather, large plants may need water once or even twice a day. Water deeply at the soil line until it drains from the bottom, and try to keep the leaves dry to discourage disease. Above all, be consistent: erratic watering is the direct cause of the two classic container-tomato problems, blossom end rot and fruit cracking. A DIY drip irrigation system or a self-watering planter takes the guesswork out.

    In our experience, watering is where nearly every disappointing container tomato goes wrong and it’s almost always inconsistency rather than the total amount. A plant that’s parched on Monday and flooded on Thursday will drop blossoms, split its fruit, and develop that frustrating dark patch of blossom end rot, even in perfect soil with plenty of feed. The gardeners who succeed are simply the ones who water little and often enough to keep the soil evenly, steadily moist. If your schedule makes daily watering unrealistic, invest in a self-watering container or a simple drip timer before you invest in anything else, it will do more for your harvest than any fertilizer.

    • Feeding. Tomatoes are heavy feeders, and container plants need more feeding than garden ones because there’s less soil to draw from. Start with a balanced fertilizer (like 10-10-10) about four to six weeks after planting, then switch to one higher in phosphorus and potassium once flowering begins to encourage fruit. Feed roughly every couple of weeks, or use a slow-release feed monthly (and about 25% more often for fast-draining fabric bags). Our guides to understanding NPK ratios and how and when to fertilize tomatoes explain the details.
    • Support. As the plant grows, loosely tie the main stems to your stake or guide them up the cage. Keeping foliage and fruit off the soil improves airflow, reduces disease, and makes harvesting easy.

    Pruning and Training Your Tomatoes

    How much you prune depends on your tomato type. Determinate (bush) tomatoes need very little pruning, in fact, heavy pruning reduces their single main harvest, so just remove any yellowing lower leaves.

    Indeterminate (vining) tomatoes, on the other hand, benefit from regular pruning. Pinch out the “suckers”, the small shoots that form in the crook between the main stem and a branch to keep the plant to one or two main stems. This channels energy into fruit rather than endless foliage, improves airflow, and keeps a vigorous vine from overwhelming its container. Pinch suckers when they’re small and do it regularly through the season.

    Whatever type you grow, it’s good practice to remove the lowest leaves once the plant is established, especially any that touch the soil. Soil can splash fungal spores up onto low foliage when you water, so keeping the bottom few inches of stem bare is a simple, effective way to prevent many common leaf diseases. Good airflow around and through the plant is one of your best defenses against the fungal problems that thrive in damp, crowded foliage.
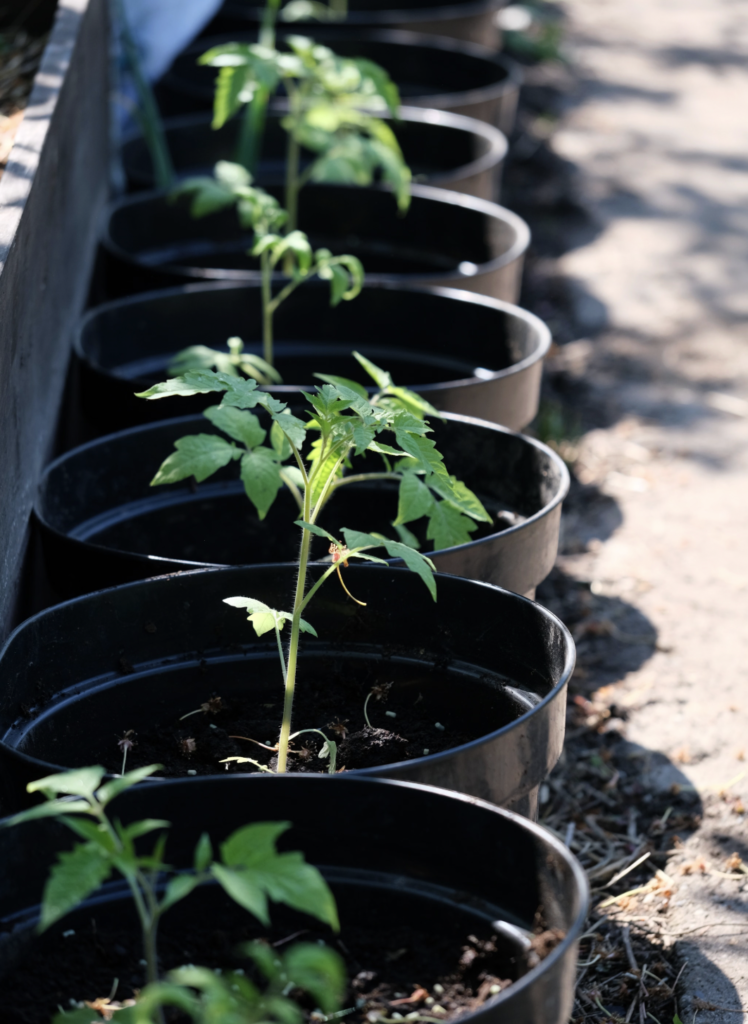
    Healthy young tomato plants growing in black pots under sunlight, perfect for gardening enthusiasts.
    Healthy young tomato plants growing in black pots under sunlight, perfect for gardening enthusiasts.

    Preventing Common Container Tomato Problems

    Most container tomato troubles are easy to prevent once you know the cause.

    Problem Likely Cause The Fix
    Blossom end rot (dark sunken base) Inconsistent watering; calcium uptake issues Water evenly and consistently; don’t let soil dry out
    Cracked or split fruit Irregular watering, especially after dry spells Keep soil evenly moist; mulch to buffer moisture
    Flowers or fruit dropping Heat stress, dryness, or erratic watering Water consistently; provide some afternoon shade in extreme heat
    Few fruits, lots of leaves Too much nitrogen; not enough sun Switch to a higher-phosphorus feed; ensure full sun
    Yellow-orange fruit in heat Temperatures above 90°F block red pigment Normal in heat; provide light afternoon shade
    Pale, leggy plants Not enough light Move to a sunnier spot

    Happily, container tomatoes often suffer fewer soil-borne diseases than garden plants, since you start each season with fresh, sterile potting mix. Birds and squirrels can nibble ripening fruit, so drape netting over plants if critters are a problem.

    Harvesting Container Tomatoes

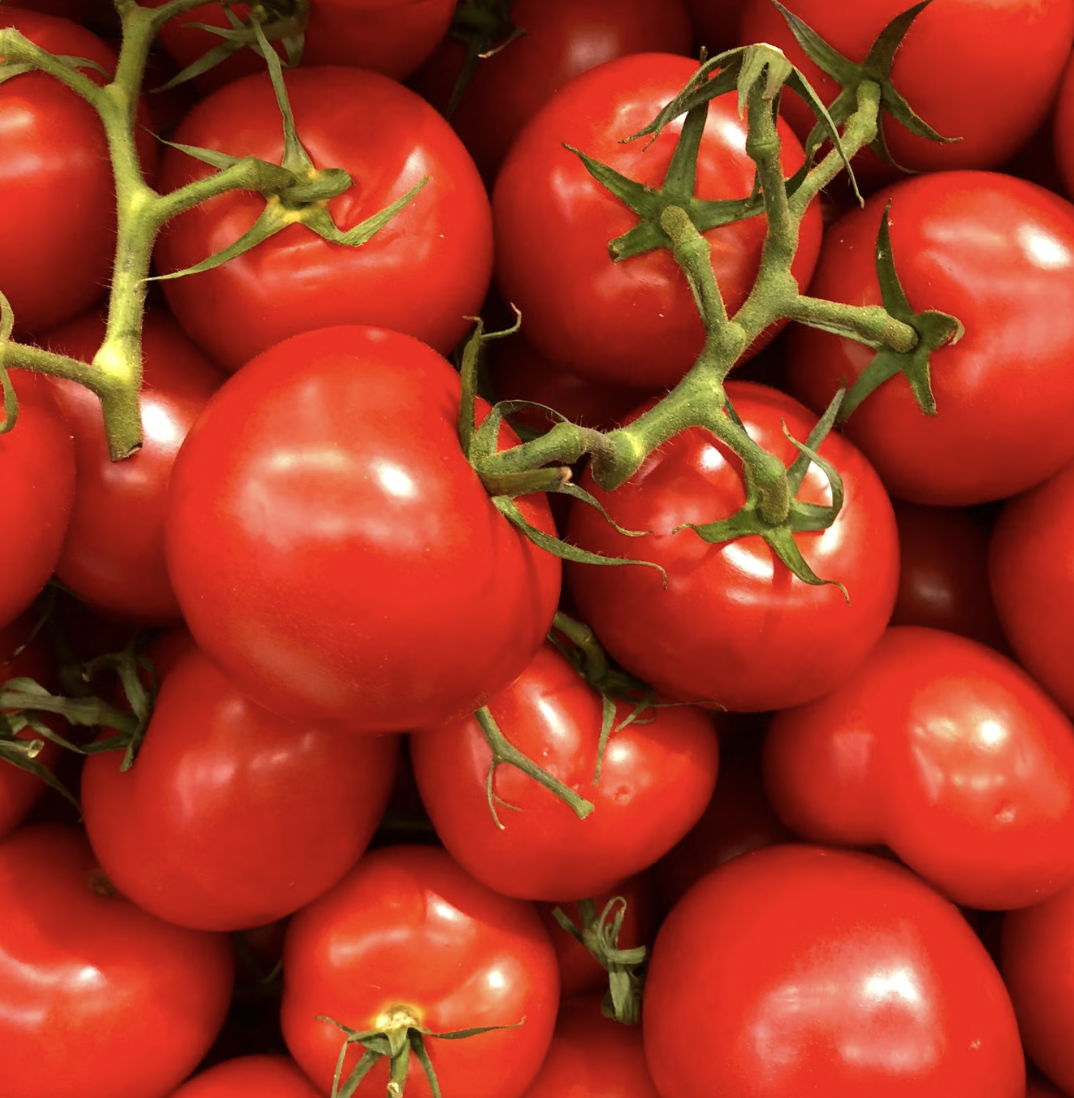
    The best part! Let tomatoes ripen fully on the plant for the sweetest, richest flavor, they’re ready when the fruit is a uniform, mature color (red, yellow, orange, depending on variety) and gives slightly to a gentle squeeze. Harvest by gently twisting the fruit from the vine or snipping the stem with clean scissors.

    Pick regularly, since frequent harvesting encourages the plant to keep producing. If cracking, pests, or birds threaten your ripening fruit, you can pick tomatoes when they’re just beginning to color and let them finish ripening on the kitchen counter, they’ll develop excellent flavor indoors. And if a frost threatens at season’s end, harvest all the mature green tomatoes and ripen them inside, so nothing goes to waste.

    A quick tip on storage: never refrigerate fresh tomatoes if you can help it, as cold temperatures dull their flavor and turn the texture mealy. Keep them on the counter, stem-side down, out of direct sun. When your plants hit their summer stride and you have more tomatoes than you can eat fresh, they freeze, roast, and cook into sauce beautifully. a single productive container plant can keep a small household in salads, sandwiches, and homemade sauce for weeks, which is exactly the kind of low-waste, homegrown abundance that makes container gardening so rewarding. And because you can grow container tomatoes right outside the kitchen door, you get to harvest each one at the exact peak of ripeness, something no grocery store can ever match.

    Is Growing Tomatoes in Containers Worth It?

    Absolutely. Few things reward a little effort as generously as a container tomato, pounds of sun-ripened fruit from a single pot, no garden plot required, and the pure joy of eating a tomato you grew yourself. Container growing also puts you in control: fresh soil, easy pest monitoring, and the flexibility to garden on a balcony, patio, or fire escape. It’s also the perfect gateway crop, master a pot of tomatoes and you’ll have learned the core skills of container gardening that carry over to almost every other vegetable you might want to grow. why grow Tomato?

    Ready to fill out your container garden? Tomatoes pair perfectly with other easy container crops. Try growing bell peppers from seed, cucumbers grown vertically, or a pot of leaf lettuce for continuous harvest. For more ideas, see our roundup of the best vegetables for container gardening, explore the full Vegetables collection, or browse the broader EcoGardenHub Plant Library. Planting companions nearby? Our companion planting guide for vegetables shows which plants love growing together.

    Grab a big pot, a compact tomato, and your sunniest corner, and get growing. Your first homegrown tomato is closer than you think. Once you’ve tasted the difference between a store-bought tomato and one still warm from your own patio, there’s no going back.
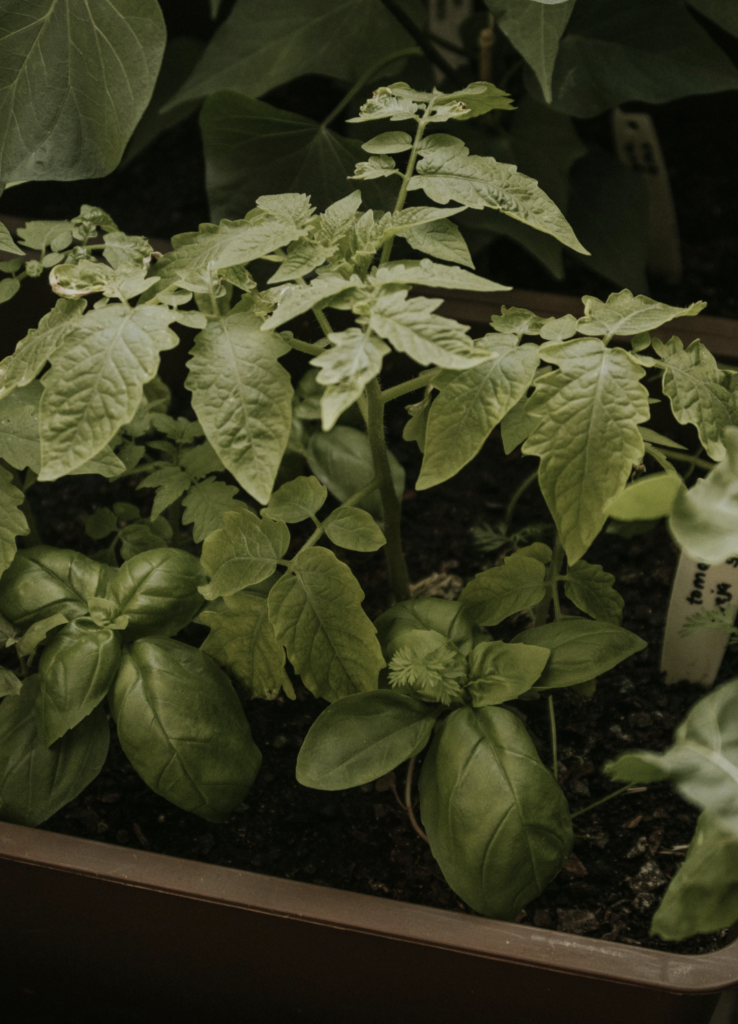
    Growing Tomatoes in Containers Worth It
    Growing Tomatoes in Containers Worth It

    Frequently Asked Questions

    • What size container do I need to grow tomatoes? Use at least a 5-gallon container for most tomatoes; cherry and mini varieties can manage in 2 gallons, while large indeterminate types need 15 to 25 gallons. In general, the bigger the pot, the healthier and more productive the plant.
    • Which tomatoes are best for containers? Compact determinate, bush, patio, and dwarf varieties are easiest for containers, along with cherry and grape tomatoes. Good picks include ‘Patio’, ‘Tiny Tim’, ‘Tumbling Tom’, and ‘Sweet 100’. Indeterminate types work too but need bigger pots and more support.
    • How often should I water container tomatoes? Check daily and water whenever the top inch of soil is dry, often once a day, and up to twice a day in hot weather, since containers dry out quickly. Consistent moisture is key to preventing blossom end rot and cracking.
    • Do container tomatoes need fertilizer? Yes. Container tomatoes are heavy feeders with limited soil, so feed every couple of weeks with a balanced fertilizer, switching to a higher-phosphorus feed once flowering starts. Fabric grow bags need feeding a bit more often.
    • Should I plant tomatoes deep in a container? Yes. Remove the lower leaves and bury up to two-thirds of the stem. Tomatoes grow roots all along the buried stem, creating a stronger, more drought-resistant root system and a sturdier plant.
    • Do tomatoes in pots need a cage or stake? Most do. Add a cage, stake, or trellis at planting time to avoid disturbing roots later. Determinate plants need modest support, while tall indeterminate vines need a sturdy, anchored structure to keep the pot from tipping.
    • How much sun do container tomatoes need? Tomatoes need at least six to eight hours of direct sun daily for strong growth and good fruiting. A big advantage of containers is that you can move them to catch the sunniest spot around your home.
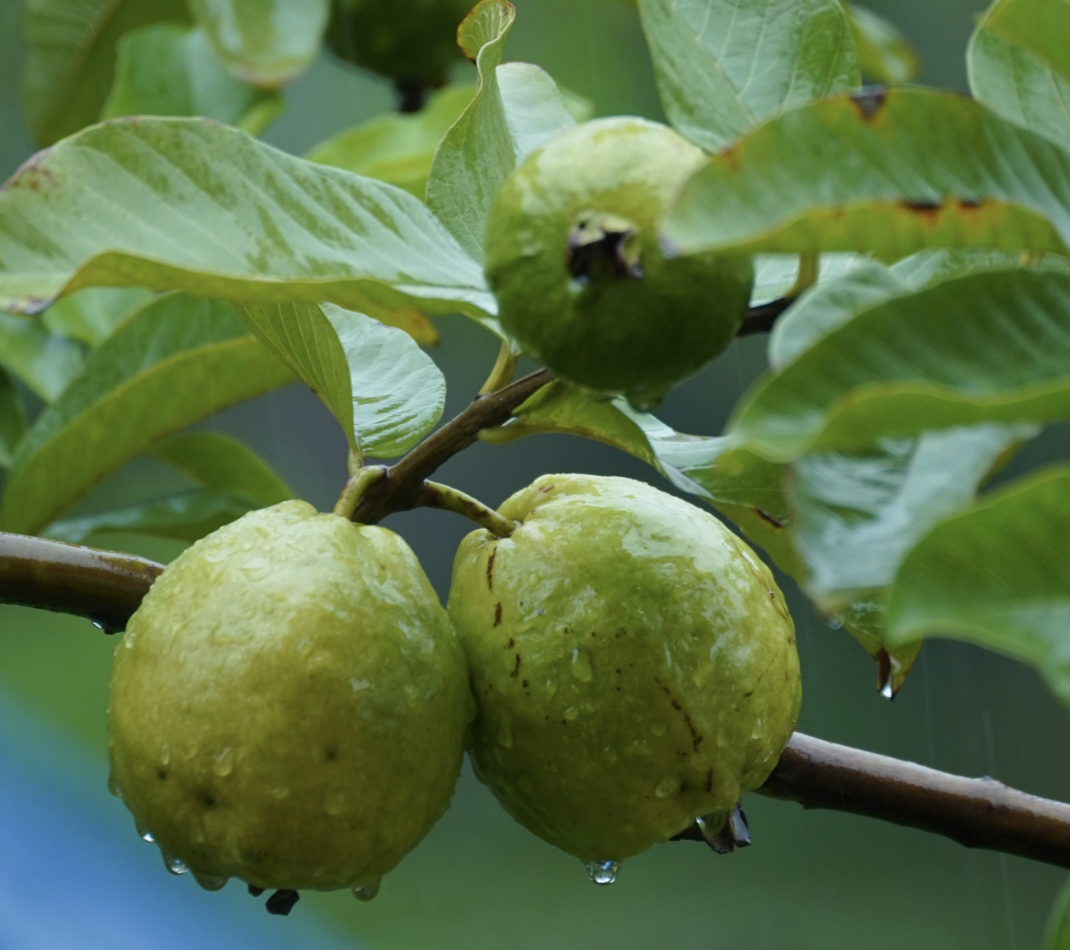
  • How to Grow Guava Trees in Containers (Full 2026 Guide)

    How to Grow Guava Trees in Containers (Full 2026 Guide)

    Imagine stepping onto your balcony on a cool morning, brushing past a glossy-leaved little tree, and picking a warm, fragrant guava for breakfast no tropical vacation required. If you have ever assumed guavas were only for gardeners with sprawling, frost-free backyards, here is some genuinely good news: learning how to grow guava in containers puts this sweet, vitamin-packed fruit within reach of almost anyone, even on a patio in a chilly climate.

    Guava trees are tough, adaptable, and surprisingly happy in pots. Growing them in containers even comes with bonus perks — you can control the soil, keep the tree compact, and simply wheel it indoors when frost threatens. This guide covers everything from choosing the right variety to picking your first perfectly ripe fruit, in plain, friendly language.

    Can You Grow Guava in a Pot at Home?

    Yes, guava grows very well in a pot. Choose a compact variety, plant it in a large container (at least 18–24 inches wide) filled with fast-draining, slightly acidic soil, and give it 6–8 hours of full sun. Water deeply but sparingly, feed every 6–8 weeks in the growing season, and protect it from frost. Potted guavas can fruit in as little as one to two years.

    The real advantage of container growing is portability. Because guava is a tropical-to-subtropical plant that dislikes hard freezes, keeping it in a pot lets you move it to a sheltered spot or indoors when the temperature drops which is exactly how gardeners well outside the tropics grow them successfully.

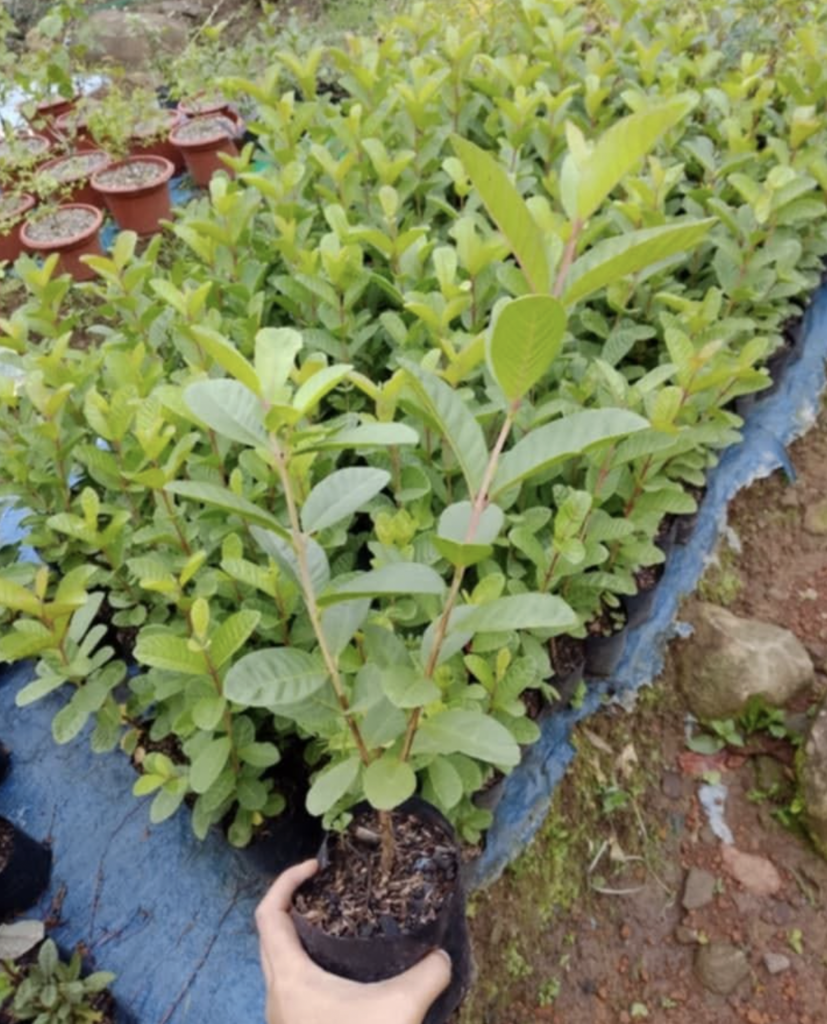
    Starting fresh Guava before transplanting in bigger pots
    Starting fresh Guava before transplanting in bigger pots

    Why Containers Are Perfect for Guava

    You might assume in-ground planting is always better, but guava is one of those fruits that genuinely thrives in a pot. Here’s why container growing works so well:

    • Beat your climate. A movable pot lets you grow a frost-tender tropical almost anywhere, wheeling it to shelter when cold threatens and back into the sun when it warms.
    • Keep it compact. Restricting the roots naturally limits the tree’s size, so a plant that could top 20 feet in the ground stays a tidy, pickable few feet tall.
    • Control the soil. You get to provide the exact fast-draining, slightly acidic mix guava loves, instead of fighting whatever’s in your yard.
    • Fewer pests and problems. Raised off the ground and easy to inspect, potted guavas are simpler to keep clean and healthy.
    • Contain a spreader. In some warm regions guava can seed itself aggressively; a pot keeps this vigorous grower politely in bounds.

    For small-space, urban, and cool-climate gardeners especially, a container isn’t a compromise it’s often the smartest way to grow guava.

    Meet the Guava (and Its Look-Alikes)

    The classic guava (Psidium guajava) is a tropical tree native to Mexico, Central America, and the Caribbean, prized for sweet, aromatic fruit bursting with vitamin C. Left in the ground it can reach 10 to 30 feet, but in a container with a little pruning it stays a manageable few feet tall, making it ideal for pots.

    It helps to know the guava “family” you’ll see at nurseries, because they aren’t all the same plant:

    • Tropical guava (Psidium guajava): the true guava, with the largest, juiciest fruit. It’s the most frost-tender of the group and the star of this guide.
    • Strawberry guava (Psidium cattleianum): a shrubbier tree with smaller, tarter red fruit and higher cold tolerance (hardy to around 25°F).
    • Pineapple guava (Feijoa sellowiana): technically a different plant with citrusy fruit and beautiful twisting trunks, and the most cold-hardy of the bunch (down to about 15°F).

    All three grow well in containers, but when someone says “guava,” they usually mean the tropical guava so that’s our main focus.

    As a bonus, guava is a handsome plant in its own right. Its paired, leathery green leaves stay on the tree year-round in mild conditions, and its small white flowers are lightly fragrant and attractive to pollinators. Even before it fruits, a potted guava earns its place as an evergreen, ornamental little tree on a patio or balcony.

    Best Guava Varieties for Containers

    Not every guava stays pot-friendly, so choosing a compact, self-fruiting variety sets you up for success. Here are reliable performers for container growing:

    Variety Fruit & Flesh Why It Works in Pots
    Ruby Supreme Sweet, pink-red flesh Popular, productive, container-friendly
    Homestead Classic sweet guava, pink flesh Reliable cropper, easy to keep compact
    Thai White Crisp, mildly sweet, white flesh Naturally smaller, great for small spaces
    Peruvian White Green ripening to white-yellow Proven in cool-climate container setups
    Barbie Pink Aromatic, pink flesh Compact habit, ornamental and tasty

    Guavas are self-pollinating, so a single tree will fruit on its own. That said, growing two different varieties nearby often boosts fruit set noticeably a nice option if you have the room. Buying a young grafted sapling rather than starting from seed also gets you fruit far faster: roughly one to two years, versus three to seven years from seed.

    What You’ll Need

    • A compact guava variety (a grafted sapling for fastest fruiting)
    • A large container with plenty of drainage holes (start smaller, size up over time)
    • A fast-draining potting mix  potting soil, compost, and sand or perlite
    • A sunny, sheltered spot getting 6–8 hours of direct sun
    • A balanced fertilizer (organic granular, fish emulsion, or 10-10-10)
    • Mulch to hold moisture and insulate the roots
    • Frost protection  a sheet, fleece, or the ability to move the pot indoors

    How to Plant a Guava Tree in a Container: Step-by-Step

    Follow these five steps to get your potted guava off to a strong start.

    • Step 1: Pick the Right Pot

    Guavas have shallow, vigorous roots and need room. If you’re starting with a small sapling, a 12-inch pot is fine, but plan to move up to a final container at least 18–24 inches across and roughly as deep (larger is even better for mature trees). Make sure it has several drainage holes. A lightweight plastic or fiberglass pot or one on wheels makes it far easier to chase the sun and dodge frost.

    • Step 2: Mix a Fast-Draining Soil

    Guava thrives in loose, well-draining soil that’s slightly acidic to neutral (pH around 5–7). A dependable blend is roughly two parts quality potting soil, one part compost or aged manure, and one part sand or perlite for drainage. Good drainage is non-negotiable, soggy soil is the fastest way to lose a guava to root rot.

    • Step 3:  Plant Your Guava

    Fill the pot about halfway with your mix. Set the sapling so the top of its root ball sits level with the final soil surface, never buried deeper. Backfill around the roots, firming gently to remove air pockets, and leave an inch or so of space below the rim for watering.

    • Step 4: Water It In and Place in Full Sun

    Water thoroughly right after planting until moisture runs from the drainage holes, then move the container to its sunny home. Guavas want at least six to eight hours of direct light daily; in very hot regions, a little afternoon shade prevents leaf scorch. Add a layer of organic mulch on top, keeping it away from the trunk.

    • Step 5: Pot Up as It Grows

    Your guava won’t stay small forever. As roots fill the container (you’ll see them circling at the drainage holes, or notice the soil drying out unusually fast and growth slowing), move the tree into the next size up, ideally in spring. Refresh with fresh mix each time. Gradual potting-up keeps the tree vigorous without shocking it and new to containers overall? Our container gardening guide for beginners covers drainage and repotting in friendly detail.

    Guava Tree Care: Sun, Water, Feeding & Pruning

    Dialed-in guava tree care is genuinely low-effort once you understand the rhythm.

    Sunlight. More sun means more fruit. Aim for 6–8 hours of direct light, rotating the pot every week or two for even growth. If winter light is weak, a full-spectrum grow light keeps the tree ticking over the same DIY grow light setup you’d use for seedlings works nicely.

    Watering. Here’s the balance guavas ask for: they like deep watering but hate soggy roots. Water thoroughly only when the top 1–2 inches of soil feel dry, then let it drain freely. Overwatering is the single most common mistake with potted guavas, so check the soil before you reach for the hose. As a rough seasonal guide, that often means a deep soak two to three times a week in the heat of summer, easing to once a week or less as temperatures cool. In winter, when growth slows to a crawl, water only sparingly, guavas are surprisingly drought-tolerant during their rest period, and letting them dry out slightly is far safer than keeping them wet in the cold.

    Feeding. Container guavas are hungry, potted trees use up nutrients faster than those in the ground. Feed with a balanced fertilizer (like 10-10-10) or organic options such as compost tea or fish emulsion every 6–8 weeks during the growing season, and feed again after any hard pruning. A useful refinement as your tree matures: while it’s young and putting on growth, a nitrogen-forward blend encourages leafy development, but once it starts flowering and fruiting, shifting to a formula higher in potassium supports better fruit set and sweetness. If those N-P-K numbers look cryptic, our guide to understanding NPK ratios makes them simple, and kitchen staples like banana peels and eggshells can gently supplement feeding. Ease off feeding in winter, when the tree slows down and rests.

    Pruning. Here’s a grower’s secret: guavas fruit on new growth, so smart pruning actually increases your harvest. Trim after fruiting or in late winter to remove dead and crossing branches, open up airflow, and keep the tree compact and easy to pick. Removing any shoots below the graft union keeps energy going to the fruiting variety. It also pays to thin the fruit itself: allow no more than about four fruits per branch, and remove any developing on thin, weak stems, so the tree channels its energy into fewer, larger, sweeter guavas. A layer of organic mulch on the soil surface conserves moisture and shields shallow roots.

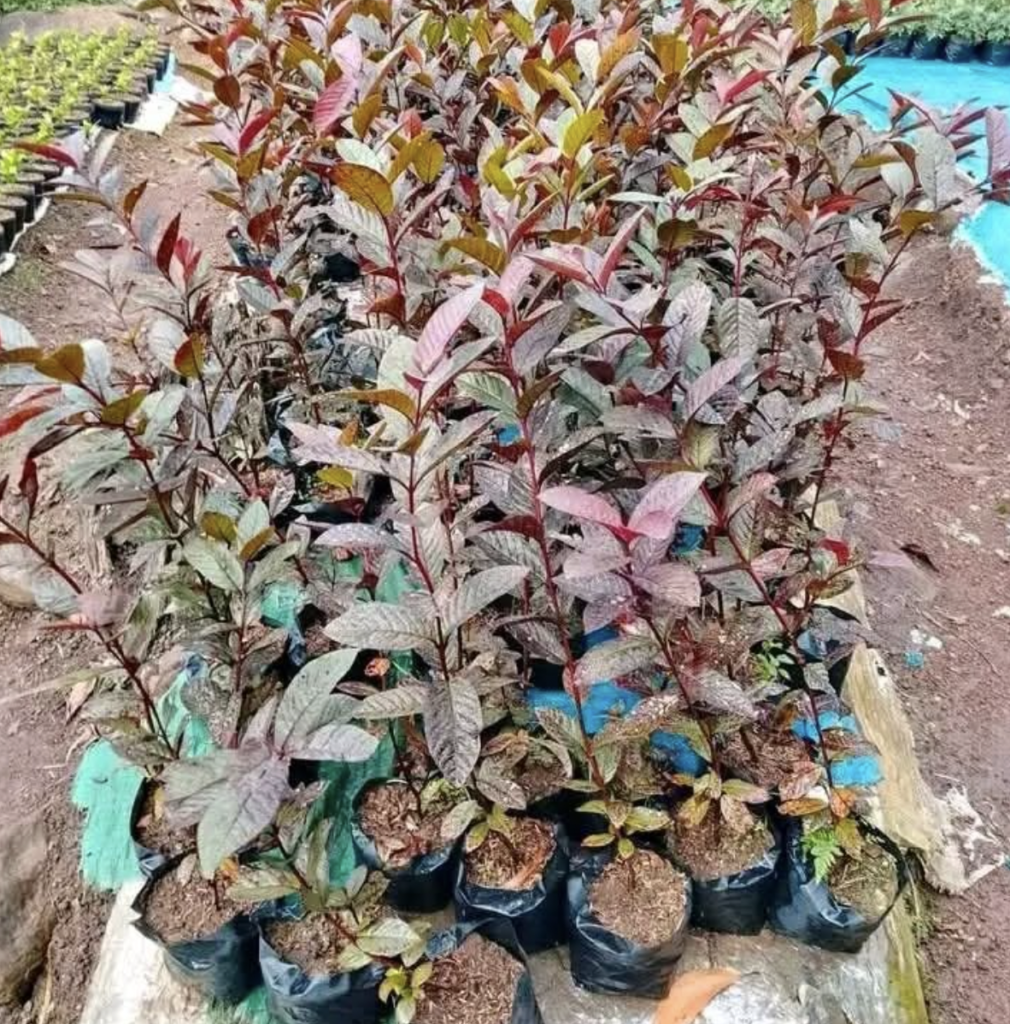
    Pink guava tree care at nursery before plantig
    Pink guava tree care at nursery before plantig

    Growing Guava in Cold Climates

    One of the joys of a potted guava is that you’re no longer limited by your zone. Guava’s native range is roughly USDA zones 9–12, but plenty of gardeners in far cooler regions grow thriving container guavas simply by moving them to shelter when the cold arrives.

    The strategy is straightforward: as nights approach freezing, bring the pot into a garage, greenhouse, or bright indoor room, or protect it in place. For short cold snaps, you can cover the tree with a frost cloth or old sheet, run a small fan for air circulation, or even string old-fashioned incandescent holiday lights through the branches for a touch of gentle warmth. Knowing your first and last frost dates makes this timing effortless, and our guide to overwintering tender plants walks through the whole cold-season routine. If you happen to garden in a warm zone, our USDA Zone 9 gardening guide covers growing guava outdoors year-round.

    In our experience, the gardeners who succeed with cool-climate container guavas treat it as a simple seasonal routine rather than a battle. They keep their trees in lightweight pots on rollers, watch the ten-day forecast in autumn, and move the plants under cover the first night temperatures are set to dip near freezing. Guavas are remarkably resilient once that one habit is in place many growers in regions as cool as USDA zone 7 harvest fragrant fruit year after year simply by giving their potted trees a warm place to wait out the coldest weeks.

    How Long Until Guava Fruits?

    Patience pays off quickly with guava especially if you start from a sapling. Here’s a realistic timeline:

    • From a grafted sapling: flowering can begin within 6–8 months of healthy growth, with fruit often in the first one to two years.
    • From seed: expect three to seven years before fruiting, which is why most container growers buy young trees.
    • Flower to ripe fruit: roughly a few months, with most guavas ripening in the cooler months.

    Give your tree strong sun, steady feeding, and thoughtful pruning, and it will reward you with fragrant fruit sooner than you might expect.

    Harvesting Guava

    Guavas tell you when they’re ready. Watch for the skin color to shift from deep green to a lighter yellow-green, yellow, or blush of pink, depending on the variety. Ripe fruit gives slightly to a gentle squeeze and the surest sign releases a wonderfully sweet, floral fragrance.

    Pick fruit by hand, twisting gently or clipping with a short stalk. If you harvest a touch early, guavas will continue to soften and sweeten at room temperature over a few days. Firm, green guavas even store for a couple of weeks. Once ripe, they’re a delight fresh, and equally lovely as juice, jam, jelly, chutney, or a tropical addition to desserts, a genuinely zero-waste, homegrown treat. Nutritionally, guavas are little powerhouses: they’re famously rich in vitamin C (often several times more than an orange, ounce for ounce), plus fiber and antioxidants, so every fruit you grow is as good for you as it is delicious. Ripe guavas are best eaten within a few days, but you can refrigerate them to extend their life, or freeze the pulp to enjoy your harvest long after the season ends.

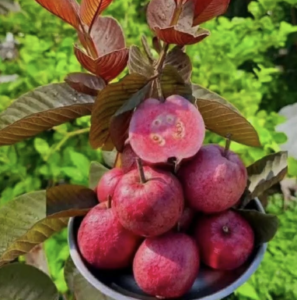
    fresh Barbie Pink Gauva ready to consume
    fresh Barbie Pink Gauva ready to consume

    Common Problems and How to Fix Them

    Most potted-guava troubles come down to water, cold, or a few familiar pests.

    Problem Likely Cause The Fix
    Yellowing leaves, wilting, mushy roots Overwatering / root rot Let soil dry between waterings; improve drainage
    Leaf scorch or brown edges Harsh midday sun or dryness Add afternoon shade in hot climates; mulch and water deeply
    Few or no flowers/fruit Too little sun or over-feeding on nitrogen Move to full sun; use balanced feed; prune to spur new growth
    Maggots or premature fruit drop Fruit flies Bag developing fruit; remove and dispose of fallen fruit
    Leggy, sparse growth Insufficient light Relocate to a brighter spot or add a grow light
    Cold, blackened leaves Frost damage Move indoors or cover before freezes; prune damage in spring

    Is Growing Guava in Containers Worth It?

    Absolutely. A potted guava gives you lush evergreen foliage, fragrant flowers, and sweet, nutritious fruit, all in a footprint small enough for a balcony, and portable enough to outsmart frost. Few tropical fruits are this forgiving or this rewarding for small-space and cool-climate gardeners. Better still, a container guava is a project that grows with you: start with one compact sapling, learn its simple rhythm of sun, water, and seasonal shelter, and you may soon find yourself adding a second variety and turning a corner of your patio into a miniature tropical orchard.

    If your container orchard is calling for more, keep going: try growing papaya from seed, growing a pineapple from a top, a citrusy kumquat tree in a pot, or fig trees for beginners. For the full lineup of exotic edibles, browse our hub on growing tropical and exotic fruits, part of the broader EcoGardenHub Plant Library.

    Pot up a young guava this season, give it sun and a little patience, and you’ll be picking fragrant, homegrown fruit before you know it. Sustainable, small-space gardening at its sweetest.

    Frequently Asked Questions

    How big a pot does a guava tree need? Start a young sapling in a 12-inch pot, then move up to a final container at least 18–24 inches wide and deep as it matures. Bigger pots support more roots and more fruit, so err on the larger side once the tree is established.

    How long does it take for a potted guava to fruit? A grafted sapling can fruit within one to two years, while a tree grown from seed may take three to seven years. That speed difference is why most container gardeners start with a young nursery tree.

    Do you need two guava trees to get fruit? No. Guavas are self-pollinating, so a single tree will produce fruit on its own. Growing a second variety nearby can improve pollination and increase yields, but it isn’t required.

    Can guava survive winter in a container? Yes, if you protect it. Guava is frost-sensitive, so in cold regions move the pot to a garage, greenhouse, or bright indoor room during freezes, or cover it and reduce watering until warmth returns.

    How much sun does a container guava need? Give it at least 6–8 hours of direct sunlight daily for good growth and fruiting. In very hot climates, light afternoon shade helps prevent leaf scorch, and in dim winters a grow light keeps it productive.

    How do I know when a guava is ripe? Ripe guavas lighten in color from green toward yellow or pink, soften slightly to the touch, and give off a strong, sweet fragrance. You can pick them a little early and let them finish ripening indoors over a few days.

    Should I prune my potted guava tree? Yes. Guavas fruit on new growth, so pruning after harvest or in late winter to remove dead, crossing, or overgrown branches both keeps the tree compact and encourages more fruit.

  • How to Grow a Lychee Tree: Care & Harvest Guide

    How to Grow a Lychee Tree: Care & Harvest Guide

    Peel back the bumpy rose-red skin of a fresh lychee and you’ll find one of the most enchanting fruits on earth: a translucent, pearl-like bite that tastes of roses, honey, and summer. If you’ve ever paid a small fortune for a punnet of them at the market and thought, “I wish I could just grow these,” here’s the happy news you can. Learning how to grow a lychee tree is a wonderful long-game project, and the reward is a gorgeous evergreen tree that hands you fistfuls of fragrant fruit for decades.

    Let’s be honest up front: lychees ask for patience. They’re slow to fruit and a little particular about climate. But once you understand their few real needs; warmth, drainage, the right winter chill, and time. they’re a genuinely rewarding tree to grow, and a stunning ornamental even before the first harvest. This guide walks you through everything, from picking the right plant to the moment you pick your first perfect cluster.

    Can You Grow a Lychee Tree at Home?

    Yes, you can grow a lychee tree at home if you live in a warm climate or can protect the tree from frost. Plant a grafted sapling in full sun and rich, well-draining, slightly acidic soil, water deeply, and feed through the growing season. Lychees thrive in USDA zones 10–11, need a cool, dry winter spell to flower well, and typically fruit within three to five years from a nursery tree.

    The single biggest factor in your success is climate. Lychees are subtropical trees that love warm, humid summers but also require a brief cool, dry winter to trigger flowering. Get the climate right or recreate it with a movable container and the rest of lychee care is refreshingly straightforward.

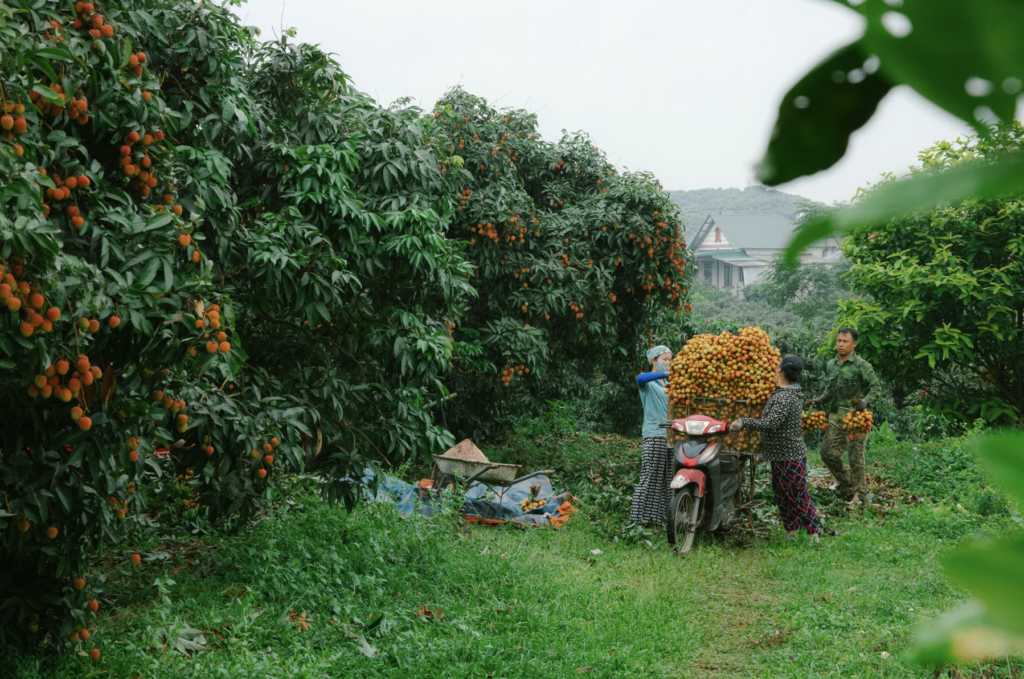
    Grow a Lychee Tree at Home | Eco Garden Hub
    Grow a Lychee Tree at Home | Eco Garden Hub

    Meet the Lychee Tree

    The lychee (Litchi chinensis) is a slow-growing tropical evergreen native to southern China, where it has been cultivated for thousands of years. Its name is often translated as “gift for a joyful life,” which feels exactly right once you’ve tasted the fruit. Beyond the harvest, it’s a beautiful landscape tree: a dense, rounded canopy of glossy compound leaves that reaches nearly to the ground, making it equally useful as a shade tree, a privacy screen, or a specimen centerpiece.

    In spring, clusters of tiny pale-yellow flowers appear, followed by summer fruit. Each lychee has that signature bumpy, leathery skin in shades of pink to deep red, wrapping a sweet, translucent white pulp around a single glossy brown seed. Left unpruned in ideal conditions, a lychee can reach 30 to 40 feet tall and wide, but most home growers keep them pruned to a friendly 10 to 15 feet for easy care and harvesting. This is a tree that rewards a long view: plant one thoughtfully, and it can shade your garden and feed your family for generations.

    Lychee Climate Zone: Where Lychees Grow Best

    Understanding the lychee climate zone is the make-or-break part of growing this tree, so let’s get it right. Lychees grow best in USDA Hardiness Zones 10 through 11, in tropical-to-subtropical regions with warm, humid summers and mild winters. In the United States, that means places like South Florida, Hawaii, and pockets of coastal California and southern Texas are naturally suited to in-ground lychees.

    Here’s the nuance that trips up many hopeful growers: lychees actually need a short spell of cool, dry weather in winter roughly 30 to 60 days of temperatures in the 40s to low 60s°F to signal the tree to set flower buds. Too warm and wet year-round, and a healthy tree may grow beautifully but stubbornly refuse to fruit.

    Cold is the other limit. Mature lychee trees can shrug off brief dips to around 25°F, but young trees are far more tender and can be damaged by even a light freeze. If you garden in a cooler zone, don’t give up you can grow lychee in a large container and move it to shelter for winter, which we cover below. To time your seasonal moves, keep an eye on your first and last frost dates, and if you’re in a borderline-warm region, our USDA Zone 9 gardening guide offers useful microclimate tips.

    Seed vs. Sapling: The Fastest Way to Homegrown Lychees

    You can grow a lychee from seed, and it’s a fun experiment but here’s the reality every honest guide should share. Lychees do not grow “true” from seed, meaning a seedling won’t reliably match its parent’s fruit quality, and it can take a patience-testing seven to ten years to fruit, if it fruits at all.

    By contrast, a grafted or air-layered nursery sapling fruits far sooner usually within three to five years and gives you a known, reliable variety. For most gardeners who actually want to eat lychees this decade, a nursery tree is the smart choice.

    If you’d still like to try seeds for the joy of it, use them fresh lychee seeds lose viability within days of leaving the fruit. Rinse a seed from a ripe lychee, soak it in water for about three days (changing the water daily), or wrap it in a moist paper towel inside a sealed bag in a warm spot. Keep germinating seeds warm, around 82–86°F, and you may see a sprout in a few weeks. Just go in knowing it’s the scenic route, not the express lane.

    A quick word on varieties, since choosing well makes a real difference. In the US, dependable home-garden lychees include ‘Brewster’ and ‘Mauritius’ (vigorous, productive classics popular in Florida), ‘Sweetheart’ (large fruit with a small, shriveled “chicken-tongue” seed and lots of flesh), and ‘Emperor’ or ‘Hak Ip’ (prized for flavor). If you can, buy from a local specialty nursery and ask which cultivar performs best in your microclimate — a variety matched to your conditions will fruit more reliably than a random seedling ever could.

    How to Plant a Lychee Tree: Step-by-Step

    Once you have a healthy sapling, spring after all danger of frost has passed is the ideal time to plant. Follow these steps.

    • Step 1: Choose a Sunny, Sheltered, Well-Drained Spot

    Pick a location in full sun that receives at least six to eight hours of direct light daily, sheltered from strong winds that can batter young trees. Give it room: plant at least 20 to 25 feet from buildings, power lines, and other trees, since a mature lychee needs space and dislikes being crowded. Avoid low spots prone to flooding.

    • Step 2: Prepare Acidic, Well-Draining Soil

    Lychees love rich, well-draining, slightly acidic soil with plenty of organic matter and they absolutely hate “wet feet.” Standing water and soggy roots are a fast track to root rot. If your soil is heavy or your area gets heavy summer rain, plant on a raised mound to improve drainage. Because lychees prefer acidic conditions, it’s worth learning how to lower soil pH for acid-loving plants if your soil runs alkaline.

    • Step 3: Plant Your Tree

    Dig a hole as deep as the root ball and twice as wide. Gently remove the tree from its nursery pot, tease out any circling roots, and set it so the top of the root ball sits level with (or slightly above) the surrounding soil. A sprinkle of mycorrhizal fungi on the roots at planting helps lychees take up phosphorus and establish more strongly. Backfill, firming gently.

    • Step 4: Water In and Mulch

    Water the newly planted tree deeply to settle the soil around the roots. Then spread a layer of organic mulch around the base, keeping it a few inches away from the trunk to conserve moisture, moderate soil temperature, and suppress weeds. A good organic mulch makes a real difference to a young lychee’s survival.

    • Step 5: Water Regularly While It Establishes

    For the first few weeks, water your new tree two to three times a week to help it develop a strong root system, then ease off as it establishes. Consistent moisture during this early phase is one of the biggest predictors of long-term success.

    Lychee Tree Care: Water, Feeding & Pruning

    Ongoing lychee tree care revolves around three things: careful watering, seasonal feeding, and light pruning.

    Watering. Lychees like deep, thorough watering rather than frequent shallow sips. Water deeply, then let the top inch or two of soil dry slightly before watering again, keeping the soil moist but never soggy. Established trees tolerate the occasional dry spell, but pay close attention during fruiting season: inconsistent moisture is a common cause of fruit splitting and drop, so water steadily as the fruit swells.

    Feeding. Feed young trees several times through the growing season (roughly quarterly, from late winter into summer) with a balanced organic fruit-tree fertilizer. As trees mature, one or two feedings each spring and summer are usually enough. A fertilizer higher in potassium and phosphorus supports flowering and fruiting and it helps to ease back on high-nitrogen feeds before harvest, so the tree pours its energy into ripening fruit rather than leafy growth. If those nutrient numbers are a mystery, our guide to understanding NPK ratios makes them clear.

    Pruning. Lychees need only light pruning. The best time is right after harvest, giving the tree the rest of the season to push new growth before winter. Remove dead, crossing, or inward-growing branches to improve airflow, and cut back the top over time to keep the tree at a manageable height. Keep the lower limbs they’re the easiest to harvest from and shade out weeds beneath the canopy. As a rule of thumb, avoid removing branches thicker than about an inch, which can reduce your fruit yield.

    How Long Until a Lychee Tree Fruits?

    Ah, the patience question. Lychee fruiting timelines depend heavily on how you started your tree:

    • From a grafted or air-layered sapling: first fruit typically in three to five years, with bigger crops building over time.
    • From seed: seven to ten years, and sometimes never, since seedlings are unpredictable.
    • Peak production: many trees hit their stride around ten years old and then produce for decades.

    Here’s a realistic season-by-season picture once a tree is old enough to fruit:

    • Late winter: a cool, dry spell triggers flower-bud formation.
    • Spring: clusters of small flowers open and are pollinated by bees and flies.
    • Early-to-mid summer: fruit clusters swell and gradually blush from green to pink-red.
    • Mid-to-late summer: a short, glorious harvest window arrives.

    One gentle heads-up: lychee fruiting can be delightfully erratic. Some years bring a bumper crop, others just a few clusters, depending on winter chill, weather, and the tree’s cycle. That’s normal  and it makes a big harvest year all the sweeter.

    In our experience, the growers who get the most reliable crops treat that winter chill period as the key to the whole year. They resist the urge to pamper the tree with water and high-nitrogen feed through late fall and winter, letting it experience the cooler, drier rest it evolved for, and then ramp care back up as spring flowers appear. Working with the lychee’s natural rhythm, rather than keeping it lush and comfortable year-round, is often the difference between a tree that’s merely handsome and one that actually fruits.


    Growing Lychee in Containers

    If you live outside the lychee’s comfort zone, a large container is your best friend. Container growing lets you give the tree a warm, sunny summer outdoors and then move it to a frost-free spot in a greenhouse, sunroom, or bright garage for the winter.

    Choose a big, sturdy pot at least 16 to 20 inches wide and deep (a half wine barrel with drainage holes is a classic choice), and fill it with a rich, well-draining mix formulated for acid-loving plants. Plant, water in, and mulch just as you would in the ground. One crucial caveat: lychees need to be outdoors in spring and summer to be pollinated, so a tree kept permanently indoors will grow but usually won’t fruit. Think of the container as a movable home, not a houseplant. Our container gardening guide for beginners covers pot selection and repotting, and our overwintering guide walks through cold-season care.

    Harvesting Lychee

    Harvest time is the payoff and getting it right matters, because of one important quirk: lychees do not continue to ripen after they’re picked. Whatever sweetness and color the fruit has when you harvest it is what you get, so patience at the end pays off.

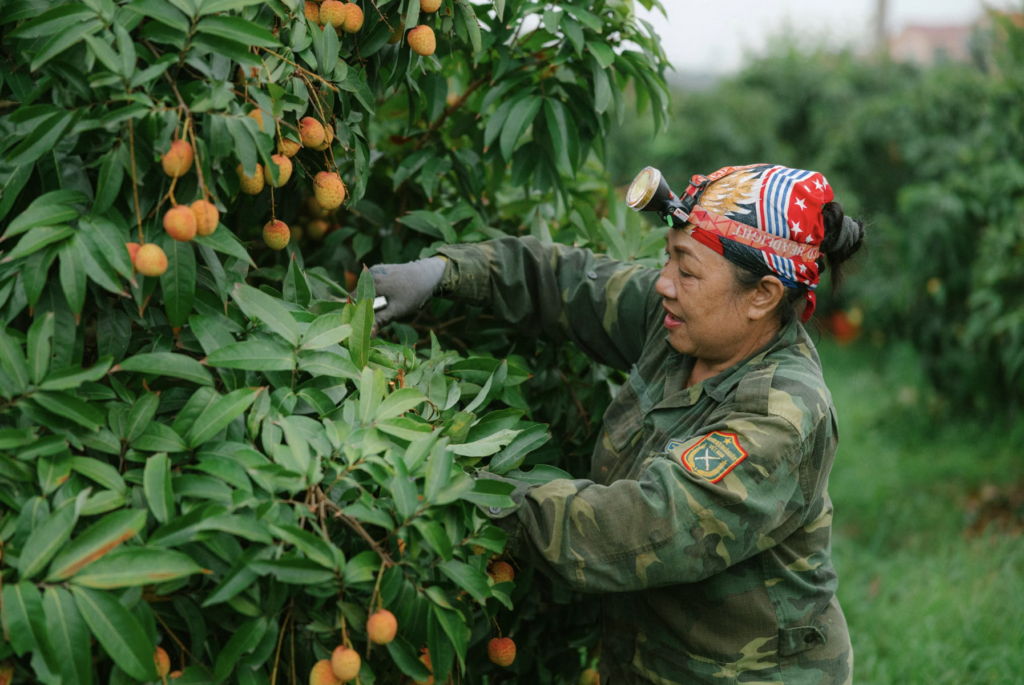
    Wait until the fruit is fully colored a rich red or pink, depending on the variety and gives slightly when gently squeezed. Rather than pulling individual fruits (which can damage both fruit and tree), snip off the entire cluster with a short piece of stem attached. Handle the fruit gently; the skin is tougher than it looks but can still bruise.

    Fresh lychees are a fleeting treasure with a short shelf life. Enjoy them within about a week refrigerated, or peel and freeze the fruit to savor your harvest for months. Beyond eating them out of hand, lychees shine in fruit salads, sorbets, cocktails, and Asian-inspired dishes, and they’re a good source of vitamin C and antioxidants so every fruit is a small, sweet nutritional bonus. Few homegrown treats feel as luxurious, and because a mature tree can produce heavily, a good year often means enough to share with the whole neighborhood.

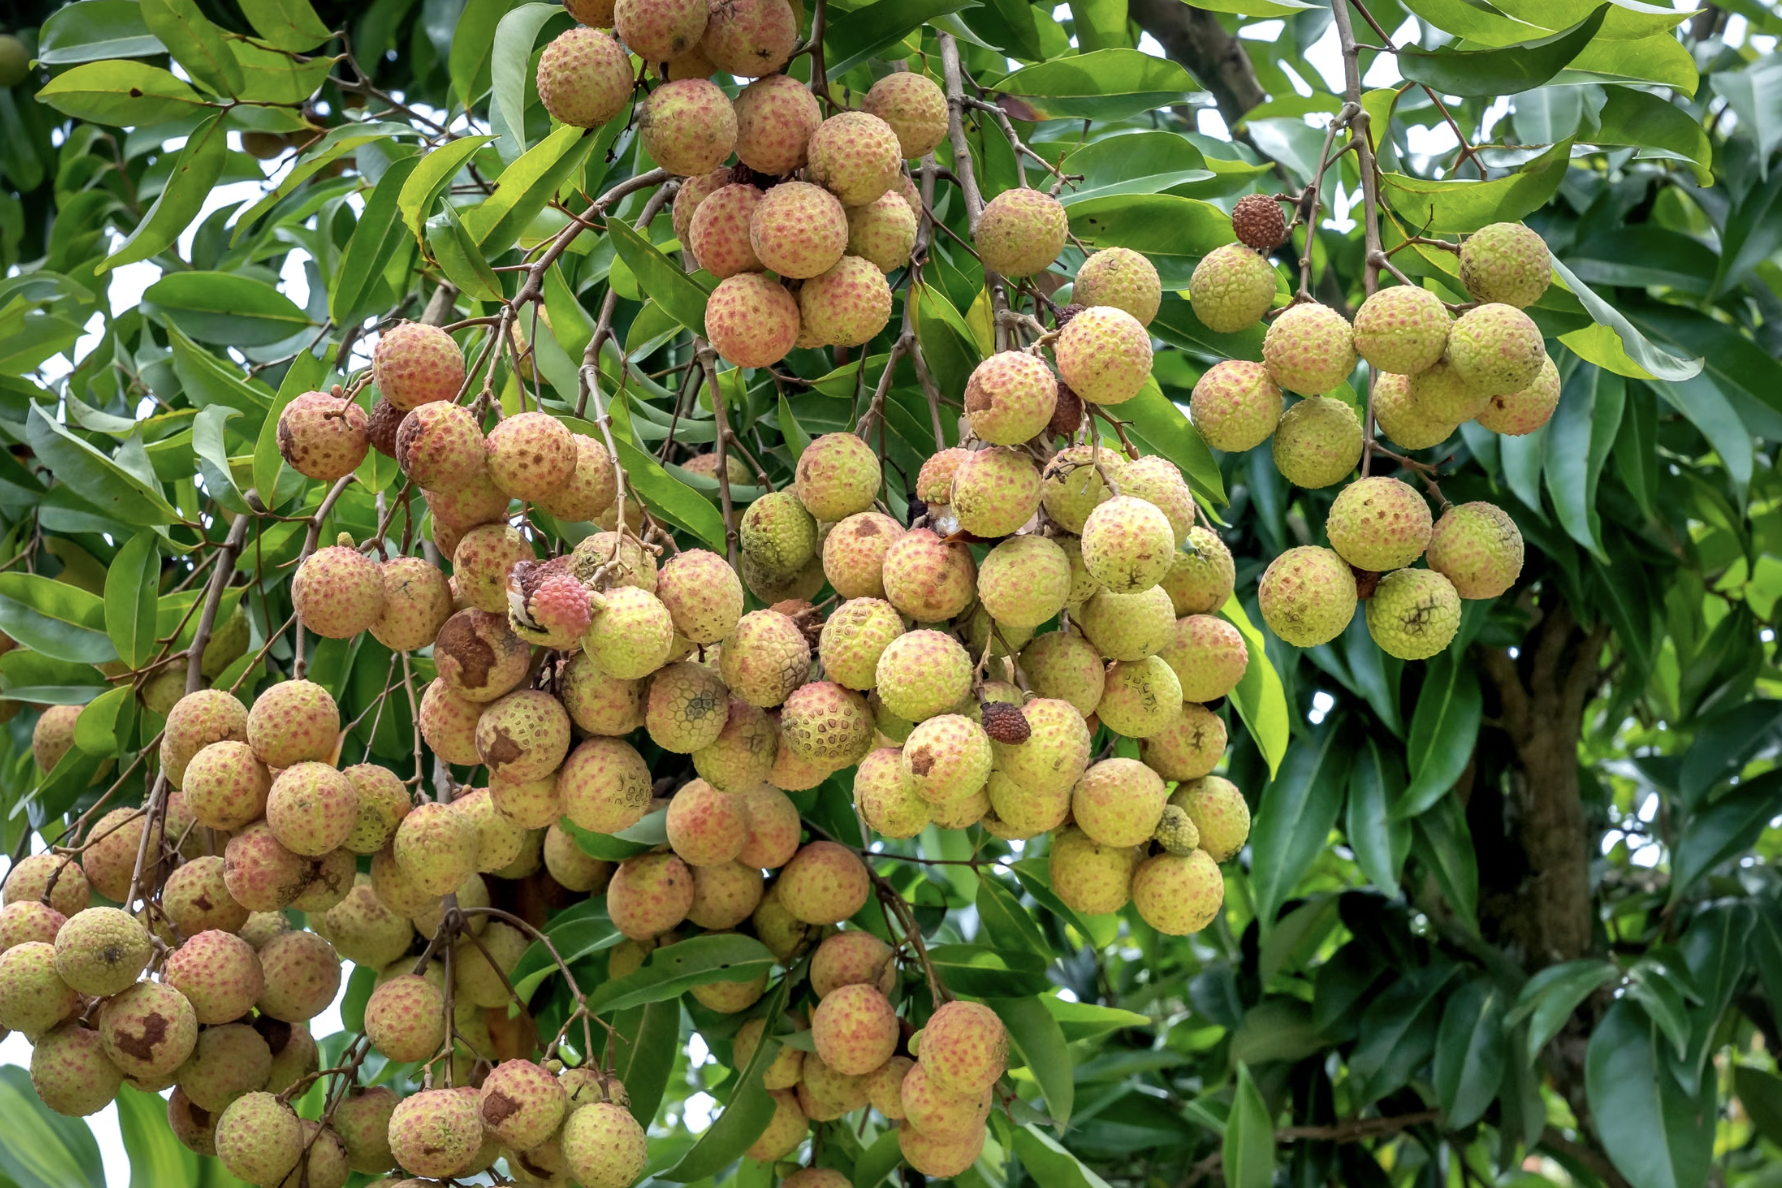
    Lychees grow best in USDA Hardiness Zones 10
    Lychees grow best in USDA Hardiness Zones 10

    Common Problems and How to Fix Them

    Most lychee troubles trace back to water, cold, or a couple of persistent pests.

    Problem Likely Cause The Fix
    Yellowing leaves, wilting, stunted growth Overwatering / root rot Improve drainage; water deeply but less often; plant on a mound
    Healthy tree but no fruit No cool, dry winter spell; tree too young Ensure a winter chill period; be patient; feed for fruiting, not leaves
    Silvery or felty patches on leaves Erinose or eriophyid mites Treat promptly with insecticidal soap or neem oil; remove affected leaves
    Sticky leaves, distorted new growth Aphids or scale Rinse off; apply insecticidal soap or neem oil
    Splitting or dropping fruit Inconsistent watering during fruiting Keep soil evenly moist as fruit swells
    Frost-damaged leaves and stems Cold snap on a tender tree Protect or move containers before freezes; prune damage in spring

    Fruit flies can also be a nuisance at harvest, so pick fallen fruit up promptly and use traps if needed.

    Is Growing a Lychee Tree Worth It?

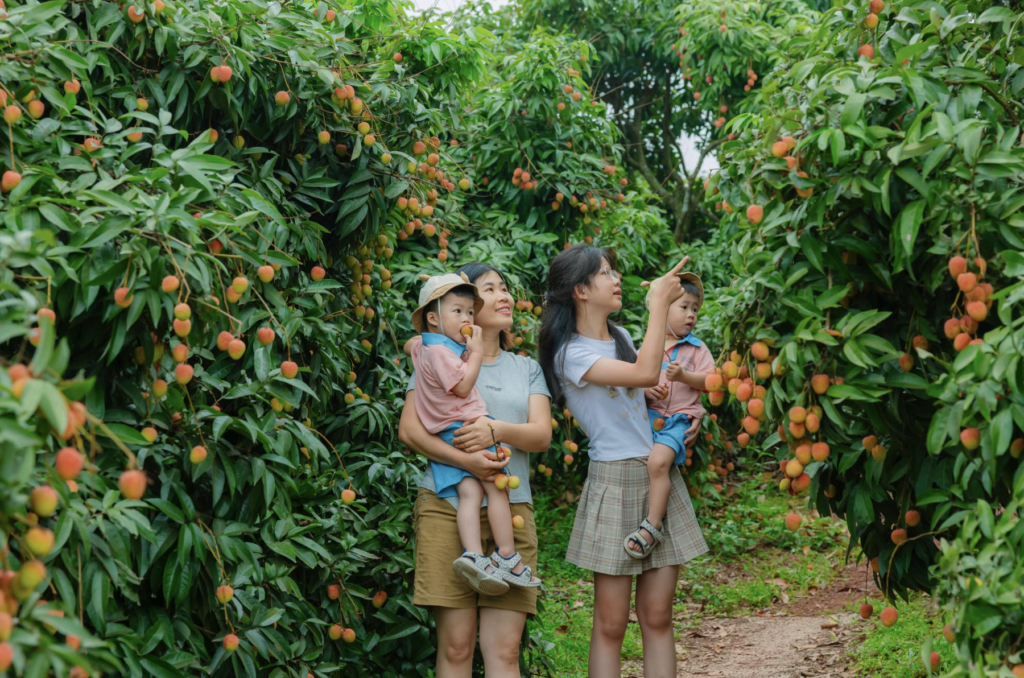
    If you love the fruit and have a little patience, absolutely. A lychee tree is a long-term investment that pays you back generously a striking evergreen that shades your yard, screens a view, and once a year delivers clusters of rose-scented fruit you simply can’t buy this fresh. There’s a quiet magic in peeling a lychee you grew yourself.

    If your tropical fruit ambitions are growing, keep the momentum going. Try growing guava trees in containers, growing papaya from seed, starting a pineapple from a top, or a compact kumquat tree in a pot. For the whole collection of exotic edibles, explore our hub on growing tropical and exotic fruits, part of the broader EcoGardenHub Plant Library.

    Plant a lychee this spring, give it sun, drainage, and time, and one summer not too far off you’ll be handing warm, fragrant fruit to everyone who visits your garden — the very definition of a gift for a joyful life. And remember, the tree earns its keep long before the first harvest: as a lush, evergreen centerpiece, a lychee makes your garden more beautiful every single day you wait.

    Is Growing a Lychee Tree Worth It
    Is Growing a Lychee Tree Worth It

    Frequently Asked Questions

    How long does it take for a lychee tree to fruit? A grafted or air-layered sapling usually fruits in three to five years, while a seed-grown tree can take seven to ten years, if it fruits at all. Peak production often arrives around ten years, after which trees can produce for decades.

    What climate zone do lychees grow in? Lychees grow best in USDA Hardiness Zones 10–11, in warm, humid climates with a brief cool, dry winter. In cooler zones, grow them in containers you can move to a frost-free spot for winter.

    Can I grow a lychee tree from seed? Yes, but it’s slow and unreliable seedlings don’t grow true to the parent and may take up to ten years to fruit. Use fresh seed and keep it warm, but for dependable fruit, choose a grafted nursery tree instead.

    Do lychees ripen after picking? No. Lychees do not ripen off the tree, so wait until the fruit is fully red or pink and gives slightly before harvesting. Pick a whole cluster with a bit of stem attached rather than pulling individual fruits.

    Do you need two lychee trees to get fruit? No, lychees are self-fruitful, so a single tree can produce a crop. That said, planting more than one cultivar nearby can improve pollination and increase yields.

    Why won’t my lychee tree flower or fruit? The most common reasons are a lack of the cool, dry winter spell that triggers flowering, a tree that’s still too young, or too much nitrogen fertilizer driving leafy growth instead of fruit. Ensure a winter chill, be patient, and feed for fruiting.

    How big does a lychee tree get? In ideal conditions a lychee can reach 30 to 40 feet tall and wide, but home growers usually prune them to 10 to 15 feet for easier care and harvesting. In containers they stay considerably smaller.