Day: July 24, 2026

  • How to Grow Spinach Year-Round (Complete Guide)

    How to Grow Spinach Year-Round (Complete Guide)

    Most gardeners treat spinach as a fleeting spring crop: sow in April, harvest a few salads in May, watch it bolt in June, and give up until next year. That’s a shame, because it’s leaving about six months of harvests on the table.

    Here’s what experienced growers know: spinach is one of the toughest plants in the entire vegetable garden. Gardeners in zone 3 where winter hits −40°F  overwinter it under nothing but a blanket of mulch, then harvest the earliest, sweetest greens of their year. Learning how to grow spinach year-round isn’t about fighting the seasons; it’s about understanding two simple things, why it bolts, and what happens when the days get short. Master those and you can pick fresh spinach from fall through spring, right through the snow.

    How Do You Grow Spinach Year-Round?

    Sow spinach in cool soil (below 68°F) in early spring and again 6 to 8 weeks before your first fall frost. Give it rich, near-neutral soil with consistent moisture, full sun in the cool months, and shade in late spring. Harvest outer leaves in 37 to 45 days, leaving the crown intact. For the biggest payoff, overwinter a fall sowing under mulch, a row cover, or a low tunnel and harvest from fall right through to spring.

    Two things unlock year-round spinach: timing your sowings so plants mature in cool weather, and getting fall plants established before daylight drops below 10 hours. That second one is the rule almost nobody talks about and it’s the key to the whole thing.

    Why Spinach Bolts (and How to Stop It)

    Bolting is spinach’s one real drama. The plant abruptly stops making leaves, shoots up a flower stalk, and turns tough. Three things trigger it:

    1. Heat: the primary culprit, and the reason summer spinach rarely works.
    2. Moisture stress: dry soil is a fast track to a flower stalk.
    3. Day length : and here’s the honest bit most guides skip: lengthening spring days trigger bolting, and there is nothing you can do about it. Spinach reads increasing daylight as a signal to reproduce.

    That third factor is precisely why spring spinach has such a short window. You can’t argue with the sun. What you can do is work around it:

    • Sow earlier in spring and later in fall than you would most cool-season crops.
    • Use shade cloth in late spring and early fall to keep temperatures down.
    • Water consistently  never let plants dry out.
    • Choose bolt-resistant varieties like ‘Bloomsdale Long Standing’ or ‘Space’.
    • Lean into fall and winter, where day length is working for you rather than against you.

    A small mercy: unlike lettuce or cilantro, bolting spinach doesn’t usually turn unpleasantly bitter, but it’s still your cue to harvest everything you can, quickly.

    A farmer inspects spinach crops in a sunlit rural field, focusing on a healthy harvest.
    A farmer inspects spinach crops in a sunlit rural field, focusing on a healthy harvest.

    The 10-Hour Rule (The Secret to Winter Spinach)

    This is the single most useful thing in this guide, and most spinach articles never mention it.

    Plant growth essentially stops when daylight falls below about 10 hours a day. Not because of cold, because of light. Depending on your latitude, that threshold arrives somewhere around late October to mid-November, and lasts until roughly February. During that stretch, spinach doesn’t die; it simply pauses, holding whatever it has.

    The practical consequence is enormous: your fall spinach must reach 4 to 5 true leaves before the 10-hour date. Plants that hit that size go into the dark months as sturdy little rosettes, sit tight through winter, and then explode into growth the moment days lengthen in February and March. Plants sown too late stay as tiny, vulnerable seedlings and often don’t make it.

    So winter spinach isn’t really a winter job at all, it’s an August or September job. Sow 6 to 8 weeks before your first fall frost, get the plants established, and winter takes care of itself.

    In our experience, this single insight is what separates gardeners who eat homegrown greens in March from those who don’t. It reframes the whole crop: you’re not “growing spinach in winter,” you’re storing living spinach in the ground through the dark months and letting it wake up early. Once you see it that way, the mid-December disappointment of a bed that seems frozen in time stops feeling like failure. Nothing is wrong. The plants are simply waiting for light and when it comes, they’re weeks ahead of anything you could have sown in spring.

    Overwintering Spinach: 8 Months of Harvests

    Overwintering is the most productive way to grow spinach, full stop. Done right, a single fall sowing can feed you from October through May.

    Why it works so well:

    • Cold makes it sweeter. As temperatures drop, spinach raises the sugar content in its tissues as natural antifreeze, the same trick kale uses. Winter spinach tastes noticeably sweeter than spring spinach.
    • You get a bumper spring crop. Overwintered plants already have established roots, so when the light returns they produce a huge, early harvest, weeks before anything you could sow in spring.
    • It protects your soil over winter and crowds out weeds.
    • The winter itself is easy. No weeding, no pests, very little watering.

    The counterintuitive part: small plants overwinter better than large ones. Your best prospects come from spinach holding just a few leaves when short days stop new growt, not fully-grown plants. Many growers deliberately make two fall sowings: one in late August for an October harvest, and a second two or three weeks later specifically to overwinter small.

    Protection by climate:

    • Zones 3–5: surprisingly, a deep straw mulch alone can work — gardeners in zone 3 Alberta overwinter spinach with no cover at all. A cold frame or low tunnel gives better results and lets you harvest through winter.
    • Zones 6–7: a low tunnel with row cover, or a cold frame.
    • Zones 8+: often no protection needed at all.

    Research has found that spinach grown under a low tunnel with row cover performs just as well as spinach in a greenhouse or high tunnel, so you don’t need expensive infrastructure. Our guides to building a cold frame, a hoop house or low tunnel, and using row covers walk through the options, and winter vegetable gardening covers the wider cold-season garden.

    One warning: choose a setup you can ventilate. Spinach under a sealed tunnel or cold frame can cook on a sunny winter day.

    A wooden sign with 'Spinach' text amidst a lush, green farm landscape, symbolizing organic farming
    A wooden sign with ‘Spinach’ text amidst a lush, green farm landscape, symbolizing organic farming

    Choosing Spinach Varieties

    Spinach comes in smooth-leaf types (easy to wash) and savoy types (crinkled, more flavorful, harder to clean). Both grow equally well.

    Variety Best For Notes
    Bloomsdale Long Standing All-round favorite Heirloom, big crinkly leaves, great flavor, slow to bolt; susceptible to downy mildew
    Space Overwintering Fast, downy-mildew resistant, holds off bolting; a favorite for cold-climate overwintering
    Giant Winter (Viroflay) Fall sowing Classic overwintering variety; watch for downy mildew
    Reflect Outdoor overwintering Performs especially well overwintered outdoors
    Acadia General use A reliable trial favorite
    Escalade / Carmel Winter tunnels Top performers in high-tunnel winter trials

    For year-round growing, the smart move is a mix: a bolt-resistant type for spring, and a proven overwinterer like ‘Space’ or ‘Reflect’ for the fall sowing.

    How to Grow Spinach: Step-by-Step

    • Step 1: Sow in Cool Soil (Never Hot)

    Here’s a hard limit: spinach does not germinate in hot soil. Wait until soil has cooled to below 68°F for fall sowings,  a soil thermometer removes all guesswork. Spinach germinates best at 40–55°F, and seeds take 7 to 14 days to emerge, so be patient. For spring, sow as soon as the soil can be worked. If you’re sowing in late summer while it’s still warm, sow more seed than you need to offset the lower germination rate.

    • Step 2: Direct Sow (Don’t Transplant)

    Spinach has a taproot and genuinely resents root disturbance, Cornell Extension notes that transplanting spinach tends to be difficult. It also grows fast enough that starting indoors gains you little. Sow seeds ½ inch deep directly where they’ll grow.

    • Step 3: Space for Airflow

    Sow about 6 inches apart for full-size plants, or up to nine plants per square foot if you’re growing intensively for baby leaves. Don’t overcrowd: dense spinach stays wet for long periods, which invites the diseases that plague winter crops.

    • Step 4: Get the Soil Right (pH Matters More Than You Think)

    Spinach wants rich, well-drained, moisture-retentive soil enriched with compost or composted manure, at a near-neutral pH of 6.5 to 6.8. It is genuinely sensitive to acidic soil, low pH causes slow growth and yellow, chlorotic leaves. If you’ve never tested, do it: our guides to testing your garden soil and raising soil pH with lime will sort you out. This matters doubly for overwintering spinach, which sits in the same ground for up to seven months.

    • Step 5: Water Consistently and Site for the Season

    Keep soil evenly moist, moisture stress causes bolting. Most watering is needed in fall and spring; in winter, when growth stalls, water sparingly. On siting, remember the seasonal flip: spinach wants full sun in fall and winter when daylight is short, but appreciates partial shade in late spring and summer when heat is the enemy. Our drip irrigation guide makes consistent watering effortless.

    The Late-Winter Booster Feed

    Here’s a professional touch that makes a real difference to overwintered spinach.

    When days lengthen in February and plants restart vigorous growth, soil temperatures are still very low — and cold soil releases nitrogen very slowly. Your plants want to grow but the nutrients aren’t available. The fix: give a booster feeding with a water-soluble plant food as soon as new growth appears in late winter. Well-fed plants stay vigorous and produce noticeably larger leaves through the peak March–April harvest. Our homemade organic fertilizer guide has gentle options.

    But beware one trap: if older spinach leaves turn yellow, don’t automatically reach for more nitrogen. Spinach is unusually sensitive to magnesium deficiency, which causes yellowing that looks almost identical to nitrogen deficiency (or downy mildew). The correct fix is magnesium, dolomitic lime or a magnesium supplement and not more nitrogen. Piling on nitrogen won’t fix it and can cause other problems. See our NPK ratios guide for the basics.

    Harvesting Spinach

    Spinach is a classic cut-and-come-again crop, ready in about 37 to 45 days (longer in the low light of late fall and winter).

    The method: clip the outer, mature leaves and leave the young center growing, exactly as you would with leaf lettuce. The plant keeps producing from the crown. Alternatively, you can clear-cut just above the growing point for a bigger single harvest and let it regrow.

    Harvest in the morning, when leaves are crisp and full of moisture.

    The one winter rule that matters: never handle spinach leaves while they’re frozen. Spinach tolerates frost remarkably well, but frozen leaves are brittle and handling them ruptures the tissue, which then kills and browns. Wait until temperatures rise into the 40s, lift your row cover, take your harvest, and re-cover in time for the space beneath to warm before nightfall.

    Two harmless things you might notice:

    • A gritty, sparkly feel on the leaves is simply mineral salts the plant has deposited as an indicator of mineral-rich soil, not a problem.
    • Tiny droplet-like bumps on winter and spring leaves that look like insect eggs are glandular trichomes, a naturally occurring structure. They’re completely harmless.

    For storage, spinach is best eaten within a few days, kept dry and loose in the fridge, though with an overwintered bed outside, the plant itself is the best storage container you’ll ever have. Any surplus blanches and freezes well for winter cooking. It’s worth the effort nutritionally too: spinach is exceptionally rich in iron, folate, and vitamins A, C, and K, and homegrown leaves picked minutes before eating retain far more of that than anything trucked to a store.
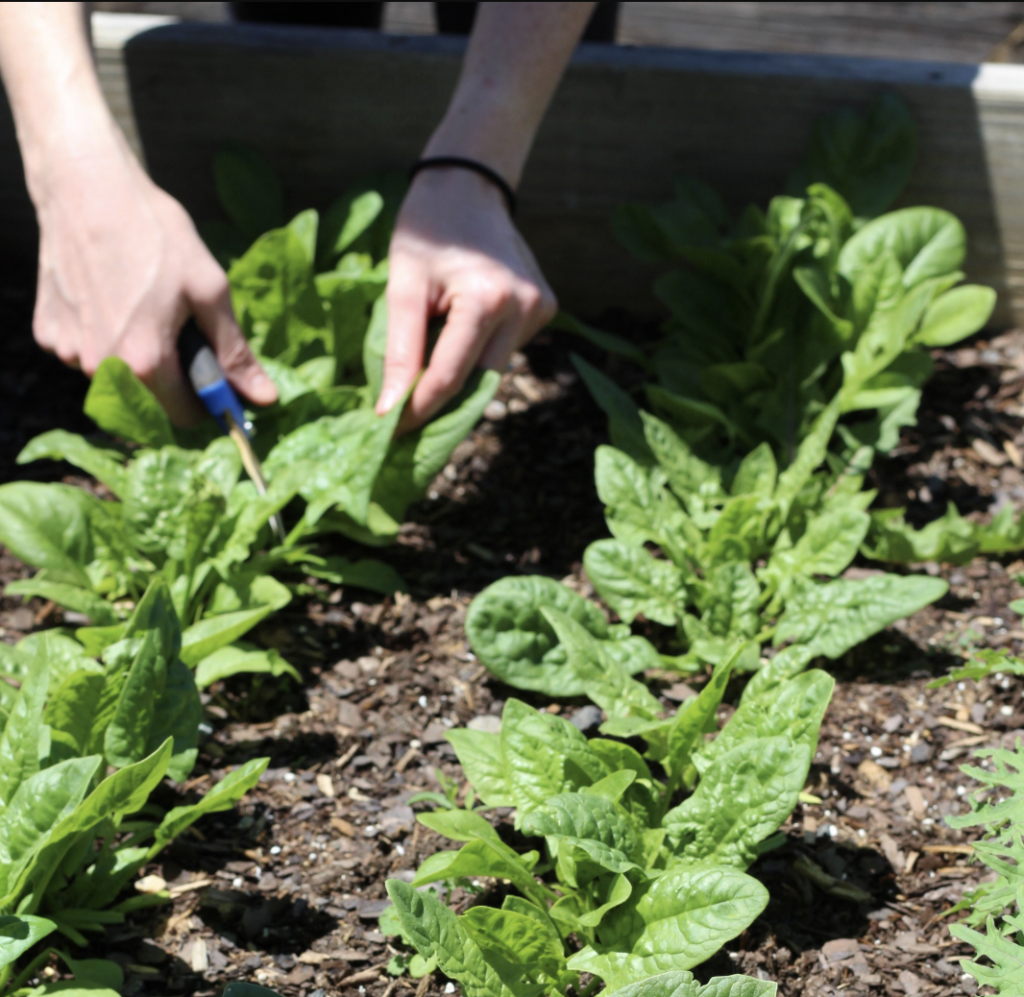
    Close-up of hands harvesting fresh spinach from a garden bed with vibrant green leaves.
    Close-up of hands harvesting fresh spinach from a garden bed with vibrant green leaves.

    Growing Spinach in Containers

    Spinach adapts beautifully to pots, which makes it ideal for balconies, patios, and windowsills. Its roots are shallow enough that a container 6 to 8 inches deep is plenty, even a shallow trough with a couple of inches of soil works if you’re growing a dense mat of baby leaves for sandwiches.

    Fill with quality potting mix, sow seeds close together, and keep the moisture consistent, that’s the one thing pots make harder, and dry spinach bolts. The great advantage is mobility: shift the container into shade as spring warms to buy yourself extra weeks of harvest, or tuck it against a sheltered wall in winter. Our container gardening guide for beginners covers the essentials, and spinach makes a fine companion for a windowsill herb garden.

    What About Summer?

    Let’s be honest: spinach and midsummer heat are not friends. No variety truly thrives above about 75°F, and pushing it usually means bolting.

    You have two good options. Work around it with shade cloth, consistent watering, and the most bolt-resistant varieties, accepting a modest harvest. Or substitute: many experienced growers simply switch to a heat-loving stand-in for the hottest weeks. Swiss chard is the classic choice, being a close relative that laughs at summer, while Malabar and New Zealand “spinach” fill the same culinary role. Then they return to real spinach the moment temperatures ease in late summer.

    There’s no shame in the second approach. Spinach is a cool-season crop by nature, and a year-round supply comes from working with that, not fighting it.

    Common Problems and How to Fix Them

    Problem Likely Cause The Fix
    Seeds didn’t germinate Soil too hot (above 68°F) Wait for cool soil; sow extra in late summer
    Plant bolted early Heat, dry soil, or lengthening spring days Sow earlier/later; shade cloth; consistent water; bolt-resistant varieties
    Yellow older leaves Magnesium deficiency (not nitrogen!) Apply dolomitic lime or magnesium — don’t add more N
    Slow growth, pale leaves Soil pH too low Test soil; lime to pH 6.5–6.8
    Nothing growing in December Daylight under 10 hours — normal Be patient; growth resumes in February
    Brown, dead patches after frost Leaves handled while frozen Only harvest once temps rise into the 40s
    Scab-like calluses on leaves (oedema) Too much water as growth slows Limit winter irrigation; ventilate to lower humidity
    Yellow mottling, fuzzy undersides Downy mildew Improve airflow; thin plants; grow resistant varieties like ‘Space’
    Plants cooked under cover Sealed tunnel on a sunny day Always use a ventilable setup

    Is Growing Spinach Year-Round Worth It?

    Absolutely, and it may be the best return on effort in the entire cool-season garden. A single late-summer sowing, plus a simple row cover, can deliver eight months of the sweetest, most nutrient-dense greens you’ll ever eat, at the exact time of year when fresh food from the garden feels like a small miracle. It takes almost no space, needs no work through winter, and hands you a bumper crop in early spring while your neighbors are still waiting to plant.

    Ready to build a year-round garden around it? Spinach pairs perfectly with other cold-hardy crops. Try kale in cool weather  which sweetens by the very same mechanism leaf lettuce for continuous harvest, or carrots in raised beds, which you can also overwinter under mulch. Spinach is also a perfect early crop in a bed you’re saving for bush beans. Explore the full Vegetables collection, part of the broader EcoGardenHub Plant Library.

    Mark a date 6 to 8 weeks before your first frost, scatter some seed, and let winter do the rest. Come March, you’ll be the one already harvesting.

    Frequently Asked Questions

    • Can you really grow spinach year-round? Yes, with succession sowing and a little protection. Spinach thrives in spring and fall, can be overwintered under mulch or a row cover for harvests from fall through spring, and can be coaxed through summer with shade cloth and bolt-resistant varieties.
    • Why does my spinach bolt so quickly? Heat, dry soil, and lengthening spring days all trigger bolting. Day length in particular can’t be controlled, which is why spring spinach has a short window. Sow earlier in spring and later in fall, water consistently, and use shade cloth.
    • When should I plant spinach for winter? Sow 6 to 8 weeks before your average first fall frost. The goal is for plants to have 4 to 5 true leaves before daylight drops below 10 hours a day, at which point growth pauses until February.
    • How cold can spinach tolerate? Very cold. Established seedlings tolerate around 15°F unprotected, and gardeners in zone 3 successfully overwinter spinach under mulch alone. With a low tunnel or cold frame, it survives intense cold and keeps producing.
    • Why won’t my spinach seeds germinate? Most likely the soil is too warm. Spinach won’t germinate in hot soil, wait until it cools below 68°F, ideally 40–55°F. Seeds take 7 to 14 days to emerge, so be patient, and sow extra during late-summer warmth.
    • Why are my spinach leaves turning yellow? Older yellowing leaves often indicate a magnesium deficiency, which looks just like nitrogen deficiency. Don’t add more nitrogen, apply dolomitic lime or magnesium instead. Low soil pH can also cause pale, slow growth.
    • Should I start spinach indoors? No. Spinach has a taproot and dislikes root disturbance, making transplanting difficult. It also germinates and grows quickly enough that direct sowing is both easier and more successful.
  • Growing Rosemary in Pots (Care & Overwintering Guide)

    Growing Rosemary in Pots (Care & Overwintering Guide)

    Here’s a story almost every gardener knows. You grow a gorgeous, fragrant rosemary all summer. It’s magnificent, three feet of piney needles you brush past on the way to the grill. Come October you bring it inside to save it from frost, put it somewhere warm and cozy, water it faithfully like a good plant parent… and by March it’s a brown, brittle skeleton.

    You didn’t neglect it. You killed it with hospitality. Learning how to grow rosemary in pots is mostly about one counterintuitive realization: a warm, well-watered living room is close to the worst place on earth for this plant. Rosemary evolved on dry, sunbaked Mediterranean cliffs where it drinks from sea-sprayed air, not soggy soil. Once you understand that, potted rosemary stops being difficult and becomes what it should be, a fragrant, evergreen, decade-long companion by your kitchen door.

    How Do You Grow Rosemary in a Pot?

    Plant rosemary in a terracotta pot with drainage holes using a fast-draining, slightly alkaline mix (cactus soil works well). Give it 6 to 8 hours of direct sun, and water only when the top of the soil is dry, rosemary hates wet feet. To overwinter indoors, keep it cool (40–60°F), in your sunniest window, away from heaters, and water sparingly. Clip sprigs regularly for cooking to keep it bushy.

    Two rules make the difference: never let it sit wet, and keep it cool and bright in winter. Nearly every dead indoor rosemary traces back to breaking one of those.

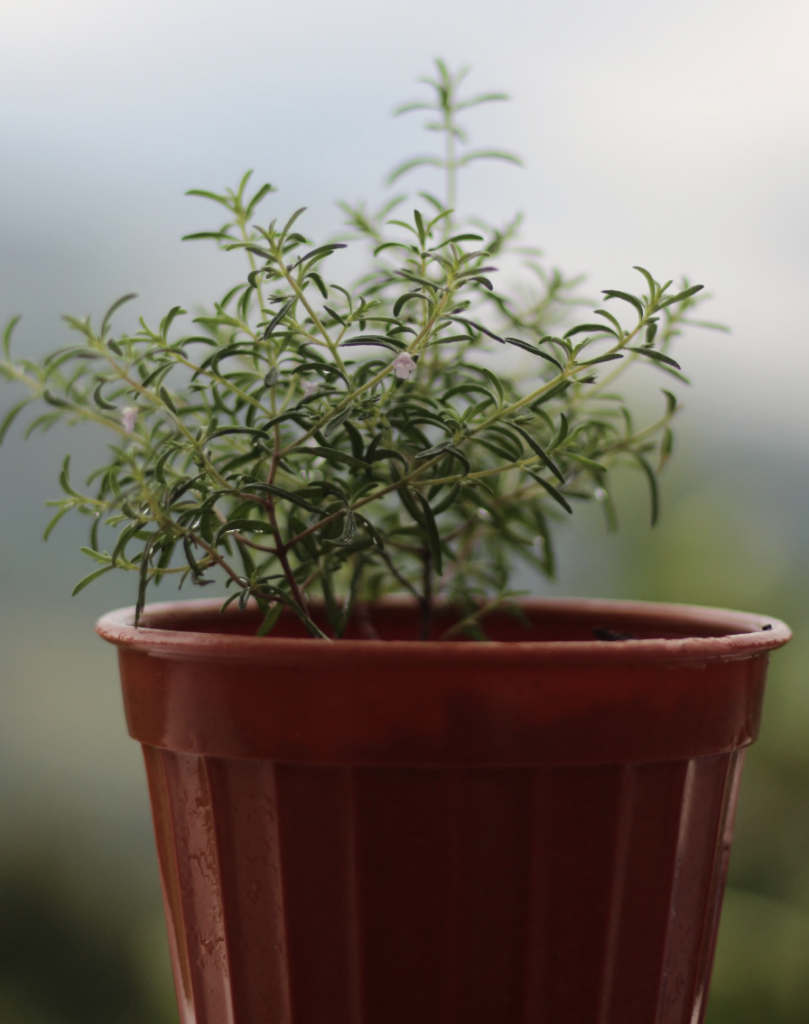
    A vibrant rosemary plant growing in a red pot outdoors, against a blurred nature backdrop
    A vibrant rosemary plant growing in a red pot outdoors, against a blurred nature backdrop

    Why Rosemary Wants What It Wants

    Rosemary (Salvia rosmarinus, reclassified from the old Rosmarinus officinalis) is a woody Mediterranean evergreen shrub, hardy outdoors in roughly USDA zones 7 to 10, where it’s used as a permanent landscape anchor, flowering nearly year-round.

    Its native habitat explains everything about its care. Rosemary grows in dry, sharply drained, rocky soil under hot sun, on coasts where the air itself is damp with sea spray. So the plant is adapted to:

    • Dry roots. It gets much of its moisture from humid air rather than from the soil. Wet feet are lethal.
    • Blazing light. It’s a full-sun plant, full stop.
    • Lean, slightly alkaline ground. Like lavender, rich soil does it no favors.
    • Cool, mild winters — not tropical warmth.

    Now consider a typical heated home in January: bone-dry air, weak light, temperatures in the 70s, and a well-meaning gardener with a watering can. That’s the inverse of a Mediterranean cliff in almost every particular. Understanding that mismatch is the whole game.

    Why Grow Rosemary in a Pot?

    • You can beat your climate. In zone 8 and colder, rosemary often won’t survive winter outdoors. A pot lets you grow this perennial shrub anywhere.
    • You control the drainage. The single biggest rosemary killer becomes a solved problem.
    • It’s portable. Summer outdoors in real sunshine, winter indoors under shelter, the best of both.
    • It’s beautiful and useful. Evergreen, architectural, wonderfully fragrant, and endlessly good in the kitchen.
    • It can live indoors permanently if you prefer, though it puts on a much lusher flush if it summers outside.

    Choosing the Pot and Soil

    The pot: terracotta, every time. A medium clay or terracotta pot is close to ideal because it’s porous, it wicks moisture away from the roots and lets the soil breathe, which is precisely what rosemary wants. It’s also easy to move and insulates the roots against temperature extremes better than thin plastic. Drainage holes are non-negotiable.

    Size it sensibly, and don’t let it get root-bound. This is an under-appreciated rosemary killer. A pot-bound plant produces weak, leggy growth and often collapses over winter. If you’re seeing roots circling the surface or emerging from the drainage holes, size up. Repot in spring, when the plant has the light and energy to recover; repotting a stressed plant in autumn, just as it heads into a dark winter, is asking a lot of it.

    The soil: fast-draining and lean. A cactus or succulent mix works beautifully, or a standard potting mix cut generously with grit, perlite, or coarse sand. Rosemary likes it slightly alkaline, so a little lime or bone meal worked in is genuinely helpful (see raising soil pH with lime). Don’t enrich it, this isn’t a plant that wants compost.

    Never leave the pot standing in a saucer of water. If you use a saucer, empty it after watering.

    Choosing a Variety

    Variety choice matters if you’re pushing your climate.

    Variety Why Grow It
    ‘Arp’ The best-known cold-hardy rosemary — often survives zone 6 with shelter. (A charming irony: it was discovered by Texas herb grower Madalene Hill while she was hunting for heat tolerance)
    ‘Hill Hardy’ (aka ‘Madalene Hill’) Another proven cold-hardy standard
    ‘Nichols Select’ Reputed to be hardy to about zone 6B and to have survived −7°F, with excellent flavor
    Trailing / prostrate types Spill beautifully over a pot rim — and several growers report they’re the best performers indoors over winter
    ‘Tuscan Blue’ Upright, vigorous, strongly flavored — a classic culinary choice

    If you plan to overwinter outdoors in a borderline zone, start with a cold-hardy cultivar and plant several in different microclimates, one sheltered spot may carry a plant through while another doesn’t.

    How to Grow Rosemary in a Pot: Step-by-Step

    • Step 1: Choose a Terracotta Pot With Drainage

    Pick a medium clay pot with generous drainage holes, sized to the plant with a little room to grow, not vastly oversized, which holds excess wet soil around the roots.

    • Step 2: Fill With a Fast-Draining, Slightly Alkaline Mix

    Use cactus mix, or potting soil cut with grit or perlite, plus a little lime or bone meal. The goal is soil that water runs through, not soil that holds it.

    • Step 3: Plant and Place in Full Sun

    Set the plant at the depth it grew in its nursery pot, firm it gently, and put it where it gets at least 6 to 8 hours of direct sun. More is better, rosemary in shade is leggy, sparse, and weakly flavored.

    • Step 4: Water Only When the Top Is Dry

    Water thoroughly, let it drain completely, and then wait. Only water again when the top of the soil is dry to the touch. Overwatering is the number one cause of potted rosemary death, and it kills through root rot.

    • Step 5: Clip Sprigs Regularly

    Light pruning keeps rosemary bushy and healthy and happily, clipping sprigs for cooking is your pruning. Snip regularly through the growing season. Save any hard pruning for spring, when growth resumes.

    Rosemary Care Through the Seasons

    • Summer outdoors. Move pots outside a few weeks after your last frost. The plant will reward you with a genuinely lush flush of growth in real sunshine and rainfall. Check your frost dates for timing.
    • Feeding. Barely necessary. An occasional dose of dilute fish emulsion and kelp during the growing season is plenty. Like most Mediterranean herbs, over-feeding gives you soft, floppy growth with diluted flavor. See homemade organic fertilizer for gentle options.
    • Humidity. Rosemary likes around 50% humidity, a genuinely important detail indoors, where heated air is far drier. An occasional light misting of the needles, or a spot away from heat sources, helps considerably.
    • Rotate the pot every few days so every side gets its share of light and the plant grows evenly rather than leaning.

    Bring it in before frost. As the first frost date approaches, move the pot back indoors. Container-grown rosemary of any variety benefits from protection whenever temperatures head for the low 20s°F.

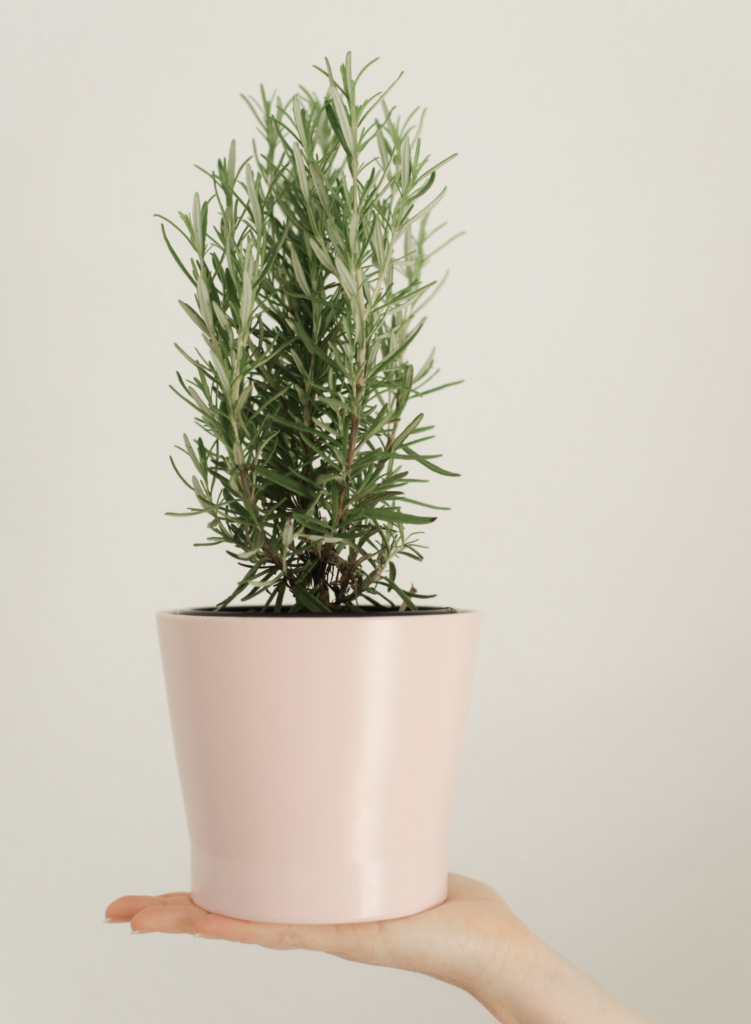
    Close-up of rosemary plant in a pink pot held by a hand, minimalistic backdrop.
    Close-up of rosemary plant in a pink pot held by a hand, minimalistic backdrop.

    Overwintering Rosemary Indoors (The Hard Part)

    This is where most rosemary is lost, so let’s be precise. Three things matter: light, temperature, and water.

    1. Light — as much as you can give. Rosemary wants 6 to 8 hours of bright, direct light daily. Use your sunniest south-facing window (a west-facing one can work), positioning the plant about 6 to 12 inches from the glass. If your windows face north, don’t fight it — use a grow light for 10 to 15 hours a day. Our DIY grow light setup guide covers simple, affordable options. Leggy winter growth is a light problem, every time.
    2. Temperature — cool, not cozy. Here’s the counterintuitive heart of it: rosemary wants to be cold in winter, around 40–60°F. Successful overwintering spots include an unheated upstairs bedroom, a cold windowsill, an enclosed porch, or a barely-heated greenhouse. What it does not want is your warm living room, and it especially doesn’t want to sit near a radiator or heat vent, which will desiccate it. Keep it away from cold drafts too cool and stable is the target.
    3. Water — sparingly, and never wet. Water only when the soil feels dry, then let it drain fully. Never let it sit in water. A weekly light sprinkle over the needles mimics that sea-spray humidity it evolved with and is often more welcome than another drink at the roots.

    The dormancy option. In cold climates, potted rosemary will often go dormant for winter, it needs less light, won’t put on much new growth, and simply rests. Some gardeners lean into this and overwinter rosemary in an unheated garage, letting it sleep until spring. If your plant isn’t growing much in January, that’s not failure; that’s the plan.

    Save yourself some grief: before winter, freeze a few sprigs. If the worst happens, you’ve still got rosemary for the roast and, as one seasoned gardener notes with admirable pragmatism, a rosemary that dries out completely indoors at least leaves you with free dried rosemary.

    In our experience, the emotional trap here is real and worth naming. Every instinct you have as a caring gardener — bring it somewhere warm, water it when it looks thirsty, keep it comfortable is precisely wrong for rosemary in January. The plants that sail through winter belong to people who essentially ignore them in a cold, bright room and water them roughly once a fortnight. The plants that die belong to people who love them attentively in a snug lounge. If it helps, reframe the job: you’re not keeping rosemary alive through winter, you’re letting it rest. Your role is to provide light and get out of the way.

    Overwintering Rosemary Outdoors

    If you’re in zone 7 or warmer, or growing a cold-hardy cultivar in a sheltered zone 6 spot, rosemary may well come through outside. But here’s the crucial nuance, and it mirrors what’s true of lavender:

    It’s rarely the absolute low temperature that kills rosemary. Established plants have survived overnight lows below 0°F. What actually kills them is wet soil followed by hard cold, repeated freeze-thaw cycles with frost heaving, and extended stretches that never rise above freezing day or night.

    So the winter strategy is less about insulation than about drainage and shelter:

    • Plant in a sharply drained spot, ideally against a warm wall or in another sheltered microclimate.
    • Choose a cold-hardy cultivar.
    • Throw garden blankets or row covers over plants you’re worried about, one or two layers. See using row covers and winter garden prep.
    • Be cautious with heavy mulch right against the trunk and root zone, some growers prefer to skip it, since trapped moisture is the enemy.

    Our overwintering plants guide covers the wider cold-season routine, and gardeners in warm zones can see USDA Zone 9 gardening.

    Harvesting and Using Rosemary

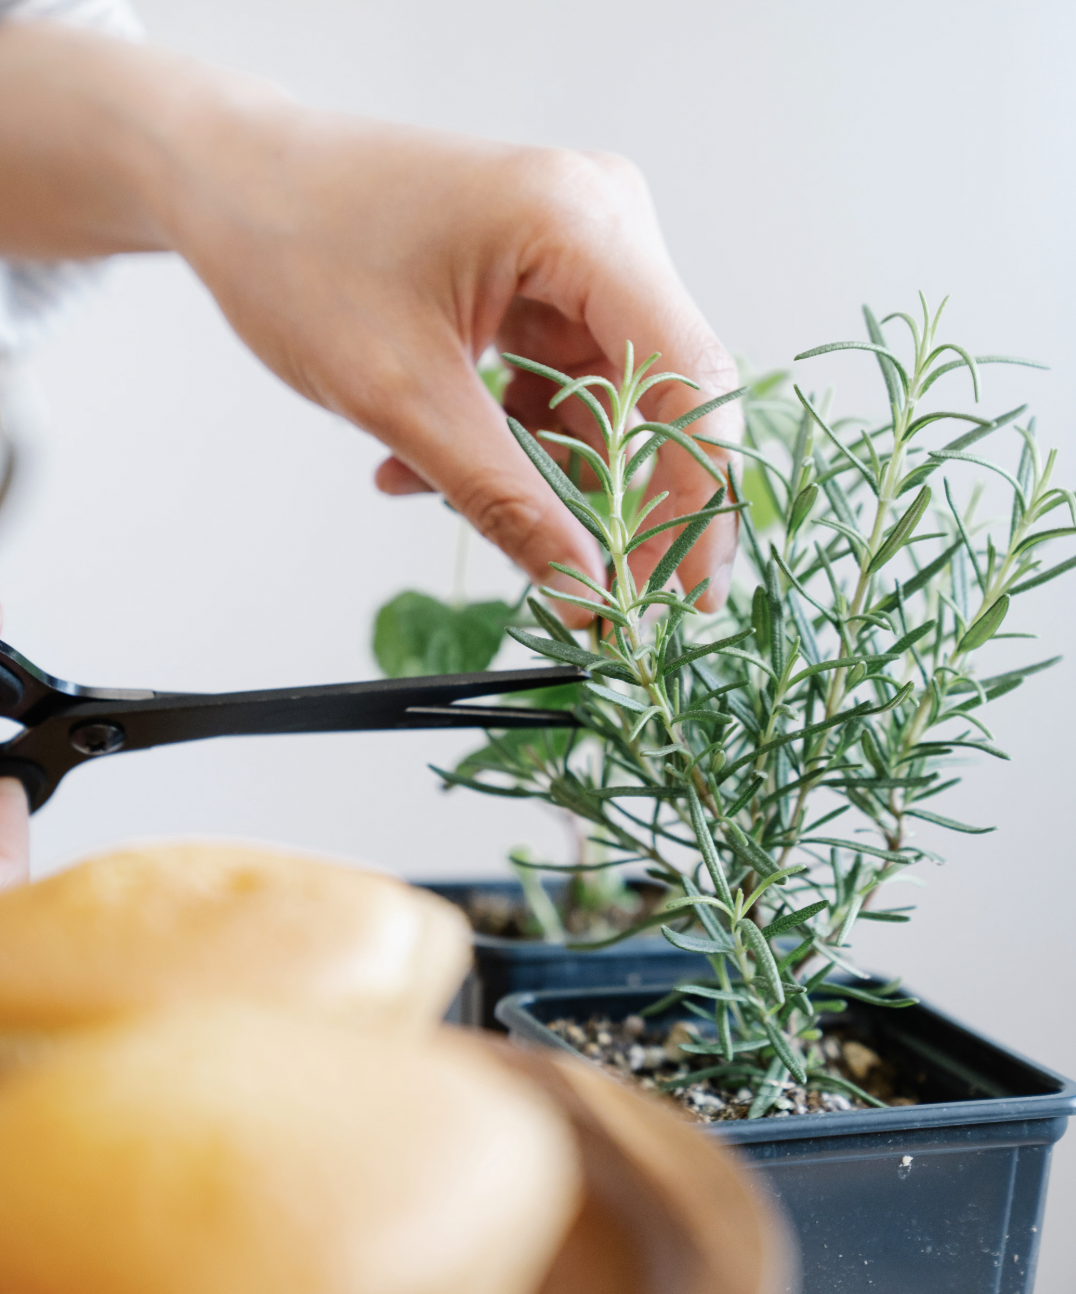
    Snip sprigs as you need them, taking soft green growth rather than old wood. Frequent clipping keeps the plant compact and productive, it’s the rare herb where harvesting is maintenance.

    In the kitchen, rosemary is superb with roast potatoes, chicken, lamb, garlic and olive oil, bread, pizza, tomato sauce, pork, and vegetable soup, but use a light hand, because the flavor is powerful. It dries beautifully and freezes well.

    Beyond cooking, rosemary has a long medicinal and aromatic history. It’s a traditional symbol of remembrance, valued in folk tradition and aromatherapy for mental clarity and focus, and its aromatic oils are a staple of soaps, rinses, and infused oils. (As always: nothing here is medical advice ,check with a healthcare professional before using any herb medicinally.)

    Free Plants: Rosemary From Cuttings

    One of rosemary’s quiet pleasures is how easily it multiplies, useful insurance if you’re nervous about overwintering, since a backup plant costs nothing.

    Take a 4- to 6-inch cutting of soft, green, non-woody growth from a healthy stem in spring or early summer. Strip the lower leaves, dip the cut end in rooting hormone if you have it, and push it into a small pot of gritty, damp mix. Keep it somewhere bright but out of scorching direct sun, and keep the mix barely moist, the same restraint that applies to the parent plant applies here. Roots typically form in a few weeks.

    The strategy worth adopting: take a couple of cuttings every summer. If your big plant sails through winter, you’ve got spares to give away. If it doesn’t, you’ve lost nothing but a pot. Given how often rosemary is lost indoors, that small habit takes all the anxiety out of the season.

    Common Problems and How to Fix Them

    Problem Likely Cause The Fix
    Died indoors over winter Overwatering, too little light, or too warm Cool room (40–60°F), sunniest window, water only when dry
    Brown, brittle needles Soil dried out completely, or heater desiccation Water when the top is dry; move away from heat sources
    Yellowing, soft, mushy base Root rot from wet feet Terracotta pot, fast-draining mix, never stand in water
    Leggy, stretched winter growth Not enough light Move within 6–12 in of a south window, or add a grow light 10–15 hrs/day
    Weak growth, plant declining Root-bound Repot into a larger pot in spring, not autumn
    White powdery coating Powdery mildew Remove affected parts, seal in a bag, dispose; improve airflow
    Sticky leaves or fine webbing Aphids or spider mites Neem oil or horticultural soap; isolate from other houseplants
    Died outdoors despite a mild winter Wet soil + freeze-thaw, not cold itself Improve drainage; plant in a sheltered, sharply drained spot

    A note on pests: rosemary’s strong aroma means few insects bother it, but a potted plant brought indoors can spread pests to your other houseplants, so inspect it before it comes in and isolate it immediately at any sign of infestation.

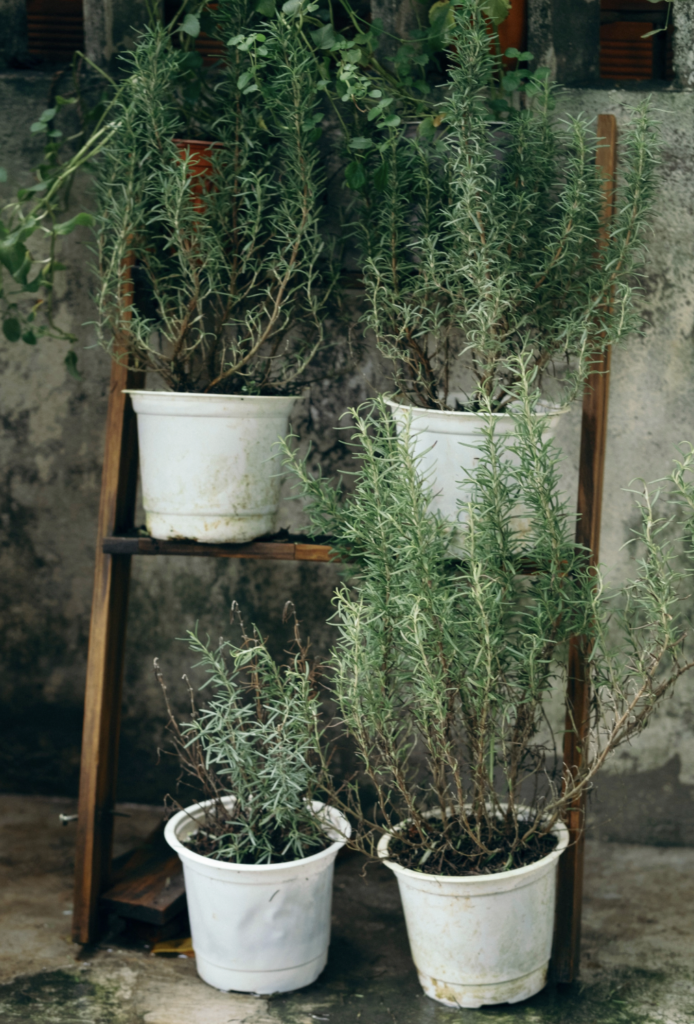
    Vibrant rosemary plants in white pots on wooden stand in a rustic garden setting. Ideal for gardening and nature themes.
    Vibrant rosemary plants in white pots on wooden stand in a rustic garden setting. Ideal for gardening and nature themes.

    Is Growing Rosemary in Pots Worth It?

    Very much so. A potted rosemary is an evergreen, architectural, deeply fragrant shrub that lives for years, asks almost nothing but sunshine and restraint, and puts one of the kitchen’s most useful flavors within arm’s reach of the stove. It survives on neglect, provided the neglect is the right kind. Don’t feed it  fuss it. Don’t cosset it by the radiator. Give it a clay pot, gritty soil, all the sun you own, a cool winter rest, and let the watering can gather dust.

    Do that and you’ll have rosemary for roast potatoes in February, and a plant that greets you at the door for a decade.

    That completes our herb collection and rosemary sits happily among all of it. Pair it with lavender, its fellow Mediterranean that wants exactly the same lean, dry, sunny treatment; with peppermint and chamomile for tea; with basil indoors; or with echinacea for a medicinal border. Explore the full Medicinal Herbs collection, part of the broader EcoGardenHub Plant Library. For pot fundamentals see our container gardening guide for beginners, or start a windowsill herb garden.

    Buy one plant, pot it in terracotta, put it in your brightest window, and then the hardest part, leave the watering can alone.

    Frequently Asked Questions

    Why does my rosemary keep dying indoors? Almost always one of three things: overwatering, not enough light, or too much warmth. Rosemary wants a cool room (40–60°F), 6 to 8 hours of direct sun, and water only when the top of the soil is dry. Keep it well away from heaters, which desiccate it.

    What kind of pot is best for rosemary? A terracotta or clay pot with drainage holes. It’s porous, so it wicks moisture away from the roots, exactly what this dry-loving Mediterranean plant needs and it insulates roots against temperature extremes better than plastic.

    How often should I water potted rosemary? Only when the top of the soil is dry to the touch, then water thoroughly and let it drain completely. Never let the pot sit in a saucer of water. Overwatering and root rot are the leading causes of dead potted rosemary.

    What temperature does rosemary need indoors in winter? Cool, ideally 40–60°F. This surprises people, but a warm living room is one of the worst places for it. An unheated bedroom, cold windowsill, enclosed porch, or barely heated greenhouse all work far better.

    Can rosemary survive winter outdoors? In zones 7 to 10, usually yes, and cold-hardy cultivars like ‘Arp’ or ‘Hill Hardy’ can manage zone 6 with shelter. Crucially, it’s rarely the cold itself that kills, it’s wet soil combined with freeze-thaw cycles, so sharp drainage matters more than insulation.

    Which rosemary variety is best for pots? Cold-hardy types like ‘Arp’, ‘Hill Hardy’, and ‘Nichols Select’ are excellent if you’re overwintering, and trailing or prostrate varieties both look lovely spilling over a rim and have a good reputation for performing indoors through winter.

    Does rosemary need fertilizer? Very little. An occasional dose of dilute fish emulsion or kelp during the growing season is plenty. Rich soil and heavy feeding produce soft, floppy growth with weaker flavor, rosemary genuinely prefers lean conditions.