Day: July 14, 2026

  • How to Grow Papaya From Seed: A Complete Guide for 2026

    How to Grow Papaya From Seed: A Complete Guide for 2026

    The next time you slice open a ripe papaya, pause before you scrape those glossy black seeds into the compost. Tucked inside that spoonful of “waste” is a whole grove of fast-growing tropical trees just waiting for a little warmth and patience. Learning how to grow papaya from seed is one of the most satisfying and surprisingly quick fruit projects a home gardener can take on.

    Here is the encouraging part: papayas are among the fastest-fruiting fruit plants you can grow, sometimes going from seed to harvest in under a year. They are also forgiving in all the ways that matter and fussy in only a couple, and once you understand those few quirks, success gets a whole lot easier. This guide walks you through every step, from saving seeds to picking your first sun-ripened fruit.

    Can You Grow Papaya From Store Bought Seeds?

    Yes, you can grow papaya from the seeds of a store-bought fruit. Scoop out the seeds, rinse off their jelly-like coating, and dry them for a few days. Sow several seeds half an inch deep in warm, well-draining soil, keep them around 80°F, and they will sprout in two to three weeks. With good care, plants can fruit in as little as six to twelve months.

    One honest caveat: many supermarket papayas are hybrids, so their seedlings will not always match the parent fruit exactly. That is part of the adventure. For the most reliable results, start with seeds from a fresh, locally grown papaya, and simply plant plenty, you will have more than enough seeds to spare.
    Grow Papaya From Store Bought Seeds
    Grow Papaya From Store Bought Seeds

    Meet the Papaya Plant: Fast, Tall, and Surprisingly Easy

    Before we dig in, it helps to know what you are actually growing. The papaya (Carica papaya) is a fast-growing, short-lived tropical originally from the lowland rainforests of Central and South America. Botanically it is not really a tree at all; it is a giant herbaceous plant with a single, soft trunk topped by a crown of huge, umbrella-like leaves, giving it a distinctly palm-tree look.

    That speed is the papaya’s superpower. In warm conditions it can shoot up several feet in a season, flower within a few months, and hand you ripe fruit before its first birthday. The trade-off is that papayas are frost-tender and relatively short-lived, often declining after a few productive years. The happy solution for most gardeners: grow them in containers you can move, and keep a few new seedlings coming along behind your mature plants.

    If you love the idea of turning kitchen scraps into edible plants, papaya pairs perfectly with our guide on how to grow a pineapple from a top another tropical treat you can start straight from the grocery store.

    What You’ll Need to Grow Papaya From Seed

    Gather a few simple supplies before you start:

    • A fresh, ripe papaya (ideally locally grown) for seeds
    • A fine sieve or colander and a paper towel for cleaning and drying seeds
    • Seed-starting mix or a light, well-draining potting mix
    • Small pots or a large final container (15–20 gallons for dwarf varieties)
    • A warm, bright spot a sunny windowsill, heat mat, or DIY grow light setup works well
    • A balanced fertilizer for feeding hungry, fast-growing seedlings

    That is genuinely all you need to get from spoonful of seeds to thriving tropical plant.

    How to Grow Papaya From Seed: Step-by-Step

    Follow these five steps and you will have healthy papaya seedlings on their way to becoming fruit-bearing plants. The active work takes maybe twenty minutes, spread across a couple of sessions.

    Step 1: Choose the Right Papaya and Save the Seeds

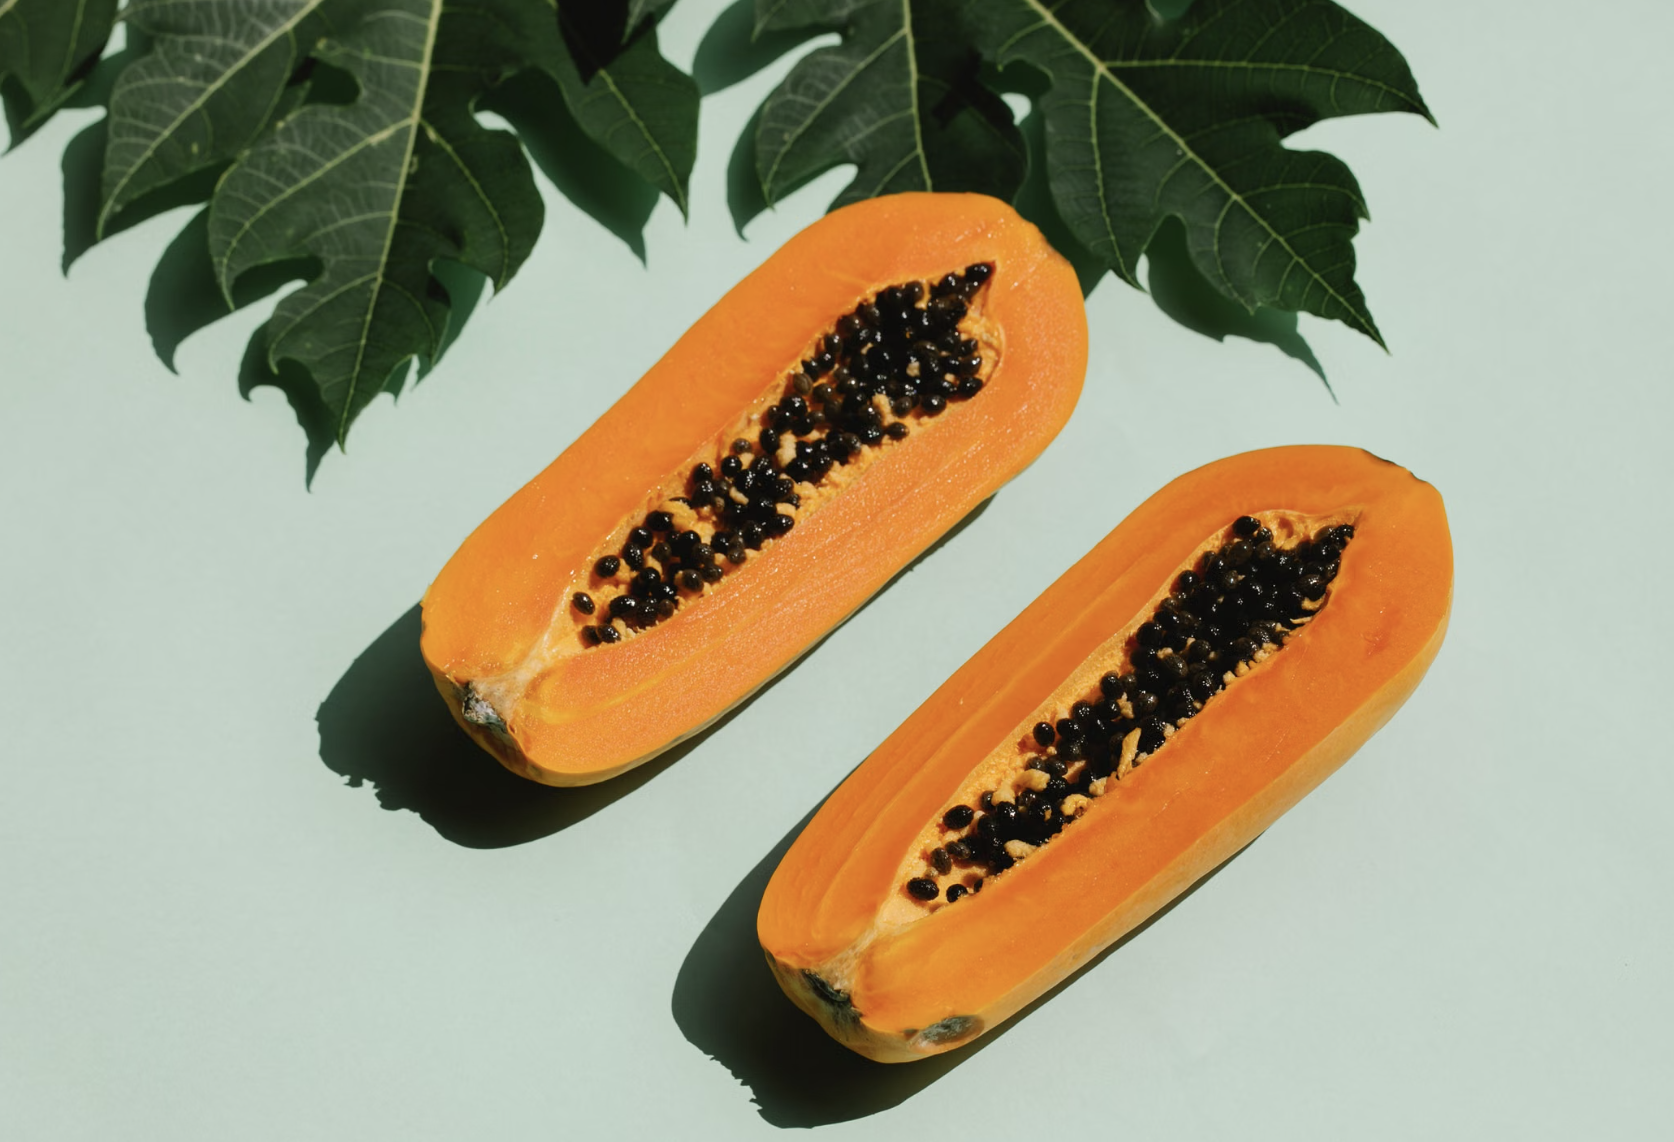
    Pick a papaya that is fully ripe, with deep yellow to reddish-orange skin that yields slightly to a gentle press. Riper fruit means more mature, viable seeds. Slice it open lengthwise and you will find the central cavity packed with round, dark seeds, each wrapped in a clear, gel-like sac.

    Scoop out a generous spoonful. Because you cannot tell a seed’s future sex by looking, always save far more than you think you need a couple of dozen is a comfortable starting point.

    Step 2: Clean and Dry the Seeds (Don’t Skip This)

    This is the step beginners most often rush, and it makes all the difference. Each papaya seed is coated in a slippery, jelly-like membrane called the sarcotesta, which contains germination inhibitors. Leave it on and your seeds may simply refuse to sprout.

    Rinse the seeds in a sieve under running water, gently rubbing them between your fingers to slip off that gel coating. You can even pinch each seed lightly to pop the outer casing and expose the bumpy inner seed. Once they are clean, spread them on a paper towel and let them dry in a cool, shady spot for a few days. Dry seeds can be sown right away or stored in a sealed, airtight container for later.

    Step 3: Sow Warm and Shallow

    Papayas germinate best in warmth. Fill your pots with a light, well-draining seed-starting mix, moisten it, and poke holes about half an inch deep. Drop three to five seeds per pot or planting spot planting several improves your odds of landing a fruitful female or bisexual plant. Cover lightly, mist the surface, and place the pots somewhere warm and bright.

    Aim for soil temperatures around 70–85°F (21–29°C); a sunny window or a seedling heat mat is ideal. Keep the mix lightly moist but never soggy, and be patient germination usually takes two to three weeks, though some batches take longer.

    Step 4: Germinate and Thin to the Strongest Seedlings

    When your seedlings emerge, you will quickly notice they are not all equal — some race ahead while others lag. That is exactly why you planted extra. Once seedlings are two to three inches tall, choose the single strongest, healthiest plant in each pot and snip the others off at the soil line with scissors.

    Snip rather than pull. Papaya roots are delicate and intertwined, and yanking seedlings out can disturb the keeper you want to protect.

    Step 5: Plant in Their Final Home (Roots Hate Moving)

    Here is the papaya’s biggest quirk: it strongly dislikes having its roots disturbed. The less you move it, the better it grows. So plan to transplant seedlings into their permanent home a large container or a sunny garden spot while they are still small, ideally at six to twelve inches tall.

    Handle the root ball as gently as possible, settle the plant at the same depth it was growing, water it in well, and keep the soil evenly moist while it settles. From here on, your papaya wants to stay put.

    The Male, Female, and Bisexual Puzzle (Papaya Sex Explained)

    If there is one thing that trips up first-time papaya growers, it is plant sex so let’s make it simple. Papayas come in three types, and you cannot tell which you have until the plant flowers, usually a few months in when it is roughly knee- to waist-high.

    • Male plants produce small flowers on long, branching stalks and generally do not bear fruit. You only need them to pollinate females one male can service ten to fifteen female plants.
    • Female plants produce larger single flowers close to the trunk and set fruit, but only if a male or bisexual plant pollinates them.
    • Bisexual (hermaphrodite) plants have “perfect” flowers with both male and female parts, so they self-pollinate and fruit on their own. These are the jackpot for home growers.

    The practical strategy: grow five or six seedlings, wait for flowering, then keep the females and bisexuals and remove most males (leaving one nearby if you need a pollinator). Better yet, if you want to skip the guessing game entirely, start with seeds from a known self-pollinating hermaphrodite variety like Red Lady or a Solo type.
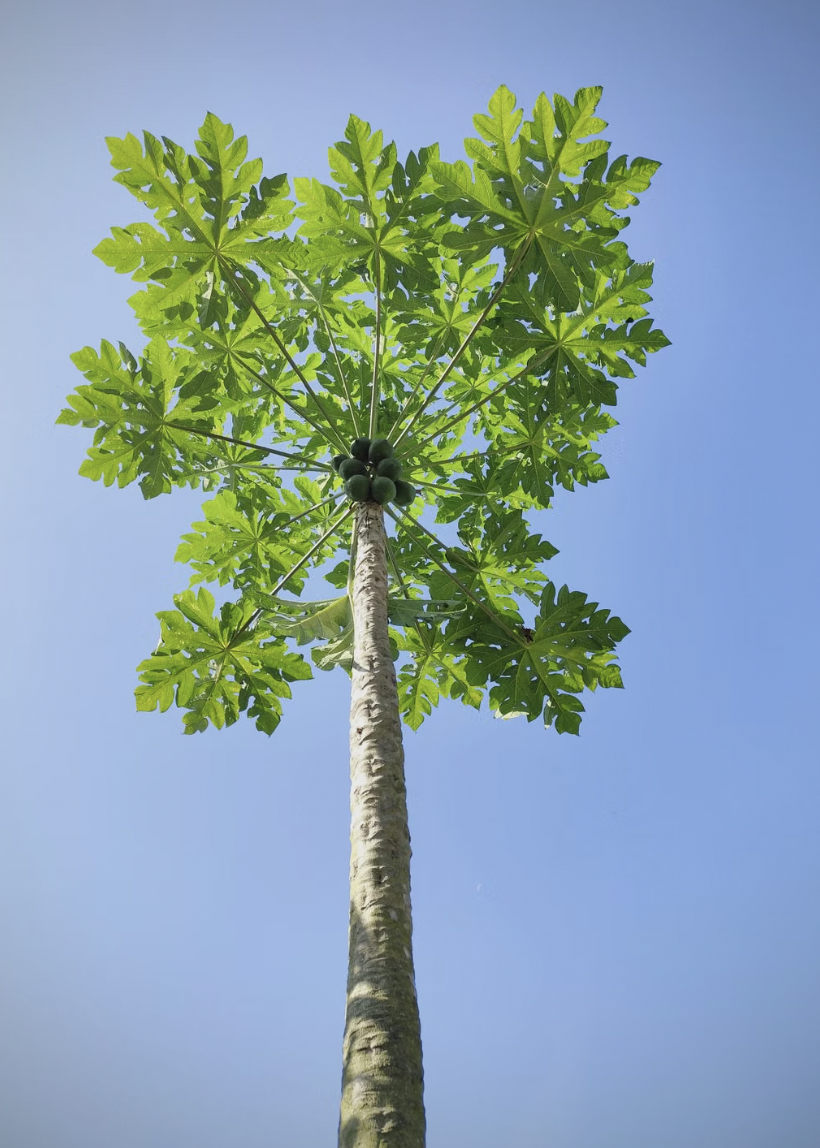
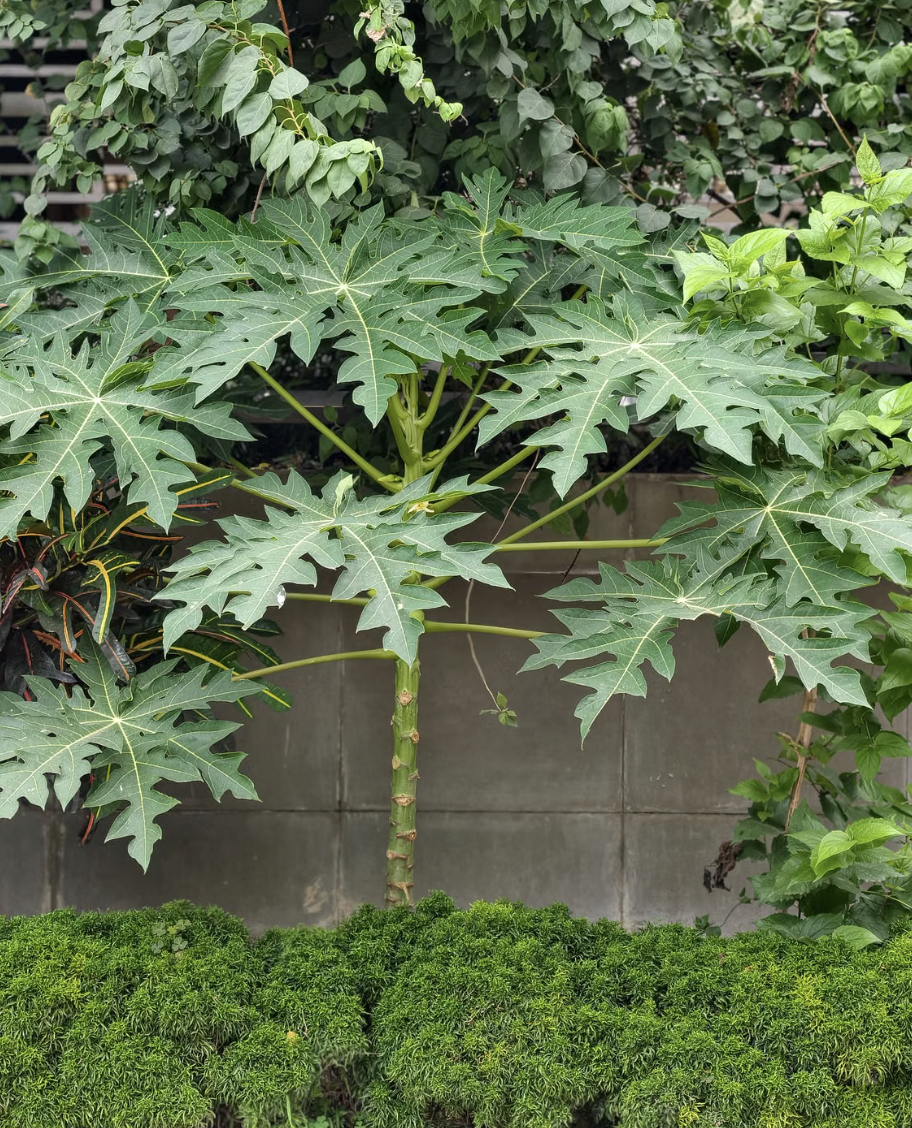
    Papaya plant with large green leaves thriving in a backyard garden setting.
    Papaya plant with large green leaves thriving in a backyard garden setting.

    Growing Papaya in Containers

    You do not need tropical acreage to grow papaya a large pot on a sunny patio or balcony works beautifully, and it hands you a superpower: the ability to wheel your frost-tender plant to shelter when the weather turns. Container growing is often the best route for gardeners outside truly tropical regions.

    The keys to papaya container growing are choosing a compact variety, giving the roots enough room, and never letting the soil get waterlogged. Here is a quick reference:

    Factor Recommendation
    Best varieties for pots Red Lady, Solo Sunrise, Tainung (compact, self-pollinating hybrids)
    Minimum container size 15–20 gallons (about 18–22 inches wide, 16 inches deep)
    Soil Rich, loose, fast-draining mix; slightly acidic to neutral (pH 6–7)
    Plants per pot One (after thinning)
    Sunlight 6–8 hours of direct sun daily
    Portability perk Move indoors or to a sheltered spot before frost

    Choose a container with generous drainage holes, and consider raising it on pot feet so water never pools underneath. If containers are new territory for you, our container gardening guide for beginners covers drainage, soil, and pot sizing in friendly detail.

    Papaya Tree Care: Sun, Water, and Feeding

    Good papaya tree care comes down to three things: bright sun, careful watering, and generous feeding. Get those right and your plant practically grows itself.

    Sunlight. Papayas are unapologetic sun lovers. Give them at least six to eight hours of direct sun a day. Too little light produces leggy, sparse plants and poor fruiting, so pick your sunniest spot.

    Watering. This is where papayas ask for balance. Their big leaves transpire a lot of water, so they need regular moisture — but they are extremely prone to root rot, and overwatering is the single most common reason papayas fail. Aim for evenly moist soil that drains freely, letting the surface dry slightly between waterings. Mulch to conserve moisture, but always keep mulch pulled back from the trunk, since the soft stem rots easily.

    Feeding. Papayas are hungry, fast growers and heavy feeders. Feed young plants with a dilute balanced fertilizer every couple of weeks, then a balanced or potassium-rich fertilizer roughly monthly through the growing season as they mature. If those fertilizer numbers look like a secret code, our plain-English guide to understanding NPK ratios breaks it down, and our roundup of banana peels and eggshells in the garden offers gentle, low-waste ways to feed them.

    Because papayas cannot tolerate frost, gardeners in cooler regions should grow them in movable containers and bring them in when temperatures dip toward the 40s°F. Knowing your first and last frost dates makes that timing easy, and our guide to overwintering tender plants will help them coast through the cold months.

    How Long Until Papaya Fruits?

    Here is the reward for a little patience and with papaya, it comes remarkably fast. Under warm, sunny conditions, papayas often flower within four to six months of sowing and produce ripe fruit in as little as six to twelve months. From flower to picked fruit is typically another four to eight months of gradual swelling.

    Here is a realistic timeline of what to watch for:

    • Weeks 2–3: Seeds germinate and the first true leaves appear.
    • Months 1–3: Rapid growth; you thin and settle plants into their final home.
    • Months 4–6: Flowering begins and you can finally identify plant sex.
    • Months 6–12: Fruit sets, swells, and begins ripening on the trunk.
    • Beyond year one: A healthy plant keeps producing for a few productive years before it should be replaced with a fresh seedling.

    Because a single plant can yield anywhere from fifteen to thirty fruits in a cycle, even one thriving papaya can keep your kitchen well supplied.

    In our own container trials, the seedlings that fruited fastest all shared the same conditions: a large pot from the start (so their roots were never disturbed again), a full-sun position against a warm wall, and steady feeding without ever letting the soil go soggy. The plants we lost, almost without exception, were lost to overwatering in cool weather a reminder that with papaya, restraint at the watering can is a virtue. Warmth is the other non-negotiable: papayas sulk below about 60°F and thrive in the balmy 70–90°F range, which is why gardeners in cooler regions lean on containers and sheltered, sun-trapping corners to keep their plants happy.

    Harvesting Papaya

    Fruits form and ripen along the trunk from the bottom up, so your lowest fruit ripens first. You will know a papaya is ready when its skin shifts from green to yellow-orange and the fruit gives slightly to a gentle press.

    To harvest, clip the fruit from the trunk with a short piece of stalk attached, handling it gently to avoid bruising. Papayas do not sweeten much after picking, so let fruit ripen as much as safely possible on the plant, then finish ripening any firmer fruit indoors at room temperature over a few days.

    Do not overlook green papaya, either. Picked while still firm and unripe, it is a beloved vegetable in salads, slaws, and curries around the world a wonderful, zero-waste way to enjoy fruit you might otherwise leave on the plant. Ripe papaya, meanwhile, is prized for being rich in vitamins A, C, and E and the digestive enzyme papain, making every homegrown fruit as nourishing as it is delicious. A quick note of care: papaya stems and unripe fruit contain a milky latex sap that can irritate sensitive skin, so wear gloves if you are prone to reactions.

    Common Papaya Problems and How to Fix Them

    Most papaya troubles trace back to water, cold, or a few familiar pests. Here is a quick troubleshooting guide.

    Problem Likely Cause The Fix
    Seeds won’t germinate Gel coating left on, or seeds too cold Clean off the sarcotesta thoroughly; keep soil at 80°F
    Yellowing, wilting, mushy base Overwatering and root or stem rot Improve drainage, water less, keep mulch off the trunk
    Tall, leggy, few leaves Not enough sunlight Move to the sunniest spot available
    No fruit at all Plant is male, or female with no pollinator Keep bisexual/female plants; add a male or hand-pollinate
    Sticky leaves, cottony spots Aphids, mealybugs, or whiteflies Rinse off; treat with insecticidal soap or neem oil
    Mottled, distorted leaves Papaya ringspot virus Remove affected plants; control aphids that spread it

    For pollination troubles specifically, hand-pollinating is easy: use a small, clean brush to move pollen from a male (or bisexual) flower onto the stigma of a female flower.

    Is Growing Papaya From Seed Worth It?

    Without a doubt. Few plants reward you as quickly or as generously as papaya, and starting from seeds you would otherwise toss makes it a genuinely sustainable, budget-friendly project. You get lush tropical foliage, fast growth, and a steady supply of vitamin-rich fruit all from a spoonful of scraps.

    If papaya has you dreaming of a homegrown tropical harvest, keep the momentum going. Try growing guava trees in containers, starting a citrusy kumquat tree in a pot, or planting fig trees for beginners. For the whole collection of exotic edibles, browse our hub on growing tropical and exotic fruits, part of the broader EcoGardenHub Plant Library. And if you garden in a warm region, our USDA Zone 9 gardening guide will help your papayas thrive outdoors year-round.

    Save your seeds this week, give them warmth and light, and in a matter of months you could be picking papayas from a plant you grew from scratch. That is sustainable gardening at its most delicious.

    Frequently Asked Questions

    How long does it take to grow papaya from seed? Seeds germinate in two to three weeks, and plants often flower within four to six months and fruit in six to twelve months under warm, sunny conditions. Papayas are among the fastest fruit plants you can grow from seed.

    Can I grow papaya from store-bought fruit seeds? Yes. Just clean off the gel coating, dry the seeds, and sow them. Keep in mind that many grocery-store papayas are hybrids, so seedlings may not exactly match the parent fruit but they will still grow into productive plants.

    Why won’t my papaya seeds sprout? The most common culprit is the slippery sarcotesta coating, which contains germination inhibitors. Rinse it off completely before sowing, and keep the soil consistently warm (around 80°F) and lightly moist.

    Do I need more than one papaya plant to get fruit? It depends on the plant’s sex. Bisexual (hermaphrodite) plants self-pollinate and fruit alone, while female plants need a nearby male or bisexual plant to pollinate them. Growing several seedlings ensures you end up with a fruiting plant.

    Can papaya grow in a pot? Absolutely. Choose a compact, self-pollinating variety like Red Lady, use a 15–20 gallon container with excellent drainage, and give it full sun. Container growing also lets you move the frost-tender plant to shelter in cold weather.

    How do I know when papaya is ripe? Ripe papayas turn from green to yellow-orange and feel slightly soft when gently pressed. Fruit ripens on the trunk from the bottom up, and since papayas barely sweeten after picking, let them ripen as much as possible on the plant.

    How big do papaya plants get? Standard papayas can reach 10 to 20 feet tall, but compact hybrid varieties bred for containers stay under about 8 feet, making them far more manageable for patios and small gardens.
  • How to Grow Pineapple From a Top at Home (Easy Guide)

    How to Grow Pineapple From a Top at Home (Easy Guide)

    That leafy green crown you twist off a grocery-store pineapple and toss in the compost? It is actually a free, ready-to-plant houseplant in disguise. Learning how to grow pineapple from a top is one of the most rewarding kitchen-scrap projects you can try, and it costs you nothing more than a fruit you were already going to eat.

    Here is the honest, encouraging truth: rooting a pineapple crown is genuinely easy, and watching those spiky leaves push out new growth on your windowsill is a small daily joy. Growing the fruit takes patience; we will be upfront about the timeline, but the plant itself is gorgeous, forgiving, and a brilliant way to turn “waste” into something alive. This guide walks you through every step, from choosing the right pineapple to the day you finally slice into homegrown fruit.

    Can You Really Grow a Pineapple From the Top?

    Yes. You can grow a brand-new pineapple plant from the leafy top (called the crown) of a store-bought fruit. Twist or cut off the crown, remove the lower leaves and any fruit flesh, let it dry for a few days, then root it in water or soil. Roots form in about four to eight weeks, and the plant can fruit in two to three years.

    Grow a Pineapple From the Top
    Grow a Pineapple From the Top

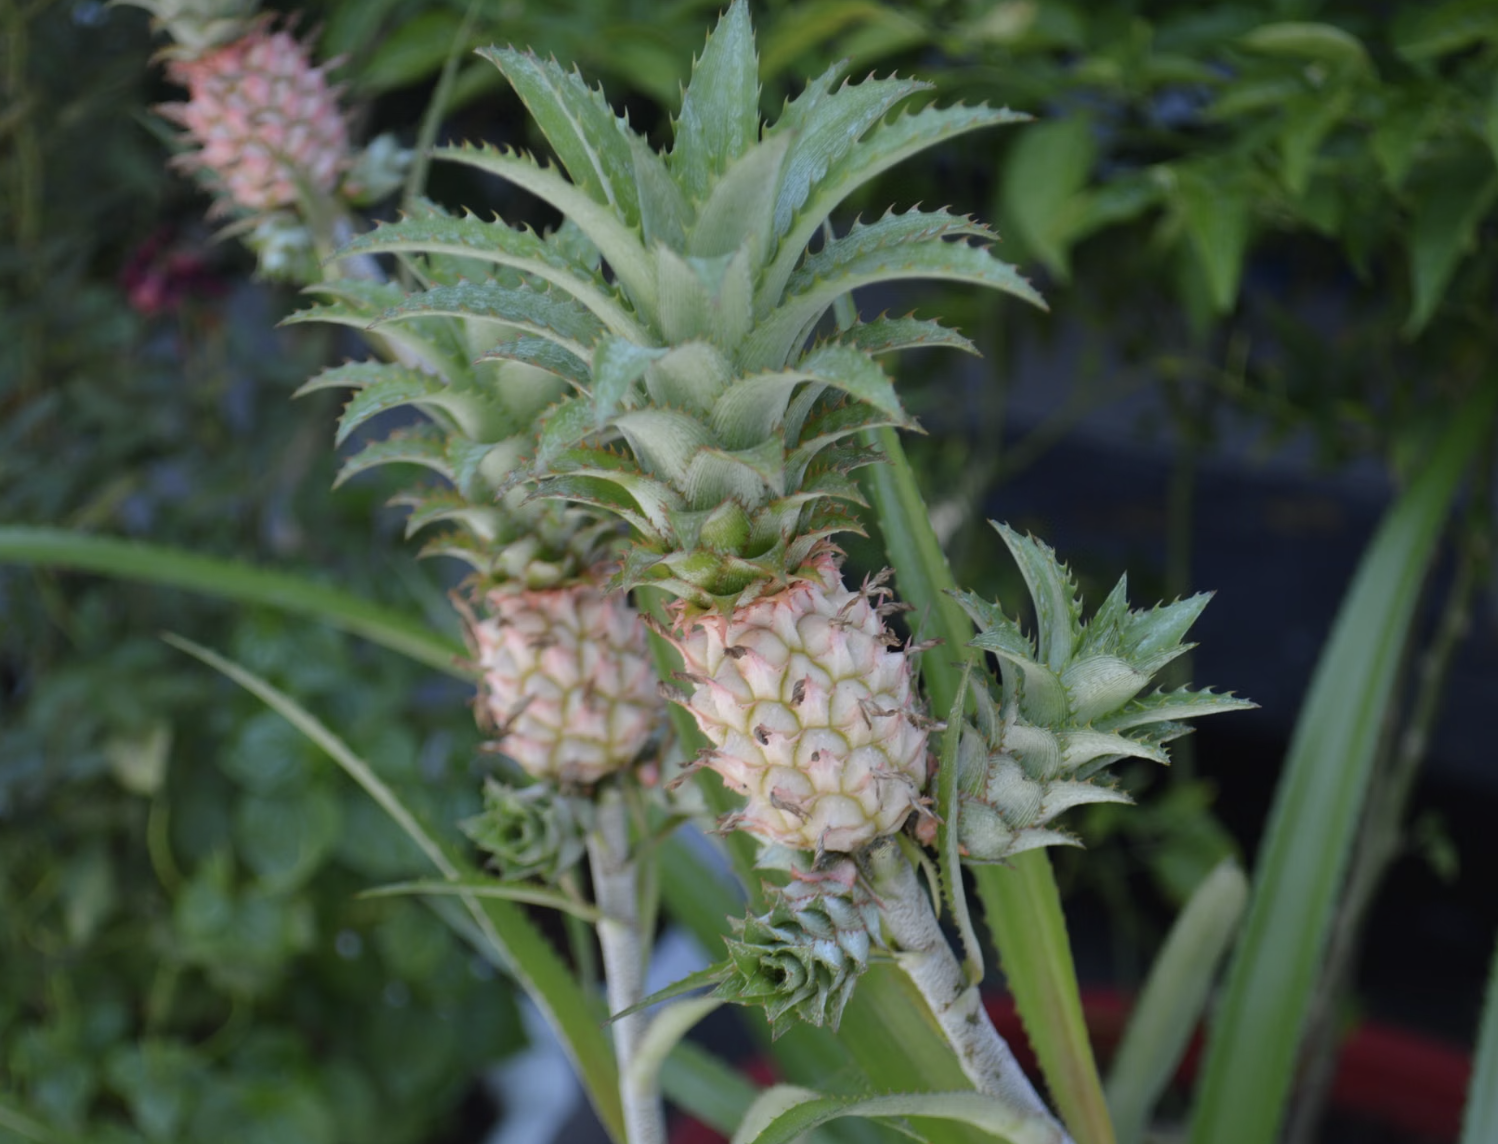
    The pineapple (Ananas comosus) is a bromeliad, a herbaceous perennial, not a tree. That surprises many first-time growers who picture pineapples dangling from branches. In reality, each pineapple grows from the center of a low, rosette-shaped plant, and the crown on top of the fruit carries everything it needs to become a whole new plant. Commercial growers propagate this way too, so you are using the same trick the pros use, just on your kitchen counter.

    What You’ll Need to Regrow a Pineapple

    One of the best parts of this project is how little you need. Gather these before you start:

    • A fresh, ripe pineapple with a healthy, green crown (this is your “seed”)
    • A sharp knife or clean hands for twisting the top off
    • A jar or glass of water (for the water method) or a 6–8 inch pot with drainage holes (for the soil method)
    • Well-draining potting mix — a cactus/succulent mix, or regular potting soil cut with perlite or coarse sand
    • A clear plastic bag (optional, to make a humidity tent)
    • A warm, bright windowsill — or a DIY grow light setup for indoor plants if your home is short on natural light

    That is it. No special equipment, no seeds to buy, no greenhouse required to get started.

    How to Grow a Pineapple From a Top: Step-by-Step

    Follow these six steps and you will have a rooted pineapple plant ready to grow. The whole hands-on process takes about fifteen minutes of active work, plus a few weeks of patient waiting while roots form.

    Step 1: Choose a Ripe, Healthy Pineapple

    Your future plant is only as good as the fruit you start with, so choose well. Look for a pineapple that smells sweet at the base, gives slightly when pressed, and has a firm, deep-green crown. Avoid crowns that are brown, mushy, dried out, or pulling apart in the center.

    If you can find a locally grown pineapple at a farmers market, even better, it has usually traveled less and the crown is fresher. Fresh, green leaves in the center of the crown are the single best predictor of success.

    Step 2: Remove the Crown (Twist or Cut)

    There are two easy ways to separate the crown from the fruit:

    • The twist method: Grip the fruit in one hand and the leafy crown in the other, then twist firmly, as if opening a stubborn jar. The crown pops off with a little stem attached is exactly what you want.
    • The cut method: Slice off the top about an inch below the leaves, then carefully cut or break away all the remaining fruit flesh down to the tough inner core.

    Whichever you choose, the goal is a clean crown with no juicy fruit left clinging to it. Leftover flesh rots easily and can take your whole crown down with it.

    Step 3: Strip the Lower Leaves and Expose the Root Buds

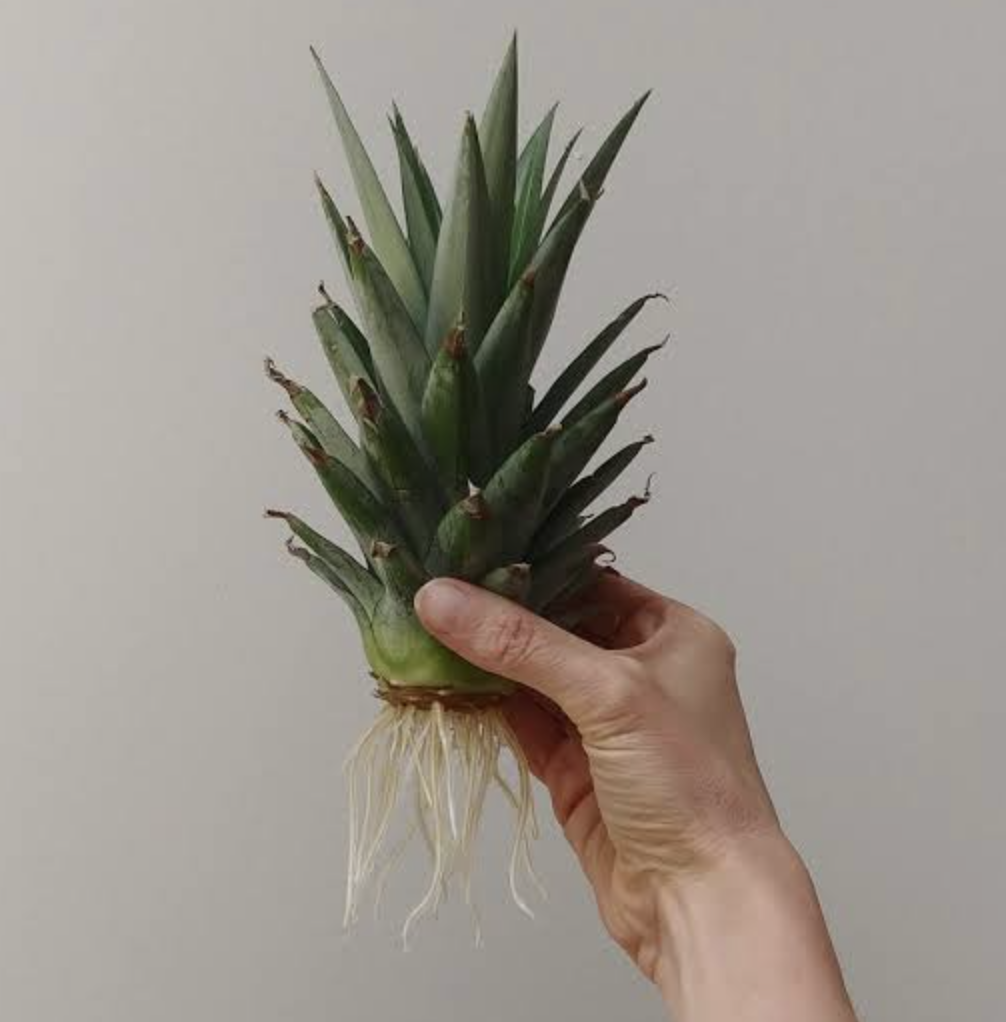
    Peel away the lowest ring of leaves, working upward, until about an inch of bare stem is showing. As you strip the leaves, look closely at the exposed base, you should see small, brown, bumpy nodes. Those are root primordia, the buds that will sprout your first roots. Uncovering them gives your plant a head start.

    Trim off any remaining fruit at the very bottom until the base looks clean and dry. This is the most important rot-prevention step, so do not rush it.

    Step 4: Cure the Crown So It Doesn’t Rot

    Set the prepared crown on its side in a dry, shaded spot for two to seven days. This “curing” period lets the cut base callus over, forming a protective seal that dramatically lowers the risk of rot once it meets water or soil. It feels counterintuitive to wait, but this single step separates thriving crowns from mushy failures.

    Step 5:  Root It (Water Method vs. Soil Method)

    Now choose how to grow those first roots. Both methods work well, and we compare them in detail below.

    • Water method: Suspend the crown in a jar so only the bare stem sits in water, using toothpicks pushed into the stem to rest on the rim if needed. Place it in bright, indirect light and change the water every two to three days to keep it fresh. Roots usually appear in one to two months. Bonus eco tip: pour the old water onto your other houseplants instead of down the drain.
    • Soil method: Skip the jar entirely. Plant the cured crown directly in a small pot of moist, well-draining mix, burying the bare stem up to the base of the leaves. Water it in, then slip a clear plastic bag over the pot to trap humidity, and keep it warm and bright. Roots typically establish in five to eight weeks.

    Step 6: Pot Up Your Rooted Pineapple

    Once your water-rooted crown has roots two to three inches long, it is ready for soil. Fill a 6–8 inch pot with a coarse, fast-draining mix, make a hole, and settle the crown so the base of the leaves rests right at the soil surface. Firm the soil gently and water well, letting the excess drain away.

    If you rooted directly in soil, simply remove the plastic bag once you see new central growth and move the pot into brighter light. Congratulations, you now have a living pineapple plant.

    Water Method vs. Soil Method: Which Should You Choose?

    Neither method is “correct” — they simply suit different gardeners. Water-rooting lets you watch roots form (wonderful with kids), while soil-rooting skips a transplant and mimics how the plant grows in nature. Here is a side-by-side to help you decide.

    Factor Water Method Soil Method
    Best for Watching progress, beginners, curious kids Fewer steps, sturdier roots, hands-off growers
    Time to root 1–2 months 5–8 weeks
    Transplant shock Slightly higher (moving from water to soil) Lower (roots start in their final medium)
    Maintenance Change water every 2–3 days Keep soil lightly moist under a humidity bag
    Rot risk Low if base is cured and water stays fresh Low if mix drains well and is not soggy
    The “wow” factor High — visible roots Lower — hidden roots

    If this is your first time, try starting two crowns using both methods. It costs nothing extra, doubles your odds of success, and teaches you which approach you prefer.

    Growing Pineapple Indoors: Light, Temperature & Humidity

    For most US gardeners, growing pineapple indoors is the only realistic option, because pineapples cannot survive frost. The good news is that a pineapple makes a striking, low-drama houseplant that asks for the same things you would give a sun-loving succulent.

    Light. Pineapples are sun worshippers. Give your plant the brightest window you have, a south- or west-facing sill is ideal aiming for at least six hours of bright light a day. If your home is dim, especially through winter, supplement with a grow light. Pale, floppy, stretching leaves are the plant’s way of telling you it wants more light.

    Temperature. Pineapples love warmth. Growth is happiest between 68°F and 86°F (20–30°C). Below about 60°F growth stalls, above 90°F it also slows, and any frost is fatal. Keep your plant away from cold drafts, single-pane winter windows, and air-conditioning blasts.

    Humidity. As a tropical bromeliad, your pineapple appreciates moisture in the air. A light misting of the leaves a couple of times a week keeps it happy, especially in dry, heated winter rooms. During rooting, that clear plastic bag doubles as a mini humidity chamber.

    Once summer arrives and nights stay reliably warm, you can move the pot outdoors to a sheltered, partly sunny spot to soak up real sunshine  just bring it back inside well before the first frost. Knowing your first and last frost dates makes this timing effortless, and if you want a deeper primer on cold protection, our guide to overwintering plants indoors has you covered.

    Pineapple Plant Care: Watering, Feeding & Repotting

    Solid pineapple plant care comes down to three easy rhythms: water evenly, feed lightly, and give the plant room to grow.

    Watering. Pineapples are somewhat drought-tolerant, but indoors it is easy to overdo it. Aim for evenly, moderately moist soil — let the top inch or two dry out between waterings, then water thoroughly and let the excess drain. Soggy soil invites root rot, while bone-dry soil turns leaves pale, then reddish and curled. A cheap moisture meter takes the guesswork out at root level. Because pineapples are bromeliads, you can also pour a little water into the central “cup” of leaves, mimicking how they collect rain in the wild.

    Feeding. Feed during the active growing season with a balanced houseplant fertilizer (a roughly even N-P-K such as 20-20-20) or a gentle slow-release organic option (something like 5-5-5). A good rhythm is every four weeks in spring and summer, tapering to every eight weeks in fall and winter. If fertilizer numbers feel like alphabet soup, our plain-English guide to understanding NPK ratios breaks it all down. In keeping with our low-waste ethos, you can also lean on gentle homemade amendments  see how banana peels and eggshells fit into a natural feeding routine.

    Repotting. Your pineapple will grows a lot. A mature plant can reach three to four feet tall and nearly as wide, so plan to move it up a pot size roughly once a year as the roots fill in. Always choose a container with drainage holes and refresh it with a coarse, well-draining mix. If containers are new to you, our container gardening guide for beginners covers pot sizes, drainage, and soil in friendly detail.

    How Long Until Your Pineapple actually grows Fruits?
    How Long Until Your Pineapple actually grows Fruits?

    How Long Until Your Pineapple Fruits?

    Here is where patience becomes part of the fun. A pineapple grown from a top typically takes two to three years to flower and fruits sometimes longer if light, warmth, or feeding are less than ideal. In that time you are rewarded with a bold, sculptural plant, so think of the fruit as the grand finale rather than the whole show.

    Want to nudge things along? Once your plant is mature (at least a couple of years old and a good size), you can try the classic ripe-apple trick. Enclose the whole plant in a clear plastic bag with a ripe apple or two for about a week. As the apples release ethylene gas, they can coax the pineapple into flowering. It does not always work, but it is a harmless, free experiment that has delighted growers for generations.

    After flowering, a small fruit forms in the center of the plant and slowly swells over several months. When it turns golden and smells sweet at the base, it is ready to harvest and enjoy.

    To set expectations, here is a realistic timeline of what to watch for along the way:

    • Weeks 1–2: Curing and the very first root nubs appearing on water-rooted crowns.
    • Weeks 4–8: A healthy root system establishes and the central leaves begin to grow.
    • Months 3–12: Steady leaf growth; the rosette widens and you move up a pot size.
    • Years 1–2: The plant approaches full size (three to four feet across) and matures.
    • Years 2–3: Flowering, followed by a single fruit that ripens over several months.
    • After fruiting: Pups and suckers form, ready to become your next generation of plants.

    In our own windowsill trials, the crowns that succeeded fastest shared three things: a fresh green top, a proper few-day cure before rooting, and consistently bright light. The ones that failed almost always rotted early from skipped curing or leftover fruit which is exactly why we labor the point in Step 3 and Step 4 above.

    After the Harvest: Pups, Suckers & Endless Free Plants

    Here is the beautiful twist that makes pineapples so sustainable: the mother plant fruits only once, and then she begins to fade. But before she goes, she produces offsets, ittle clones called pups, suckers, or slips around her base and stem.

    Simply twist or cut these offsets off once they are a few inches tall, then root and pot them exactly like you did the original crown. Each one grows faster than the crown did (often fruiting in a year or two rather than three), which means one grocery-store pineapple can launch a rotating, never ending supply of plants. It is the ultimate low-waste gardening loop a single fruit that keeps on giving.

    Common Problems and How to Fix Them

    Most pineapple troubles trace back to water, light, or rot. Here is a quick troubleshooting guide to keep your plant thriving.

    Problem Likely Cause The Fix
    Base turns mushy and brown Rot from leftover fruit or soggy conditions Remove all fruit flesh, cure the crown before rooting, use fast-draining mix
    No roots after 8+ weeks Too cold, too dark, or a damaged crown Move somewhere warm and bright; start a fresh crown as backup
    Pale, stretched leaves Not enough light Move to a brighter window or add a grow light
    Leaf tips turning brown Over- or under-watering Even out watering; trim brown tips with clean scissors
    Center of plant yellow/brown Crown rot — often fatal Improve drainage next time; the plant may not recover
    White cottony spots or sticky leaves Mealybugs, aphids, thrips, or scale Wipe with insecticidal soap; isolate from other houseplants

    A quick note on pests: mealybugs, aphids, thrips, and scale are the usual suspects on indoor pineapples. Catch them early, wipe them off, and keep your plant well-lit and unstressed, and they rarely become a serious problem.

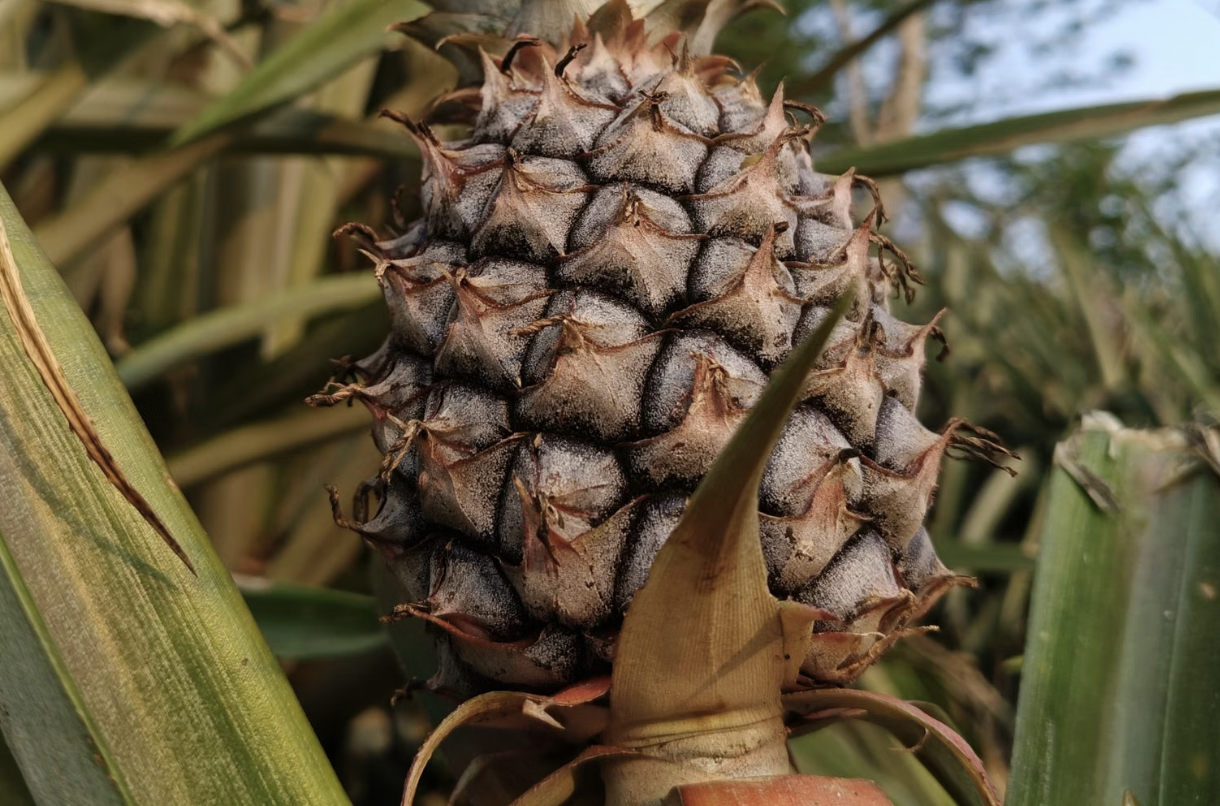
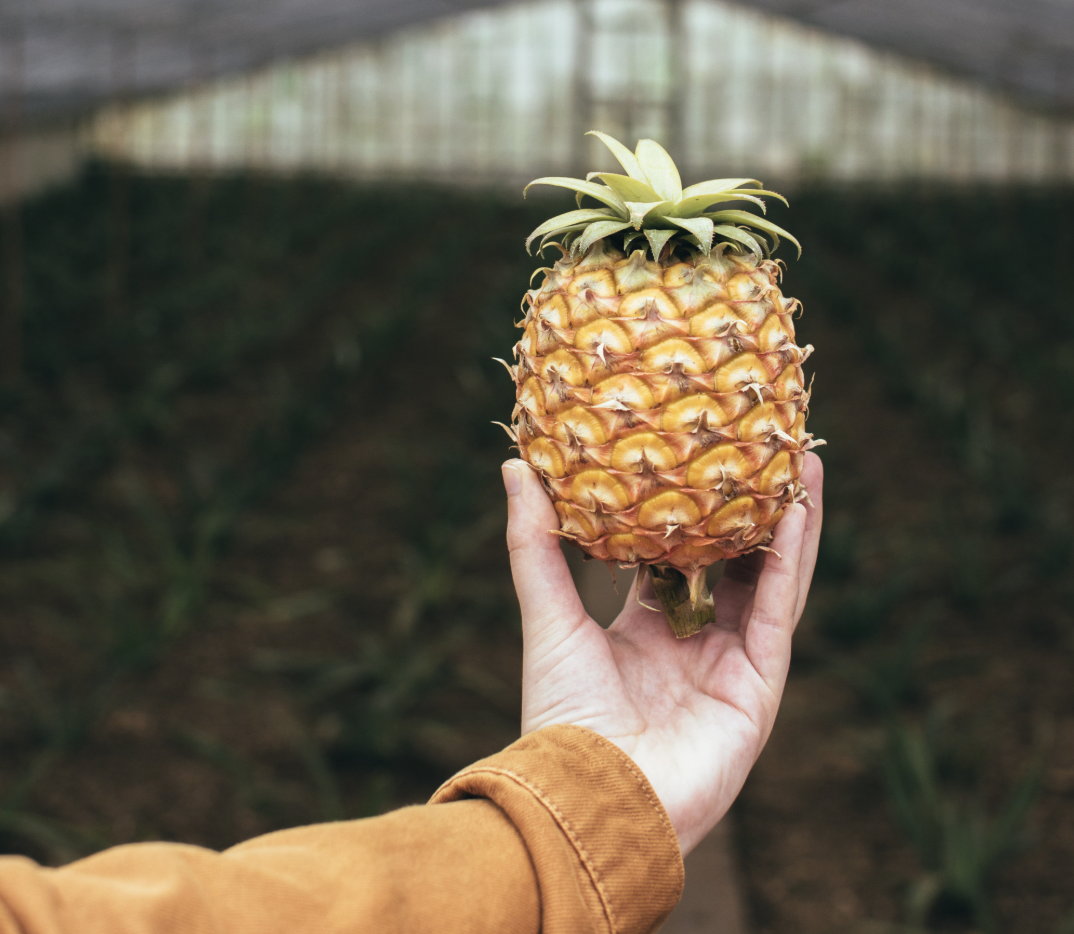
    A detailed close-up of a pineapple fruit growing in an Indian field, showcasing natural textures.
    A detailed close-up of a pineapple fruit growing in the field, showcasing natural textures.

    Is Growing Pineapple Worth It? A Sustainable Kitchen-Scrap Win

    Absolutely and not just for the fruit. Regrowing a pineapple from a top is a feel-good, waste-reducing habit that turns a would-be scrap into a beautiful, air-freshening houseplant and, eventually, homegrown fruit. It is proof that sustainable living can be genuinely fun rather than a chore.

    This project also pairs wonderfully with other easy tropical growing adventures. If you have caught the bug, try growing papaya from seed, growing guava trees in containers, or keeping a citrusy kumquat tree in a pot. For the full collection of exotic edibles you can grow at home, browse our hub on growing tropical and exotic fruits, part of the broader EcoGardenHub Plant Library. And if you are lucky enough to live in a warm region, our USDA Zone 9 gardening guide will help you grow your pineapple outdoors year-round.

    Start one crown this week. In a few days you will spot the first roots, in a few weeks a whole new plant and somewhere down the line, a pineapple you grew yourself, from a scrap you almost threw away.

    Frequently Asked Questions

    How long does it take to grow a pineapple from a top? Roots form in about four to eight weeks, but the plant needs roughly two to three years to flower and produce fruit. The plant itself is attractive the entire time, so enjoy it as a houseplant while you wait for the fruit.

    Should I grow my pineapple top in water or soil? Both work. Water rooting lets you watch the roots develop and is great for beginners and kids; soil rooting skips a transplant and tends to produce sturdier roots. If you are unsure, start one crown each way.

    Do I have to root the pineapple top in water first? No. Rooting in water is popular because it is fun to watch, but you can plant a cured crown straight into well-draining soil under a humidity bag and skip the water stage entirely.

    Can you grow a pineapple indoors? Yes, and for most US gardeners indoors is the way to go, since pineapples cannot survive frost. Give it a bright window (or a grow light), warmth between 68–86°F, and occasional misting, and it will thrive as a houseplant.

    Why is my pineapple top rotting instead of rooting? Rot almost always comes from leftover fruit flesh on the crown or from conditions that are too wet. Remove every bit of fruit, cure the crown for a few days until the base dries, and use a fast-draining mix or fresh water to prevent it.

    Does the pineapple plant die after fruiting? The main plant fruits once and then slowly declines, but it first produces offsets called pups or suckers around its base. Root those and you will have new plants that often fruit faster than the original.

    How big does a pineapple plant get? A mature pineapple can reach about three to four feet tall and nearly as wide, so give it room to spread and plan to move it into a larger pot roughly once a year.