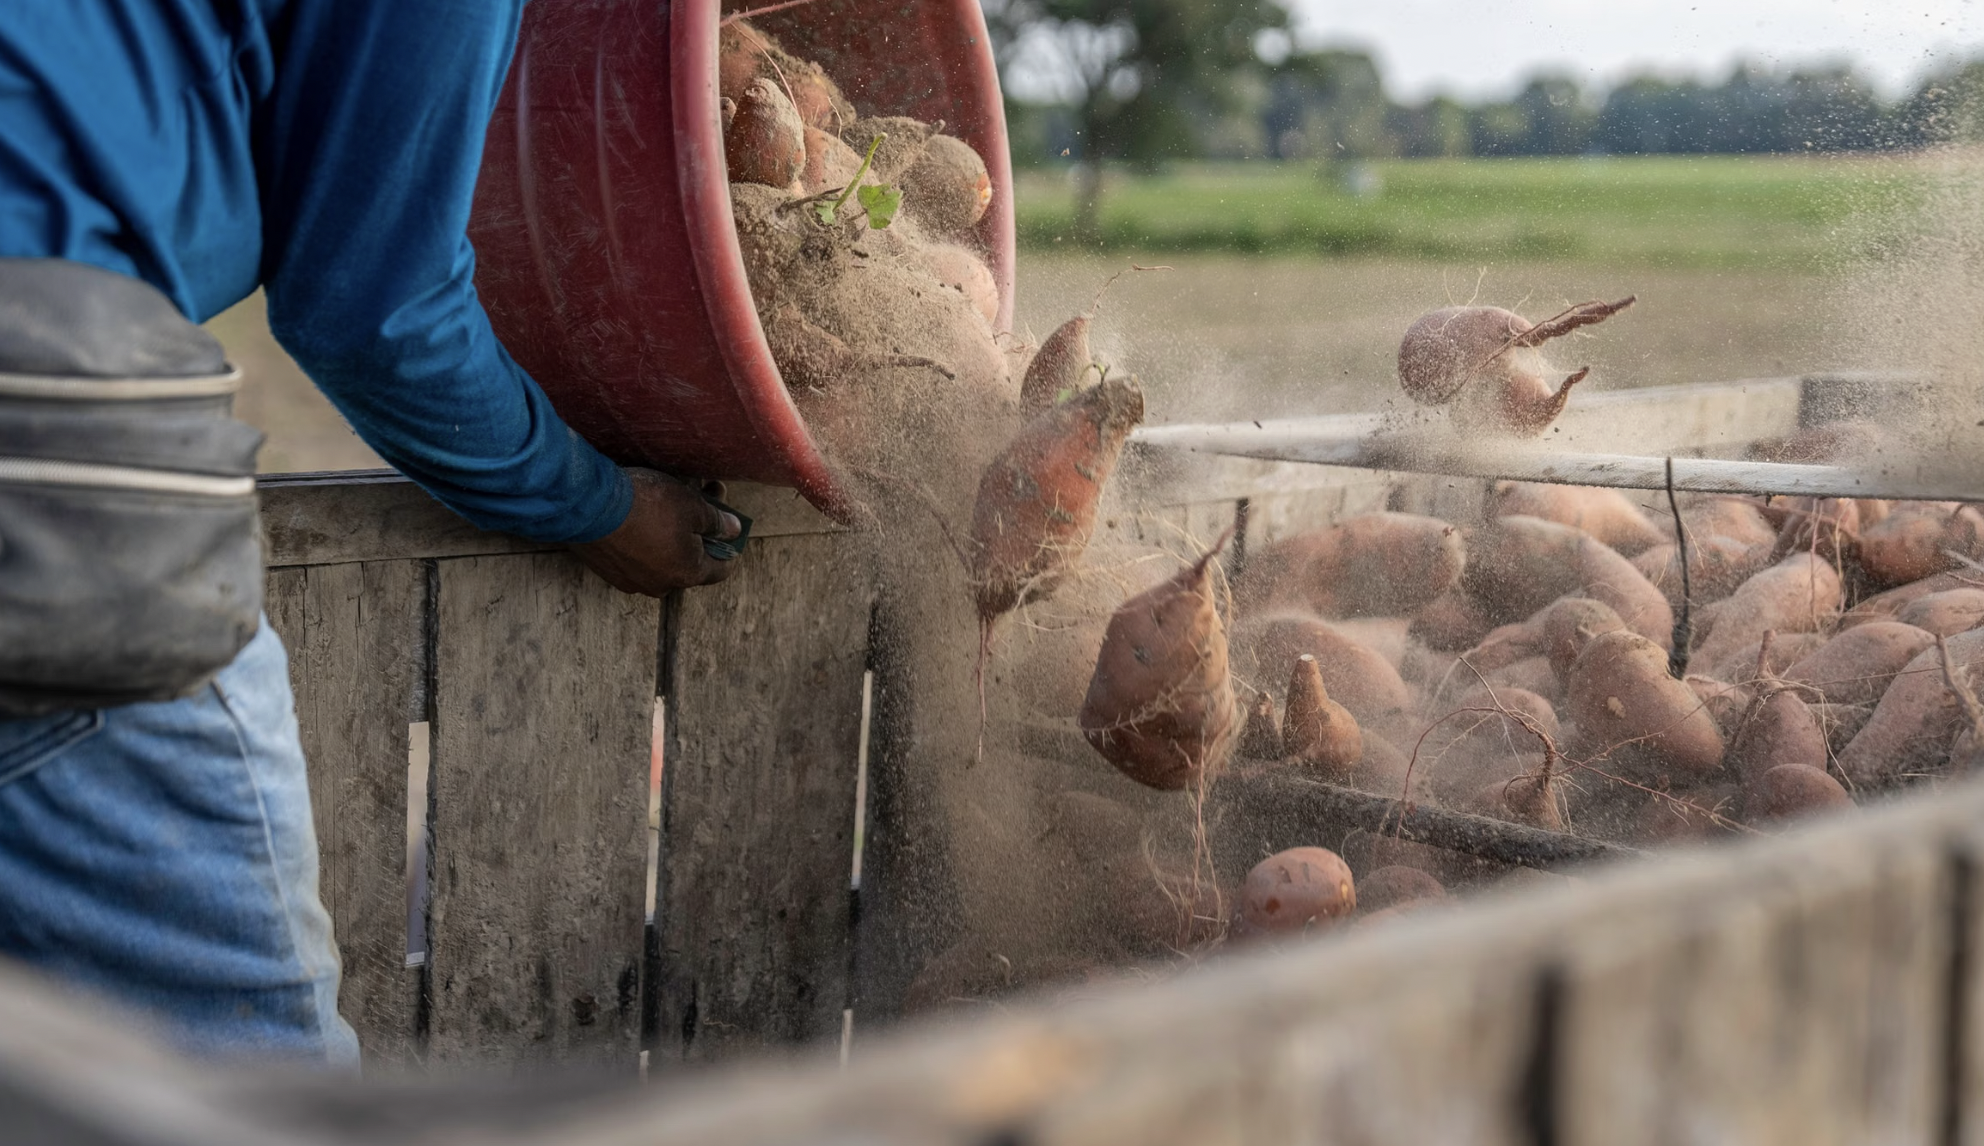
Here’s a moment worth planting for: at the end of the season, you tip a container over onto a tarp, the soil tumbles out, and buried in it are a dozen fat orange roots you grew from a single grocery-store sweet potato. No digging, no forking, no accidentally spearing your harvest. Just treasure.
That’s the quiet joy of learning how to grow sweet potatoes in containers. They’re heat-loving, drought-tolerant, almost pest-free, and gorgeous enough to pass as an ornamental until the day you harvest. But there’s one step that separates a genuinely delicious sweet potato from a bland, disappointing one and it happens after you dig them up. Most beginners skip it. This guide covers everything: making free slips, choosing the right pot, and the crucial finishing step nobody warns you about.
How Do You Grow Sweet Potatoes in a Container?
Start slips from a whole sweet potato about 8 weeks before your last frost. Plant them in a container of at least 10 gallons (12+ inches deep) filled with loose, well-draining, low-nitrogen mix, once soil warms to 60–65°F. Give them 6 to 9 hours of full sun, water regularly, and harvest at about 100 days by tipping the container over. Then cure the roots at 80–85°F for 10 to 14 days this is what makes them sweet.
Two things decide your harvest: a big enough container (cramped roots make small, curly, disappointing sweets) and curing them properly afterward. Get those right and one pot can hand you pounds of food.
Meet the Sweet Potato (It’s Not What You Think)
Let’s clear up some confusion. The sweet potato (Ipomoea batatas) is not related to the Irish potato at all, and it isn’t a yam either. It’s a member of the morning glory family, which explains those pretty trailing vines and heart-shaped leaves. True yams belong to an entirely different family, have rough, bark-like skin, and are rarely found in US grocery stores despite the label.
This matters practically, because sweet potatoes behave nothing like regular potatoes. They’re a tender tropical crop domesticated in South America at least 5,000 years ago. They love heat, tolerate drought, shrug off most pests, and need 90 to 120 frost-free days. In Florida-hot summers when little else will grow, sweet potatoes flourish. rich in complex carbohydrates, fiber, beta-carotene, vitamin C, vitamin B6, potassium, and magnesium which makes them one of the most nutritionally valuable things you can grow in a single pot.
They’re also grown differently: you can’t grow sweet potatoes from seed. They’re grown from slips, living sprouts that emerge from a mature root.
Making Your Own Slips (For Free)
You can buy slips, but they’re perishable, sometimes hard to find, and arrive looking like sad, wilted stems (don’t panic — most recover beautifully). The alternative is more fun and essentially free: make your own from a single sweet potato.
Start about 8 weeks before your last frost date. Here’s how:
- Choose a good parent root. Pick a smooth, unblemished, ideally organic sweet potato from a store or farmers market. Non-organic roots are often treated with anti-sprouting chemicals, if that’s all you have, wash them thoroughly first. Ask about the variety if you can.
- Bed it. Fill a tray, bin, or nursery flat with a couple of inches of coarse sand or light growing mix. Lay whole sweet potatoes on top (or slice them in half lengthwise and lay them cut-side down), leaving an inch or two between them, then cover with another 2 inches of mix.
- Keep it warm and damp. Maintain 75–85°F and damp-but-not-soggy soil. A heat mat helps enormously; a plastic cover holds humidity until shoots appear.
- Give them light. Once shoots emerge, remove any cover and put them under a bright window or a grow light for 14 to 16 hours a day.
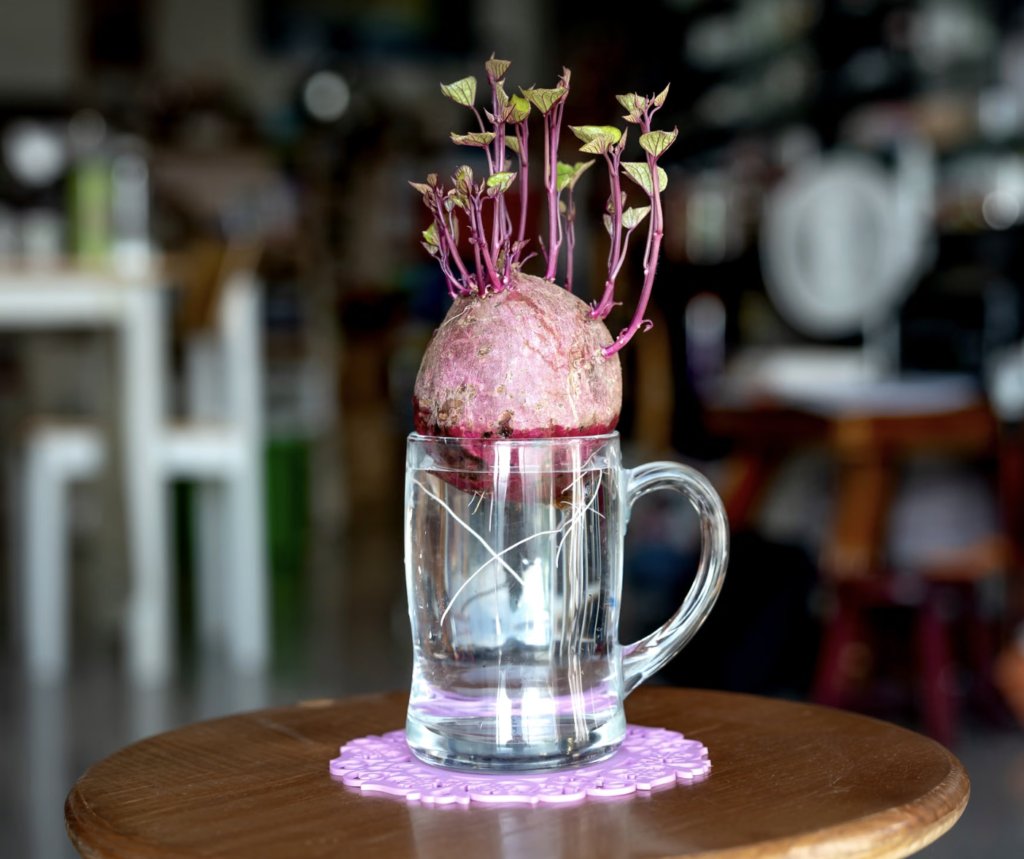
- Harvest the slips. After 6 to 8 weeks, when shoots are 6 to 12 inches long with leaves and roots, twist or pull them from the parent root. You can also stand them in a jar of water until roots reach 2 to 3 inches.
One parent potato yields a surprising number of slips. Always make a few extra, some inevitably rot or dry out before planting.
Choosing Your Container (Size Really Matters)
This is where container sweet potatoes succeed or fail. A too-small container produces small, curly, disappointing roots, the tubers need room to expand underground.
| Container Size | Number of Plants |
|---|---|
| 5-gallon bucket | 1 (workable, but expect a small harvest) |
| 10 gallons | 2–3 plants |
| 16-gallon half whiskey barrel | 3–4 plants |
| 20–25 gallons | 4–6 plants |
Aim for at least 12 inches deep and go as wide as you can. A half whiskey barrel is close to ideal and readily available. Large storage tubs, mineral tubs, and fabric grow bags all work well, just drill plenty of drainage holes. Each plant averages 3 to 5 tubers, so a half barrel can genuinely feed you.
One practical warning: fill and plant the container where it’s going to live. A 20-gallon pot of wet soil is extremely heavy, and you won’t be moving it afterward. Choose your sunniest spot first.
The Soil: Loose, Well-Drained, and Low in Nitrogen
Sweet potatoes want loose, fine, well-draining, slightly acidic soil (around pH 6.5) think sandy loam. Roots need to push through easily to size up.
Here’s the counterintuitive part, and it echoes the rule for bush beans: high fertility is not necessary, and nitrogen is actively harmful. Too much nitrogen gives you a spectacular, lush, leafy vine and spindly, useless roots. That’s the classic container sweet potato failure.
A good container blend: quality potting mix amended with compost and sand for drainage, plus bonemeal and wood ash to supply the potassium and potash that fuel root development. Skip the nitrogen-rich fertilizer entirely. Our NPK ratios guide explains the numbers, and our raised bed soil mix guide covers building loose, root-friendly soil.
Choosing a Variety
Bush-type varieties are the container grower’s secret. Their vines stay short and compact rather than sprawling ten feet across your patio, but here’s the key point: the roots are full size, not miniatures. You get the same harvest in a fraction of the space.
| Variety | Type | Why Grow It |
|---|---|---|
| Vardaman | Bush | Compact vines, full-size orange roots — ideal for pots |
| Bush Porto Rico | Bush | Classic compact variety, great flavor |
| Beauregard | Vining | The reliable standard; widely available, productive |
| Georgia Jet | Vining | Fast-maturing — the best bet for northern, short-season gardens |
| Covington | Vining | Uniform, sweet, stores well |
| Bayou Belle | Vining | Deep red skin, excellent flavor |
Northern gardeners should prioritize a short-season variety like ‘Georgia Jet’ and consider using black plastic mulch or a row cover early on to bank extra warmth. It’s a common misconception that sweet potatoes are a southern-only crop, with a fast variety and a warm container, gardeners as far north as parts of Canada grow them successfully.
How to Plant Sweet Potatoes in Containers: Step-by-Step
- Step 1: Wait for Warm Soil
Sweet potatoes are extremely frost-tender tropicals. Plant 2 to 3 weeks after your last frost, once soil has warmed to 60–65°F and nights are consistently in the 55–60°F range. Cool, wet soil causes slips to rot outright. Check your last frost date — patience here saves your crop.
- Step 2: Fill and Pre-Moisten the Container
Fill your container most of the way with your loose, low-nitrogen mix, then pre-moisten it to reduce transplant shock. A good test: squeeze a handful hard, and only a few drops should come out.
- Step 3: Plant the Slips Deep
Make a hole for each slip and bury 2 to 4 nodes (growing points) about 3 to 4 inches deep, leaving only the top leaves exposed. Those buried nodes are where your sweet potatoes will form, so depth matters. Space slips as generously as your container allows — more room means bigger roots.
Two pro tips: in hot weather, plant in the evening to spare the slips the midday sun. And if the forecast calls for hot, dry, or windy conditions in the first few days, strip the leaves off the slips before planting — it seems drastic, but it helps them retain moisture while they root.
- Step 4: Water Well, Then Taper
Water thoroughly at planting. Then follow this rhythm: – Week 1: water daily while slips establish. – Week 2: every other day. – After that: about an inch a week is plenty.
Sweet potatoes are genuinely drought-tolerant and happy in fairly dry soil — but containers dry faster than ground, so check regularly rather than assuming.
- Step 5: Give Them Full Sun
Five hours of direct sun is the bare minimum; 7 to 9 hours produces a noticeably bigger harvest. More sun, more sweet potatoes. This is a plant that genuinely wants to bake.
Care Through the Season
Keep the vines off the soil. Sweet potato vines will root wherever a node touches damp ground, and every one of those rooted spots diverts energy away from your main tubers. In a container this is less of an issue than in a bed, but if long vines trail down and root into the ground below, lift them, mulch beneath them, or train them onto a small trellis. It’s an easy win most gardeners never think about.
Prune freely. Vines can run ten feet by season’s end. Trim them back whenever they outgrow your space, it won’t hurt your harvest.
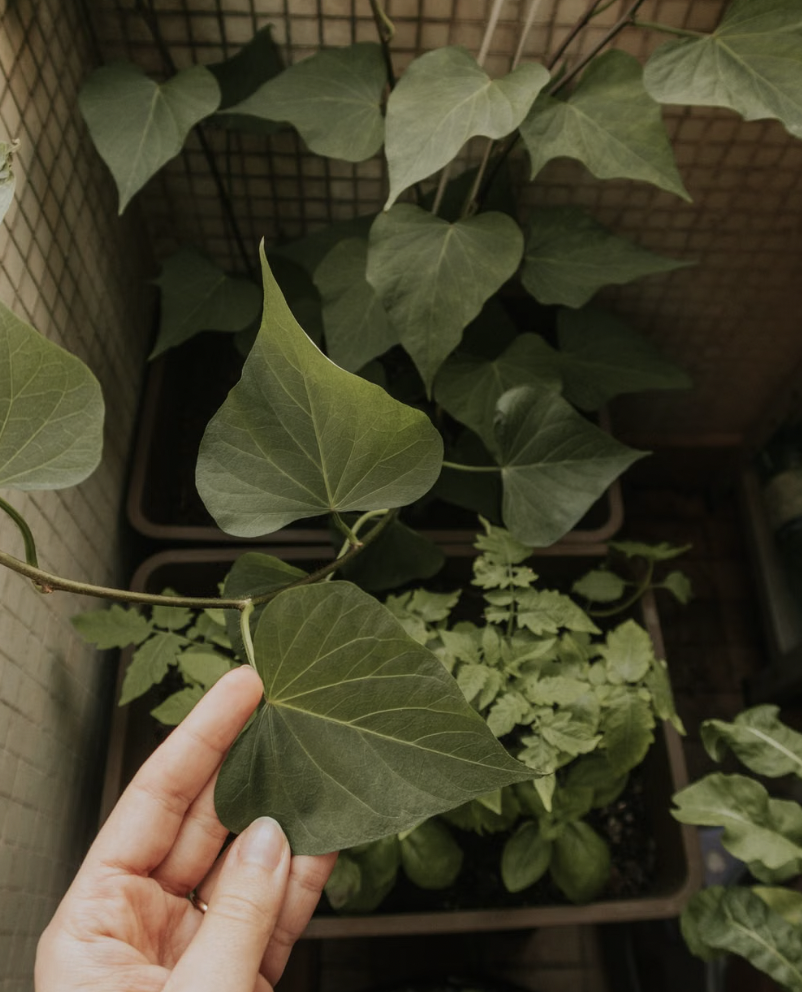
Eat the leaves. Here’s a lovely bonus: sweet potato leaves and flowers are completely edible and genuinely delicious, cooked much like spinach. A container sweet potato quietly gives you a leafy green crop all summer and a root harvest in fall, excellent low-waste value from one pot.
Pests are rare. Sweet potatoes are famously trouble-free. The main nuisance is rabbits and deer nibbling the vines, which sets back production, see our guides on keeping rabbits out and deterring deer naturally.
Taper water at the end. Cut back on watering for the final 3 to 4 weeks before harvest. This prevents the roots from splitting and helps them store far longer.
Harvesting: The Best Part of Container Growing
Sweet potatoes are ready at roughly 100 days (90–120 depending on variety), when the leaves and vine ends begin turning yellow. You can also dig gently at the edge to check size — if they’re small, cover them back up and wait.
- The container advantage: forget forks and spades, which spear and scar tubers. Just tip the whole container over onto a tarp, let the soil tumble out, and sift through it by hand with gloves on. It’s genuinely one of the most satisfying moments in gardening, and you’ll damage almost nothing — a real advantage over in-ground growing.
- Handle them like eggs. Sweet potato skins are thin at harvest and bruise easily. Brush off loose soil but do not wash them moisture invites rot in storage.
Beat the frost. Harvest before your first frost. If frost does catch your vines, dig immediately decay travels down from frost-damaged foliage into the roots. Soil below 50°F also causes chilling injury.
Curing: The Step That Actually Makes Them Sweet
This is the most important part of this guide. If you skip curing, your sweet potatoes will taste bland and starchy, and you’ll wonder why homegrown wasn’t worth it.
Curing does two things: it converts starches into sugars, literally creating the sweetness and it forms a second skin over nicks and bruises so the roots store for months.
How to cure: spread the roots in a single layer with good airflow (a mesh screen is ideal) somewhere warm and humid, about 80–85°F at 85–90% humidity. out of direct sun, for 10 to 14 days. At full commercial conditions it can take as little as 5 to 6 days.
Realistic home options: a boiler room, a warm garage, a covered porch (if you harvest in September while it’s still warm and humid), or simply the warmest room in your house. It doesn’t have to be perfect, it will still cure, just more slowly. Protect them from rain and animals if you’re curing outdoors.
In our experience, curing is the reason most first-time growers quietly conclude that homegrown sweet potatoes “aren’t as good as store-bought.” They aren’t wrong about the taste, they’re just eating them two weeks too early. Every sweet potato you’ve ever bought was cured before it reached the shelf, so the sweetness you expect isn’t something the plant handed you in the soil; it’s something that develops afterward, in a warm room, while you wait. Resist the urge to roast one the evening you harvest. Give them their fortnight and they’ll reward you tenfold.
Then store them properly: move cured roots to a cool, dry, dark, well-ventilated place at 55–60°F, a basement or root cellar is ideal in boxes or baskets lined with newspaper for airflow. Keep them away from furnaces and hot water heaters. Never refrigerate sweet potatoes; cold ruins their texture and flavor. Stored well, they keep about three months, and here’s the delightful part: their sugar content keeps slowly increasing the whole time. A December sweet potato from your patio tastes better than an October one.
Common Problems and How to Fix Them
| Problem | Likely Cause | The Fix |
|---|---|---|
| Bland, starchy flavor | Skipped curing | Always cure at 80–85°F, high humidity, 10–14 days |
| Small, curly, spindly roots | Container too small | Use 10+ gallons, at least 12 inches deep |
| Huge vines, hardly any roots | Too much nitrogen | Skip N fertilizer; add bonemeal and wood ash instead |
| Slips rotted after planting | Soil too cold or too wet | Wait for 60–65°F soil; ensure sharp drainage |
| Split roots | Heavy watering late in the season | Taper watering the last 3–4 weeks |
| Roots rot in storage | Washed before storing, or bruised | Brush off soil only; handle gently; cure properly |
| Vines chewed back | Rabbits or deer | Fencing or barriers around the container |
| Roots shrivel and sprout | Stored too warm | Store at 55–60°F, not in the fridge, not by a heat source |
Is How Growing Sweet Potatoes in Containers Worth It?
Wonderfully so. For the price of a single grocery-store sweet potato you get slips, a summer of lush ornamental foliage, an edible leaf crop, and come autumn pounds of nutritious roots you harvest by simply tipping a pot over. They’re drought-tolerant, pest-resistant, and thrive in the punishing heat of midsummer when much of the garden is sulking. Add in months of storage that only makes them sweeter, and it’s hard to think of a better use of a big container.
That wraps up our vegetable growing series and sweet potatoes pair beautifully with the rest of it. For more warm-season crops, try tomatoes in containers, bell peppers from seed, or zucchini in a small garden. For the cool seasons that bookend them, see kale, spinach, and carrots in raised beds. Explore the full Vegetables collection, part of the broader EcoGardenHub Plant Library, or browse the best vegetables for container gardening.
Buy one sweet potato this winter, sprout it on your windowsill, and by autumn you’ll be tipping a barrel of your own harvest onto the lawn. It’s one of the most quietly astonishing returns in all of gardening: a single grocery-store root, transformed into a season of food.
Frequently Asked Questions
- What size container do sweet potatoes need? At least 10 gallons and 12 inches deep for 2 to 3 plants; a 20-gallon container holds 4 to 6. A 5-gallon bucket works for one plant but yields little. Too-small containers produce small, curly roots, so go as big as you can.
- How do you make sweet potato slips? About 8 weeks before your last frost, bed a whole organic sweet potato in damp sand or growing mix, keep it at 75–85°F, and give the shoots bright light once they emerge. After 6 to 8 weeks, pull off slips that are 6 to 12 inches long with leaves and roots.
- Do sweet potatoes need fertilizer? Very little, and definitely not nitrogen. Too much nitrogen produces lush vines and spindly roots. Amend your mix with compost plus bonemeal and wood ash for potassium and potash, and skip nitrogen-rich feeds.
- How long do sweet potatoes take to grow? About 100 days on average, with a range of 90 to 120 depending on variety. Harvest when leaves and vine ends start to yellow, and always before your first frost.
- Why do my sweet potatoes taste bland? You almost certainly skipped curing. Curing at 80–85°F and high humidity for 10 to 14 days is what converts starches into sugars. Without it, sweet potatoes taste starchy rather than sweet.
- When should I plant sweet potato slips? Two to three weeks after your last frost, once soil has warmed to 60–65°F and nights stay above 55°F. Cool, wet soil causes slips to rot, so wait for genuine warmth.
- Can you eat sweet potato leaves? Yes, the leaves and flowers are edible and delicious, cooked much like spinach. It’s a great bonus crop from a container that’s also producing roots underground.