


Here’s a riddle that puzzles every new daylily owner. Each flower lasts exactly one day opens at dawn, gone by nightfall. The plant is literally named for it: Hemerocallis, from the Greek hemera (“day”) and kallos (“beauty”). And yet a daylily in July looks like it’s been blooming nonstop for weeks.
The answer is in the arithmetic, and once you see it you understand the entire plant. Each flower stalk carries 12 to 15 buds. A mature plant sends up 4 to 6 stalks. That’s somewhere north of fifty blooms per plant, opening in relay, one day at a time, for weeks on end. Nothing is wasted; nothing is repeated.
That combination, spectacular output, near-zero demands, is why learning how to grow daylilies is arguably the single best first step into perennial gardening. You’d be hard-pressed to find an easier plant. They’re tough, long-lived, drought-tolerant, pest-proof, and genuinely tolerant of neglect.
How Do You Grow Daylilies?
Plant daylilies in full sun in moist, well-draining soil rich in organic matter, spacing clumps 18 to 24 inches apart, in spring or fall. Water weekly in dry spells and feed lightly in spring. Deadhead spent blooms removing the whole flower including the seed pod to encourage more. Divide every 3 to 5 years after flowering. Plant early, mid, late, and reblooming varieties for months of color. Hardy in zones 3 to 9.
The two things beginners most need to know: don’t plant them too deep (a leading cause of no flowers), and plant a mix of bloom times rather than one variety.
Daylilies Are Not Lilies
Worth clearing up straight away, because the name misleads everyone.
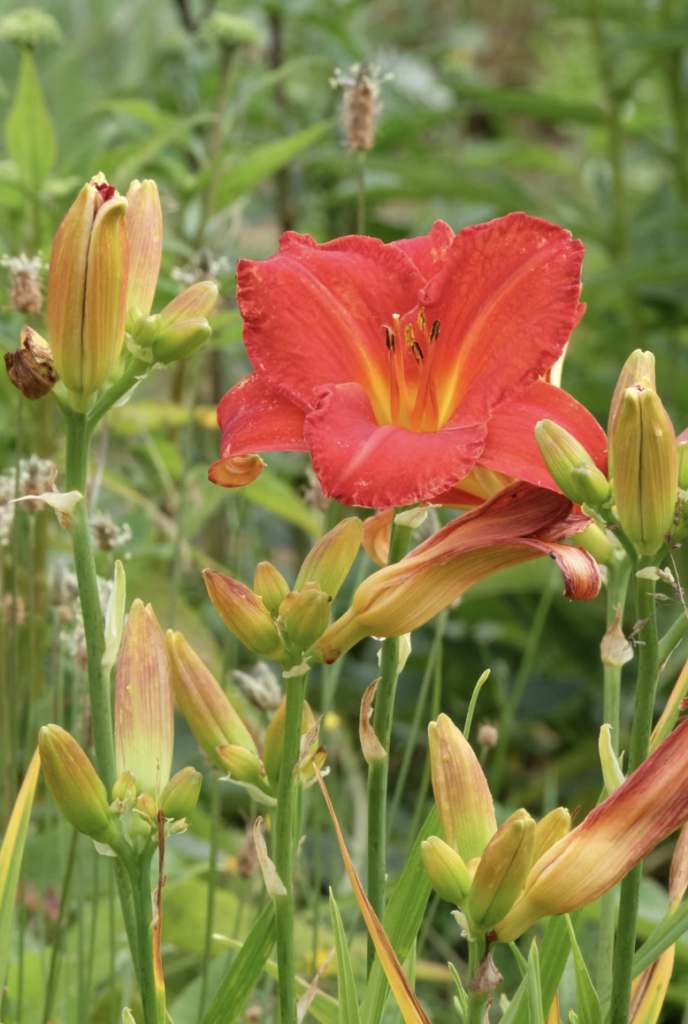
Daylilies (Hemerocallis) are not true lilies (Lilium). They’re a completely different genus. True lilies grow from bulbs and produce flowers along a tall leafy stem. Daylilies grow from fleshy, tuberous roots and send up bare flower stalks, called scapes from a clump of arching, grass-like foliage.
That difference matters practically:
- No bulbs to lift or store. Daylilies are winter-hardy; you plant them and walk away.
- The fleshy roots are the storage organ which is why division works so well, and why letting them get overcrowded eventually chokes off the blooms.
- The foliage earns its keep. Even out of bloom, a daylily clump reads like a wide-leafed ornamental grass a genuine design asset rather than a gap in the border.
The Bud Math (Why They Seem to Bloom Forever)
It’s worth pausing on this, because it changes how you think about the plant.
One flower, one day. But:
- Each scape holds 12 to 15 buds, which open in sequence.
- A mature plant produces 4 to 6 scapes.
- That’s roughly 50 to 90 flowers per plant, delivered one relay at a time.
So the “continuous” bloom is an illusion built from dozens of single days. Which explains two things beginners find confusing:
- Yesterday’s flower always looks dead. That’s not a problem, that’s the design. Every spent bloom you see is a bud that did its job.
- Deadheading is genuinely a lot of work if you’re a perfectionist, precisely because the plant produces so many one-day flowers. Some gardeners deadhead daily; plenty of experienced ones don’t bother at all. Both are legitimate, more on this below.
Why Daylilies Are the Ideal Beginner Perennial
Before the how-to, it’s worth understanding why this plant forgives so much:
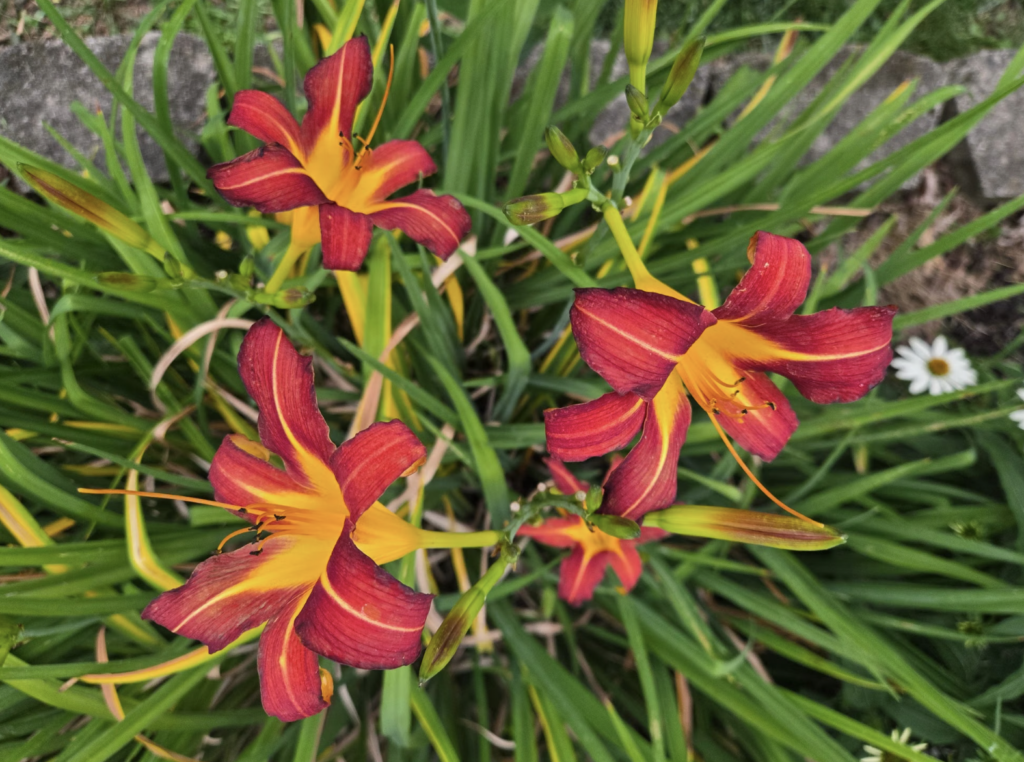
- They’re adaptable to almost any soil. Most perennials have opinions. Daylilies mostly don’t.
- They shrug off pests and disease. There’s essentially no spraying, no vigilance, no diagnosis.
- They’re drought-tolerant once established, thanks to those fleshy water-storing roots.
- They’re winter-hardy across zones 3 to 9 with no lifting, wrapping, or protecting.
- They tolerate neglect — genuinely. A forgotten daylily is usually just a slightly smaller daylily.
- They get better every year, and hand you free plants when you divide them.
- They bloom profusely. Even a mediocre daylily year is a good year.
The result is a plant with an unusually generous failure mode. Most things you can do wrong to a daylily produce fewer flowers, not a dead plant, which means beginners get feedback and second chances rather than casualties. That’s exactly what you want from the first perennial you ever grow.
Choosing Varieties: The Season-Long Trick
The single best decision a beginner can make: don’t buy six of one variety. Different daylilies bloom at different times, and mixing them turns a three-week show into a season.
| Type | Examples |
|---|---|
| Early bloomers | ‘Maytime Orange’, ‘Sooner Gold’ |
| Midseason | ‘Lavender Eyes’, ‘Peach Fairy’, ‘Plum Beauty’, ‘Treasure Gold’ |
| Late bloomers | ‘August Ruby’, ‘Gold Bullion’, ‘Orange Float’ |
| Rebloomers / everbloomers | ‘Stella de Oro’, ‘Happy Returns’, ‘Mini Stella’, ‘Good Fairy’, ‘Ruby Stella’, ‘Frankly Scarlet’, ‘Lemon Lollipop’ |
Rebloomers are the beginner’s friend. Varieties like ‘Stella de Oro ’, the ubiquitous small yellow daylily you’ve seen massed by the thousand outside every office park, flower and then flower again, some running right up until a hard frost.
On size: foliage clumps range from under a foot to 3 feet tall; flower scapes from under a foot to 6 feet, though most sit at 3 to 4 feet. And the palette is enormous, tens of thousands of registered varieties, from the tall orange “ditch lilies” of country roadsides to ruffled, spidery, and purple modern cultivars.
Mix early, mid, late, and a rebloomer or two, and you’ll have daylilies from late spring to fall.
How to Plant Daylilies: Step-by-Step
- Step 1: Pick a Sunny Spot
Full sun gives the best flowering. Daylilies tolerate some light shade and in hot southern climates a little afternoon shade is actually beneficial, but too little light is one of the top reasons daylilies don’t bloom.
- Step 2 Improve the Soil (a Little)
Daylilies are adaptable to almost any soil, which is part of their charm. But they perform noticeably better in slightly moist, well-drained soil high in organic matter. Work about 3 inches of compost into the top 6 to 8 inches before planting. That’s the whole soil prep.
- Step 3: Plant in Spring or Fall and Not Too Deep
Plant when the weather is mild, in spring or fall. Here’s the specific beginner error worth naming: planting the clump too deeply is a leading cause of daylilies that never bloom. Set the crown, the pale point where the leaves meet the roots, at or just barely below the soil surface. Don’t bury it.
- Step 4: Space Them Properly
Give clumps room to expand. Daylilies spread by budding new small plants beside the main one, and crowding is the other major cause of poor flowering.
- Step 5: Water In and Mulch
Water thoroughly at planting, then spread a thin layer of organic mulch to add nutrients, suppress weeds, and hold moisture. See our types of mulch guide.
Daylily Care: Genuinely Minimal
Watering. Water thoroughly at planting and weekly during dry spells. Once established, daylilies are notably drought-tolerant in a normal season you may never water them at all.
Feeding. Here’s where sources differ, so let’s be practical. In well-amended soil, daylilies need little or no supplemental fertilizer. If your soil is poor or you want to push performance, a slow-release balanced granular (10-10-10) in early spring with a little extra nitrogen — encourages strong growth, bigger blooms, and winter hardiness. Rebloomers benefit most, since they’re being asked to flower twice. Apply around the base, not on the crown. Our NPK ratios guide explains the numbers.
Tidying. Remove yellowed or dead foliage by grasping it firmly and giving a quick tug, it comes away cleanly.
Fall. Trim foliage to about 2 inches above the ground once the weather cools, or leave the dead foliage standing and clear it in early spring before new growth resumes. Both work. A thin layer of mulch insulates the crown over winter, though daylilies are hardy enough that overwintering takes essentially no effort.
Deadheading: How to Do It Right
Deadheading daylilies is easy, but there’s one detail that matters and one honest question.
The technique: pinch the base of the spent flower between thumb and forefinger and gently snap it off. The critical part: remove the whole flower, including the small seed pod (the ovary) just below the petals. Pulling off only the wilted petals leaves the ovary behind, the plant keeps pouring energy into seed, and you’ve achieved nothing. Take care not to damage the adjacent buds waiting their turn on the same scape.
When the scape is finished, no buds left, cut the entire stalk back to the base. Tidy, and it stops the plant investing in seed capsules it doesn’t need.
Is it necessary? Honest answer: it depends on your variety.
- For rebloomers, deadheading is genuinely important — removing spent flowers and seed pods is what drives the second flush.
- For single-season varieties, it’s largely cosmetic. It keeps the plant tidy and redirects energy away from seed production toward next year’s flowers — but the bloom will finish when it finishes either way. Plenty of good gardeners skip it.
Two practical warnings:
- It’s more work than you think. Dozens of one-day flowers means daily deadheading if you want a spotless clump. Be realistic about how much you’ll actually do.
- Darker purple varieties stain. They will mark your hands and your clothes. Wear gloves and don’t deadhead in anything you care about.
In our experience, this is a place where beginners quietly torture themselves for no reason. Someone reads that deadheading is essential, plants a dozen daylilies, and then spends every July evening pinching two hundred spent flowers off a plant that would have bloomed magnificently regardless. If you grow rebloomers, the effort genuinely pays. If you grow standard varieties, deadhead when you happen to be walking past with a coffee in hand and let the rest go. The plant doesn’t mind, and neither, from ten feet away, will anyone else.
Dividing: Free Plants, Better Blooms
This is the one real maintenance task, and it pays you.
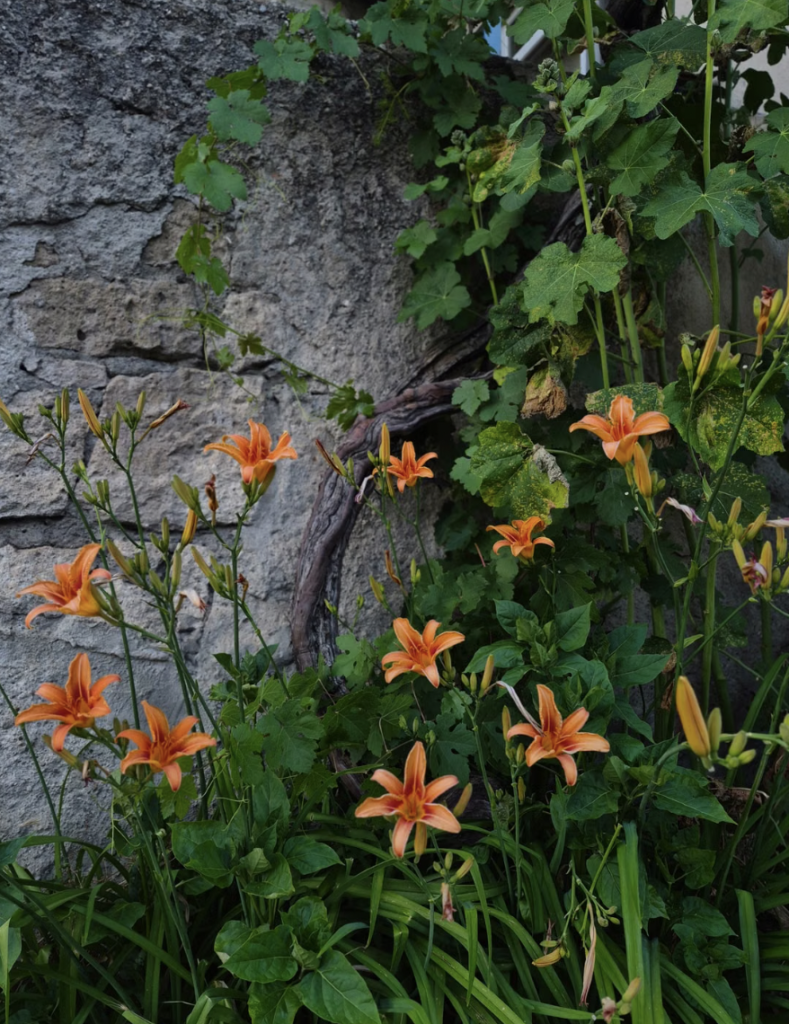
Why: daylilies form clumps that spread outward every year. Eventually they become so crowded that flowering falls off, and the fleshy roots grow tough. Division fixes both and gives you free plants.
When: every 3 to 5 years, or every 2 years for reblooming types, which work harder. The best moment is right after flowering finishes, in late summer or early fall, that gives the divisions time to build roots before winter. Spring works too, at least six weeks before winter arrives.
How:
- Dig up the entire clump, taking care not to wreck the roots. Shake off excess soil, soaking the root ball in water helps loosen it.
- Find the crown, the small white core between leaves and roots.
- Separate it. Gently prying the roots apart by hand gives you more divisions; chopping through with a sharp spade is faster. Either is fine.
- Don’t divide a clump more than three times — each section needs enough healthy roots to survive.
- Cut leaves back to about half their length, remove weeds, and replant immediately at the right depth.
- Water well and keep the soil moist.
You’ll often see new growth the same year. Note that most daylilies don’t self-sow, so division is how you propagate them — which means every few years your daylily patch quietly doubles for free.
A note on the timing debate. You’ll see conflicting advice on when to divide, and the honest answer is that daylilies are forgiving enough that most of it works. Dividing straight after flowering is the classic choice because the plant has finished its display and has months to establish before winter. Spring division works too, and some gardeners simply divide whenever they happen to have the time and a sharp spade. The only genuinely bad option is dividing in the middle of a heat wave or too close to a hard freeze. Beyond that, pick a mild day and get on with it, this is not a plant that punishes approximation.
Designing With Daylilies
Daylilies are one of the most useful plants in a beginner’s border:
- Mass them. They’re at their best in drifts, and their weed-smothering clumps make maintenance easier as they fill in.
- Use them as a skirt. They work beautifully in front of leggier plants, or fronting shrubs and roses.
- Grow them in containers. Compact rebloomers like ‘Mini Stella’ are ideal see our container gardening guide.
- Pair for contrast. Their arching, grassy foliage sets off the daisy shapes of coneflowers and black-eyed Susans, and the spikes of salvia and liatris. See best low-maintenance perennials for full sun.
- Plant on slopes and banks. Their tough root systems help hold soil.
- Use them in a drought-tolerant scheme see drought-tolerant garden design.
A Word About Deer
Unlike hostas, which deer can strip to stumps overnight, daylilies get a more encouraging verdict.
Deer will graze daylily foliage, particularly tender new spring growth, and they’ll nibble the flowers too. But daylilies are resilient to deer browse and generally recover. It’s an annoyance rather than a catastrophe. Repellent sprays help if the pressure is heavy — see keeping deer out of your garden naturally.
Common Problems and How to Fix Them
| Problem | Likely Cause | The Fix |
|---|---|---|
| Not blooming | Too little light, poor soil, overcrowding, or planted too deep | Full sun; divide crowded clumps; set the crown at soil level |
| Blooms getting sparser each year | Clump is overcrowded | Divide every 3–5 years (2 for rebloomers) after flowering |
| Flowers look dead every evening | Completely normal — each bloom lasts one day | Nothing to fix; more buds open tomorrow |
| Deadheading isn’t producing more blooms | Only the petals removed, not the seed pod | Snap off the whole flower including the ovary below the petals |
| Rebloomer didn’t rebloom | Spent flowers and seed pods left on | Deadhead diligently — it’s what drives the second flush |
| Purple stains on hands and clothes | Dark cultivars do this | Wear gloves; don’t deadhead in good clothes |
| Foliage grazed in spring | Deer | Plants usually recover; use repellents if pressure is heavy |
| Roots tough and woody | Long overdue for division | Lift and divide; don’t split a clump more than three times |
Are Daylilies Worth Growing?
For a beginner, it’s hard to make a stronger case. Daylilies are practically bulletproof: they thrive in nearly any soil, shrug off pests, tolerate drought and neglect, survive brutal winters without lifting a finger, come back bigger every year, and double themselves for free every few seasons. They bloom from late spring to frost if you plant a mix, and their grassy foliage keeps the border looking furnished even when nothing’s open.
And there’s a quiet lesson in them, too. Every daylily flower gets exactly one day and the plant answers by producing fifty of them. It’s difficult to think of a better attitude for a garden, or a better plant to learn on.
Ready to build the border? Pair daylilies with coneflowers for season-long color and black-eyed Susans, fill the shady side with hostas, go native with best native perennials for US gardens, or browse the whole palette in best low-maintenance perennials for full sun. Explore the full Ornamental Perennials collection, part of the broader EcoGardenHub Plant Library.
Buy four daylilies this spring: one early, one mid, one late, one rebloomer, plant them shallow in the sun, and then go and do something else. They’ve got this.
Frequently Asked Questions
- Why do daylily flowers only last one day? That’s simply how they work, the name Hemerocallis means “day beauty.” But each flower stalk carries 12 to 15 buds and a mature plant sends up 4 to 6 stalks, so you get roughly 50 to 90 blooms opening in relay. The continuous display is built from dozens of single days.
- Why aren’t my daylilies blooming? The four usual causes are too little light, poor soil, overcrowded clumps, and a common beginner error: planting the crown too deeply. Give them full sun, divide clumps every 3 to 5 years, and set the crown at or just below soil level.
- Do I have to deadhead daylilies? It depends. For reblooming varieties, deadheading is genuinely important; it’s what triggers the second flush. For single-season types it’s mostly cosmetic. Either way, remove the entire flower including the seed pod below the petals, not just the wilted petals.
- How often should I divide daylilies? Every 3 to 5 years, or every 2 years for rebloomers. Divide right after flowering in late summer or early fall so new plants can root before winter. Don’t split a clump more than three times each section needs enough healthy roots.
- Are daylilies the same as lilies? No. Daylilies (Hemerocallis) grow from fleshy roots and send up bare flower scapes from grassy foliage. True lilies (Lilium) grow from bulbs with leaves along the stem. They’re entirely different genera.
- Do daylilies need fertilizer? Usually not. In well-amended soil they need little or no feeding. If your soil is poor or you grow rebloomers, a slow-release 10-10-10 in early spring encourages stronger growth and bigger blooms.
- How do I get daylilies to bloom all season? Plant a mix of early, midseason, and late varieties, plus rebloomers like ‘Stella de Oro’ or ‘Happy Returns’ that flower again later. Deadhead the rebloomers diligently and you’ll have daylilies from late spring until frost.